Clear Drying Wood Glue: Seamless Fixes for Crafters
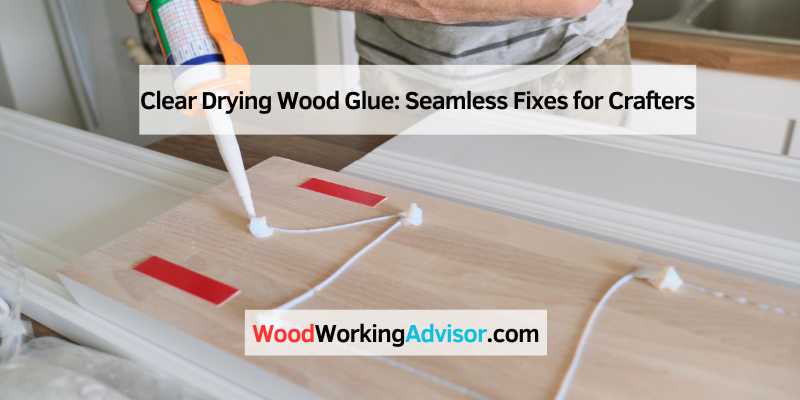
Clear Drying Wood Glue is a strong-bond adhesive that dries quickly and is easy to clean up, making it an ideal choice for woodworking projects. It is available in various sizes and can be purchased from retailers such as Amazon, Walmart, Home Depot, and Rockler Woodworking and Hardware.
The Magic Of Clear Drying Wood Glue
Experience the magic of clear drying wood glue, a versatile adhesive that offers a strong and transparent bond. Ideal for woodworking and crafts, this easy-to-use glue dries quickly and ensures a seamless finish for your projects. With its strong bonding power, clear drying wood glue is the go-to choice for all your woodworking needs.
Why Choose Clear Drying?
Clear drying wood glue offers a myriad of benefits that make it the preferred choice for woodworking projects. Its strong bond ensures that your fixes are secure and durable, providing peace of mind knowing that your work will stand the test of time. The clear drying feature allows for seamless integration with the wood, eliminating any unsightly residue or visible glue lines. Whether you are working on intricate joinery or repairing a broken piece, clear drying wood glue is the perfect solution.
Best Practices For Seamless Fixes
When using clear drying wood glue, following these best practices will help you achieve flawless results:
- Ensure the surfaces to be glued are clean, dry, and free from any debris.
- Apply a thin and even layer of glue to both surfaces using a brush or applicator.
- Press the surfaces together firmly to create a strong bond.
- Wipe away any excess glue immediately with a damp cloth to prevent it from drying and becoming visible.
- Allow the glue to dry completely before sanding, staining, or finishing the wood.
By following these best practices, you can achieve seamless fixes that are virtually undetectable, enhancing the overall aesthetics of your woodworking projects.
Types Of Clear Wood Glues
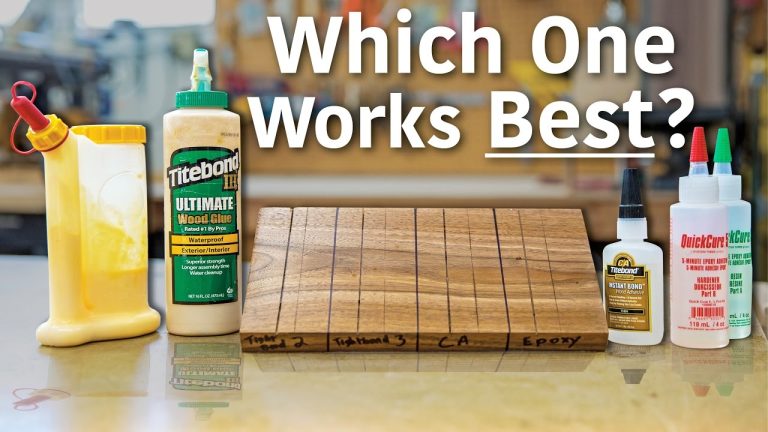
When it comes to woodworking projects, using the right type of wood glue is crucial for achieving strong and durable bonds. Clear drying wood glues are particularly popular for applications where an invisible bond line is desired. There are different types of clear wood glues available, each with its own unique properties and suitable applications. Let’s take a closer look at the types of clear wood glues and their characteristics.
Pva-based Glues
PVA-based glues, also known as polyvinyl acetate glues, are a popular choice for woodworking projects. These glues are easy to use, have a fast drying time, and are non-toxic. They are suitable for bonding porous materials such as wood, paper, and cloth. PVA-based glues form a strong bond and are ideal for interior woodworking projects where moisture resistance is not a primary concern. They are also known for their ease of clean-up, making them a convenient option for hobbyists and DIY enthusiasts.
Epoxy Resins
Epoxy resins are a versatile type of clear wood glue known for their exceptional strength and durability. These glues consist of a resin and hardener that must be mixed together before application. Once cured, epoxy resins create a waterproof and heat-resistant bond, making them suitable for both interior and exterior applications. Epoxy glues are commonly used in marine and outdoor woodworking projects where exposure to moisture and harsh environmental conditions is expected. While they may have a longer curing time compared to PVA-based glues, epoxy resins offer superior performance and are well-suited for high-stress bonding requirements.
Selecting The Right Glue For Your Project
When it comes to selecting the right glue for your project, clear drying wood glue can be a great option. Some popular brands include Titebond, Gorilla, and Crafter’s Pick Ultimate Glue. These glues offer strong bonds, quick drying times, and easy cleanup.
Assessing Wood Types
When selecting the right glue for your woodworking project, it’s crucial to assess the type of wood you are working with. Different wood types have varying levels of porosity, which can affect how well the glue adheres to the surface.
Pine and cedar are known for their porous nature, requiring a glue that can penetrate the wood fibers for a strong bond. In contrast, hardwoods such as oak and maple have a tighter grain, necessitating a glue with excellent adhesion capabilities.
Project Requirements
Understanding the specific requirements of your project is essential when choosing the right wood glue. Consider factors such as the strength of the bond needed, the setting time of the glue, and whether the project will be exposed to moisture or outdoor elements.
For instance, furniture projects may require a waterproof glue, while decorative crafts may benefit from a glue with a clear drying feature to maintain the aesthetic appeal.
Application Techniques For Crafters
When it comes to crafting projects, having the right adhesive is essential. Clear Drying Wood Glue is a versatile and reliable option that provides a strong bond, dries quickly, and is easy to clean up. To ensure the best results with your craft projects, here are some application techniques for crafters to keep in mind:
Surface Preparation
Before applying Clear Drying Wood Glue, it’s important to prepare the surfaces to be bonded. Make sure the surfaces are clean and free from dust, dirt, and any existing adhesive residue. Sanding the surfaces lightly can help improve the bond by creating a rougher texture.
Glue Spreading Tips
When spreading Clear Drying Wood Glue, it’s recommended to use a brush or a foam applicator for even distribution. Apply a thin and even layer of glue to one surface, ensuring that it covers the entire area to be bonded. Avoid applying too much glue, as excess glue can cause messiness and potentially weaken the bond.
If you’re working with intricate or small pieces, consider using a toothpick or a small brush to apply the glue precisely. This can help ensure that the glue reaches all the nooks and crannies of your project.
Clamping And Drying
Once the glue has been applied, it’s important to clamp the surfaces together firmly. This helps create a strong bond by ensuring that the glue is evenly distributed and that the surfaces are held tightly together. Use clamps, rubber bands, or any other suitable method to hold the pieces in place while the glue dries.
Clear Drying Wood Glue typically dries within a few hours, but it’s recommended to leave the project clamped for at least 24 hours to ensure a secure bond. Avoid moving or disturbing the project during this time to prevent any potential weakening of the bond.
After the glue has dried, any excess glue that may have squeezed out can be easily cleaned up. Use a damp cloth or sponge to wipe away the excess glue before it fully hardens.
By following these application techniques, crafters can achieve optimal results with Clear Drying Wood Glue. Its strong bond, quick drying time, and easy cleanup make it a great choice for a variety of craft projects.
Clamping And Curing
Clamping and curing are essential steps when using clear drying wood glue. This type of glue is known for its strong bond, easy application, quick drying time, and easy cleanup. Whether you’re working on crafts or furniture projects, clear drying wood glue is a reliable choice for your woodworking needs.
Clamping and Curing: Clear Drying Wood Glue
When it comes to woodworking, having the right glue is essential. Clear drying wood glue is a popular option for many woodworkers due to its strong bond, easy application, and quick drying time. However, to ensure optimal results, it’s important to understand the clamping and curing process.
Clamp Time For Optimal Bond
Clamping time is crucial to achieve an optimal bond. It’s recommended to clamp the pieces together for at least 30 minutes to an hour, depending on the size and complexity of the project. If using a larger surface area, it’s best to apply pressure with a heavy object or use a clamp to prevent the pieces from moving and ensure a strong bond.
Cure Time And Conditions
After clamping, the glue needs time to cure properly. The cure time will vary depending on factors such as humidity, temperature, and the type of wood being used. Generally, clear drying wood glue will cure fully within 24 hours, but it’s best to wait a full day before handling the project. It’s important to keep the project in a dry and well-ventilated area during the curing process to prevent any moisture from affecting the glue’s strength.
In conclusion, clamping and curing are critical steps to ensure the success of your woodworking project. By taking the time to clamp the pieces together and allowing the glue to cure properly, you’ll achieve a strong and lasting bond. With clear drying wood glue, you can enjoy a quick and easy application, making it a popular choice among woodworkers.
Troubleshooting Common Issues
Troubleshooting common issues with clear drying wood glue can be a frustrating task. However, with proper guidance and techniques, you can overcome problems such as incomplete drying, weak bonds, or difficulty in cleanup. By following best practices and using high-quality wood glue, you can ensure successful and efficient woodworking projects.
Avoiding Air Bubbles
One of the most common issues that can occur when using clear drying wood glue is the formation of air bubbles. These bubbles can create weak spots in the bond and compromise the overall strength of the joint. To avoid air bubbles, it’s important to apply the glue evenly and avoid applying too much pressure when clamping the pieces together. Additionally, using a toothpick or other small tool to spread the glue evenly and remove any excess can help to eliminate air pockets.
Dealing With Excess Glue
Another issue that can arise when working with clear drying wood glue is excess glue. While it’s important to apply enough glue to create a strong bond, using too much can result in a messy and difficult-to-clean-up situation. If you find yourself dealing with excess glue, the best course of action is to wipe away as much as possible with a damp cloth or paper towel before it dries. Once the glue has dried, it can be sanded away or removed with a chisel or scraper.
Overall, clear drying wood glue is an excellent option for creating strong and durable bonds between pieces of wood. By following these troubleshooting tips, you can avoid common issues and ensure that your projects turn out perfectly every time.
Finishing Touches For A Professional Look
When it comes to woodworking projects, using clear drying wood glue is essential for achieving a professional look. However, the glue application is just the first step in creating a flawless finish. To truly elevate your woodworking projects, you need to pay attention to the finishing touches. In this article, we will explore two key aspects of achieving a professional look with clear drying wood glue: sanding techniques and painting/staining over glue.
Sanding Techniques
Sanding is a crucial step in achieving a smooth and professional finish on your woodworking projects. Proper sanding not only removes any excess glue but also smooths out any imperfections in the wood surface. Here are a few sanding techniques to consider:
- Start with coarse sandpaper (around 80-100 grit) to remove any rough patches or excess glue.
- Gradually move to finer grit sandpaper (such as 150-220) to achieve a smooth surface.
- Sand in the direction of the wood grain to avoid creating visible scratches.
- Use a sanding block or sanding sponge for better control and even pressure distribution.
- Regularly check the surface with your hand to ensure it feels smooth to the touch.
Painting And Staining Over Glue
Clear drying wood glue provides a strong bond for your woodworking projects, but what if you want to paint or stain the surface? Fortunately, with the right techniques, you can easily achieve a professional finish even when working over glue. Here’s what you need to do:
- Ensure the glued surface is completely dry before applying any paint or stain.
- If you plan to paint, apply a primer first to create a smooth and even base for the paint.
- For staining, choose a stain that is compatible with the type of wood and apply it evenly using a brush or cloth.
- Work in small sections, and wipe off any excess stain or paint to avoid buildup or uneven color.
- Allow the paint or stain to dry completely before applying additional coats or finishing products.
By following these sanding techniques and understanding how to paint or stain over glue, you can achieve a professional look for your woodworking projects. Remember to always read and follow the instructions provided by the manufacturer of the clear drying wood glue and any finishing products you plan to use. With attention to detail and proper finishing touches, your woodworking creations will stand out with a polished and professional appearance.
Preservation And Storage Tips
For proper preservation and storage of clear drying wood glue, it’s important to keep the lid tightly closed after use to prevent air exposure. Store the glue in a cool and dry place, away from direct sunlight and heat sources.
Always check the expiration date before use to ensure maximum effectiveness.
Extending Shelf Life
Proper storage and handling can significantly extend the shelf life of clear drying wood glue. This can help you make the most out of your investment and ensure that the glue remains effective for future use.
Proper Storage Conditions
Storing clear drying wood glue properly is essential for maintaining its quality. Here are some key tips for preserving and storing this type of wood glue:
- Keep the glue container tightly sealed when not in use to prevent air exposure and potential drying out of the product.
- Store the glue in a cool, dry place away from direct sunlight and extreme temperatures, as heat and light can affect its composition.
- Ensure that the storage area is well-ventilated to prevent the accumulation of moisture, which could compromise the glue’s effectiveness.
- Store the glue container in an upright position to prevent leakage and maintain the integrity of the seal.
Eco-friendly And Non-toxic Options
When it comes to woodworking and crafts, using eco-friendly and non-toxic wood glue is not only beneficial for the environment but also for the health and safety of the individuals using it. Fortunately, there are several green alternatives to traditional glues that offer strong bonding properties without the harmful effects of toxic chemicals.
Health And Safety Considerations
Using traditional wood glues often involves exposure to harmful chemicals that can pose health risks to individuals. From respiratory issues to skin irritation, the use of toxic glues can have detrimental effects. On the other hand, eco-friendly and non-toxic wood glues eliminate these health concerns, providing a safer working environment for craftsmen and hobbyists alike.
Green Alternatives To Traditional Glues
Green alternatives to traditional wood glues include products that are made from natural and renewable materials such as plant-based resins. These glues offer comparable strength and durability without the use of toxic additives. Additionally, some eco-friendly wood glues are water-based, making them easy to clean up and reducing the environmental impact compared to solvent-based options.
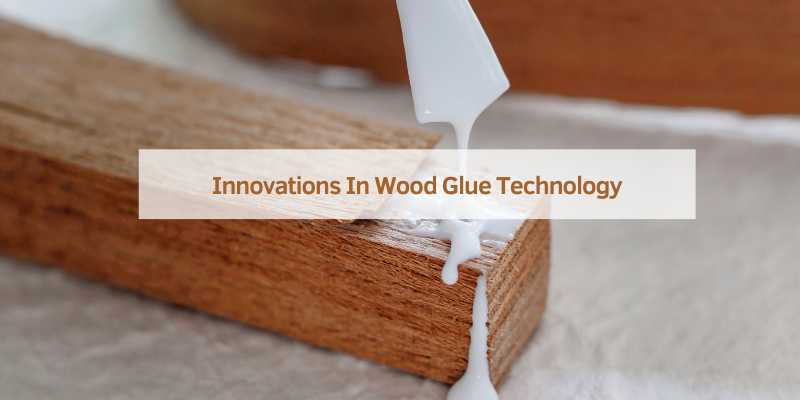
Innovations In Wood Glue Technology
Wood glue has come a long way in recent years, thanks to continuous innovations in adhesive technology. These advancements have led to the development of clear drying wood glue, revolutionizing the way we work with wood. In this blog post, we will explore the latest innovations in wood glue technology and how it is shaping the future of crafting glues.
New Market Trends
The woodworking industry is witnessing new market trends with the introduction of clear drying wood glue. Unlike traditional wood glues that dry with a yellowish tint, clear drying wood glue offers a transparent finish, allowing the natural beauty of the wood to shine through. This trend is particularly popular among craftsmen and DIY enthusiasts who value aesthetics and want their projects to have a seamless and professional look.
Moreover, clear drying wood glue offers a strong bond, making it ideal for various woodworking applications. Whether you’re working on furniture, cabinetry, or smaller crafts, this innovative adhesive ensures a secure and durable connection between wood pieces.
Future Of Crafting Glues
The future of crafting glues lies in the continuous improvement of wood glue technology. Manufacturers are constantly striving to enhance the performance and versatility of wood glues to meet the evolving needs of craftsmen and hobbyists.
One of the key areas of innovation is the development of wood glues with faster drying times. Clear drying wood glue, for instance, dries quickly, allowing users to move on to the next steps of their projects without delay. This not only increases productivity but also reduces waiting times, making woodworking a more efficient and enjoyable experience.
Additionally, future crafting glues are expected to offer improved ease of use and clean-up. Clear drying wood glue, in particular, is known for its user-friendly properties. It is easy to apply and spreads smoothly, ensuring hassle-free application. Moreover, any excess glue can be easily cleaned up with water, eliminating the need for harsh chemicals or solvents.
In conclusion, innovations in wood glue technology, particularly in the form of clear drying wood glue, have brought significant advancements to the woodworking industry. With its transparent finish, strong bond, and user-friendly properties, this adhesive is setting new standards for crafting glues. As the industry continues to evolve, we can expect even more exciting developments that will shape the future of woodworking and crafting.
Frequently Asked Questions
Does Titebond Glue Dry Clear?
Yes, Titebond glue dries clear. This wood glue forms a transparent bond when it dries.
What Glue Is Strong And Dries Clear?
A strong and clear drying glue is Clear Drying Wood Glue. It offers a strong bond, dries quickly, and is easy to clean up. This glue is suitable for various applications, including woodworking and crafts. You can find it at various retailers such as Amazon, Walmart, Home Depot, and Rockler Woodworking and Hardware.
What Is The Best Clear Wood Glue For Woodworking?
The best clear wood glue for woodworking is the Clear Drying Wood Glue, offering a strong bond and quick drying time. It is easy to use and clean up, making it ideal for woodworking projects. Additionally, it provides good water resistance for outdoor use.
How Do You Make Glue That Dries Clear?
To make glue that dries clear, use a clear-drying adhesive or mix clear glue with a small amount of water.
Conclusion
Clear drying wood glue is a must-have for any woodworking project. Its strong bond, quick drying time, easy cleanup, and water resistance make it a versatile and reliable adhesive. Whether you’re a professional carpenter or a DIY enthusiast, investing in a high-quality clear drying wood glue will ensure that your projects last for years to come.
So, choose the best option for your needs and get ready to create beautiful and long-lasting woodworking projects.

