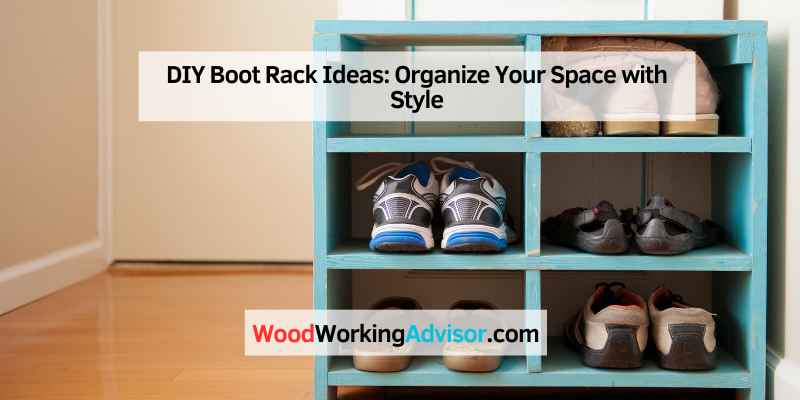
DIY Boot Rack Ideas: Organize Your Space with Style
Need a DIY boot rack? Check out these simple steps to create your own boot storage solution.
Whether you have a collection of work boots, winter boots, or cowboy boots, a DIY boot rack can help keep your footwear organized and in good condition. By following these steps, you can easily customize the boot rack to fit your space and style while keeping your boots off the floor and neatly stored.
This DIY project is a practical and efficient way to maintain an organized entryway or closet, saving you time and frustration when searching for the perfect pair of boots for any occasion.
Introduction To DIY Boot Rack Projects
Discover the world of DIY boot rack projects, where you can create stylish and functional storage solutions for your footwear. With step-by-step guides and creative ideas, you can easily organize your boots while adding a personal touch to your space.
Why DIY?
DIY boot rack projects offer customization and cost savings.
Benefits Of Organized Spaces
Organized spaces reduce clutter and make finding items easier.
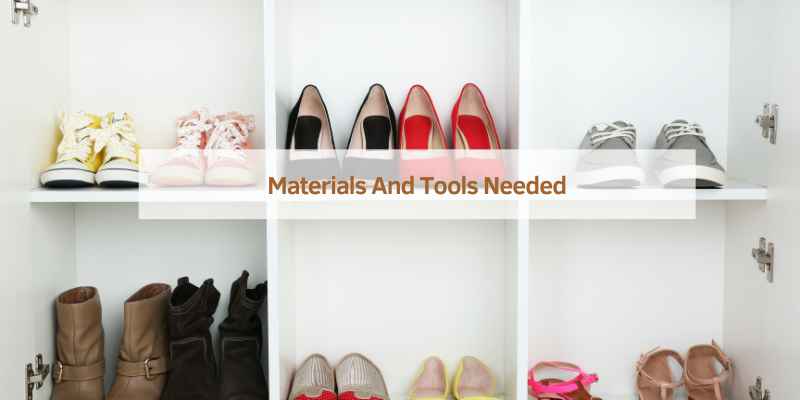
Materials And Tools Needed
When it comes to creating your own DIY boot rack, having the right materials and tools is crucial for ensuring a successful and functional end product. Here, we’ll discuss the essential materials and tools needed to get started on your boot rack project.
Choosing The Right Materials
Wood: Select sturdy, weather-resistant wood such as cedar, redwood, or pressure-treated pine for durability.
PVC Pipes: If you prefer a lightweight and portable option, PVC pipes are a great alternative to wood.
Metal Rods: Consider using metal rods for a sleek and modern look, especially for industrial-themed decor.
Essential Tools For The Job
- Measuring Tape: A precise measuring tape is essential for accurate dimensions and spacing.
- Saw: Whether it’s a circular saw or a handsaw, a cutting tool is necessary for shaping the materials.
- Drill and Bits: A reliable drill and drill bits will be used for creating holes and assembling the rack.
- Sanding Block: Smooth out rough edges and surfaces using a sanding block for a polished finish.
- Screws or Nails: Depending on the material you choose, ensure you have the appropriate fasteners for assembly.
- Paint or Stain: If desired, have paint or wood stain ready for adding a decorative touch to the finished rack.
Simple Wooden Boot Rack
Craft your own simple and practical DIY boot rack with this easy wooden boot rack tutorial. Keep your entryway tidy and organized while adding a touch of rustic charm to your home. A perfect project for any DIY enthusiast!
Step-by-step Guide
Creating a simple wooden boot rack is a practical DIY project that can help keep your entryway organized and clutter-free.
– Gather materials: wood planks, saw, screws, drill
– Measure and cut wood to desired dimensions
– Assemble the base and vertical supports
– Attach the vertical supports to the base
– Secure the rack to the wall for stability
Customization Ideas
Adding a personal touch to your wooden boot rack can enhance its functionality and aesthetic appeal.
– Paint or stain the wood in your favorite color
– Add hooks for hanging keys or small items
– Incorporate a bench seat for added convenience
– Label each section for different family members
– Use decorative knobs for a stylish look
Pvc Pipe Boot Holder
This DIY boot rack utilizes a PVC pipe holder to neatly organize your boots. It is a practical and cost-effective solution for keeping your boots in order and maximizing space in your closet or entryway.
Gathering Materials
Assembly Instructions
Follow these step-by-step instructions to assemble your PVC Pipe Boot Holder:
1. Measure and mark each PVC pipe at 3-inch intervals, starting from one end. This will serve as a guide for inserting the boots.
2. Using a saw or PVC pipe cutter, carefully cut the PVC pipe at each marked interval. You should end up with four sections of PVC pipe, each with three evenly spaced slots.
3. Apply PVC pipe glue to one end of each PVC pipe section.
4. Attach a PVC pipe elbow to each glued end of the PVC pipe sections, creating a rectangular shape.
5. Apply PVC pipe glue to the open ends of the PVC pipe elbows.
6. Connect the PVC pipe sections together by inserting the open ends of the elbows into the glued ends of the adjacent PVC pipe section. This will create a sturdy and stable boot holder structure.
7. Allow the PVC pipe glue to dry completely, following the manufacturer’s instructions.
8. Once the glue has dried, your PVC Pipe Boot Holder is ready to use!
You can now place your boots into the slots of the PVC pipe, allowing them to air out and maintain their shape. This DIY boot rack is not only practical but also a great way to organize your footwear collection.
Upcycled Pallet Boot Rack
Are you tired of tripping over scattered boots and shoes in your entryway? Say goodbye to clutter with a DIY upcycled pallet boot rack. This simple and affordable project will not only keep your space organized, but also add a rustic charm to your home decor. Let’s dive into the details of creating your very own upcycled pallet boot rack.
Finding The Perfect Pallet
When sourcing a pallet for this project, look for one that is sturdy and in good condition. Make sure it has no signs of chemical spills or damage that could compromise the integrity of the rack. Additionally, choose a pallet with wide enough slats to accommodate different sizes of boots.
Construction Steps
- Start by sanding the pallet to remove any rough edges or splinters. This step is essential to prevent any damage to your boots.
- Next, decide the orientation of the pallet. You can either mount it vertically on the wall or lay it horizontally on the floor.
- Attach hooks or knobs to the pallet slats. These will serve as the hangers for your boots. Make sure to space them evenly to provide ample room for each pair of boots.
- If you’re opting for a wall-mounted rack, use sturdy hooks or brackets to secure the pallet in place. For a floor rack, consider adding feet to elevate the pallet slightly off the ground.
- Once your pallet boot rack is assembled, give it a final inspection to ensure everything is securely in place.
Wall-mounted Boot Rack Solutions
When it comes to organizing your boots, a wall-mounted boot rack is a practical and space-saving solution. Not only does it keep your boots in one place, but it also helps maintain their shape and prevent them from getting damaged. In this article, we will explore some design considerations and installation tips for creating your own DIY wall-mounted boot rack.
Design Considerations
Before you start building your wall-mounted boot rack, it’s important to consider a few design factors:
- Boot Size: Make sure the rack is designed to accommodate your boot sizes, whether they are ankle boots, knee-high boots, or any other style.
- Number of Boots: Determine how many boots you need to store and plan the rack size accordingly.
- Materials: Choose sturdy and durable materials such as wood or metal to ensure the rack can support the weight of your boots.
- Space: Measure the available wall space where you intend to install the boot rack to ensure a proper fit.
Installation Tips
Once you have your design considerations in mind, follow these installation tips for a successful DIY wall-mounted boot rack:
- Select a suitable location: Choose a wall in your entryway or closet that is easily accessible and doesn’t obstruct any other items or furniture.
- Mark the wall: Use a pencil to mark the desired height and spacing for each boot rack bracket or hook.
- Install brackets or hooks: Depending on your design, attach the brackets or hooks securely to the wall using screws and anchors for added stability.
- Test the rack: Before hanging your boots, make sure the rack is firmly installed and can support the weight of the boots.
- Hang your boots: Place each pair of boots on the rack, making sure they are evenly spaced and not overcrowded.
With these design considerations and installation tips, you can create a functional and aesthetically pleasing wall-mounted boot rack that keeps your boots organized and easily accessible. Say goodbye to the hassle of searching for matching boots and enjoy a clutter-free entryway or closet.
Creative Decorating Tips For Your Boot Rack
Elevate your entryway with these innovative DIY boot rack ideas. Organize and showcase your footwear collection creatively. Transform your space with these stylish and functional decorating tips for your boot rack.
Are you tired of tripping over your boots every time you enter your home? A DIY boot rack is a great solution to keep your boots organized and in good condition. A well-designed boot rack can also add a touch of style to your home decor. In this article, we will discuss some creative decorating tips for your boot rack that will make it look unique and attractive.
Painting and Finishing
The first step to decorating your boot rack is to choose the right color. You can either match the color of the rack with your home decor or choose a contrasting color to make it stand out. If you decide to paint your boot rack, make sure you use a paint that is suitable for the material of your rack. For example, if your rack is made of wood, use a wood primer before applying the paint.
Once you have painted your boot rack, you can add some finishing touches to make it look more attractive. You can use a clear coat to protect the paint and give it a glossy finish. Alternatively, you can use a matte finish to give your boot rack a more rustic look.
Adding Personal Touches
To make your boot rack look more personal, you can add some decorative elements that reflect your personality. For example, you can add some hooks to hang your hats, scarves, or other accessories. You can also add some decorative knobs or handles to give your boot rack a unique look.
Another way to add a personal touch to your boot rack is to use stencils to create a design. You can choose a design that matches your home decor or reflects your personality. Use a contrasting color to make the design stand out.
In conclusion, a DIY boot rack can be a great addition to your home decor. By following these creative decorating tips, you can make your boot rack look unique and attractive. Whether you choose to paint it or add some personal touches, your boot rack will not only keep your boots organized but also add a touch of style to your home.
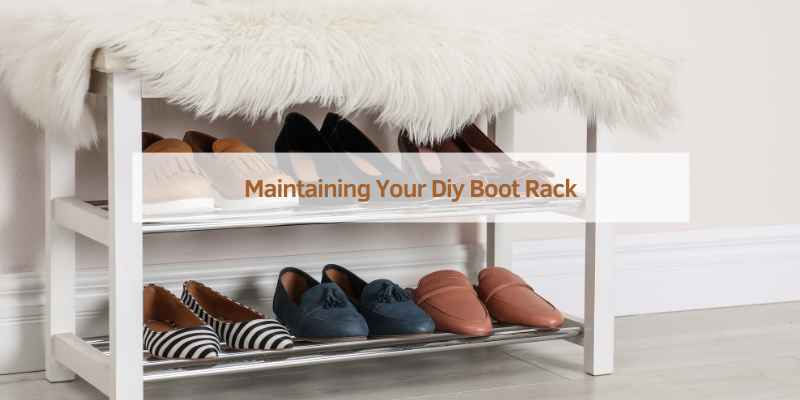
Maintaining Your Diy Boot Rack
To maintain your DIY boot rack, regularly wipe it down to remove dirt and mud, and check for any loose screws or damaged parts. Store your boots upside down to allow proper drying and prevent mold growth. Consider applying a protective coat of sealant to prolong the life of the rack.
Congratulations on successfully building your own DIY boot rack! Now that you have a stylish and functional solution for organizing your footwear, it’s important to know how to maintain it properly. With some regular cleaning and occasional repairs, your boot rack can last for years to come. Here are some tips to help you keep your DIY boot rack in great condition.
Regular Cleaning Tips
Keeping your boot rack clean is essential for preventing dirt and mud buildup, which can cause damage over time. Here are some simple cleaning tips to follow:
- Wipe down the rack regularly with a damp cloth to remove any dust or debris.
- Use a mild soap solution for tougher stains or spills.
- Be sure to dry the rack thoroughly after cleaning to prevent water damage.
Repair And Upkeep
Even with regular cleaning, your DIY boot rack may need some repairs or upkeep from time to time. Here are some common issues to watch out for and how to fix them:
| Issue | Fix |
|---|---|
| Loose or broken screws | Tighten or replace screws as needed to ensure stability. |
| Warping or bending | Use clamps or weights to straighten the rack and prevent further damage. |
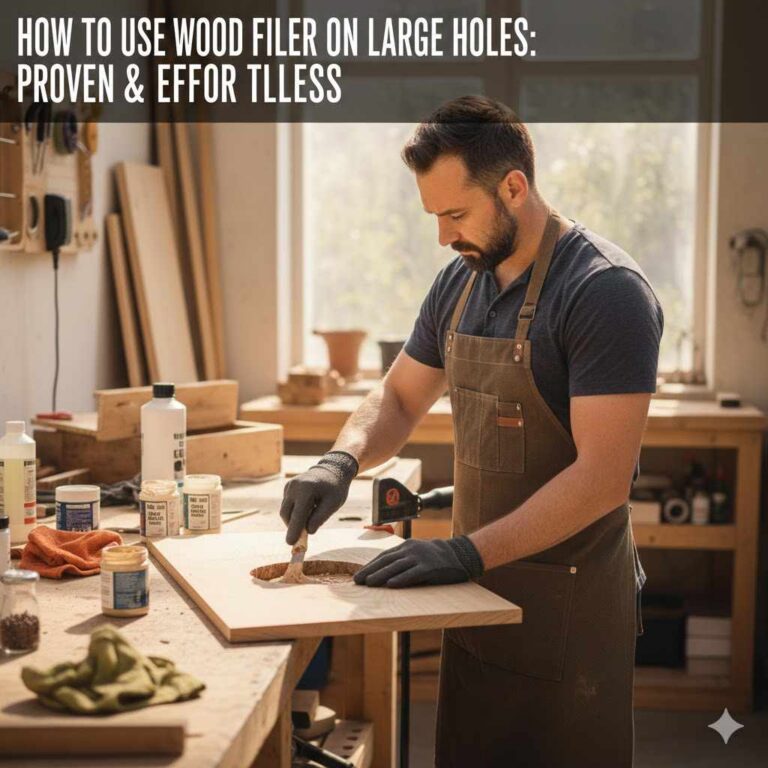
| Cracks or splits | Fill in cracks or splits with wood filler and sand down the surface for a smooth finish. |
By following these simple tips for regular cleaning and occasional repairs, you can maintain your DIY boot rack and enjoy its benefits for years to come. Remember to check your boot rack periodically for any signs of wear and tear, and address any issues promptly to prevent further damage.
Frequently Asked Questions
What Materials Do I Need To Build A Diy Boot Rack?
To build a DIY boot rack, you will need materials such as wood boards, screws, a saw, sandpaper, and a drill. You can also add a coat of paint or stain to make it look more attractive.
How Many Pairs Of Boots Can A Diy Boot Rack Hold?
The number of pairs of boots a DIY boot rack can hold depends on the size of the rack you build. On average, a four-tiered boot rack can hold up to 12 pairs of boots.
How Can I Customize My Diy Boot Rack?
You can customize your DIY boot rack by painting or staining it to match your decor. You can also add hooks or baskets to the sides of the rack to store additional items such as hats, gloves, or scarves.
Can I Build A Diy Boot Rack Without Any Prior Woodworking Experience?
Yes, you can build a DIY boot rack without prior woodworking experience. There are many tutorials available online that can guide you through the process step-by-step. Just be sure to take your time and follow the instructions carefully.
Conclusion
In sum, crafting your DIY boot rack is a practical and rewarding project. By following the steps outlined, you can efficiently organize your footwear collection while adding a personal touch to your home. Embrace the satisfaction of creating a functional piece tailored to your needs and style.