DIY Maple Sap Evaporator: A Genius, Essential Guide
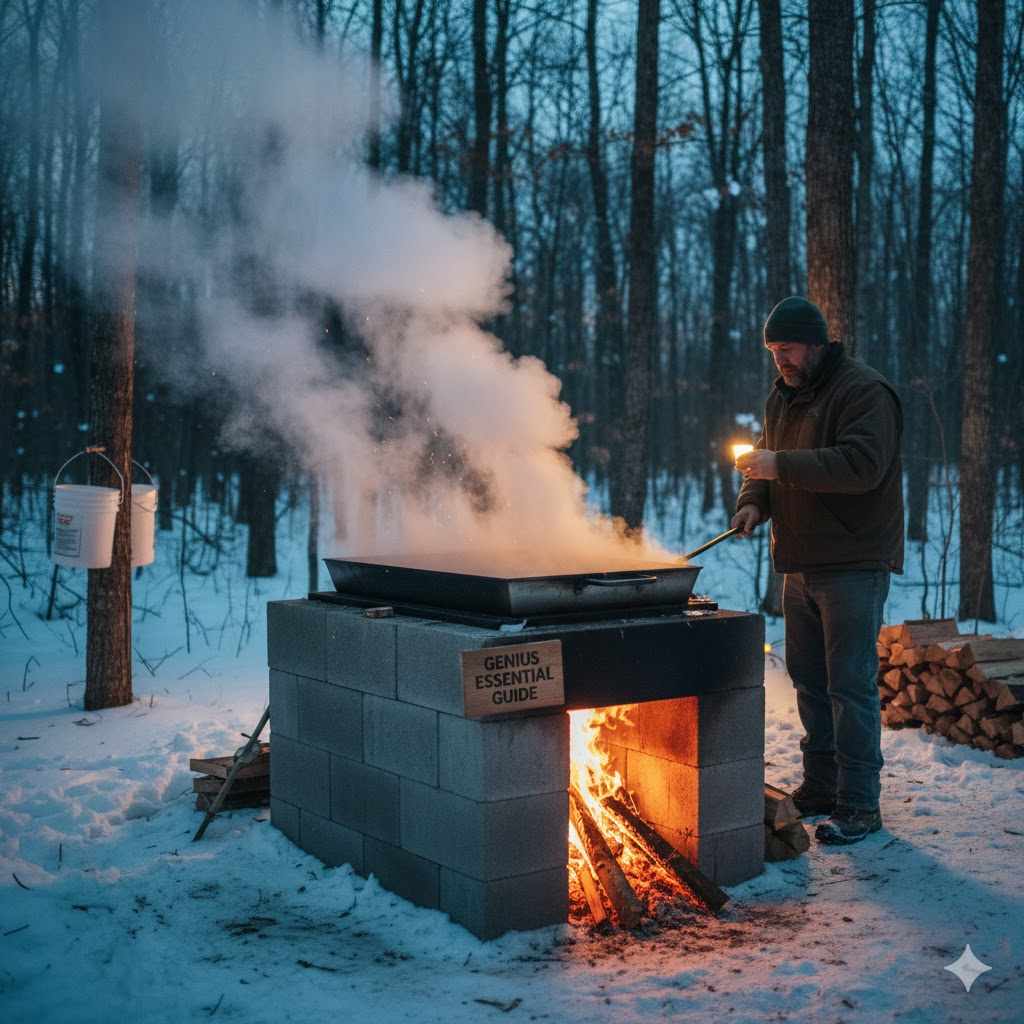
Building a DIY maple sap evaporator is simpler than you think. Construct a U-shaped arch using cinder blocks, leaving a gap for feeding wood and another for a stove pipe chimney. Place a long stainless steel pan on top. This setup efficiently boils large amounts of sap outdoors, turning it into delicious homemade maple syrup without steaming up your house.
Have you ever dreamed of making your own maple syrup? It’s a wonderful tradition that connects you to the seasons. But many beginners hit a snag. Boiling sap on your kitchen stove can take forever. Worse, it releases gallons of sticky steam into your home. This can make your walls tacky and even peel your wallpaper. Don’t worry, there’s a much better way.
Building a simple, effective evaporator in your backyard is a perfect weekend project. It’s affordable, easy to assemble, and makes the process so much faster and cleaner. In this guide, I’ll walk you through every step, from gathering materials to your very first boil. Let’s build something amazing together!
The Sweet Rewards of a DIY Evaporator
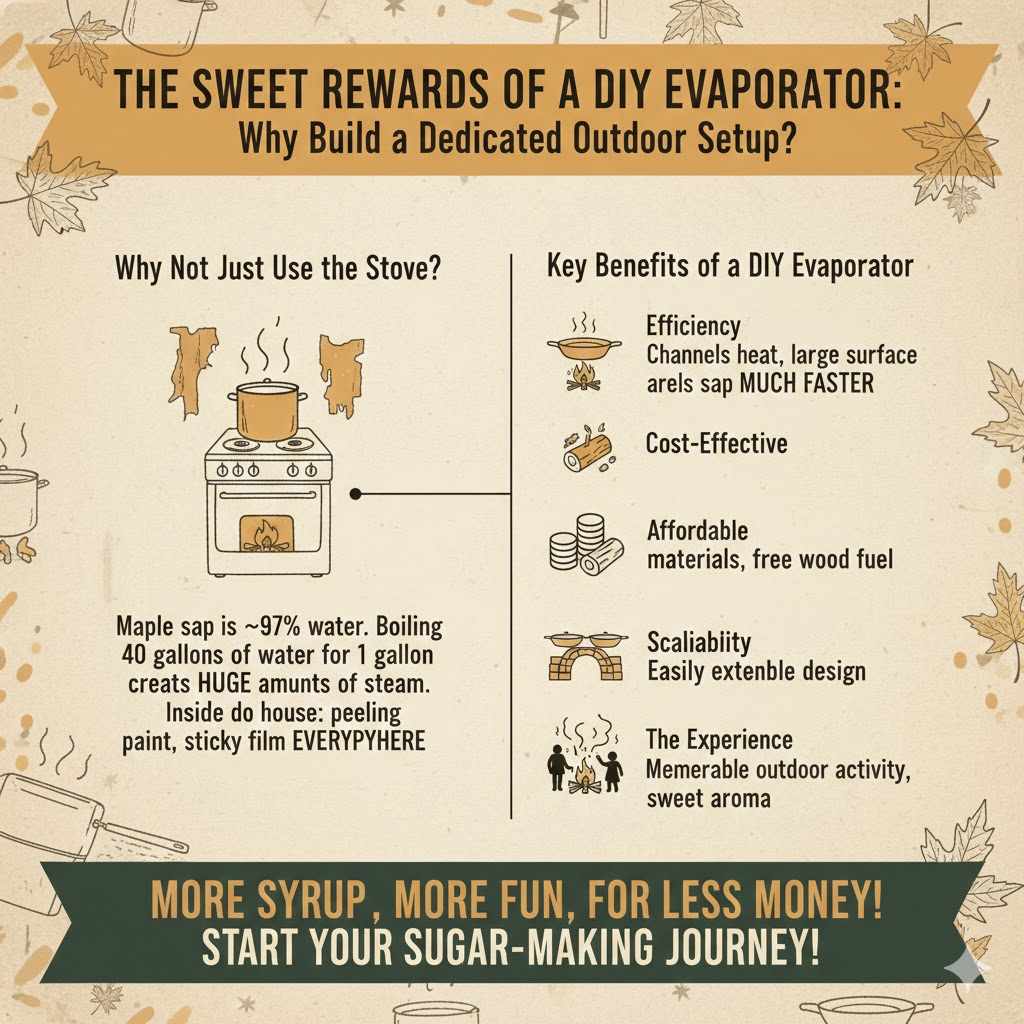
You might wonder if it’s worth building a special setup just to boil sap. The answer is a resounding yes! A dedicated outdoor evaporator isn’t just a fun project; it’s a game-changer for anyone serious about making more than a tiny jar of syrup. Let’s break down why this is the best path for a home sugar maker.
Why Not Just Use the Stove?
Your kitchen stove is great for finishing a small batch of syrup, but it’s terrible for the main event—the long boil. Maple sap is about 97% water. To get one gallon of syrup, you need to boil away roughly 40 gallons of water. Imagine what that much steam does inside your house. It’s a recipe for peeling paint and a permanent sticky film on every surface. An outdoor evaporator keeps all that moisture outside where it belongs.
Key Benefits of a DIY Evaporator
- Efficiency: A DIY evaporator, like the cinder block arch we’re about to build, channels heat directly onto the bottom of your pan. This creates a large, hot surface area, which boils sap much faster than a single pot on a burner. More boiling means more syrup in less time.
- Cost-Effective: Professional evaporators can cost thousands of dollars. Our DIY version uses affordable, easy-to-find materials. You’ll be making syrup for a fraction of the cost, and the fuel—wood from your property—can even be free!
- Scalability: This design is easy to adjust. Start with a single pan, and as you tap more trees, you can easily extend the block arch to hold a second or even a third pan.
- The Experience: There’s something truly special about tending a fire on a crisp late-winter day, with the sweet smell of maple steam in the air. It turns a chore into a memorable outdoor activity for the whole family.
Workshop Safety: Your Top Priority
Before we pick up a single block, let’s talk about safety. Working with fire and boiling liquids requires your full attention. This isn’t the time to rush. By taking a few simple precautions, you can ensure your syrup-making adventure is safe and successful from start to finish. Think of these as the unbreakable rules of your new sugar shack.
Choosing a Safe Location
Where you build your evaporator is the most important safety decision you’ll make.
- Keep Your Distance: Set up at least 25 feet away from your house, garage, woodpile, or any other structure. Sparks can travel, and you want to keep them far from anything flammable.
- Look Up: Make sure there are no low-hanging tree branches directly above your setup.
- Find Level Ground: A stable, level base is non-negotiable. An evaporator full of boiling sap on wobbly ground is incredibly dangerous. Use a shovel to clear and level a patch of dirt or gravel.
Essential Safety Gear and Practices
- Have a Fire Plan: Keep a fire extinguisher, a bucket of sand, or a charged garden hose within easy reach at all times. Never leave the fire unattended, even for a minute.
- Protect Yourself: Wear thick leather work gloves when handling firewood and cinder blocks. Safety glasses are a must to protect your eyes from smoke and stray embers. Avoid wearing loose, flammable clothing like nylon jackets.
- Handle with Care: The evaporator, chimney, and pan will become extremely hot. Be mindful of where you step and always assume every part of the setup is hot. The boiling sap itself can cause severe burns, so handle it carefully.
- Watch the Wind: Pay attention to wind direction. You don’t want thick smoke blowing into your neighbor’s windows or back toward your house.
Your Shopping List: Tools and Materials
One of the best things about this project is its simplicity. You don’t need a fancy workshop or expensive tools. Most of what you need can be found at your local hardware or home improvement store. Let’s get our list together so you can start building with confidence.
Materials You’ll Need
This list is for a standard single-pan evaporator, which is perfect for beginners. You can easily add more blocks and another pan if you decide to expand later.
- Cinder Blocks: You’ll need about 20-24 standard concrete masonry units (CMUs), often called cinder blocks (8″ x 8″ x 16″). It’s good to have a couple extra on hand.
- Evaporator Pan: A stainless steel steam table pan is the perfect choice. A “full-size” hotel pan (around 12″ x 20″ x 6″ deep) works great. Do not use galvanized steel, as it can release toxic fumes when heated.
- Stove Pipe: One 4-foot section of 6-inch diameter stove pipe will act as your chimney.
- Stove Pipe Elbow: One 90-degree elbow for the stove pipe. A cap for the top is optional but helps keep rain out.
- Sand or Firebricks: You’ll need enough to create a 2-inch layer on the bottom of your firebox. This insulates the ground and reflects heat upwards. About two bags of play sand will do the trick.
Comparing Pan Materials
The pan is where the magic happens, so choosing the right one is important. Stainless steel is the clear winner for food safety and durability.
| Material | Pros | Cons |
|---|---|---|
| Stainless Steel | Food-safe, durable, easy to clean, excellent heat transfer. The top choice for syrup making. | Can be more expensive than other options. |
| Aluminum | Inexpensive, lightweight, heats up quickly. | Can impart a metallic taste, can be pitted by acidic sap over time, less durable. Not recommended. |
| Galvanized Steel | Inexpensive. | Extremely Dangerous! The zinc coating releases toxic fumes when heated. Never use galvanized metal for cooking. |
Tools for the Job
No power tools required! These basic hand tools are all you need.
- Shovel (for leveling the ground)
- Level (a 2-foot level works well)
- Measuring Tape
- Heavy-Duty Work Gloves
- Safety Glasses
Building Your Cinder Block Evaporator: A Step-by-Step Guide
Alright, you’ve gathered your materials and chosen a safe spot. Now for the fun part: the build! This process is like building with giant LEGOs. It’s quick, satisfying, and requires no mortar, so you can easily take it down at the end of the season. Follow these steps, and you’ll have a working evaporator in about an hour.
Step 1: Choose and Prepare Your Location
As we covered in the safety section, pick a spot that’s level and far from any buildings or flammable materials. Clear away any dry grass, leaves, or twigs from the area. Use your shovel to create a flat, stable pad of bare dirt for your foundation. Check it with your level to make sure it’s perfect.
Step 2: Lay the First Course of Blocks
This is your foundation. You’ll create a long, U-shaped channel. Place two cinder blocks side-by-side at what will be the back of your evaporator. Now, lay two more rows of blocks lengthwise, coming forward from the back blocks. The inside channel should be just wide enough to support your pan. A typical full-size pan rests perfectly on the edges of the blocks when they are about 13 inches apart. Use your pan as a guide to get the spacing right.
Step 3: Build Up the Walls
Now, add a second layer (or course) of blocks on top of the first. To make the structure strong, you need to stagger the joints, just like with bricks. This means the block on top should span the seam of the two blocks below it. Continue building the U-shape up. Three courses high is usually perfect. This height provides enough space for the fire and good airflow.
Step 4: Create Openings for Fire and Flue
Your arch needs two openings. At the front (the open end of the “U”), leave an opening in the bottom course large enough to feed firewood into the firebox. You can do this by turning one of the blocks sideways. At the back, you need a hole for your chimney. In the top course of the back wall, leave a space for your stove pipe by removing half of a block or using a half-block if you have one. The round stove pipe will fit snugly into the square opening.
Step 5: Insulate the Base
Pour your sand or lay your firebricks on the ground inside the block walls. Create an even layer that’s about two inches deep. This simple step is crucial. It insulates the ground from the intense heat and reflects that energy back up toward your pan, making your boil much more efficient.
Step 6: Install the Chimney
Fit the 90-degree stove pipe elbow into the hole you left at the back of the arch. Then, attach the straight section of pipe so it points straight up. The chimney is vital for creating a good draft, which pulls air through the firebox and draws smoke away from you.
Step 7: Place Your Pan
You’re ready for the final piece! Carefully set your stainless steel pan on top of the block walls. It should cover the entire open channel, from just behind the firebox opening to the back wall. You want a reasonably good seal around the edges so that the hot air and flames are forced to travel the length of the pan before exiting up the chimney. This maximizes heat transfer and boiling speed.
From Sap to Syrup: Your First Boil
With your evaporator built, it’s time to make syrup! This is where your hard work pays off. The process is straightforward: apply a lot of heat to a lot of sap for a long time. Here’s how to manage your first boil like a pro.
Starting and Managing the Fire
A good fire is the engine of your operation. You want a hot, lively fire, not a slow, smoldering one.
- Fuel Up: Use dry, seasoned hardwood for the best results. Softwoods like pine burn fast and can create a sooty flavor. Split your wood into smaller pieces that fit easily into the firebox.
- Start Small: Begin with a small fire using kindling and newspaper. Once it’s going strong, gradually add larger pieces of wood. You want to heat the evaporator and pan slowly at first to avoid thermal shock.
- Fill the Pan First: Before you build a hot fire, pour at least two inches of sap into your pan. NEVER heat an empty or nearly empty pan, as this can warp or “scorch” it, ruining the pan and the syrup.
The Boiling Process
Once your fire is roaring, the sap will start to steam and then come to a boil. Your goal is to maintain a continuous, rolling boil across the entire surface of the pan.
- Maintain Your Depth: As water boils away, the sap level will drop. You need to add more sap periodically to maintain a depth of at least 1.5 to 2 inches.
- Pre-warm Your Sap: Adding cold sap directly to the boiling pan will kill your boil and slow things down. A simple trick is to keep a smaller pot of sap near the chimney or on the edge of the evaporator to pre-warm it before adding it to the main pan.
- Skim the Foam: As sap boils, a light-brown foam may form on the surface. This is caused by proteins and minerals in the sap. Skim it off with a long-handled spoon or strainer.
- Patience is Key: This takes time. Depending on your fire and the weather, it can take many hours to boil down a large volume of sap. Enjoy the process!
Taking Your Evaporator to the Next Level
The cinder block evaporator is a fantastic starting point, but once you get a taste for the hobby, you might look for ways to improve your setup. Here are a few popular upgrades that can make your evaporator more efficient and easier to use.
Upgrade Idea: A Pre-Heater Coil
Remember how adding cold sap can slow down the boil? A pre-heater solves this. It’s a coil of copper tubing that runs through the chimney stack. You run your fresh sap through the tubing, and the hot exhaust gases heat the sap on its way to the evaporator pan. This means the sap entering your pan is already steaming hot, which dramatically increases your boiling rate. It’s a highly effective efficiency booster.
Upgrade Idea: Firebricks and Mortar
If you find a permanent spot for your sugaring operation, you can make your cinder block arch more durable and efficient by lining the inside with firebricks. Firebricks are designed to withstand and reflect very high temperatures. You can even mortar the blocks and bricks together for a rock-solid, permanent structure that will last for years.
Making a Better Seal
If you notice a lot of steam and smoke leaking from the sides of your pan, you’re losing heat. You can create a better seal by laying a gasket made of wet cloth or special ceramic fiber blanket along the top of the blocks where the pan rests. This forces all the heat to travel under the pan and out the chimney.
Using a Hydrometer
For more precise syrup making, serious hobbyists use a tool called a hydrometer. This device measures the density (or sugar content) of your syrup. According to the University of Wisconsin-Madison Extension, finished maple syrup should have a sugar concentration of 66% to 68%. A hydrometer takes the guesswork out of knowing exactly when your syrup is done.
The Final Steps: Finishing and Storing Your Syrup
Your long day of boiling outside is almost done. When the liquid in your pan has noticeably thickened and started to take on an amber color, it’s time to move to the final stage. This part is best done inside on a controllable heat source, like your kitchen stove, where you have precise command over the temperature.
Finishing on the Stove
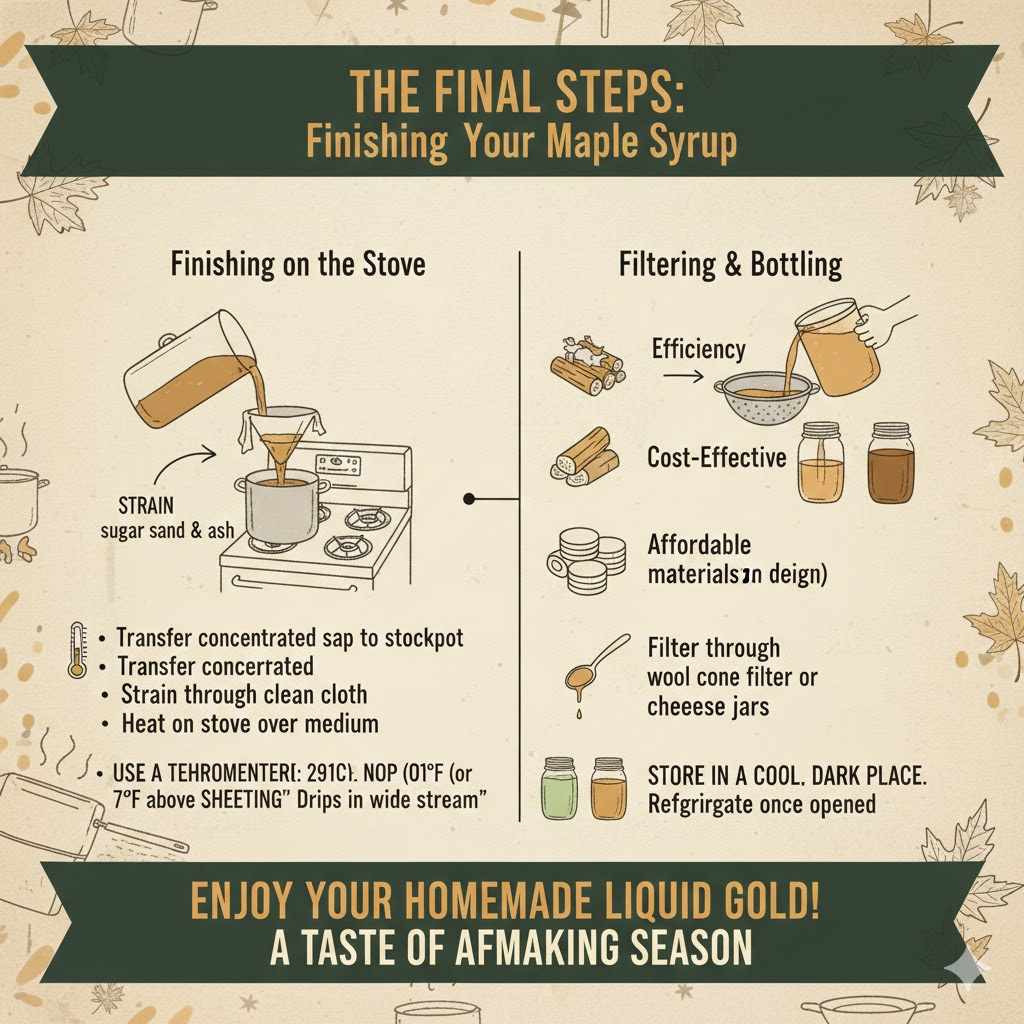
Carefully transfer the concentrated sap from your evaporator pan into a smaller, deep stockpot. It’s important to strain it through a clean cloth as you pour to catch any “sugar sand” (niter) and ash from the fire.
Place the pot on your stove over medium heat. Now, you need to watch it closely. The final moments happen fast!
- Use a Thermometer: The most reliable way to know when syrup is done is by temperature. Finished syrup boils at 7.1°F (or about 4°C) above the boiling point of water. Since the boiling point of water changes with elevation and weather, you should test it first. Boil a pot of plain water, note the temperature, and then add 7 degrees. For most people, this will be around 219°F.
- Watch for “Sheeting”: Another classic method is to watch how the syrup drips off a spoon. When it’s not ready, it will drip off in single drops. When it’s done, it will form a “sheet” or “apron” and drip off the edge of the spoon in a wide, flat stream.
Filtering and Bottling
Once your syrup hits the magic temperature, immediately remove it from the heat. It must be filtered one last time while it’s piping hot. Professionals use thick wool or synthetic cone filters, which you can buy online. For home use, several layers of clean cheesecloth in a colander will also work, though it may not be as perfectly clear.
Pour the hot, filtered syrup into sterilized glass jars or bottles. Seal them immediately. As the syrup cools, it will create a vacuum seal, preserving your liquid gold so you can enjoy it for months to come. Store sealed jars in a cool, dark place. Once opened, keep it in the refrigerator.
Frequently Asked Questions About DIY Evaporators
What is the best wood to use for boiling sap?
Dry, seasoned hardwoods are best. Woods like oak, maple, and ash burn hot and create long-lasting coals. Avoid softwoods like pine or spruce, as they can produce a resinous smoke that may affect the flavor of your syrup.
How long will it take to make syrup?
This depends on your fire, your pan’s surface area, and how much sap you have. With a good cinder block evaporator, you might boil off 5-8 gallons of water per hour. To make one gallon of syrup from 40 gallons of sap, expect to spend a full day boiling.
Can I use a different kind of pan?
Yes, but stick to stainless steel. Any food-grade stainless steel pan with a large, flat bottom will work. Restaurant supply stores are a great place to find them. Avoid aluminum if possible, and absolutely never use galvanized metal for anything that touches food.
Why can’t I just boil sap in my house?
Boiling sap releases an enormous amount of water vapor. Boiling 40 gallons of sap means turning 39 gallons of water into steam. Indoors, this will make your walls, ceilings, and everything else wet and sticky. It can cause serious moisture damage to your home.
How do I clean my evaporator pan?
After you finish, there will likely be a deposit of mineral scale (sugar sand or niter) on the bottom of the pan. The easiest way to clean this is to fill the pan with a 50/50 mixture of white vinegar and water and let it soak overnight. The scale should soften and wipe away easily the next day.
Is it really safe to build a fire in a cinder block structure?
Yes, it is. Standard concrete blocks are non-combustible and can handle the heat of a wood fire very well. Over many years of intense use, they can degrade, but for seasonal use in a hobby evaporator, they are perfectly safe and effective.
How do I know when the sap is ready to be collected from the trees?
The maple sugaring season starts when winter begins to thaw. You need nights that are below freezing (20s F) and days that are above freezing (40s F). This temperature swing creates the pressure that makes the sap run.
Your Sweet Success Awaits
There you have it—a complete guide to building your very own maple sap evaporator. You’ve learned why it’s the best way to make syrup at home, how to build it safely with simple materials, and how to manage your very first boil. This project is about more than just making a delicious treat; it’s about creating an experience. It’s about spending a day outside, tending a fire, and turning a natural resource into something truly special with your own two hands.
Building this evaporator is a project you can be proud of. Every time you pour that homemade syrup over a stack of pancakes, you’ll remember the satisfaction of building something functional and the joy of the process. So go ahead, gather your blocks, tap those trees, and get ready to taste the sweetest reward of all: your own homemade maple syrup.