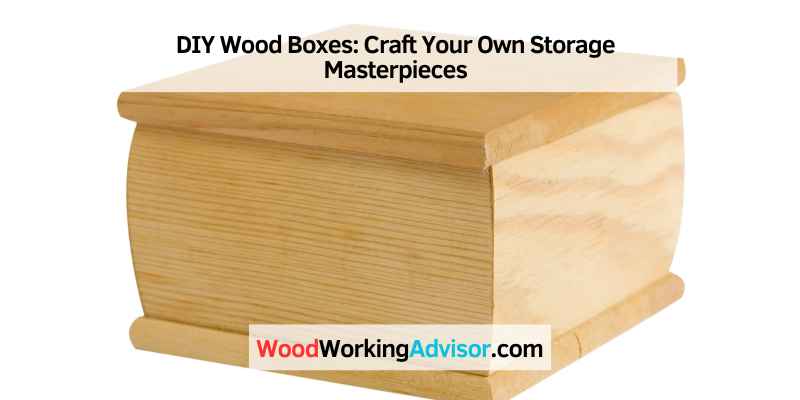
DIY Wood Boxes: Craft Your Own Storage Masterpieces
Looking to create DIY wood boxes? Follow simple steps to craft custom wood boxes at home easily.
Woodworking enthusiasts often enjoy the process of creating custom wood boxes from scratch. Whether for storage, decor, or gifting purposes, making DIY wood boxes allows for personalization and creativity. By selecting the right wood, measuring accurately, and using proper tools, you can craft unique and functional wooden boxes.
With the satisfaction of creating something with your hands and the ability to customize the design to your liking, DIY wood boxes are a rewarding project for beginners and experienced woodworkers alike. Whether you’re making a small trinket box or a larger storage container, the possibilities are endless when it comes to DIY wood boxes.
Introduction To DIY Wood Boxes
Learn how to create DIY wood boxes with this easy-to-follow tutorial. From selecting the right wood to measuring and cutting, this guide will help you create beautiful and functional boxes for your home or office. Get creative and customize your boxes with paint, stain, or other decorative elements to match your personal style.
Why Choose Wood?
Wood is eco-friendly, versatile, and durable material for DIY projects.
The Appeal Of DIY
DIY projects offer a sense of accomplishment and customization.
Introduction to DIY Wood Boxes:
DIY wood boxes are a popular project for beginners and experienced crafters alike. Crafting your own wood boxes allows for creativity and personalization.
Why Choose Wood?
- Eco-friendly
- Versatile
- Durable
The Appeal Of DIY
- Sense of accomplishment
- Customization
Materials And Tools Needed
Create your own DIY wood boxes with just a few materials and tools. With easy-to-follow instructions, you can personalize and design your own unique storage solution for any room in your home. Get creative and showcase your woodworking skills with this fun and practical project.
To get started on your DIY wood box project, you’ll need to gather the right materials and tools. Here’s what you’ll need:
Selecting The Right Wood
- Choose a durable wood like pine or cedar.
- Opt for smooth, untreated wood for easy finishing.
- Ensure the wood is free from cracks or warping.
Essential Tools For The Project
- Saw for cutting the wood to size.
- Hammer and nails or a drill and screws for assembly.
- Measuring tape and ruler for accurate dimensions.
- Sandpaper for smoothing out rough edges.
- Wood glue for extra reinforcement.
Designing Your Wood Box
Designing your wood box is an exciting and creative process that allows you to bring your unique vision to life. From finding inspiration to sketching your design, there are various steps to consider when creating a DIY wood box that reflects your personal style and meets your practical needs.
Finding Inspiration
When seeking inspiration for your wood box design, look to nature, architecture, and other woodworking projects. Take note of shapes, patterns, and colors that catch your eye, and consider how they might translate into a functional and visually appealing box.
Sketching Your Design
Start by sketching your design on paper, considering the dimensions, compartments, and any decorative elements you want to incorporate. This initial sketch will serve as a blueprint for your wood box and can help you visualize the final product before you begin the construction process.
Basic Construction Techniques
Discover basic construction techniques for creating DIY wood boxes. Learn essential skills for measuring, cutting, and assembling pieces to build custom wooden boxes for various purposes. Explore step-by-step guides and tips for designing and constructing your own unique wood boxes.
Basic Construction Techniques for DIY Wood Boxes
Creating your own wooden boxes can be a rewarding and practical DIY project. Understanding the basic construction techniques is essential for ensuring your wood boxes turn out sturdy and visually appealing.
Cutting The Wood
When cutting the wood for your DIY wood boxes, accuracy is key. Use a miter saw or a table saw to make precise cuts. Measure twice and cut once to ensure the pieces fit together perfectly.
Assembling The Pieces
Assemble the pieces of the wood box using wood glue and clamps for a strong bond. Ensure the corners are square by using a carpenter’s square. Pilot holes and screws can also be used for added strength.
Finishing Touches
Sand the surfaces of the wood box to smooth out any rough edges or surfaces. Apply wood stain or paint for a decorative finish. Adding a clear coat of polyurethane can protect the wood and enhance its natural beauty.
By mastering these basic construction techniques, you can create custom wood boxes that are both functional and visually appealing.
Decorative Techniques
When it comes to DIY wood boxes, the possibilities for adding a personal touch are endless. With a little creativity and the right techniques, you can transform a simple wooden box into a stunning decorative piece that adds charm and character to any space. In this blog post, we will explore two popular decorative techniques: painting and staining, and carving and engraving.
Painting And Staining
If you want to add a pop of color or enhance the natural beauty of the wood, painting and staining are excellent options. Painting allows you to create a bold and vibrant look, while staining brings out the rich tones and grain patterns of the wood. Before you begin, make sure to prepare the surface by sanding it smooth and applying a primer if needed. Once the surface is ready, you can apply your chosen paint or stain using a brush or a sponge. Remember to apply multiple thin coats for a more even and professional finish. If you’re feeling adventurous, you can also experiment with different techniques like distressing or layering colors to achieve a unique and rustic look.
Carving And Engraving
If you prefer a more intricate and detailed design, carving and engraving can add a touch of elegance to your wooden box. Carving involves removing wood to create three-dimensional designs, while engraving uses tools to etch patterns or text onto the surface. Before you start carving or engraving, sketch your design onto the wood to serve as a guide. Use sharp carving tools or a woodburning pen to carefully carve or engrave your design, taking your time to ensure precision and accuracy. Once you’ve finished, you can further enhance the carved or engraved areas by applying a stain or paint to make them stand out even more.
With these decorative techniques in your arsenal, you can elevate your DIY wood boxes to a whole new level. Whether you choose to paint and stain or carve and engrave, each method offers a unique way to express your creativity and make your wooden box truly one-of-a-kind.
Practical Uses For Your Wood Boxes
Discover creative DIY wood box projects. From stylish storage solutions to rustic home decor, wood boxes are versatile and practical for organizing and adding charm to any space. Explore endless possibilities for repurposing wood boxes in your home.
If you’re looking for a versatile and affordable DIY project, look no further than making your own wood boxes. Not only are they easy to make, but they also have a variety of practical uses around the home. Here are just a few ideas to get you started.
Home Storage Solutions
One of the most practical uses for your wood boxes is for home storage solutions. Whether you need to organize your pantry, declutter your closet, or tidy up your desk, a wooden box can help. Here are a few ideas for how to use your DIY wood boxes for storage:
- Use them to hold office supplies like pens, paperclips, and notepads.
- Store your spices in them to keep your pantry organized.
- Use them as a catch-all for keys, wallets, and other small items in your entryway.
Gift Ideas
Another great use for your DIY wood boxes is as a gift for friends and family. Not only are they thoughtful and unique, but they’re also customizable to fit anyone’s style or taste. Here are a few ideas for how to use your wood boxes as gifts:
- Fill them with their favorite snacks or treats for a personalized gift basket.
- Use them as a planter for succulents or herbs.
- Fill them with craft supplies for the DIY enthusiast in your life.
No matter how you choose to use your DIY wood boxes, they’re sure to add a touch of charm and practicality to any space. And with their endless customization options, you can create a box that’s truly one-of-a-kind.
Advanced Projects

When it comes to woodworking, creating advanced projects like incorporating hinges and latches and creating compartments in DIY wood boxes can be a rewarding challenge. These projects require precision and attention to detail, but the end result is a functional and visually appealing wooden box that can be used for storage or as a decorative piece in your home.
Incorporating Hinges And Latches
Adding hinges and latches to a wood box can elevate its functionality and aesthetic appeal. Here are the steps to follow:
- Choose the type of hinge and latch suitable for your project.
- Measure and mark the locations for the hinges and latches on the box.
- Use a chisel to create recesses for the hinges and latches to sit flush with the surface of the wood.
- Secure the hinges and latches in place using screws.
Creating Compartments
Designing compartments within a wood box allows for organized storage and adds a level of sophistication to the project. Here’s how to do it:
- Plan the layout of the compartments based on the items you intend to store in the box.
- Measure and mark the locations for the compartment dividers inside the box.
- Use a saw or router to carefully create the compartments, ensuring precise dimensions.
- Sand the edges of the compartments to ensure a smooth finish.
Maintaining Your Wood Boxes
Maintaining your wood boxes is essential to ensure their longevity and keep them looking their best. Proper care and attention will help to preserve the natural beauty of the wood and protect it from damage. Here are some tips for cleaning, caring, and repairing your wood boxes to keep them in top condition for years to come.
Cleaning And Care
To clean your wood boxes, use a soft, dry cloth to remove dust and debris. For stubborn stains, dampen the cloth with a mild soapy solution and gently wipe the affected areas. Avoid using harsh chemicals or abrasive cleaners, as these can damage the wood finish. To maintain the luster of the wood, apply a high-quality wood polish or wax regularly, following the manufacturer’s instructions.
Repairing Damage
If your wood box sustains minor scratches or dents, you can repair them using a wood filler or touch-up pen that matches the color of the wood. Apply the filler or touch-up solution to the damaged area, following the product’s guidelines, and allow it to dry completely. For more significant damage, such as deep scratches or cracks, seek professional assistance to ensure proper restoration without compromising the integrity of the wood.
Frequently Asked Questions
How To Make A Simple Box From Wood?
To make a simple box from wood, measure and cut wood pieces, assemble them with nails or screws, sand the surfaces, and finish with paint or varnish.
How Thick Should Wood Be For A Wooden Box?
For a wooden box, the wood should be around 1/2 to 3/4 inches thick for durability and stability.
How To Make A Wooden Table Box?
To make a wooden table box, follow these steps: 1. Measure and cut the wood pieces to the desired dimensions. 2. Assemble the pieces using screws or nails. 3. Sand the surfaces to smooth out any rough edges. 4. Apply a wood finish or paint for protection and aesthetics.
5. Finally, attach any additional features like handles or hinges if desired.
How To Make A Wooden Ply Box?
To make a wooden ply box, you will need plywood sheets, a saw, a drill, screws, and wood glue. Cut the plywood sheets to the desired dimensions, then assemble the box using the wood glue and screws. Sand the edges and surfaces of the box to give it a smooth finish.
Finally, apply a coat of varnish or paint to protect and enhance the appearance of the wooden ply box.
Conclusion
DIY wood boxes are a great way to add a touch of rustic charm to your home décor. With just a few materials and some basic tools, you can create custom pieces that are both functional and stylish. Whether you’re using them for storage, organization, or simply as decorative accents, these boxes are sure to impress.
So why not try your hand at making your own DIY wood boxes today? You might just be surprised at how easy and rewarding it can be!