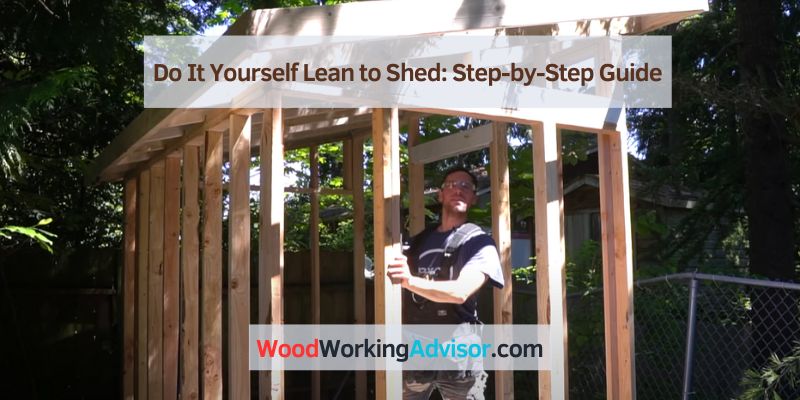
DIY Lean-to Shed: Cost, Roof Pitch and Step-by-Step Build Guide
A DIY lean-to shed runs roughly $12–$29 per square foot in materials — cheaper than a gable-roof shed since the single-slope roof needs less framing and fewer shingles. Skimping on roof pitch is the most common mistake: go below 2:12 (9.46°) with asphalt shingles and you’ll get leaks within a season or two. This guide covers real cost numbers, the roof pitch your roofing material actually requires, and the full build process from foundation to final touches.
How Much Does a Lean-to Shed Cost to Build?
A DIY lean-to shed typically costs $12 to $29 per square foot in materials for a basic wood-framed build — less than half what a contractor-built shed runs. Attaching a lean-to onto an existing structure (garage, barn, or house wall) averages around $30 per square foot since you’re only framing three walls and a single-slope roof instead of a full standalone structure.
| Component | Typical Cost | Notes |
|---|---|---|
| Framing/lumber | $12–$25/sq ft | Pressure-treated joists, studs, roof framing |
| Siding | $3–$7/sq ft (vinyl) or $5–$15/sq ft (wood/T1-11) | Match to existing structure |
| Foundation (slab) | $6–$12/sq ft | Piers or skids cost less than a poured slab |
📊 A lean-to roof is the cheapest roof profile to frame and shingle of any shed style, since it has no ridge, no valleys, and needs the fewest linear feet of framing lumber per square foot of coverage.
Planning Your Lean-to Shed
When it comes to adding extra storage space to your property, a lean-to shed is a practical, cost-effective, and space-efficient solution. Planning your lean-to shed requires careful consideration of various factors, from assessing space and size requirements to understanding zoning laws and regulations. By following the right steps, you can ensure that your lean-to shed meets your needs while complying with local regulations.
Assessing Space And Size Requirements
Before you begin building your lean-to shed, it’s essential to assess the available space and determine the appropriate size for your needs. Measure the area where you plan to install the shed, considering factors such as the slope of the ground and any existing structures that may affect the shed’s placement. Consider the items you intend to store and how much space they will require. This assessment will help you determine the optimal dimensions for your lean-to shed.
Selecting The Ideal Location
Choosing the right location for your lean-to shed is crucial. Look for a spot that provides easy access and complements the overall aesthetics of your property. Consider factors such as proximity to the main building, prevailing winds, and natural light exposure. Additionally, ensure that the location meets any setback requirements from property lines and other structures. A well-chosen location will maximize the usability and visual appeal of your lean-to shed.
Choosing Building Materials
When planning your lean-to shed, carefully consider the building materials you will use. Opt for durable, weather-resistant materials that match the existing structures on your property. You may choose from a variety of options, including wood, metal, or vinyl. Consider the maintenance requirements and longevity of each material to select the best option for your needs and budget.
Understanding Zoning Laws And Regulations
Before breaking ground on your lean-to shed, familiarize yourself with local zoning laws and regulations. Check with your municipality to determine any restrictions regarding shed placement, size, and construction materials. Ensure that your planned lean-to shed complies with these regulations to avoid future issues, such as fines or removal orders. Understanding and adhering to zoning laws is essential for a hassle-free building process.

Do It Yourself Lean To Shed: Design Phase
When it comes to creating a Do It Yourself Lean to Shed, the design phase is a critical first step. This phase involves carefully planning out the layout, roof slope and pitch, as well as window and door placement. By paying attention to these key design elements, you can ensure that your lean to shed not only looks great but also functions effectively for your storage needs.
Sketching The Shed Layout
Begin the design process by sketching out the layout of your lean to shed. Consider the available space, the size of the shed, and how you want to organize the interior. You can use graph paper or software tools to create a visual representation of your shed layout, including the placement of shelves, workbenches, and any other storage solutions you plan to incorporate.
Determining Roof Slope And Pitch
Your roofing material sets the minimum pitch, not personal preference: metal roofing can go as low as 1:12 (4.76°), asphalt shingles need at least 2:12 (9.46°), and standard 3-tab shingles require 4:12 (18.43°) to shed water properly. Most lean-to sheds land in the 3:12 to 5:12 range — steep enough to shed water and snow without the framing getting unnecessarily tall on the high side. Going below your roofing material’s minimum pitch is the single most common cause of lean-to shed leaks.
Window And Door Placement
Window and door placement is an important consideration for both functionality and aesthetics. Determine the best locations for windows to allow natural light into the shed, and for doors to provide easy access. Think about how the placement of these features will impact the interior space and how they will align with the overall design of the shed.
Building A Solid Foundation
Building a solid foundation is essential when constructing a lean-to shed. The foundation provides stability and support for the structure, ensuring its longevity and durability. By properly preparing the ground and choosing the right foundation option, you can create a sturdy base for your lean-to shed.
Clearing And Leveling The Ground
Before building a lean-to shed, it’s crucial to clear and level the ground where the foundation will be laid. Start by removing any vegetation, rocks, or debris from the site to create a smooth and even surface. Use a shovel, rake, and a level to ensure the ground is properly leveled, allowing for a stable foundation.
Laying The Foundation Options: Concrete Slabs, Piers, Or Skids
When it comes to laying the foundation for a lean-to shed, there are several options to consider: concrete slabs, piers, or skids. Each option has its advantages and considerations, so it’s important to choose the most suitable one for your specific needs.
- Concrete Slabs: Concrete slabs provide a solid and durable foundation for lean-to sheds, running roughly $6–$12 per square foot. They offer excellent support and protection against moisture, making them ideal for long-term stability. However, they require more extensive preparation and professional installation.
- Piers: Piers are cylindrical concrete supports that are placed at intervals along the perimeter of the shed. They are a cost-effective option and can be adjusted to accommodate uneven ground. Piers are suitable for smaller sheds and are relatively easy to install.
- Skids: Skids, also known as runners, are pressure-treated wooden beams that are placed directly on the ground. They provide a simple and economical foundation solution for lean-to sheds. Skids are particularly useful for sheds that may need to be relocated in the future.

Step-by-step Construction Process
When it comes to building a lean-to shed, following a step-by-step construction process is crucial to ensure a successful and sturdy structure. From framing the walls to installing the roofing material, each step contributes to the overall durability and functionality of the shed. In this guide, we will walk through the essential stages of constructing a lean-to shed.
Framing The Walls
The first step in building a lean-to shed is framing the walls. This involves measuring and cutting the lumber according to the shed’s dimensions. The frame is then assembled using nails or screws to create the basic structure of the shed.
Attaching The Roof Frame
Once the walls are in place, the next step is to attach the roof frame. This involves securing the roof joists to the top of the walls, ensuring proper alignment and support for the roof structure. The roof frame provides the foundation for the shed’s roof and helps distribute the weight evenly.
Sheathing And Roofing Material Installation
After the roof frame is in place, the sheathing and roofing materials are installed. The sheathing acts as a base for the roofing materials and provides additional support and insulation. Once the sheathing is installed, the roofing materials, such as asphalt shingles or metal panels, are added to complete the roof.
Exterior Finishing: Siding And Trim
With the walls and roof in place, the final step is exterior finishing, including siding and trim installation. Siding not only adds aesthetic appeal to the shed but also serves as a protective layer against the elements — see our siding cost calculator to estimate materials before you buy. Trim helps to create clean lines and adds a polished look to the shed’s exterior.
Ensuring Shed Durability
Weatherproofing Tips And Techniques
When building a do-it-yourself lean-to shed, weatherproofing is crucial to ensuring its longevity and durability. Here are some essential tips and techniques to protect your shed from the elements:
- Choose Quality Materials: Opt for weather-resistant materials such as pressure-treated wood, metal roofing, and durable siding to withstand harsh weather conditions.
- Apply Waterproof Sealant: Seal all seams, joints, and gaps with a high-quality waterproof sealant to prevent water infiltration and protect the interior of the shed.
- Install Proper Ventilation: Proper ventilation helps reduce moisture buildup inside the shed, preventing mold and rot. Consider adding ridge vents, soffit vents, or gable vents for adequate airflow.
- Angle the Roof for Drainage: Ensure the roof is sloped to allow water to run off easily, minimizing the risk of water pooling and damage.
Best Shed-Building Screws Pick
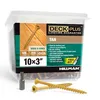
Deck Plus 3″ Epoxy Coated Exterior Wood and Fence Screws
Corrosion-resistant framing screws sized right for shed wall studs and roof joists exposed to weather.
- Best for: framing walls and roof joists on an outdoor shed
- Why we picked it: epoxy coating resists rust better than plain zinc, matters since these stay exposed to weather
- Main drawback: torx/star drive bit isn’t included — buy a compatible bit separately
Compare more shed-building supplies
 Option 1 Gorilla 100% Silicone Waterproof Caulk
|
 Option 2 DAP Dynaflex Ultra Advanced Exterior Sealant
|
 Option 3 LIONMAX 3″ Deck Screws, 300-Piece Bulk Pack
|
As an Amazon Associate we earn from qualifying purchases.
Installing Drainage Systems
Proper drainage is essential to prevent water accumulation around the shed, which can lead to moisture-related issues and structural damage. Consider the following tips for installing effective drainage systems:
- Grading the Surrounding Area: Ensure the ground slopes away from the shed to divert water runoff and prevent pooling near the foundation.
- Install Gutters and Downspouts: Channel rainwater away from the shed by installing gutters and downspouts. Direct the water towards a designated drainage area or a rain barrel for storage.
- Create French Drains: Dig a trench around the perimeter of the shed and fill it with gravel to create a French drain, allowing water to flow away from the building.
Maintenance And Upkeep Best Practices
Regular maintenance and upkeep are essential to preserve the durability of your lean-to shed. Follow these best practices to prolong its lifespan:
- Inspect and Repair Damage: Routinely inspect the shed for any signs of damage, such as cracks, leaks, or rot, and promptly address any issues to prevent further deterioration.
- Keep the Exterior Clean: Regularly clean the exterior of the shed to remove dirt, debris, and mildew, which can compromise its weatherproofing and appearance.
- Reapply Protective Coatings: Periodically reapply protective coatings, such as paint, stain, or sealant, to reinforce the shed’s resistance to moisture and UV damage.
Final Touches For Your Shed
Once you have completed the construction of your DIY lean-to shed, it’s time to add those final touches that will make it fully functional and visually appealing. From the painting and decorating to organizing and utilizing space efficiently and implementing security enhancements, these final steps will transform your shed into a practical and attractive space.

Painting And Decorating
After the construction is complete, it’s time to give your shed a fresh coat of paint. Choose a high-quality exterior paint that will protect the wood from the elements and add a pop of color to your outdoor space. Consider using a semi-gloss finish for easy cleaning and durability. You can also add decorative touches such as window boxes, a charming wreath, or outdoor wall art to personalize the space.
Organizing And Utilizing Space Efficiently
Once your shed is painted and looking great, it’s time to focus on organizing the interior space efficiently. Install shelves, hooks, and storage bins to keep tools, gardening supplies, and other items neatly organized. Consider using vertical space with wall-mounted organizers to maximize floor space. Labeling containers will make it easy to find what you need, and adding a workbench or a folding table can provide a dedicated workspace.
Security Enhancements For Your Shed
Enhance the security of your shed by adding a sturdy lock to the door and installing motion-detector lights around the exterior. Consider adding a security camera or an alarm system for added peace of mind. You can also reinforce vulnerable areas such as hinges and latches to deter potential intruders. Don’t forget to periodically check for any necessary repairs or maintenance to keep your shed secure.
Frequently Asked Questions On Do It Yourself Lean To Shed
Is It Cheaper To Build Lean-to Shed?
Yes. A lean-to shed is typically cheaper than a gable-roof shed because it needs fewer walls (often just two or three if attached to an existing structure) and a simpler single-slope roof with less framing lumber and fewer shingles.
What Materials Do I Need For A Lean-to Shed?
For a lean-to shed, you’ll need pressure-treated lumber for framing and the foundation, plywood or OSB for sheathing, roofing material (asphalt shingles or metal panels), exterior-rated screws, and a weatherproof sealant for seams and joints.
Can You Build A Lean-to Shed?
Yes, a lean-to shed is one of the more approachable DIY structures since it has a simple single-slope roof and, if attached to an existing wall, only three walls to frame instead of four.
What Are The Disadvantages Of A Lean-to Shed?
The disadvantages of a lean-to shed include limited interior space and storage compared to gable-roof designs, a higher risk of leaks if the roof pitch falls below your roofing material’s minimum, and less headroom on the low side of the slope. Regular maintenance is essential to prevent deterioration.
What Roof Pitch Should A Lean-to Shed Have?
Most lean-to sheds use a 3:12 to 5:12 pitch. The absolute minimum depends on your roofing material: 1:12 for metal roofing, 2:12 for asphalt shingles, and 4:12 for standard 3-tab shingles. Going below the minimum for your material risks leaks and ice damming.
Conclusion
Building a lean-to shed can be a rewarding DIY project. With the right materials and a clear plan, you can create a functional and durable storage solution. Remember to follow safety precautions and local building codes. Good luck with your lean-to shed construction project!
For more outdoor building projects, browse our full woodworking projects hub.