
Easy Things to Make With Wood: 5 Creative DIY Crafts
Looking for easy things to make with wood? Check out these simple and fun DIY projects that you can create with scrap wood or beginner woodworking skills.
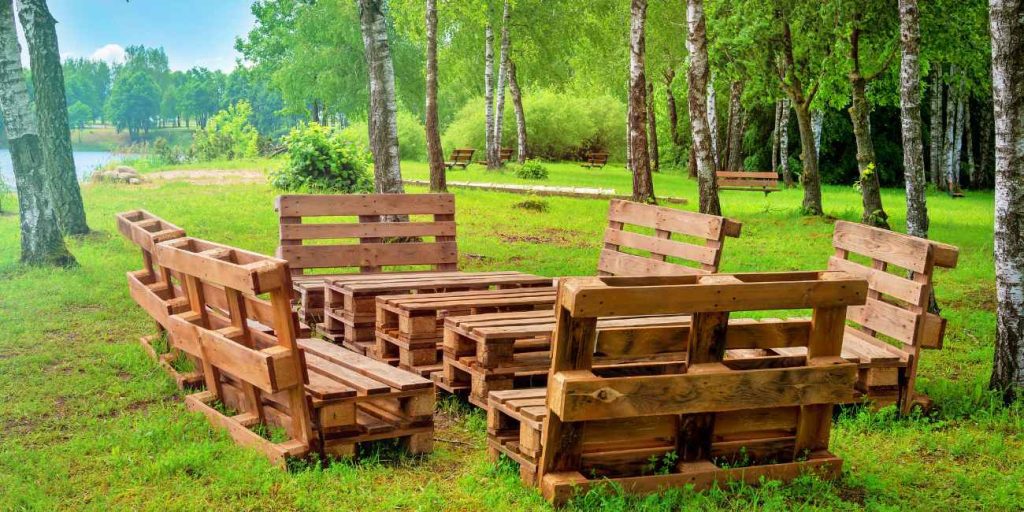
From small wood projects like a wooden doormat or clothes drying rack, to larger pieces like a writing desk or outdoor coffee table, there’s something for everyone. You can also try your hand at making wooden signs, cutting boards, furniture, and more to sell as woodworking projects.
Don’t let your random pieces of wood go to waste – try out some of these easy scrap wood project ideas, like a DIY laptop stand or jewelry holder. Get creative and start building today!
Introduction To Woodworking
Discover the world of woodworking by creating easy and practical items with wood. From wooden doormats to DIY laptop stands, there are numerous beginner-friendly projects to explore. Let your creativity flow and bring these simple woodwork ideas to life.
Why Choose Wood For DIY Crafts
Wood is a versatile material for DIY crafts due to its natural beauty and durability.
The Joy Of Crafting With Wood
Crafting with wood brings a sense of accomplishment and creativity to your projects.
Getting Started
Welcome to the exciting world of woodworking! Whether you’re a complete beginner or looking to expand your DIY skills, working with wood is a rewarding and fulfilling hobby. Before diving into your first project, it’s important to understand the basics and gather the essential tools.
Selecting The Right Tools
Before you begin your woodworking journey, it’s crucial to have the right tools at your disposal. Some essential tools for beginners include:
- Measuring tape
- Hammer
- Screwdriver set
- Hand saw
- Power drill
- Clamps
- Sandpaper
- Safety goggles
Understanding Wood Types
Wood comes in various types, each with its unique characteristics. Understanding the different wood types will help you choose the right material for your projects. Common wood types include:
- Pine
- Oak
- Maple
- Walnut
- Cherry
- Mahogany
Each type of wood has its own grain patterns, hardness, and color, so it’s essential to select the appropriate wood for your specific project.
Project 1: Wooden Coasters
Wooden coasters are a simple and fun woodworking project that can add a touch of rustic charm to your home decor. Whether you’re a beginner or an experienced woodworker, making wooden coasters is a great way to showcase your craftsmanship. In this step-by-step guide, we will walk you through the process of creating your own set of wooden coasters.
Materials Needed
To get started, gather the following materials:
- Scrap wood pieces (preferably hardwood)
- Saw (circular saw or miter saw)
- Sandpaper (various grits)
- Wood glue
- Clamps
- Wood stain or paint (optional)
- Clear polyurethane or varnish
- Paintbrush
Step-by-step Guide
Follow these simple steps to create your wooden coasters:
- Measure and mark the desired size for your coasters on the scrap wood.
- Using a saw, carefully cut along the marked lines to create individual coaster pieces.
- Smooth the edges and surfaces of each coaster using sandpaper. Start with a coarse grit and gradually move to a finer grit for a smooth finish.
- Apply wood glue to the bottom of each coaster and press them firmly together to create a stack.
- Secure the stack of coasters with clamps and allow the glue to dry completely.
- If desired, stain or paint the coasters in your preferred color. Apply multiple coats for a richer finish.
- Once the stain or paint is dry, apply a clear polyurethane or varnish to protect the coasters from moisture and spills. Follow the manufacturer’s instructions for application.
- Allow the coasters to dry completely before using or gifting them.
With just a few materials and simple steps, you can create a set of beautiful wooden coasters that will impress your guests and add a personal touch to your home. Get creative with different wood types, shapes, and finishes to make your coasters truly unique.
Project 2: Handmade Picture Frames
Craft beautiful handmade picture frames effortlessly with Project 2. This woodworking project offers a creative way to utilize scrap wood for stunning home decor pieces. Perfect for beginners, these frames make lovely gifts or additions to any space.
Choosing Your Wood
Select a sturdy wood type like oak or pine.
Ensure the wood is smooth and free of knots.
Crafting Your Frame
Measure and cut the wood to desired frame size.
Sand the edges for a polished finish.
Project 3: Simple Jewelry Box
Welcome to the third project in our series of easy things to make with wood! In this project, we will be creating a simple and elegant jewelry box that you can customize to your own taste. Whether you’re a beginner or an experienced woodworker, this project is perfect for anyone looking to add a personal touch to their jewelry storage.
Design Ideas
When designing your jewelry box, consider adding compartments for different types of jewelry, such as rings, earrings, and necklaces. You can also incorporate decorative elements like inlays, engravings, or a unique finish to make your jewelry box stand out.
Construction Process
- Start by choosing the type of wood for your jewelry box, such as cherry, walnut, or maple.
- Measure and cut the wood into pieces for the base, sides, and lid of the jewelry box.
- Assemble the pieces using wood glue and clamps, ensuring everything is square and aligned.
- Add hinges to attach the lid, and consider adding a small knob for easy opening and closing.
- Sand the jewelry box to a smooth finish, and apply a protective coat of varnish or paint.
Project 4: Plant Stand
Introducing Project 4: Plant Stand, an easy woodworking project using scrap wood. Enhance your home decor with this simple and functional DIY project that adds a touch of nature to any room. Perfect for beginners and those looking for creative ways to use wood.
If you’re looking for a fun and easy woodworking project that you can complete in just a few hours, a plant stand is a great choice. Not only is it practical, but it also adds a touch of greenery to any room in your home. Here are the supplies you’ll need and the assembly instructions to make your own plant stand.
Gathering Your Supplies
Before you get started, you’ll need to gather the following supplies:
– Scrap wood (2x4s or 2x2s work well)
– Wood screws
– Drill
– Circular saw or handsaw
– Sandpaper
– Stain or paint (optional)
Assembly Instructions
1. Cut the wood. Using your saw, cut the wood into four pieces: two long pieces for the legs and two shorter pieces for the top and bottom of the plant stand.
2. Sand the wood. Once you’ve cut the wood, sand it down to create a smooth surface.
3. Assemble the legs. Take the two longer pieces and attach them together using wood screws to create an “X” shape.
4. Attach the top and bottom. Attach the shorter pieces to the top and bottom of the legs using wood screws. Make sure the top and bottom pieces are level.
5. Sand again. Sand the entire plant stand again to make sure everything is smooth.
6. Stain or paint (optional). If you want to add some color to your plant stand, now is the time to stain or paint it.
And there you have it – a simple and stylish plant stand that you can make with just a few supplies and a little bit of time. Give it a try and see how it looks in your home!
Project 5: Birdhouse
Create a charming birdhouse with this easy woodworking project. Using simple materials and basic tools, this beginner-friendly project is perfect for those looking to make something with wood. The end result is not only functional but also a delightful addition to any garden or outdoor space.
Building a birdhouse is a fun and rewarding woodworking project that can be enjoyed by both beginners and experienced woodworkers. Not only does it provide a cozy home for our feathered friends, but it also adds a touch of nature to our outdoor spaces. In this section, we will guide you through the process of building your own birdhouse, from selecting the right blueprints and materials to the final touches.
Blueprints And Materials
Before you start building your birdhouse, it’s essential to have the right blueprints and gather all the necessary materials. The blueprint will serve as your guide, providing measurements and instructions for each component of the birdhouse. You can find birdhouse blueprints online or in woodworking magazines.
Here is a list of materials you will need:
- 1-inch thick cedar or pine boards
- Wood glue
- Nails or screws
- Hinges
- Outdoor paint or wood stain
- Drill and drill bits
- Saw
- Sandpaper
- Paintbrushes
Building Your Birdhouse
Once you have your blueprints and materials ready, it’s time to start building your birdhouse. Follow these steps:
- Using the blueprint as a guide, cut the boards into the required sizes for each component of the birdhouse.
- Sand all the edges and surfaces of the boards to ensure they are smooth and free from splinters.
- Assemble the birdhouse by attaching the sides, front, back, and roof together using wood glue and nails or screws.
- Drill an entrance hole in the front panel of the birdhouse. Make sure it is sized appropriately for the type of birds you want to attract.
- Add a hinged door to the back of the birdhouse to allow for easy cleaning and maintenance.
- Paint or stain the birdhouse with outdoor paint or wood stain to protect it from the elements and give it a decorative touch.
- Once the paint or stain is dry, your birdhouse is ready to be placed in your garden or backyard.
Remember to choose a location for your birdhouse that is sheltered from harsh weather conditions and away from predators. It’s also essential to regularly clean and maintain the birdhouse to ensure the health and safety of the birds.
Building a birdhouse is a great way to unleash your creativity and connect with nature. Not only will you enjoy the process of woodworking, but you will also have the satisfaction of providing a safe and cozy home for our feathered friends.
Finishing Touches
Create charming wood projects with these finishing touches: Sliding wood crate storage, wooden doormats, and reclaimed industrial side tables. Explore easy, beginner-friendly woodworking ideas to craft unique and functional pieces for your home.
When it comes to woodworking projects, the finishing touches can make all the difference. Whether you want to enhance the natural beauty of the wood or add a pop of color, there are several options to choose from. In this section, we will explore two popular finishing techniques: staining and painting, as well as sealing and protecting the wood.
Staining And Painting
Staining and painting are great ways to add color and character to your wood projects. Staining allows you to enhance the natural grain of the wood while adding a touch of color. It is important to choose the right stain color that complements the wood and your overall design aesthetic. You can find a wide range of stain colors available at your local hardware store.
On the other hand, painting provides endless possibilities for creativity. You can choose any color you like and even experiment with different techniques such as distressing or stenciling. Before painting, make sure to prepare the wood surface by sanding it smooth and applying a primer to ensure the paint adheres properly. Once the primer is dry, you can apply your chosen paint color using a brush or a roller.
Sealing And Protecting
After you have stained or painted your wood project, it is crucial to seal and protect it to ensure its longevity. Sealing the wood not only enhances its appearance but also helps to protect it from moisture, UV rays, and other potential damages. There are various sealants available, such as polyurethane, lacquer, or varnish. Choose a sealant that is compatible with the type of wood and the desired level of protection.
Before applying the sealant, make sure the surface is clean and free from dust or debris. Use a brush or a clean cloth to apply an even coat of sealant, following the manufacturer’s instructions. Allow the sealant to dry completely before applying additional coats if necessary. Remember to lightly sand the surface between coats for a smooth finish.
In conclusion, the finishing touches play a significant role in elevating the overall look and durability of your wood projects. Whether you opt for staining or painting, or sealing and protecting, these techniques allow you to showcase your creativity and protect your hard work. So, don’t overlook the importance of the finishing touches and enjoy the beautiful results they can bring to your woodworking projects.
Sharing Your Creations
Create beautiful and functional items with scrap wood, such as a sliding wood crate storage, wooden doormat, or a DIY laptop stand. These easy woodworking projects are perfect for beginners and offer a great way to repurpose leftover wood pieces.
Photographing Your Work
Once you’ve completed your wood creations, it’s time to show them off! One of the best ways to share your work is by taking high-quality photographs. Use natural lighting and a clean background to showcase your piece. Take photos from different angles and distances to capture the details and overall look. You can even edit your photos to enhance the colors and clarity. Sharing beautiful photos of your woodwork can inspire others and help you gain recognition for your skills.
Selling And Gifting
If you’ve made more wood creations than you know what to do with, consider selling or gifting them. Selling your work can be a great way to earn some extra cash or turn your hobby into a business. You can sell your creations online through platforms like Etsy or at local craft fairs and markets. Gifting your work to friends and family is also a thoughtful gesture that shows off your skills. Plus, it’s a great way to spread the joy of woodworking to others.
In conclusion, sharing your wood creations is a rewarding experience. By photographing your work, selling or gifting them, you can inspire others and gain recognition for your skills. So, don’t be shy to share your creations with the world!
Frequently Asked Questions
What Is Easy To Build Out Of Wood?
Easy woodworking projects include sliding wood crate storage, clothes drying rack, wooden doormat, pallet crate, outdoor coffee table, and writing desk.
What I Can Make With Wood?
Wood can be used to make a variety of things, such as furniture, wooden signs, cutting boards, wooden candle holders, and even surfboards. It’s also great for easy DIY projects, like a wooden doormat, a clothes drying rack, or a sliding wood crate storage.
With a little creativity, the possibilities are endless.
What Is A Simple Wood Work Project?
A simple wood work project is a DIY project that can be completed easily and quickly using basic woodworking tools and techniques. Examples include a wooden doormat, sliding wood crate storage, DIY laptop stand, wooden signs, and a wooden pallet crate.
These projects are perfect for beginners and those with limited woodworking experience.
What Can I Do With Random Pieces Of Wood?
Transform random wood pieces into useful items like a laptop stand, wall clock, or dog bowl stand. Upcycle creatively!
Conclusion
Incorporating wood projects into your life can be both fun and rewarding. Whether you’re a beginner or an experienced woodworker, there are endless possibilities. From simple items like wooden signs to more intricate pieces like furniture, the joy of creating with wood is unmatched.
Start crafting today!