
How to Cut 45 Degree Angle With Hand Saw: Mastering Precision Cuts
To cut a 45 degree angle with a hand saw, use a carpenters speed square as a guide and clamp it to the board, then carefully saw along the line. This is a simple and accurate method that requires a sharp saw and a steady hand.
Cutting precise angles by hand can be challenging, but with the right technique and tools, it can be done successfully. We’ll explore different methods for cutting angles with hand saws, including using a miter saw, a circular saw, and a miter box.
We’ll also provide tips and tricks to ensure that your cuts are clean and accurate, and discuss common mistakes to avoid when cutting angles by hand.
Using A Speed Square And Clamp
To cut a 45 degree angle with a hand saw, you can use a carpenter’s speed square and clamp. By holding the speed square against the board and sawing along its edge, you can achieve the desired angle. This method ensures accurate cuts every time.
Marking The 45 Degree Angle
Before starting to cut wood, it is necessary to mark the angle to ensure precision. To mark a 45-degree angle on the board, follow these steps:
- Begin by measuring and marking the board at the point where you want to cut.
- Position the speed square along the edge of the board and draw a straight line. It should form a 90-degree angle at the point you just marked.
- Next, align your speed square with the line you just drew, and adjust it to a 45-degree angle.
- Draw a straight line along the edge of your speed square.
Clamping The Speed Square To The Board
Now that you have marked the angle, it’s time to clamp the speed square to the board. This helps maintain accuracy and prevents the board from shifting as you cut.
- Place your speed square on the board and align it with the line you drew at the desired angle.
- Use clamps to secure the speed square to the board. This way, you can cut the board without worrying about the angle shifting during the process.
- Ensure that the clamp is tight enough to hold the speed square in place, but not too tight that it could damage the board.
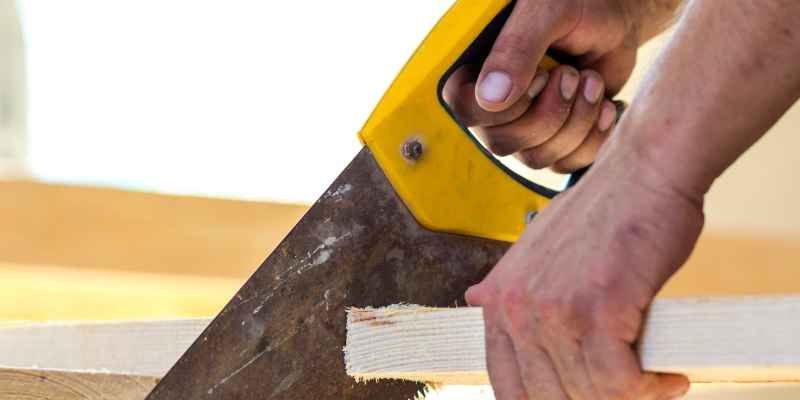
Cutting The Board With Hand Saw
Now that the speed square and clamp are securely in place, it’s time to cut the board. Here are some tips on how to cut a 45-degree angle with a hand saw:
- Hold the saw at a 45-degree angle. This helps keep the blade perpendicular to the board, ensuring a smooth cut.
- Make a shallow cut at the angle by starting at one end of the board and cutting towards the other end. Use a back and forth motion to create a groove in the wood. Repeat the process on the other side of the board.
- Once the cut is deep enough to guide your saw, complete the cut by sawing straight through the board.
- Be patient and take your time while cutting. Rushing the cutting process can lead to mistakes.
- After you have completed your cut, remove the clamps and speed square. Sand or polish the board to create a seamless and perfect finish.
By following the above steps, you will be able to cut a precise 45-degree angle with a hand saw. Remember to take your time and be patient. It may take some practice, but with the right tools and technique, you can create a perfect cut every time.
Making A Guide Fence
To cut a 45-degree angle with a hand saw, you can create a guide fence. First, create a knife line and a reference line. Then, clamp a straight board along the reference line to create your guide fence.
Choosing The Right Material For The Fence
Before starting, choose the right material for the fence. The most common material for a guide fence is plywood. It is strong and easy to cut. Make sure the plywood is straight, smooth, and free from knots. You can also use a straight piece of hardwood or MDF board.
Measuring And Cutting The Fence
After choosing the material, measure the length of the board you want to cut. Add a few inches to the measurement for the guide fence. This additional length ensures the hand saw will not slip from the guide fence. Using a saw, cut the plywood into a strip of the required length. If you’re using hardwood, then use a table saw to cut the board into a thin strip.
Attaching The Fence To The Board
To attach the fence to the board, use a good quality clamp and make sure it is tight. Put the fence on top of the board, making sure it is parallel to the cutting line. Check for accuracy with a T-square. If it is not parallel, adjust the fence and clamp it again. Repeat this process until the fence is parallel to the cutting line.
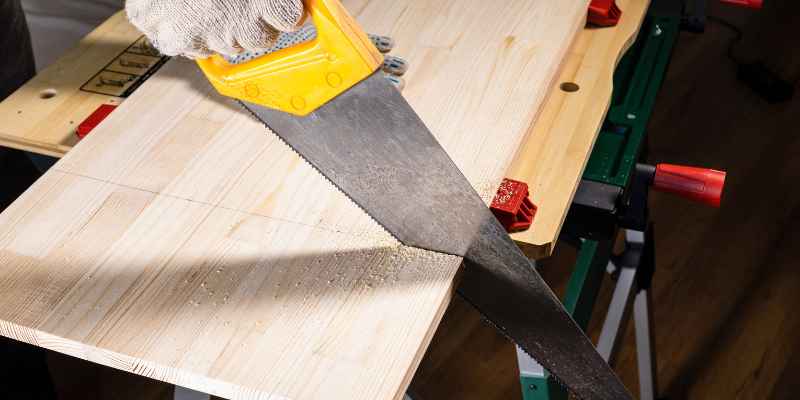
Cutting The Board With Hand Saw
Once the fence is in the right position, make sure the board is also firmly clamped to the work surface. Use a hand saw to cut the board. Start slowly and follow the guide fence accurately. It is important to maintain a steady pace with firm pressure on the saw. Check your progress frequently to ensure that you are cutting at a perfect angle. Remove the fence and sand the edges of the board to make it smooth.
Use these steps to cut any length of the board with a 45-degree angle accurately. Make sure to choose the right material for the guide fence, attach it accurately to the board, and cut it with the hand saw with patience. Happy cutting!
Using A Miter Box
To cut a 45 degree angle with a hand saw, you can use a miter box as a guide. Place your material in the box, align the saw with the guide slots, and carefully cut along the marked line. With patience and a steady hand, you can achieve precise cuts for your woodworking projects.
Understanding The Miter Box
A miter box is a handy tool for making precise angled cuts in wood. It consists of a box or frame with slots cut into it at specific angles to guide the saw. The slots are positioned to cut angles commonly used in woodworking, such as 45 degrees and 90 degrees. Miter boxes are a great tool for beginners who don’t have access to a power saw or want to make quick, precise cuts with a hand saw.
Choosing The Right Saw For The Box
When selecting a saw to use with a miter box, a backsaw or hand saw is best. The saw should have fine teeth and a rigid back to prevent bending or bowing during use. The blade length should be slightly longer than the length of the miter box to make it easy to cut completely through the wood without binding.
Marking And Aligning The Board
Before making the cut, mark the wood where you want the cut to be made. Align the board in the miter box with the line in the appropriate slot. Use a clamp to hold the wood securely in place within the miter box to prevent movement during the sawing process.
Cutting The Board With Miter Saw
Place the saw in the slot, ensuring that the teeth are facing away from the wood. Hold the saw steady and in a vertical position, starting at the far end of the slot. Begin cutting slowly and steadily, following the guide slot until the saw has completely passed through the wood. Be patient and avoid rushing the cut, as this can cause the saw to jump or produce a poor-quality cut.
Using a miter box is a great way to ensure accurate and precise cuts, whether you are a beginner or an experienced woodworker. Taking the time to understand the miter box, choose the right saw, mark and align the wood, and make a precise cut will result in excellent cuts every time.
Cutting Without A Guide
Cutting a 45 degree angle with a hand saw without a guide can be challenging, but there are tips to make the process easier. Use a carpenter’s speed square as a guide, mark your cut accurately, and make sure your saw is properly sharpened.
Marking The Board
Before cutting a 45-degree angle with a hand saw, it is essential to mark the board. Marking the board ensures that the angle is precisely cut. To mark the board, measure and mark where the angle will begin and end. You can use a ruler to measure the length of the cutting line accurately. Always ensure that the angle is clearly marked on the board before making any cuts.
Creating A Knife Line
Creating a knife line helps ensure that the saw cuts are accurate. Use a sharp utility knife to create a knife line along the edge of your marked line. This knife line will provide a guide for the saw, making it easier to cut the board accurately.
Drawing A Reference Line
Drawing a reference line will also assist in ensuring that the saw cuts are accurate. Draw a straight line along the board, placing the line perpendicular to the edge of the board where the cut will be made. The reference line will serve as a guide for the saw.
Making The Cut
Once you have marked the board and drawn the necessary lines, it is time to make the cut. Before you start cutting, ensure that the blade is sharp and securely attached to the saw. Position the saw blade on the marked line, using the reference line as a guide. Hold the saw firmly and begin cutting slowly to avoid mistakes.
In conclusion, cutting a 45-degree angle with a hand saw without a guide is possible, but it requires careful measurement, marking, and cutting. By using these techniques, you can cut a precise angle with a hand saw and create professional-looking results.
Tips For Precision Cuts
If you need to make accurate cuts at precise angles, using a hand saw can be a great choice. However, to achieve the desired results, you need to exercise care and precision throughout the process. Below are some tips on how you can cut a 45-degree angle with a hand saw, accurately.
Keeping The Saw Sharp
To make precise cuts, your saw needs to be freshly sharpened. Always check the teeth before starting the cutting process. There should be no rust or burrs on the teeth of the saw. You can use a metal file to sharpen the saw teeth before cutting. A well-sharpened saw ensures a clean and straight cut.
Using Proper Hand Placement
Hand placement is crucial for making accurate cuts. Make sure your non-dominant hand is holding the wood securely while the dominant hand is controlling the saw. Your thumb and fingers should be spread apart and firmly gripping the handle of the saw. This will help to maintain accuracy and control over the saw’s cutting direction.
Following The Line
It’s important to mark the cutting line carefully before starting the cut. You can use a ruler or a speed square to draw a line at a 45-degree angle. Ensure the saw blade is exactly aligned with the cutting line before beginning the cut. While cutting the wood, be sure to follow the line and make sure the saw stays on track. A slight deviation from the line can ruin your desired cut.
Finishing The Cut
When you are at the end of the cut, keep your saw straight and avoid twisting. A slight twist can cause the saw blade to deviate from the line, and the end of the cut may not be straight. To ensure a clean and accurate end to the cut, slow down the speed of the saw blade and finish the cut carefully. Remember to keep your hand placement and focus on following the line to make the final cut.
By following these tips, you can cut a 45-degree angle with a hand saw, accurately. Maintaining a steady hand grip and focusing on precision can make all the difference between a perfect cut or a botched one. Keep a straight posture, apply even pressure, and let the saw do the work. With some practice, you’ll get the hang of it, producing clean and polished cuts for any woodworking projects.
Understanding 45 Degree Angle
Cutting a 45 degree angle with a hand saw requires drawing a line on the wood to be cut, using a miter box or a carpenter’s speed square as a guide, and sawing precisely along the line using a sharp hand saw.
With a little bit of patience and practice, you can achieve a clean and accurate cut every time.
Definition And Properties Of 45 Degree Angle
In geometry, 45 degrees angle is formed when a straight line is divided into two equal parts. It is an acute angle, meaning it is less than 90 degrees. A 45-degree angle has unique properties: firstly, if you mirror it, it remains the same angle, and secondly, it divides a square or rectangle evenly, making it particularly useful in woodworking.
Real-life Applications Of 45 Degree Angle
The 45-degree angle is commonly used in woodworking to create mitre joints. It is also used in construction for supporting and framing walls, creating rooflines, and laying tiles at an angle. In addition, it is used in baking and cooking to cut slices or pieces of food at an angle.
Common Mistakes When Cutting At 45 Degrees
One common mistake when cutting at 45 degrees is to not measure the angle accurately, leading to imprecise cuts. Another mistake is not using the saw properly, leading to crooked cuts. Not marking the wood before cutting is also a common mistake, which could result in uneven cuts.
Troubleshooting Tips
If you’re having trouble getting a straight cut at 45 degrees with a handsaw, try clamping a saw guide onto the wood. Alternatively, use a mitre box to guide your saw and make the cut. Ensure that the saw you’re using has a sharp blade and that you’re holding it correctly. If you’re still finding it challenging, practice on a scrap piece of wood before moving onto the actual project.
In summary, understanding the properties and applications of the 45-degree angle is critical for a successful woodworking project. By avoiding common mistakes and utilizing troubleshooting tips, you can efficiently make a precise cut at this angle with a handsaw.
Tools For Cutting 45 Degree Angle
Cutting 45-degree angles with a hand saw can be tricky, but using a carpenter’s speed square as a guide and a clamp to hold it to the board can help. Another option is using a miter saw, which is the most accurate method for cutting lengths of timber at any angle.
Hand Saws
When it comes to cutting a 45 degree angle with a hand saw, there are a few different tools you can use to achieve this. First up is the hand saw, which is a versatile tool that can be used for a wide range of cuts, including angled cuts. For cutting a 45 degree angle with a hand saw, you will need a saw with a fine-toothed blade, as this will give you the cleanest cut possible. Additionally, it may be helpful to use a guide, such as a speed square or a clamped piece of wood, to ensure the angle is precise and accurate.
Miter Saw
Another tool that is commonly used for cutting 45 degree angles is the miter saw. This type of saw allows you to easily adjust the angle of the blade to make precise cuts, making it a popular choice for woodworking projects. To use a miter saw, you will need to adjust the angle of the blade to 45 degrees, and then carefully line up your material to make the cut.
Circular Saw
In addition to hand saws and miter saws, circular saws can also be used to make 45 degree cuts. When using a circular saw, it is important to ensure that the blade is properly set to the correct angle, and that you are using a guide or fence to keep the saw on track as you make the cut. Circular saws can be a bit more difficult to use than hand saws or miter saws, but they can be a good choice for larger or thicker materials.
Miter Box
If you don’t have access to a power saw, a miter box can be a useful tool for cutting 45 degree angles by hand. A miter box is a simple guide that helps to hold the material in place while you make the cut. To use a miter box, simply align the material with the appropriate slot, and then use a hand saw to make the cut.
Other Essential Tools
In addition to these main tools, there are a few other essential items that can come in handy when cutting 45 degree angles. First up is a square, which can be used to ensure that your cuts are perfectly perpendicular. A clamp can also be useful for holding your material in place as you make the cut. Finally, if you are working with larger materials, a sawhorse or a workbench can help to provide a stable surface for your tools and materials.
Frequently Asked Questions For How To Cut 45 Degree Angle With Hand Saw
How Do You Cut 45 Degrees By Hand?
To cut at a 45-degree angle by hand, use a carpenter’s speed square as a guide along with a sharp saw and clamp. Another method is to draw a line segment and construct a semicircle bisecting the line at point P.
Using a miter saw is the most accurate way to cut timber at any angle. Avoid cutting angles with a handsaw by utilizing a guide fence and making proper reference lines.
How Do You Cut Right Angles In Wood By Hand?
To cut right angles in wood by hand, use a carpenter’s speed square as a guide and clamp it firmly to the board. Make sure your saw is sharp, and cut along the edge of the square. Another method is to use a miter saw, which is the most accurate method for cutting timber at any angle.
How To Make A 45 Degree Angle Without A Protractor Or Compass?
To make a 45 degree angle without a protractor or compass, draw a line segment BC of any length. Taking B as the center, construct a semicircle that bisects BC at point P. Mark the points as x and y where the arcs bisect the semi-circle.
Alternatively, a carpenter’s speed square or a miter saw can be used as a guide. A clamp can help to hold the speed square to the board.
What Kind Of Saw Cuts 45 Degree Angle?
A miter saw or chop saw is the most accurate tool to cut a 45 degree angle. It is also called a saw that cuts angles or length of timber easily. A carpenter’s speed square can be used as a guide if you have a decently sharp saw and a clamp to hold the speed square to the board.
Conclusion
Congratulations! You have successfully learned how to cut a 45-degree angle with a hand saw. With the right tools and techniques, you can now make precise cuts in your woodworking projects. Remember to always take safety precautions, use the proper saw, and take your time to ensure accurate cuts.
Whether you are a professional carpenter or just a DIY enthusiast, cutting angles with a hand saw is an essential skill to have in your arsenal. Keep practicing, and soon you’ll be a pro at cutting angles with hand saws.
Happy woodworking!