Easy Wood Burning Ideas: Spark Your Creativity
Embark on easy wood burning projects perfect for beginners in Austin, Texas, with printable patterns and designs. Discover simple wood burning ideas for summer, like state-themed designs and deer patterns.
Unleash your creativity with small pyrography projects, stencil wood burning, and easy-to-follow beginner guides. Explore wood burn patterns featuring flowers, love themes, and even hobbit-inspired designs. Get inspired by a variety of wood burning ideas and tips from DIY enthusiasts and crafters.
Learn about the best wood types for burning and how to make your wood burning projects stand out. Whether you’re a novice or seasoned pro, these wood burning ideas will ignite your passion for creating stunning artwork on wood.
Introduction To Wood Burning
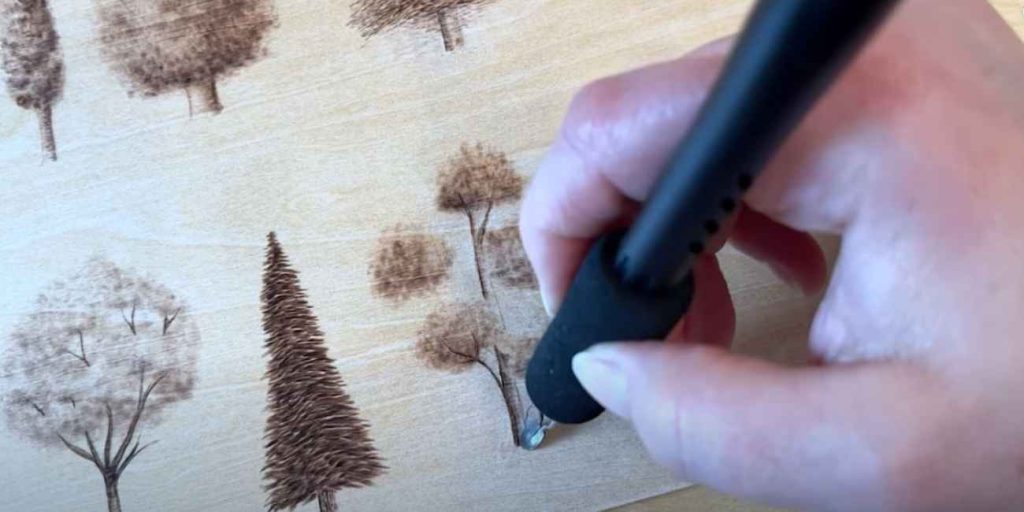
Wood burning, also known as pyrography, is the art of decorating wood by burning designs onto its surface using a heated metal point. It is a versatile and rewarding craft that allows artists to create intricate designs, patterns, and images on various wooden surfaces. From decorative pieces to personalized gifts, wood burning offers endless creative possibilities.
The Allure Of Pyrography
Pyrography, or wood burning, has a timeless appeal that draws in artists and hobbyists alike. The process of etching designs into wood with a heated tool is both mesmerizing and satisfying, offering a unique way to bring creativity to life.
Tools Of The Trade
When it comes to wood burning, having the right tools is essential for achieving precision and detail in your designs. The basic tools for wood burning include a wood burning pen, various tips for different effects, a surface to work on, and safety equipment such as gloves and a mask to protect against fumes.
Selecting Your Canvas
Selecting Your Canvas for Easy Wood Burning Ideas – Austin, Texas, United States. Explore beginner-friendly wood burning patterns, simple designs for summer, deer stencils, small pyrography projects, printable patterns, wooden crafts, easy wood burn flowers, love designs, children’s ideas, and even a hobbit pattern for your next wood burning project.
Discover inspiration and step-by-step tutorials to create unique and personalized wood burned creations.
Choosing The Right Wood
When it comes to wood burning, selecting the right canvas is crucial for a successful project. Choosing the right wood can greatly impact the final result of your design. Here are a few factors to consider when selecting your wood:
- Density: Different types of wood have different densities, which affects how well they hold heat and burn. Hardwoods like oak and birch are ideal for wood burning due to their density.
- Smoothness: The smoother the wood surface, the easier it will be to create detailed and intricate designs. Look for wood that has a smooth and even grain.
- Size: Consider the size of the wood piece you’ll be working with. Larger pieces provide more space for elaborate designs, while smaller pieces are great for practicing and experimenting.
- Drying: It’s important to use dried wood for wood burning to prevent cracking and warping during the burning process. Avoid using freshly cut or green wood.
Preparing Wood For Burning
Before you start burning your design onto the wood, it’s essential to properly prepare the surface. Follow these steps to ensure the best results:
- Sanding: Begin by sanding the wood to create a smooth and even surface. This will help the woodburning tool glide smoothly and prevent any unwanted marks or scratches.
- Cleaning: Remove any dust or debris from the wood surface by wiping it with a clean cloth or using a gentle brush. This will ensure that the burning process goes smoothly.
- Design Transfer: If you have a specific design in mind, you can transfer it onto the wood using transfer paper or by creating a stencil. This will help you achieve more precise and accurate results.
- Practice: If you’re new to wood burning, it’s always a good idea to practice on a scrap piece of wood before working on your final project. This will help you get comfortable with the tool and techniques.
By carefully selecting the right wood and properly preparing it for burning, you’ll be well on your way to creating beautiful and intricate wood burning designs. Remember to take your time, be patient, and have fun with your projects!
Wood Burning Techniques
Discover easy wood burning ideas for beginners and unleash your creativity with simple wood burning designs. From floral patterns to wildlife stencils, find inspiration and tips to create beautiful wood-burned projects. Explore different types of wood for burning and enhance your skills with the easiest wood burning tools.
Mastering Basic Strokes
Start by mastering basic strokes when wood burning. Practice straight lines, curves, and dots to gain control over the wood burning tool. Experiment with different tips to create various line thicknesses and textures.
Shading And Texturing Tips
Shading and texturing add depth and dimension to wood burning projects. Use a light touch for subtle shading and a darker touch for deeper shading. Experiment with different textures by varying the pressure and speed of your strokes.
Simple Project Ideas
Wood burning offers a creative outlet for crafting beautiful and functional items. Whether you’re a beginner or seasoned enthusiast, here are some simple project ideas to inspire your next creation:
Wooden Spoons And Kitchenware
- Personalize wooden spoons with intricate designs
- Decorate cutting boards for a unique touch in the kitchen
- Create custom coasters for a stylish addition to your table
Rustic Picture Frames
- Add rustic charm to plain frames with wood burning patterns
- Embellish frames with nature-inspired motifs like leaves or flowers
- Customize frames with initials or meaningful quotes
Seasonal Creations
If you’re looking for easy wood burning ideas for seasonal creations, you’ve come to the right place! Here are some ideas for summer-themed designs, as well as holiday ornaments and gifts.
Summer-themed Designs
Summer is the perfect time to create wood burned designs inspired by nature. Here are some ideas:
- Wooden coasters with beach or ocean designs
- A wood burned sunflower on a wooden sign
- Wooden spoons with fruit designs
Holiday Ornaments And Gifts
Wood burning can also make for unique and personalized holiday ornaments and gifts. Here are some ideas:
- Wooden snowflakes with intricate designs
- A wood burned reindeer on a wooden slice ornament
- A personalized wood burned cutting board for a hostess gift
Patterns And Stencils
When it comes to wood burning, patterns and stencils are a great way to add unique designs to your projects. Whether you’re a beginner or an experienced wood burner, using pre-made patterns or creating your own designs can take your creations to the next level.
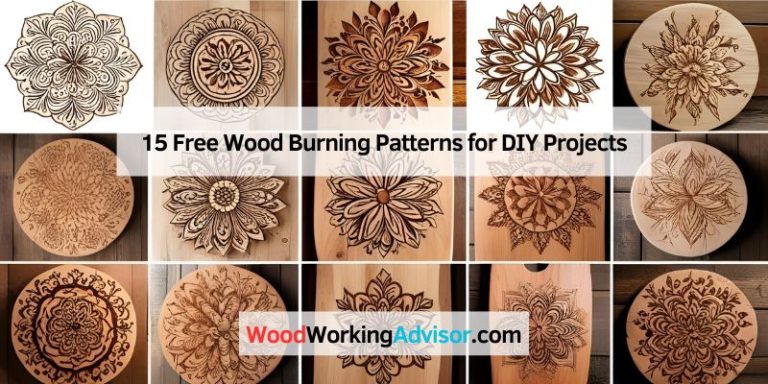
Using Pre-made Patterns
If you’re just starting out or looking for some inspiration, using pre-made patterns is a fantastic option. There are plenty of resources available online where you can find printable wood burn patterns suitable for beginners. These patterns often come with step-by-step instructions, making it easy for you to follow along and create beautiful designs.
Additionally, you can find patterns for specific themes, such as nature, animals, or even state outlines like the state of Michigan. With a wide variety of patterns available, you can easily find one that suits your style and preferences.
Creating Your Own Designs
If you want to take your wood burning to the next level and add a personal touch to your projects, creating your own designs is the way to go. This allows you to have complete creative control and make each piece truly unique.
Start by sketching your design on a piece of paper or using design software on your computer. Once you have your design ready, transfer it onto the wooden surface using transfer paper or by tracing it with a pencil. Then, you can start wood burning following the lines of your design.
Remember, practice makes perfect, so don’t be discouraged if your first few attempts don’t turn out exactly as you imagined. With time and practice, you’ll improve your wood burning skills and create stunning designs.
Whether you choose to use pre-made patterns or create your own designs, wood burning is a great way to express your creativity and create beautiful pieces of art. So grab your wood burner and let your imagination run wild!
Adding Color To Your Projects
Enhancing your wood burning projects with vibrant colors can take your creations to the next level. Adding pigments and colors can bring life and personality to your designs, making them truly stand out.
Techniques For Adding Pigments
- Use water-based wood stains for a translucent effect
- Experiment with acrylic paints for bold and opaque colors
- Try oil paints for a rich and glossy finish
- Blend different colors to create unique shades
Sealing And Protecting Colored Work
- Apply a clear varnish or sealant to protect the colors from fading
- Use a UV-resistant finish to prevent sun damage
- Avoid using harsh chemicals that may react with the pigments
- Allow sufficient drying time between layers for a durable finish
Wood Burning For Kids
Discover easy wood burning ideas for kids to explore their creativity and create unique crafts. From simple designs to printable patterns, children can enjoy creating wood burn art with beginner-friendly projects. With the right tools and guidance, they can bring their imagination to life through this fun and rewarding activity.
Safe Practices
- Always supervise kids during wood burning activities
- Ensure proper ventilation in the workspace
- Use safety gear like gloves and goggles
Simple Projects For Young Crafters
- Wooden keychains with initials
- Decorated coasters with basic designs
- Personalized bookmarks with simple patterns
Advanced Wood Burning Ideas
Once you’ve mastered the basics of wood burning, you may be ready to take your skills to the next level. Advanced wood burning ideas allow you to create intricate patterns and portraits, as well as experiment with mixing mediums. Let’s explore some exciting possibilities!
Intricate Patterns And Portraits
If you’re looking to challenge yourself and showcase your artistic abilities, creating intricate patterns and portraits through wood burning is a great way to do it. With patience and precision, you can create stunning designs that will leave people in awe. Whether you prefer geometric patterns, floral motifs, or even realistic portraits, the possibilities are endless.
Here are a few tips to help you achieve the best results:
- Start with a well-prepared wood surface, free of any dirt or debris.
- Use a fine-tipped wood burning tool to allow for intricate detailing.
- Plan your design in advance and use guidelines or stencils if needed.
- Take your time and work in small sections to ensure precision.
- Experiment with different shading techniques to add depth and dimension to your artwork.
Mixing Mediums With Pyrography
Pyrography, the art of wood burning, can be taken to new heights by incorporating other mediums into your projects. By combining wood burning with painting, staining, or even using colored pencils, you can create unique and visually striking pieces of art.
Here are a few ideas to get you started:
- Wood burn a design onto a wooden plaque, then use acrylic paints to bring the design to life with vibrant colors.
- Create a mixed media piece by combining wood burning with collage elements or found objects.
- Experiment with different types of wood stains to add a touch of rustic elegance to your wood burning creations.
By mixing mediums, you can create truly one-of-a-kind pieces that showcase your creativity and skill.
Remember, advanced wood burning ideas require practice and patience. Don’t be afraid to experiment and push your boundaries. With time and dedication, you’ll be amazed at what you can achieve!
Caring For Your Wood Burned Items
Caring for your wood burned items is important to ensure their longevity. Use a soft cloth to wipe them down and avoid exposing them to direct sunlight or water. Incorporating easy wood burning ideas such as coasters or wall art can add a touch of rustic charm to your home decor.
Wood burning is a fun and creative way to add a personal touch to your wooden items. However, like any other art form, caring for your wood burned items is crucial to maintaining their beauty and longevity. In this section, we will discuss maintenance tips and repairing common issues to ensure your wood burned items stay in top condition.
Maintenance Tips
Regular cleaning is essential to maintain the appearance of your wood burned items. Here are some tips to help you keep them looking their best:
1. Dust your wood burned items regularly using a soft, dry cloth.
2. Avoid using water or cleaning solutions as they can damage the wood and the burn design.
3. Apply a thin layer of furniture polish or wax to protect the wood and enhance the burn design.
Repairing Common Issues
Even with the best maintenance, your wood burned items may face some common issues that require repair. Here are some tips to help you fix them:
1. If the burn design becomes faded or light, you can darken it by going over it with a wood burning tool.
2. If the wood burned item develops cracks or splits, you can repair it by filling the gaps with wood filler and sanding it smooth.
3. If the wood burned item develops scratches or scuff marks, you can gently sand them out and apply a new layer of furniture polish or wax.
Conclusion
By following these maintenance tips and repairing common issues promptly, you can ensure that your wood burned items remain beautiful for years to come. Remember, taking care of your wood burned items is not only important for their appearance but also for their longevity.
Community And Resources
Engage with a vibrant wood burning community and explore valuable resources to enhance your skills.
Online Forums And Groups
Connect with like-minded individuals on online forums and groups dedicated to wood burning.
- Share ideas, tips, and inspiration
- Receive feedback on your projects
- Stay updated on the latest trends
Books And Tutorials For Further Learning
Expand your knowledge with books and tutorials tailored for wood burning enthusiasts.
- Explore different techniques and styles
- Learn from experienced artists and craftsmen
- Master advanced skills to take your projects to the next level
Showcasing Your Work
Once you’ve honed your wood burning skills and created beautiful pieces of art, it’s time to showcase your work to the world. Whether you want to share your creations with friends and family or turn your passion into a profitable venture, there are various ways to exhibit and sell your wood burning masterpieces.
Creating A Portfolio
Building a professional portfolio is essential for displaying your wood burning artwork. Consider creating a dedicated section on your website or a physical portfolio to showcase high-quality images of your work. Include a variety of pieces to demonstrate your skills and style, and provide a brief description for each piece, highlighting the inspiration and techniques used.
Selling Your Creations
Turning your wood burning hobby into a business venture is a rewarding way to share your talent and generate income. Explore online platforms such as Etsy, Amazon Handmade, or eBay to sell your creations to a global audience. Additionally, consider participating in local craft fairs, art markets, or setting up your own booth to connect with potential customers and art enthusiasts.
Frequently Asked Questions
What Is The Easiest Way To Burn Wood?
The easiest way to burn wood is to use birch, as it burns easily and can be burnt unseasoned.
What Is The Easiest Wood To Wood Burn?
Birch wood is the easiest to wood burn, burning quickly and can be burnt unseasoned. It’s best mixed with slower burning woods like Oak or Elm for optimal results. Birch bark is excellent for fire-lighting, making it a great choice for beginners.
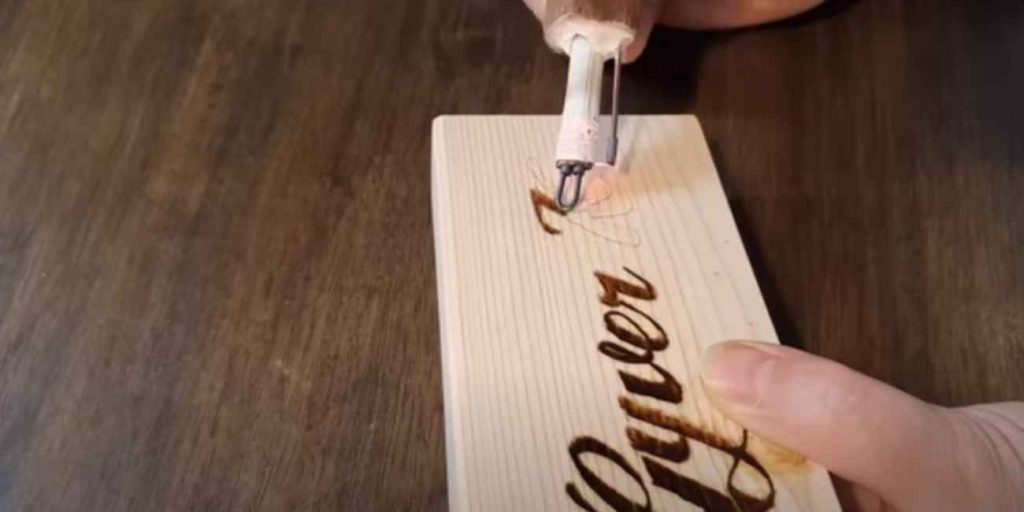
How Do You Make Wood Burning Look Good?
To make wood burning look good, start with simple lines instead of shading. Use a wire-nibbed pyrography pen for smoother lines and shading. Lightly touch the wood for stippling and don’t press too hard. You can always make a burn darker, but you can’t lighten it.
Choose the right wood, like birch or oak, and practice to improve your skills.
What Is The Easiest Wood Burning Tool To Use?
The wire-nib woodburners are the easiest to use for wood burning. They are like actual pens and are satisfying to use, making them great for beginners.
Conclusion
Wood burning is a wonderful way to add a personal touch to your home decor or create unique gifts for loved ones. With these easy wood burning ideas, even beginners can create beautiful designs and patterns on a variety of surfaces.
Remember to choose the right wood, tools, and safety precautions before starting your project. Let your creativity flow and have fun with this timeless art form!