Edge Tape for Plywood: Boost the Resilience of Your Woodwork
Edge tape for plywood provides a finished look and adds durability to the edges. It enhances the appearance and protects the edges of the plywood from damage.
In the world of woodworking and furniture making, attention to detail is key for achieving a professional finish. A crucial element of this process is edge banding, especially when working with plywood. Plywood, while strong and versatile, exposes its raw edges, which can be unattractive and prone to damage.
Edge tape for plywood serves as a seamless solution to these issues, offering not only a protective layer but also a clean and polished aesthetic. This article delves into the importance of edge tape for plywood and its various benefits in woodworking projects.
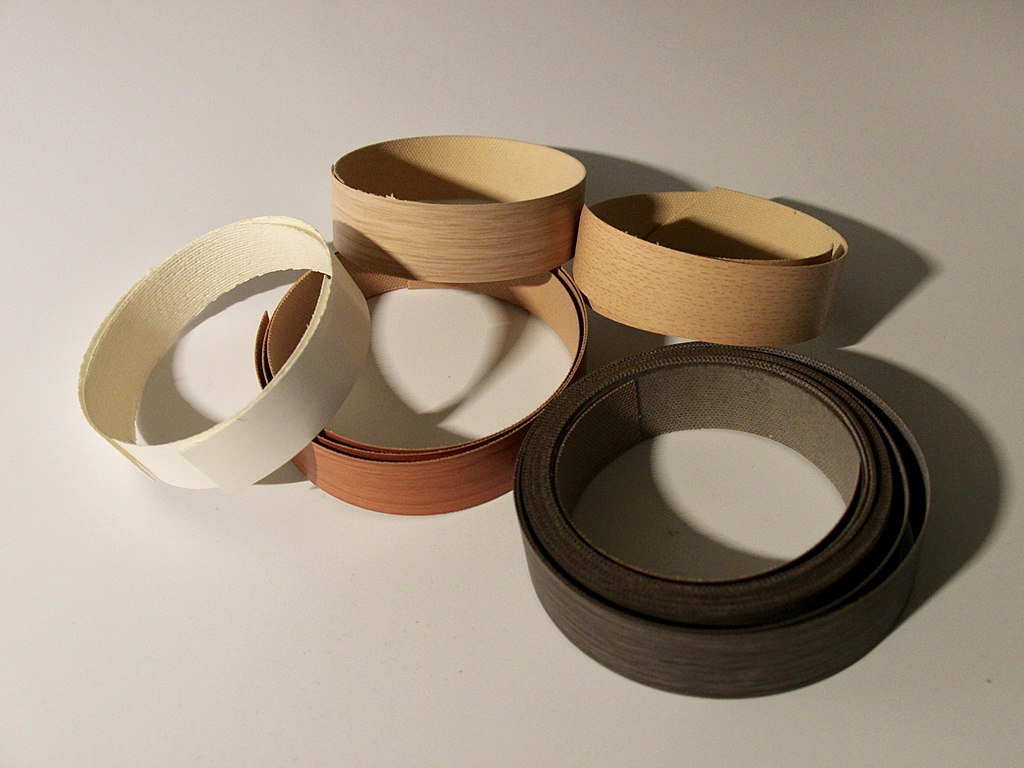
Credit: dcifurn.com
Selecting The Right Edge Tape
When it comes to enhancing the durability and aesthetics of plywood surfaces, selecting the right edge tape is crucial. Follow these key considerations to ensure a seamless application and long-lasting results.
Consider The Material
Ensure the edge tape material matches the desired look and functionality. Consider options like PVC, ABS, or real wood for different needs.
Match The Thickness And Width
Check that the edge tape aligns with the plywood’s thickness and desired finished look. Ensure the width is sufficient for a proper bond and coverage.
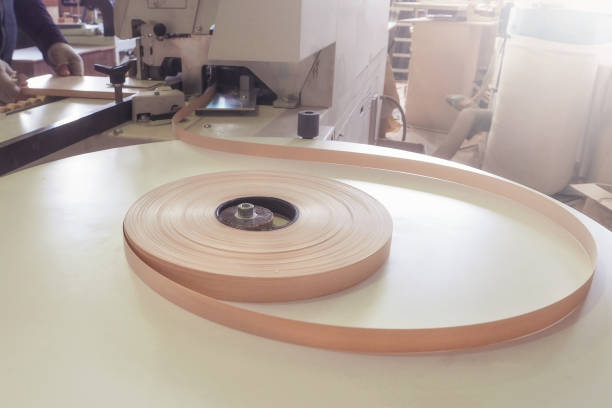
Credit: www.maxavegroup.com
Application Techniques
When it comes to applying edge tape for plywood, proper cleaning and preparation are crucial steps that should not be overlooked. Follow these techniques to ensure a smooth and durable application.
Proper Cleaning And Preparation
- Clean the surface thoroughly with a mild detergent and water solution.
- Remove any dust, grease, or debris that may hinder adhesion.
- Sand the plywood edges to create a smooth surface for the tape to adhere to.
Applying The Edge Tape
- Measure the length of plywood edge and cut the tape accordingly.
- Peel off the backing of the tape and align it carefully with the plywood edge.
- Press firmly along the tape to ensure proper adhesion.
Remember to trim any excess tape with a utility knife for a neat finish.
Enhancing Durability
Enhancing the durability of plywood is crucial to ensure its longevity and reliable performance. One effective way to achieve this is by using edge tape, which offers protection against various elements that can compromise the structural integrity of plywood.
Heat And Moisture Resistance
Edge tape for plywood is designed to provide excellent resistance against heat and moisture, which are common factors that can impact the durability of plywood. The specially formulated materials used in the edge tape create a barrier that helps to prevent the penetration of moisture and protect the plywood from warping or delamination due to exposure to high temperatures.
Impact And Scratch Protection
The edge tape not only enhances the durability of plywood by offering heat and moisture resistance, but also provides effective protection against impact and scratches. By effectively shielding the edges of the plywood from potential physical damage, the edge tape helps to maintain the structural integrity of the material, ensuring that it can withstand the rigors of handling and transportation without sustaining major damage.
Creating A Seamless Finish
Having a seamless finish on your plywood is crucial for achieving a polished and professional look. One effective solution for creating a seamless finish is using edge tape. Edge tape, also known as edge banding, is a thin strip of material that is applied to the edges of plywood to give it a finished appearance. In this article, we will explore two key aspects of creating a seamless finish with edge tape: trimming and sanding, and color and texture matching.
Trimming And Sanding
Trimming and sanding the edge tape is an essential step in achieving a seamless finish. Once the edge tape is applied to the plywood, any excess tape needs to be trimmed off. This can be done using a sharp utility knife or a specialized edge trimming tool. Make sure to trim the tape flush with the surface of the plywood for a clean and consistent look.
After trimming, sanding becomes the next crucial step in creating a seamless finish. Sanding the edges of the plywood helps to smooth out any rough or uneven areas, ensuring that the edge tape seamlessly blends with the surface. Start with a coarse-grit sandpaper to remove any excess material and then gradually move to finer grits for a smoother finish. Take your time and sand in a back-and-forth motion to avoid any visible scratches on the surface.
Color And Texture Matching
In addition to achieving a seamless edge, color and texture matching is equally important for a professional-looking result. The edge tape selected should closely match the color and texture of the plywood to create a cohesive appearance. When choosing edge tape, consider factors such as wood species, grain pattern, and color variations. There are a variety of options available on the market, including natural wood veneer, PVC, and melamine, each offering different color and texture choices.
To ensure a perfect color match, compare the edge tape to the plywood in different lighting conditions. This will help you identify any noticeable differences in color and adjust your selection accordingly. Additionally, consider the texture of the plywood when choosing the edge tape. If the plywood has a smooth finish, opt for a smooth-textured edge tape to complement it. On the other hand, if the plywood has a textured surface, choose an edge tape with a similar texture to create a seamless transition between the plywood and the tape.
By paying attention to trimming and sanding techniques and carefully selecting edge tape that matches the color and texture of the plywood, you can create a seamless finish that enhances the overall aesthetic appeal of your project. Whether it’s a furniture piece or cabinetry, edge tape ensures that the edges of your plywood look professional and polished.
Additional Design Options
When it comes to plywood, the edge tape plays a crucial role in providing a finished look to the exposed edges. However, edge tape is not just limited to its functional aspect. It also offers a range of design options to enhance the overall aesthetics of your project. Let’s explore some of the additional design options that edge tape for plywood provides.
Custom Printing
With custom printing, you have the ability to personalize your plywood edges and make a statement. Whether you want to display your company logo, a unique pattern, or any other design element, custom printing on edge tape allows you to showcase your creativity. This option is particularly useful for businesses that want to promote their brand identity or homeowners who want to add a personal touch to their furniture.
Embossing And Texture Variations
In addition to custom printing, edge tape for plywood offers embossing and texture variations. These features add depth and visual interest to the edges, making them stand out from the rest. Embossed patterns can replicate natural wood grains or create unique textures, providing a tactile experience. Texture variations, on the other hand, offer a range of finishes, such as smooth, matte, glossy, or wood-like textures. This diversity allows you to choose the option that best complements your project’s style and overall design concept.

Credit: www.amazon.com
Frequently Asked Questions On Edge Tape For Plywood
What Is Edge Tape For Plywood?
Edge tape for plywood is a thin strip of material used to cover the exposed edges of plywood sheets. It provides a smooth and finished look to plywood furniture or other woodworking projects. It also helps to protect the edges from damage and wear over time.
How Is Edge Tape Applied To Plywood?
To apply edge tape to plywood, start by cleaning the edges and ensuring they are free from any dirt or debris. Then, apply a thin layer of adhesive to the edge of the plywood. Carefully place the edge tape on top of the adhesive, ensuring it aligns properly with the edge.
Use a roller or a clamp to apply pressure and allow the adhesive to dry.
What Are The Benefits Of Using Edge Tape On Plywood?
Using edge tape on plywood offers several benefits. It provides a finished and professional appearance, covering any rough or unfinished edges. It also protects the plywood from moisture and prevents it from splintering. Additionally, edge tape adds strength to the plywood and helps to prolong its lifespan.
Can I Paint Or Stain Edge Tape?
Yes, you can paint or stain edge tape to match the color of your plywood or desired finish. Before applying paint or stain, ensure the edge tape is clean and smooth. Apply a primer if necessary, then use a brush or sponge to apply the desired paint or stain color.
Allow it to dry completely before using or handling the plywood.
Conclusion
For a professional and reliable finish to your plywood edges, edge tape is the ideal solution. With its durable and stylish options, it adds both protection and aesthetic appeal to your project. Choose from a variety of colors and finishes to match your design.
Edge tape is the perfect way to give your plywood a polished and professional look.