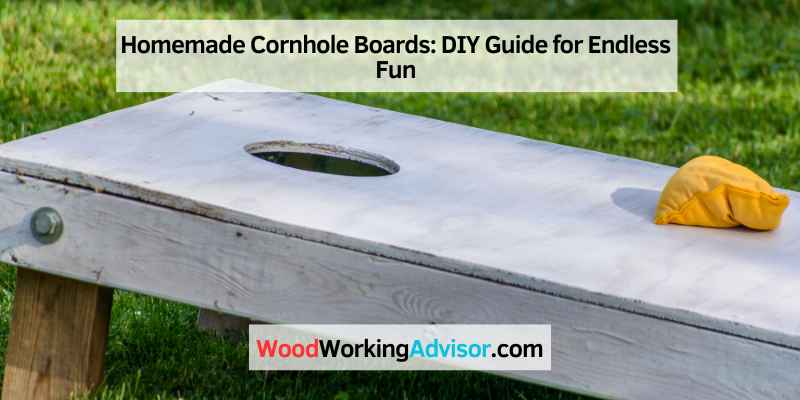
Homemade Cornhole Boards: DIY Guide for Endless Fun
Looking for Homemade Cornhole Boards? Check out various options like Wayfair, American Cornhole Association, and DIY tutorials on YouTube and HGTV.
From building materials to step-by-step instructions, creating your own cornhole boards is a fun and rewarding project. Whether you prefer a custom design or a regulation set, there are plenty of resources available to help you craft the perfect cornhole boards for your next backyard gathering.
With the right tools and a bit of creativity, you can enjoy hours of entertainment with your handmade cornhole boards.
Introduction To Cornhole
Learn how to create your own Homemade Cornhole Boards with easy DIY instructions. Discover step-by-step guides for crafting regulation-size sets and custom designs to elevate your cornhole game experience. Let your creativity shine with personalized cornhole boards for endless outdoor fun.
Popularity Of The Game
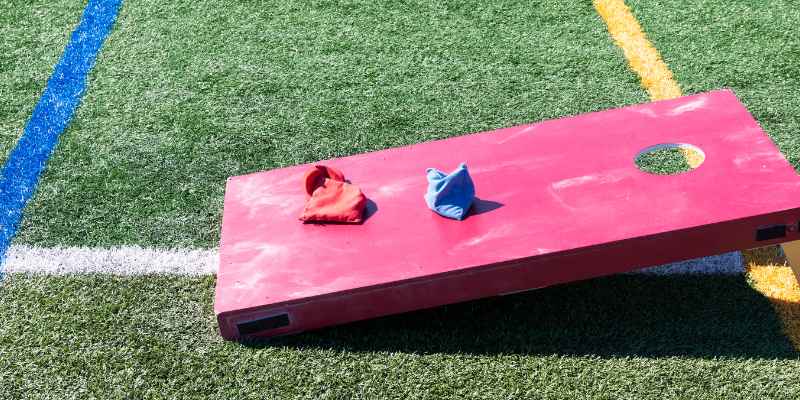
Cornhole, also known as bean bag toss, has gained immense popularity in the United States over the past few years. It is a simple yet entertaining game that can be enjoyed by people of all ages at various outdoor events such as tailgating parties, picnics, and backyard gatherings.
The game involves throwing bean bags at a raised platform with a hole at the far end. The objective is to score points by getting the bean bag into the hole or landing it on the platform. Its easy-to-learn rules and casual gameplay make it a favorite pastime for many.
Benefits Of DIY
Building homemade cornhole boards brings several benefits, including cost savings and customization options. By creating your own boards, you can tailor the design, size, and finish to your preferences, ensuring a personalized touch to your gaming experience. Additionally, the process of making DIY cornhole boards can be a fun and rewarding activity for individuals or families, fostering a sense of accomplishment and creativity.
Materials Required
Building homemade cornhole boards is a fun and rewarding DIY project that can be customized to your preferences. Before starting, gather the necessary materials to ensure a successful outcome.
Choosing The Right Wood
- Select a sturdy and durable wood such as birch or pine for the cornhole board.
- Ensure the wood is smooth and free of any imperfections for optimal gameplay.
Hardware And Tools
Here is a list of essential hardware and tools needed:
| Hardware | Tools |
|---|---|
| Cornhole bags | Drill |
| Wood screws | Screwdriver |
| Wood glue | Sander |
| Measuring tape | Saw |
Cornhole Board Dimensions
Discover the ideal dimensions for homemade cornhole boards, ensuring they meet regulation standards for a perfect game. Achieve the recommended 2 feet by 4 feet size, with a 6-inch diameter hole, to craft your own custom boards. Perfect for tailgates and backyard fun!
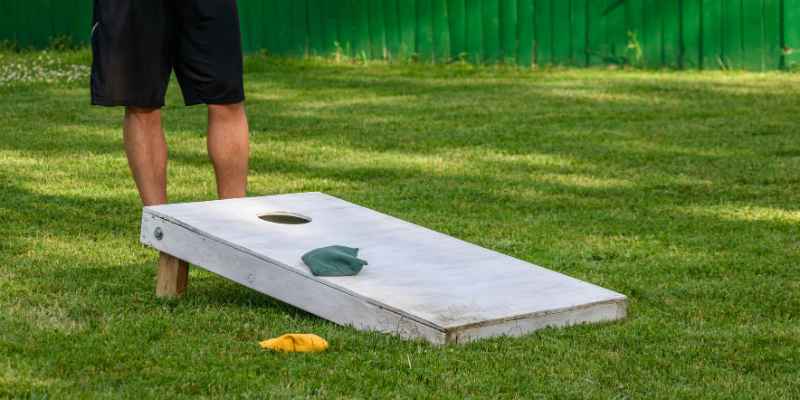
Cornhole is a popular outdoor game that is enjoyed by people of all ages. Whether you’re playing with friends at a backyard BBQ or competing in a tournament, having the right cornhole board dimensions is essential to ensure a fair and enjoyable game. In this section, we will discuss the official size specifications for cornhole boards as well as customization options that are available to ensure that your cornhole board is unique to you.
Official Size Specifications
According to the American Cornhole Association (ACA), the official size for a cornhole board is 2 feet wide by 4 feet long, with a 6 inch diameter hole centered 9 inches from the top of the board and 12 inches from each side. The board should also be elevated 12 inches from the ground at the back and 3-4 inches at the front. These specifications ensure that the game is played fairly and that each player has the same opportunity to score points.
Customization Options
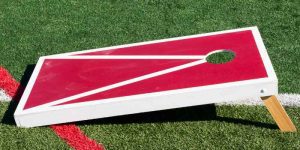
While the official size specifications must be adhered to, there are many customization options available to make your cornhole board unique. From choosing different colors and designs to adding logos and decals, the possibilities are endless. Some people even choose to create themed boards to match the occasion or event they are playing at. Just be sure to check the rules of any tournament you are entering to ensure that any customizations you make are allowed.
Overall, cornhole is a fun and easy game to play, and with the right cornhole board dimensions and customization options, you can make it even more enjoyable. So get creative and have fun with it!
Cutting The Wood
Learn how to make your own homemade cornhole boards with these easy DIY steps, including cutting the wood to the right dimensions for the perfect game set. Enjoy hours of fun with friends and family on your custom-made boards.
Measuring And Marking
To ensure precise cuts when making homemade cornhole boards, it is essential to start with accurate measurements and markings. Before cutting the wood, take the time to measure and mark each piece according to the desired dimensions of the cornhole board. Use a measuring tape to measure the length and width of the board, and mark the measurements with a pencil or marker. This step is crucial for achieving a professional-looking finished product.
Using Saws For Precise Cuts
Once the wood is measured and marked, it’s time to make the cuts using saws. There are different types of saws that can be used for cutting the wood, such as a circular saw or a table saw. Whichever saw you choose, make sure it is properly set up and the blade is sharp for precise and clean cuts. Take your time and follow the marked lines carefully to ensure each piece is cut to the correct size.
When cutting the wood, it is important to wear appropriate safety gear, such as safety goggles and gloves, to protect yourself from any potential accidents. Always keep your hands away from the blade and use a push stick or guide when necessary to maintain control and accuracy. Remember, safety should always be a top priority when working with power tools.
By measuring and marking the wood accurately and using saws for precise cuts, you can ensure that each piece of the cornhole board is cut to the correct dimensions. This attention to detail will contribute to the overall quality and professional appearance of your homemade cornhole boards.
Assembling The Frame
Assembling the frame is a crucial step in making homemade cornhole boards. By using the correct measurements and tools, you can ensure that your frame is sturdy and durable. Follow step-by-step instructions to create a perfect frame for your cornhole boards and enjoy endless hours of fun with friends and family.
Joining The Sides
Connect the 2×4 boards using wood screws.
Ensuring Stability
Place corner brackets for added strength.
Creating The Playing Surface
When it comes to homemade cornhole boards, creating the playing surface is a crucial step that can make or break the game. Here’s how you can ensure a smooth and visually appealing playing surface:
Sanding For Smoothness
To achieve a professional-quality playing surface, sanding the board is essential. Follow these simple steps:
- Start with coarse sandpaper to remove any rough spots or imperfections.
- Gradually switch to finer grit sandpaper to achieve a smooth finish.
- Focus on the edges and corners to ensure uniform smoothness.
Painting And Decoration
Once the surface is smooth, it’s time to add some personality to your cornhole boards. Consider the following tips:
- Apply a primer to ensure the paint adheres properly to the wood.
- Use high-quality outdoor paint to withstand wear and tear.
- Consider adding decorative elements such as team logos or creative designs.
Attaching The Legs
To attach the legs to your homemade cornhole boards, simply align them with the pre-drilled holes and secure tightly. Ensure the legs are straight and even for stability during gameplay. Use screws or bolts for a durable and long-lasting finish.
Cutting And Shaping
To attach the legs to your homemade cornhole boards, you’ll first need to cut and shape them to the appropriate size. Start by measuring and marking the desired length for the legs. Use a saw to carefully cut the legs to the correct length, making sure to keep the cuts straight and even. Once the legs are cut, you can use a sander or sandpaper to smooth out any rough edges and shape them to your desired style. This step is crucial to ensure a sturdy and professional-looking cornhole board.
Hinge Installation
After you have cut and shaped the legs, it’s time to install the hinges. Hinges will allow you to fold the legs up for easy storage and transportation of your cornhole boards. Begin by placing the hinge on the inside of the board, aligning it with the edge of the leg and the board. Mark the
with a pencil, then use a drill to create pilot holes for the screws. Make sure the pilot holes are slightly smaller than the screws to ensure a secure fit. Finally, attach the hinges to both the leg and the board using screws, making sure they are tightly fastened.
Ensuring Stability
To ensure the stability of your cornhole boards, it’s important to pay attention to the angle at which the legs are attached. The legs should be attached at a slight angle, allowing the board to lean back slightly when in use. This angle helps prevent the boards from tipping over during gameplay. Additionally, make sure the legs are securely attached to the board with strong screws or bolts. This will ensure that the legs stay in place and provide a stable surface for playing cornhole.
Once the legs are attached and secure, you can add any finishing touches to your homemade cornhole boards. This may include painting or staining the boards, adding decals or designs, or applying a protective sealant. These finishing touches not only enhance the appearance of your boards but also provide added durability and protection against the elements. Take your time with this step to ensure a polished and professional-looking final product.
Remember, attaching the legs is a crucial step in the construction of homemade cornhole boards. By carefully cutting and shaping the legs, installing hinges properly, ensuring stability, and adding finishing touches, you can create a set of cornhole boards that are both functional and visually appealing. With your DIY skills and a bit of creativity, you’ll have a custom-made cornhole set that will provide hours of fun for friends and family.
Finishing Touches
Enhance your homemade cornhole boards with the perfect finishing touches to elevate your game day experience. Personalize with custom paint, varnish, or decals for a unique touch that reflects your style and craftsmanship. Add a protective clear coat for durability and long-lasting enjoyment of your DIY creation.
Drilling The Hole
Once you have completed the construction of your homemade cornhole boards, the next step is to drill the hole. This is an important step as it determines the scoring mechanism of the game. Using a drill and a hole saw, carefully create a 6-inch diameter hole centered 9 inches from the top of the board. Make sure the hole is smooth and free from any splinters.
Applying Sealant And Top Coat
After drilling the hole, it’s time to apply the finishing touches to your cornhole boards. Start by applying a sealant to the entire surface of the board. This will help protect the wood from moisture and extend the lifespan of your boards. Allow the sealant to dry completely before moving on to the next step.
Once the sealant has dried, apply a top coat to provide a smooth and durable finish. You can use polyurethane or a clear acrylic sealer for this step. Apply multiple coats, allowing each coat to dry before applying the next one. This will ensure a strong and long-lasting finish that can withstand the outdoor elements.
Make sure to follow the manufacturer’s instructions for the sealant and top coat products you choose, as drying times and application methods may vary.
With the drilling of the hole and the application of the sealant and top coat, your homemade cornhole boards are now complete and ready for hours of fun and entertainment!
Making Cornhole Bags
Making Cornhole bags is an essential part of creating your own homemade cornhole boards. The bags are typically made from durable fabric and filled with corn kernels to ensure the perfect weight and feel for gameplay.
Selecting Fabric And Filling
When selecting fabric for the cornhole bags, it’s important to choose a strong and durable material that can withstand regular use. Duck canvas or heavy-duty upholstery fabrics are popular choices due to their sturdiness. Additionally, the fabric should be weather-resistant to ensure longevity.
For the filling, whole kernel corn is the traditional and preferred choice. It provides the ideal weight and texture for the bags, giving them the proper toss and slide during gameplay. Avoid using other materials like sand or plastic pellets, as they can affect the game performance and may not meet regulation standards.
Sewing Techniques
When sewing the cornhole bags, it’s crucial to use a strong and secure stitching method to prevent the bags from bursting during use. Double stitching along the seams and reinforcing the corners can help enhance the durability of the bags.
Using a heavy-duty sewing machine or a strong needle for hand stitching is recommended, as the fabric and filling can be tough to work with. Ensure that the stitches are tight and well-secured to withstand the rigors of gameplay.
Maintenance And Care
Proper maintenance and care are essential for homemade cornhole boards to last longer. Regularly inspect the boards for any damage, clean them with a mild detergent, and store them in a dry place when not in use. Consider applying a protective coating to prevent wear and tear.
Regular Cleaning
Regularly clean your homemade cornhole boards with a damp cloth.
Ensure to remove any dirt or debris to maintain the board’s surface.
Storage Tips
Store your cornhole boards in a dry place to prevent warping.
Keep them away from direct sunlight to maintain the colors.
Rules Of The Game
When it comes to playing cornhole, understanding the rules of the game is essential. Whether you’re a beginner or a seasoned player, knowing the ins and outs of cornhole will help you enjoy the game to the fullest. In this section, we’ll explore the scoring and gameplay of cornhole, as well as some variations suitable for all ages.
Scoring And Gameplay
In cornhole, the objective is to toss bean bags onto a raised platform with a hole at the far end. Players take turns throwing their bags and earn points based on where the bags land. Here’s a breakdown of the scoring system:
- A bag that lands on the platform is worth 1 point.
- A bag that goes through the hole is worth 3 points.
- If both players have bags on the platform, the player with the closest bag to the hole earns an additional point.
The gameplay continues until one player or team reaches a predetermined number of points, typically 21 or 25. The player or team with the highest score at the end of the game is declared the winner.
Variations For All Ages
Cornhole is a versatile game that can be enjoyed by people of all ages. Here are some variations to make the game more exciting:
- Kids’ Cornhole: Set up the boards at a shorter distance and use smaller bean bags to make it easier for children to play.
- Team Cornhole: Play in teams of two, with each team member taking turns throwing the bags.
- Speed Cornhole: Set a timer and see how many bags each player can toss within a certain time limit.
These variations add a fun twist to the classic cornhole game and ensure that players of all ages can join in on the fun.
Hosting A Cornhole Tournament
Get ready to host an epic cornhole tournament with your homemade cornhole boards. Crafted with care, these custom boards will elevate your game and impress your guests. Embrace the DIY spirit and create a memorable outdoor event that everyone will enjoy.
Hosting a Cornhole Tournament can be a fun way to bring people together and showcase your homemade Cornhole Boards. Organizing teams is a crucial part of the tournament. You can either have teams pre-selected or have them pick their own partners. It’s important to make sure each team has an equal chance of winning by setting up brackets. This can be done using a simple table with team names and match times.
To ensure a fair tournament, make sure each team plays against other teams with similar skill levels. You can do this by creating different brackets based on experience or by randomly selecting opponents. Be sure to keep track of the scores and progress of each team throughout the tournament.
Setting up the Cornhole Boards for the tournament is also important. Make sure the boards are placed far enough apart and on a level surface. Provide enough space for players to stand comfortably and throw the bags. It’s a good idea to have multiple sets of bags in case some get lost or damaged during the tournament.
Overall, hosting a Cornhole Tournament can be a great way to spend time with friends and family while enjoying some friendly competition. By organizing teams and setting up brackets, you can ensure a fair tournament while showcasing your homemade Cornhole Boards.
Frequently Asked Questions
What Are The Standard Dimensions For Cornhole Boards?
The standard dimensions for cornhole boards are 2 feet by 4 feet with a 6-inch diameter hole centered 9 inches from the top. These dimensions are crucial for ensuring the proper playing experience for all participants.
What Materials Are Needed To Make Homemade Cornhole Boards?
To make homemade cornhole boards, you will need plywood, screws, wood glue, a saw, a drill, a compass, and sandpaper. These materials are essential for constructing durable and professional-looking cornhole boards.
Can I Customize The Design Of My Homemade Cornhole Boards?
Yes, you can customize the design of your homemade cornhole boards using paint, decals, or stains. Personalizing the boards adds a unique touch and allows you to showcase your creativity.
How Can I Properly Maintain My Homemade Cornhole Boards?
To maintain your homemade cornhole boards, regularly inspect them for any damage or wear. Additionally, keep them clean and dry, and store them in a cool, dry place when not in use. This maintenance routine will ensure the longevity of your boards.
Conclusion
Making homemade cornhole boards can be a fun and rewarding DIY project for anyone looking to add some outdoor entertainment to their backyard. With a few basic tools and materials, it’s easy to create custom cornhole boards that match your personal style and preferences.
Whether you’re a seasoned woodworker or a novice crafter, building your own cornhole boards is a great way to spend time with friends and family while enjoying the great outdoors. So why not give it a try and see what creative designs you can come up with?