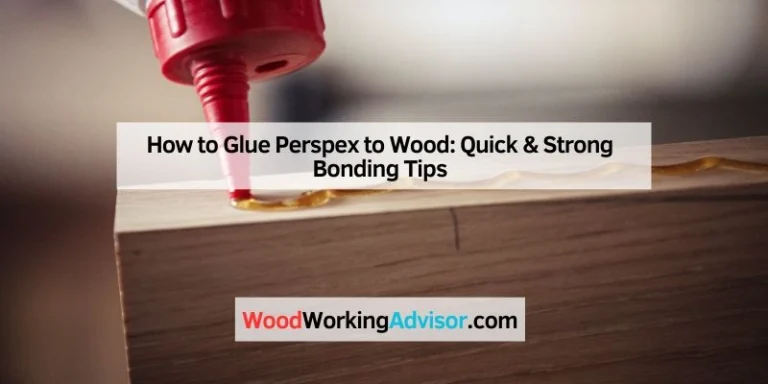
How Long Does Wood Glue Need to Be Clamped? Discover the Expert Recommendations!
Wood glue typically needs to be clamped for at least 30 minutes. Clamping time may vary based on the type and brand of wood glue used.
Additionally, factors such as temperature and humidity can affect the drying time of wood glue. To ensure a strong bond, it is recommended to leave the clamps on for 24 hours. This allows the glue to fully dry and cure, providing a sturdy and long-lasting joint.
Proper clamping ensures that the glue maintains pressure on the joint, preventing any gaps or weak spots. By following the recommended clamping time, you can ensure a successful woodworking project.
The Importance Of Clamping
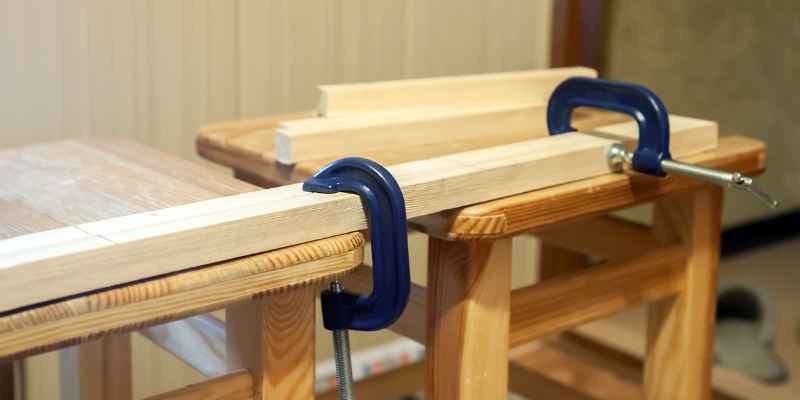
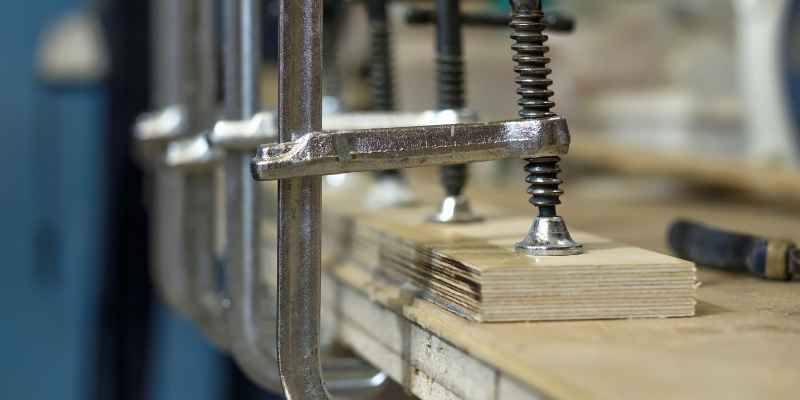
When working with wood glue, clamping is a crucial step that cannot be overlooked. Proper clamping ensures a strong bond, prevents warping and bending, and ultimately leads to a successful woodworking project. In this article, we will explore the importance of clamping and discuss how long wood glue needs to be clamped for optimal results.
Ensuring Proper Adhesion
Proper adhesion is vital for any woodworking project. Clamping applies pressure to the glued surfaces, allowing the wood glue to create a secure bond between the pieces. Without clamping, the glue may not be able to fully penetrate the wood fibers, leading to a weak and unreliable connection.
Additionally, clamps help to align the glued pieces, ensuring that they stay in place while the glue dries. This is essential for achieving a tight fit and reducing the chances of any gaps or unevenness in the joint.
Preventing Warping And Bending
Wood is naturally prone to warping and bending due to changes in temperature, humidity, and other environmental factors. However, clamping during the gluing process can help mitigate these issues.
Clamping holds the wood pieces firmly together while the glue cures, preventing any movement or shifting that could lead to warping or bending. This ensures that your final product remains stable and retains its shape over time.
It’s important to note that the length of time the wood glue needs to be clamped will vary depending on factors such as the specific wood glue being used, the type of wood, and the ambient temperature and humidity. It is recommended to refer to the manufacturer’s instructions to determine the appropriate clamping time for your particular glue.
In conclusion, clamping is an essential step when using wood glue. It ensures proper adhesion and helps prevent warping and bending. By taking the time to clamp your woodworking projects correctly, you can be confident in the longevity and strength of your joints.
Expert Recommendations For Clamping Time
When it comes to woodworking projects, knowing how long to clamp wood pieces together after applying wood glue is vital for achieving a strong and durable bond. Expert recommendations for clamping time can help ensure your woodworking projects are successful and long-lasting.
Standard Clamping Time Guidelines
Following standard clamping time guidelines is essential for quality woodworking. Here are some expert recommendations for clamping time:
- For most common wood glues, a clamping time of 30 minutes to 1 hour is recommended.
- When using polyurethane glue, it’s advisable to clamp the wood pieces for at least 2 hours.
- For strong and durable bonds, experts suggest leaving the clamps on for a minimum of 24 hours, allowing the glue to cure fully.
Factors To Consider For Extended Clamping
There are certain factors to consider that may require extended clamping time:
- Large or heavy wood pieces may need longer clamping to ensure the glue sets properly.
- If the ambient temperature is colder than 70°F, it’s recommended to extend the clamping time to allow the glue to cure adequately.
- When working with exotic or oily woods, it’s best to extend the clamping time to ensure a strong bond due to the wood’s resistance to adhesives.
Tips For Optimal Clamping
When it comes to woodworking projects, using wood glue is essential to ensure the strength and durability of your joints. However, knowing how long to clamp the wood after applying the glue can be a bit tricky. In this section, we will share some valuable tips to help you achieve optimal clamping results for your projects.
Surface Preparation
Before applying wood glue and clamping your pieces together, it is crucial to prepare the surfaces properly. Start by ensuring that the surfaces you are bonding are clean and free from dust, debris, or any other contaminants. You can use a damp cloth or a brush to remove any particles. If you have rough or uneven surfaces, consider using sandpaper to smooth them out and create a better bond.
Applying Even Pressure
One of the key factors in achieving a successful glue joint is applying even pressure during the clamping process. Uneven pressure can result in weak or incomplete bonds. To ensure even pressure distribution, it is recommended to use clamping cauls or blocks. These can be made from scrap wood and placed on either side of the joint while clamping. Clamping cauls will help distribute the pressure evenly across the entire joint, reducing the risk of weak spots.
Additionally, using pipe clamps or bar clamps can provide better control over the pressure application. These clamps allow you to apply consistent and uniform pressure along the length of the joint. It is important to tighten the clamps gradually and evenly, avoiding over-tightening, which could squeeze out excess glue and weaken the bond.
Another helpful technique is to reverse the clamps’ direction after tightening. This will ensure that any minor misalignments caused by clamping are corrected. It is recommended to wait for a few minutes after tightening before reversing the clamps, so the glue can start setting. This method will help to achieve a stronger and more stable bond.
Remember that different types of wood glue have different setting times. Always refer to the manufacturer’s instructions for the specific glue you are using. While some glues may require only a few hours of clamping, others may need up to 24 hours for complete curing. Patience is key to allow the glue to dry properly and create a solid bond.
By following these tips for optimal clamping, you can ensure that your woodworking projects have strong and long-lasting joints. Properly preparing the surfaces, applying even pressure, and allowing adequate drying time will contribute to the success of your projects.
Determining Clamping Time
When working with wood glue, clamping plays a crucial role in ensuring a strong and secure bond. The clamping time refers to the length of time that the glued pieces need to be held together with pressure until the adhesive has fully cured. Determining the appropriate clamping time is essential to avoid compromising the strength and durability of the bond.
Visual And Tactile Cues
One way to determine the clamping time is by observing visual and tactile cues. As the adhesive cures, it undergoes changes that can be detected through its appearance and feel. Here are some visual and tactile cues to look out for when determining the appropriate clamping time:
- Smoothing and Squeeze-out Reduction: As the adhesive cures, you will notice a reduction in squeeze-out, which is the excess glue that is squeezed out from between the bonded surfaces. Additionally, the glue line may start to appear smoother and less liquid-like.
- No Slippage: When you gently touch the glued pieces, there should be no slippage or movement. The adhesive should be tacky to the touch but not so wet that it easily glides or shifts when pressure is applied.
- No Visible Wetness: The glue line should no longer appear wet or glossy. Instead, it should develop a dull, matte finish, indicating that the adhesive is curing.
Testing For Full Cure
While visual and tactile cues are helpful, it is always recommended to perform a thorough test to ensure that the adhesive has fully cured. Testing for full cure involves subjecting the bonded pieces to stress or strain to check the strength of the bond. Here are a few methods to test for full cure:
- Applying Pressure: Apply gentle pressure to the bonded pieces using your fingertips or a small tool. If the bond remains strong without any signs of cracking or separation, it is a good indicator that the adhesive has fully cured.
- Flexing or Bending: Depending on the size and shape of the bonded pieces, you can try flexing or bending them slightly to assess the bond’s strength. If the adhesive holds up well without any apparent weakening, it is likely fully cured.
- Stress Testing: In situations where the bonded pieces will be subjected to specific stress, it is beneficial to simulate those conditions during the testing phase. For example, if the bond needs to withstand pressure, apply controlled pressure to ensure the adhesive can handle it without failure.
By following these visual and tactile cues and performing thorough tests, you can ensure that you achieve the optimal clamping time for your wood glue projects. Remember, allowing the adhesive sufficient time to cure under appropriate pressure is crucial for achieving a strong and durable bond.
Frequently Asked Questions On How Long Does Wood Glue Need To Be Clamped
How Long Does It Take Wood Glue To Set?
Wood glue typically sets within 30 minutes to 24 hours, depending on the type and brand. It’s best to follow the instructions on the specific product for the most accurate drying time.
How Long To Leave Gorilla Wood Glue Clamped?
Gorilla wood glue should be clamped for 20-30 minutes.
What Happens If You Don’t Clamp Wood Glue?
If wood glue is not clamped, it won’t create a strong bond. Clamping ensures the glue spreads evenly and the pieces are pressed tightly together. Without clamping, the bond may be weaker, resulting in possible gaps or failure of the joint.
Why Does Wood Glue Need To Be Clamped?
Clamping wood glue creates pressure for a strong bond. Without clamping, the parts may shift or separate during drying. This ensures a secure, lasting adhesive hold.
Conclusion
The clamping time for wood glue is crucial for ensuring a strong bond. Understanding how long to clamp wood glue will lead to better woodworking results. By following the recommended clamping times, you can create sturdy and durable wood joints for your projects, ensuring long-lasting and professional-looking results.