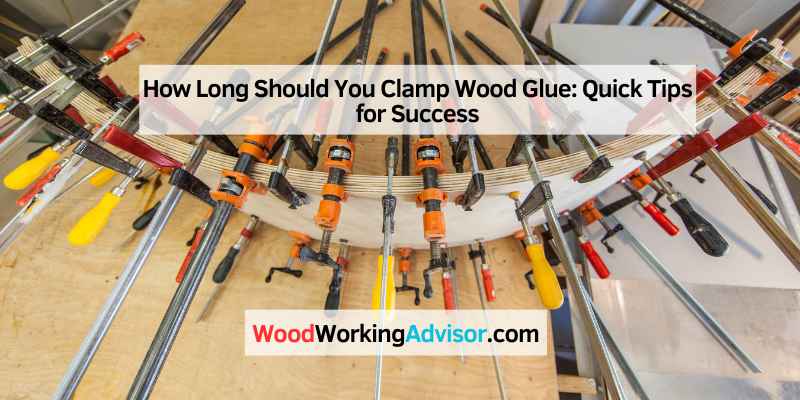
How Long Should You Clamp Wood Glue: Quick Tips for Success
Clamp wood glue for at least 30 minutes to 1 hour for a secure bond. Proper clamping ensures strong adhesion.
When working on woodworking projects, achieving a strong bond between pieces is crucial for durability and longevity. One essential step in this process is to clamp wood glue properly. By following the recommended clamping time of at least 30 minutes to 1 hour, you can ensure that the glue sets effectively, creating a sturdy connection between the wood pieces.
In this blog post, we will explore the importance of clamping wood glue correctly and provide tips on how to achieve the best results in your woodworking projects.
The Basics Of Wood Glue Clamping Time
When it comes to woodworking projects, using the right wood glue and allowing it to set properly is crucial for creating strong and durable bonds. Understanding the basics of wood glue clamping time is essential for ensuring the success of your woodworking projects.
Factors Affecting Clamping Duration
Several factors influence how long you should clamp wood glue for optimal bonding. The type of wood, humidity level, and the specific glue used are key factors that impact clamping time.
Typical Clamping Time Ranges
Different types of wood glue require varying amounts of time to set and cure properly. Here are the typical clamping time ranges for some common wood glues:
- PVA (Polyvinyl Acetate) Glue: 30 minutes to 1 hour
- Waterproof PVA Glue: 1 to 2 hours
- Polyurethane Glue: 1 to 2 hours
- Cyanoacrylate (CA) Glue: 1 to 3 minutes
Types Of Wood Glue And Their Set Times
When working with wood, using the right type of glue and allowing it to set properly is essential for a strong and durable bond. Each type of wood glue has different set times, and understanding these differences can help ensure the success of your woodworking projects. Let’s explore the types of wood glue and their set times.
Pva Glues
PVA (polyvinyl acetate) glues are popular for woodworking projects due to their ease of use and versatility. They typically set within 30 minutes to 1 hour, making them ideal for quick bonding. However, for maximum strength, it’s recommended to clamp PVA glue joints for at least 1 to 2 hours.
Epoxy Resins
Epoxy resins provide exceptionally strong bonds and are resistant to moisture and heat. They have a longer set time, usually around 6 to 8 hours, allowing for ample working time. For the best results, clamping epoxy resin joints for 4 to 6 hours is advisable to ensure a secure and durable bond.
Polyurethane Adhesives
Polyurethane adhesives offer excellent flexibility and are suitable for both indoor and outdoor applications. Their set time ranges from 1 to 4 hours, depending on the specific product. Clamping polyurethane adhesive joints for 2 to 3 hours is recommended for optimal bonding strength.
Assessing Wood Type And Joint Design
Assessing wood type and joint design is crucial to determine the strength of a wood glue bond. The amount of time to clamp wood glue depends on the wood type and joint design, as some woods and joints require longer clamping times for a secure bond.
Hardwoods Vs. Softwoods
Hardwoods have tight grains, while softwoods have more open grains.
Simple Joints Vs. Complex Joints
Simple joints require less clamping time compared to complex joints.
Clamping Pressure: Finding The Sweet Spot
Clamping wood glue is essential to ensure a strong, permanent bond between two pieces of wood. However, determining the right amount of clamping pressure can be tricky. If you use too little pressure, the glue won’t bond properly, and if you use too much, you risk damaging the wood. In this post, we’ll explore the sweet spot of clamping pressure for your wood glue projects.
Too Little Pressure
If you don’t use enough pressure when clamping your wood glue, the bond between the two pieces of wood may not be strong enough. The glue may not spread evenly, leaving gaps that can weaken the bond. Additionally, if the pieces of wood are not held tightly together, they may shift during the drying process, resulting in misaligned joints.
To avoid this issue, make sure you apply enough pressure when clamping your wood glue. A good rule of thumb is to use at least 100 pounds of pressure per square inch of gluing surface. You can use a clamp or a heavy object such as a book to apply pressure. Make sure the pressure is evenly distributed across the entire surface area.
Too Much Pressure
Using too much pressure when clamping your wood glue can also be problematic. If you apply too much pressure, you risk deforming or even damaging the wood. The excess pressure can also force the glue out of the joint, creating a weak bond.
To avoid using too much pressure, start by using a moderate amount and gradually increase it until you find the sweet spot. Keep in mind that different types of wood may require different amounts of pressure. For example, softer woods may require less pressure than harder woods.
Summary
- To achieve a strong bond, use at least 100 pounds of pressure per square inch of gluing surface.
- Avoid using too much pressure, as it can damage the wood and create a weak bond.
- Start with a moderate amount of pressure and gradually increase it until you find the sweet spot.
Environmental Factors Impacting Glue Cure
Environmental factors such as humidity and temperature significantly affect how long you should clamp wood glue. High humidity levels can extend curing time, while low temperatures can slow down the process. It’s crucial to consider these factors to ensure a strong and durable bond.
Temperature And Humidity
Temperature and humidity levels affect how long wood glue should be clamped.
Ventilation And Air Flow
Proper ventilation and air flow speed up the curing process of wood glue.
The Role Of Moisture Content In Wood
Wood glue is an essential component in woodworking projects, as it offers a strong and long-lasting bond between two pieces of wood. However, the effectiveness of wood glue relies heavily on the moisture content of the wood. If the moisture content is too high or too low, the glue will not adhere properly, resulting in a weak bond.
Measuring Moisture Levels
Before applying wood glue, it is crucial to measure the moisture content of the wood. This can be done using a moisture meter, which is a handy tool that measures the amount of moisture in the wood. The ideal moisture content for wood glue is between 6% and 8%. If the moisture content is higher than 10%, it is recommended to wait for the wood to dry before applying the glue.
Preparation For Optimal Adhesion
To achieve optimal adhesion with wood glue, the wood must be prepared correctly. This involves ensuring that the wood surfaces are clean and free from dust, dirt, and other debris. Sanding the wood surfaces also helps to create a rough surface that allows the glue to penetrate better.
- Use a clean, dry cloth to wipe down the wood surfaces.
- Sand the surfaces with a fine-grit sandpaper to create a rough surface.
- Apply the wood glue evenly to both surfaces.
- Clamp the two pieces of wood together firmly.
When clamping the wood, it is essential to apply enough pressure to ensure that the two pieces of wood are held together tightly. The amount of time the wood needs to be clamped depends on the type of wood glue used and the moisture content of the wood. As a general rule, it is recommended to clamp the wood for at least one hour for every inch of thickness.
| Type of Wood Glue | Minimum Clamping Time |
|---|---|
| PVA Glue | 30 minutes |
| Polyurethane Glue | 1-2 hours |
| Cyanoacrylate Glue | 10-30 seconds |
By measuring the moisture content of the wood, preparing the surfaces correctly, and clamping the wood for the recommended time, you can ensure that your wood glue will create a strong and long-lasting bond between two pieces of wood.
Advanced Tips For Clamping And Curing
When it comes to woodworking projects, using wood glue is essential for creating strong and durable joints. But once you’ve applied the glue, how long should you clamp the pieces together to ensure a proper bond? In this section, we will explore advanced tips for clamping and curing wood glue to maximize the strength and integrity of your projects.
Using Cauls For Even Pressure
One effective technique to achieve even pressure when clamping wood pieces together is by using cauls. Cauls are strips of wood or other materials that are placed between the clamps and the workpieces. They help distribute the clamping pressure evenly across the surface, preventing any gaps or weak spots in the glue joint.
When using cauls, make sure they are clean and free from any debris or glue residue. Apply a thin layer of wax or non-stick coating to the cauls to prevent the glue from sticking to them. Position the cauls along the length of the joint, ensuring they are in contact with both workpieces. Then, tighten the clamps gradually, alternating between the top and bottom, to apply even pressure across the entire joint.
Extending Clamping Time For Strength
While most wood glues recommend clamping for a specific duration, extending the clamping time can enhance the strength of the bond. The longer the glue is allowed to cure under pressure, the better the overall bond strength.
If you want to maximize the strength of the joint, consider extending the clamping time beyond the recommended duration. Keep in mind that different types of wood glues have varying curing times, so refer to the manufacturer’s instructions for specific guidelines.
In addition to extending the clamping time, you can also apply external pressure to the joint using weights or clamping aids. This additional pressure helps squeeze out excess glue and creates a tighter bond between the wood pieces.
Remember to remove any excess glue that squeezes out from the joint before it fully cures. Use a damp cloth or scraper to clean up the glue, ensuring a neat and tidy finish.
By using cauls for even pressure and extending the clamping time, you can achieve stronger and more reliable glue joints in your woodworking projects. These advanced techniques will help you create long-lasting and sturdy pieces that withstand the test of time.
Troubleshooting Common Gluing Mistakes
When it comes to woodworking projects, using wood glue is essential for creating strong and durable joints. However, even with the right adhesive, mistakes can happen during the clamping process that can weaken the bond between the pieces of wood. In this section, we will discuss common gluing mistakes and provide solutions to fix them.
Identifying Weak Bonds
Weak bonds can occur when the clamping pressure is not sufficient or when the glue is not evenly distributed between the surfaces being joined. To identify weak bonds, look for the following signs:
- Visible gaps between the wood pieces
- Parts of the joint that easily separate
- Weak or squeaky joints
If you notice any of these signs, it is crucial to address the issue before it compromises the strength of your project.
Fixing Improperly Clamped Joints
Improperly clamped joints can result in weak bonds and can be easily fixed by following these steps:
- Identify the problem area: Carefully inspect the joint to determine where the clamping pressure was inadequate.
- Reapply glue: If the joint is still intact, apply a small amount of wood glue to the problem area.
- Reclamp the joint: Use a clamp to secure the joint tightly, ensuring even pressure across the entire joint.
- Remove excess glue: Wipe away any excess glue with a damp cloth before it dries.
- Allow proper curing time: Follow the manufacturer’s instructions regarding the recommended curing time for the specific wood glue you are using.
By properly addressing and fixing improperly clamped joints, you can ensure the strength and longevity of your woodworking projects.
Final Steps After Clamping
Clamping wood glue is an essential step in woodworking, but it’s not the last. You need to follow some final steps to ensure that the glue joint is perfect. In this section, we will discuss the final steps that you should follow after clamping the wood glue.
Removing Excess Glue
After clamping, you may notice some glue squeezed out of the joint. It’s essential to remove the excess glue before it dries out. You can use a scraper or chisel to remove the glue. Be careful not to damage the wood surface while removing the glue. You can also use a damp cloth to wipe off the excess glue. Make sure that you remove all the glue before it dries out, as it will be difficult to remove later.
Sanding And Finishing
Once you have removed the excess glue, you can move on to sanding and finishing. Sanding is essential to remove any glue residue and to smooth out the wood surface. You should start sanding with a coarse grit sandpaper and gradually move to finer grits. Once you have sanded the wood surface, you can apply the finish of your choice. You can use stain, paint, or varnish to finish the wood surface. Make sure that you apply the finish evenly and let it dry completely before using the wood piece.
Following these final steps will ensure that the wood glue joint is perfect and the wood piece is ready to use. Remember to remove the excess glue and sand the wood surface before applying the finish.
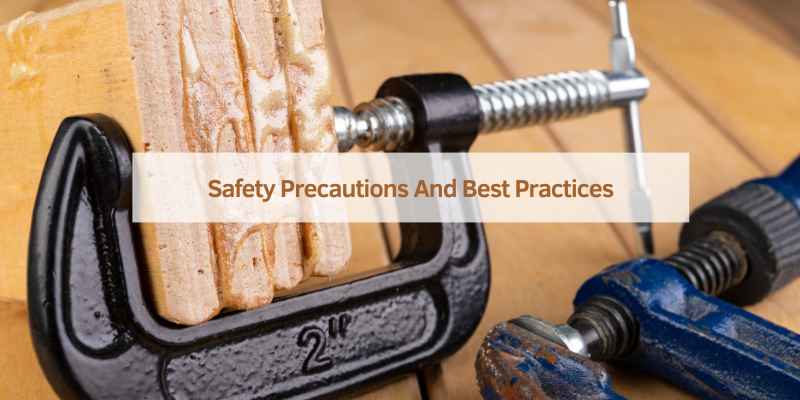
Safety Precautions And Best Practices
For the best results, it’s advisable to clamp wood glue for at least 30 minutes to ensure a secure bond. This allows the glue to set properly and prevents the wood from shifting. Additionally, following the manufacturer’s recommendations for clamp time is essential for achieving strong and durable joints.
Personal Protective Equipment
When working with wood glue, wearing appropriate safety gear is crucial.
- Always wear safety goggles to protect your eyes from splashes.
- Use gloves to prevent glue from coming into contact with your skin.
- Wear a respirator to avoid inhaling harmful fumes.
Workspace Setup And Cleanup
Properly setting up and cleaning your workspace is essential for a successful wood glue application.
- Ensure your work area is well-ventilated to disperse fumes.
- Cover your work surface with a protective layer to prevent glue spills.
Frequently Asked Questions
How Long Should You Clamp Wood Glue For?
Clamping wood glue is typically recommended for a minimum of 30 minutes to ensure a strong bond. However, the exact time may vary depending on factors such as the type of wood and glue used. It’s advisable to check the instructions provided by the glue manufacturer for specific recommendations.
Proper clamping time is crucial for a successful woodworking project.
Can You Remove Clamps Too Soon After Applying Wood Glue?
Removing clamps too soon after applying wood glue can weaken the bond and compromise the strength of the joint. It’s important to follow the recommended clamping time specified by the glue manufacturer to allow the adhesive to fully cure. Rushing the process may result in a weaker connection and potential failure of the glued joint.
What Happens If You Leave Clamps On Too Long?
Leaving clamps on for an extended period of time can sometimes lead to excessive pressure and create indentations or marks on the wood surface. Additionally, if the adhesive hasn’t fully cured, removing the clamps too late may result in a weaker bond.
It’s essential to strike a balance and remove the clamps within the recommended timeframe to ensure optimal results.
How Do I Know If The Wood Glue Is Fully Cured?
To determine if the wood glue is fully cured, check for signs such as transparency and no tackiness when touched. Fully cured glue should be dry and hard to the touch. Additionally, referring to the manufacturer’s instructions can provide guidance on the expected curing time for the specific wood glue being used.
It’s important to allow sufficient time for the glue to cure before subjecting the joint to stress or load.
Conclusion
The ideal clamping time for wood glue depends on several factors. It’s crucial to consider the type of wood, environmental conditions, and the specific project requirements. By following the recommended clamping times and techniques, you can ensure strong and durable bonds in your woodworking projects.
Mastering this skill will undoubtedly enhance the quality and longevity of your creations.