How Long to Wait between Coats of Stain: Expert Recommendations
Wait at least 24 hours between coats of stain for optimal results. When staining wood surfaces, it is important to allow sufficient drying time between coats to ensure the best finish.
Waiting at least 24 hours before applying another coat of stain allows the previous layer to fully dry and set. This helps prevent smudging, streaking, or uneven color distribution. It also allows the stain to penetrate the wood more effectively, resulting in a deeper, more vibrant color.
Rushing the process by applying consecutive coats without ample drying time can compromise the overall appearance and durability of the finished product. Taking the time to properly wait between coats of stain will ensure a beautifully stained wood surface that lasts for years to come.
Factors That Affect Drying Time For Stain
Factors such as humidity, temperature, and wood porosity can affect the drying time for stain. It is important to wait the recommended time between coats of stain to ensure proper adhesion and a smooth finish.
When it comes to staining wood, proper drying time between coats is crucial to achieving the desired finish. Several factors can influence the drying time of stain, including temperature and humidity, type and thickness of stain, and surface porosity. Understanding these factors will help you determine how long to wait between coats for optimal results.
Temperature And Humidity:
- Warmer temperatures generally lead to faster drying times, while colder temperatures can slow down the drying process.
- High humidity levels can prolong the drying time, as moisture in the air hinders evaporation. Conversely, lower humidity speeds up evaporation and promotes faster drying.
- Maintaining an ideal temperature range of 60-80°F (15-27°C) with a relative humidity of 40-60% is recommended for efficient stain drying.
Type And Thickness Of Stain:
- Different types of stain, such as oil-based, water-based, or gel stains, have varying drying characteristics.
- Oil-based stains typically take longer to dry compared to water-based stains due to their higher oil content.
- Gel stains are thicker and require more drying time, as they need to penetrate the wood before the excess can be wiped off.
- The thickness of the stain application also affects drying time. Applying thin, even coats allows for quicker evaporation and drying, while thicker layers take longer to dry.
Surface Porosity:
- The porosity of the wood surface determines how quickly the stain is absorbed and dries.
- Woods with tighter grain patterns, such as maple or cherry, may take longer to dry because they have less open pores for the stain to penetrate.
- In contrast, woods with more open grains, such as oak or pine, can absorb the stain faster and dry more quickly.
- Preparing the wood surface through sanding helps to create a more even surface porosity, promoting consistent stain absorption and drying.
Remember, these factors are interdependent, and any changes in temperature, humidity, stain type, or wood porosity can affect the overall drying time. Patience is essential during the staining process, and allowing ample drying time between coats will help you achieve a beautiful and durable finish for your wood projects.

Optimal Time Gap Between Stain Coats For Different Situations
For optimal results, the ideal time gap between stain coats varies depending on the situation. Factors such as temperature, humidity, and the type of stain used can impact drying time. It is recommended to follow the instructions on the stain product for the specific wait time between coats.
Applying Multiple Coats On Unfinished Wood
When it comes to staining unfinished wood, it is important to apply multiple coats for a deep and rich finish. However, the question arises: how long should you wait between coats? Understanding the optimal time gap between stain coats is crucial to achieve the desired results.
Here are some factors to consider:
- Absorption rate: Unfinished wood tends to absorb stain at different rates depending on the type of wood and its condition. It is essential to let the wood absorb the stain properly before applying another coat.
- Drying time: Each coat of stain needs time to dry before the next coat can be applied. This drying time can vary depending on the type of stain and the environmental conditions in which you are working.
- Manufacturer’s instructions: Always refer to the manufacturer’s instructions for specific guidance on drying and recoating times. These instructions are usually provided on the stain container and should be followed diligently for optimal results.
Remember, rushing the process by applying subsequent coats too quickly may result in uneven color and poor adhesion. Allow each coat to fully dry before proceeding with the next one to ensure a professional-looking finish.
Applying Stain Over Existing Finish
If you are looking to bring new life to a piece of furniture or woodworking project by applying stain over an existing finish, there are a few considerations to keep in mind. Here’s what you need to know:
- Surface preparation: Before applying stain over an existing finish, it is important to prepare the surface properly. This may involve cleaning, sanding, or stripping the existing finish to ensure good adhesion and an even stain application.
- Compatibility: Not all stains are compatible with existing finishes, especially if they are oil-based or water-based. It is important to choose a stain that is compatible with the existing finish to avoid any adhesion or compatibility issues.
- Testing: Prior to applying stain over the entire surface, it is recommended to test it in an inconspicuous area. This will help you determine the compatibility and ensure that you achieve the desired result.
Remember to follow the recommended drying and recoating times specified by the stain manufacturer to ensure proper adhesion and a beautiful finish.
Staining Outdoor Surfaces
Staining outdoor surfaces, such as decks, fences, or wooden furniture, requires careful consideration of weather conditions and the type of stain used. Here are some key points to keep in mind:
- Weather conditions: It is important to choose a time to stain outdoor surfaces when the weather is dry and mild. Avoid staining during extreme temperatures, high humidity, or when rain is expected, as these conditions can affect the drying and curing process of the stain.
- Surface preparation: Before staining, ensure that the outdoor surface is clean and free from dirt, dust, and debris. This may require pressure washing or scrubbing the surface to remove any contaminants that could interfere with the stain’s adhesion.
- UV protection: Outdoor stains often come with UV protection properties, providing an extra layer of defense against sunlight and weathering. Look for a stain specifically formulated for outdoor use to ensure long-lasting color and protection.
Remember, proper surface preparation, choosing the right weather conditions, and using a high-quality outdoor stain will contribute to a durable and attractive finish that enhances the natural beauty of your outdoor surfaces.
Staining Large Projects
Staining large projects, such as floors, cabinets, or extensive woodworking ventures, requires careful planning and execution to achieve consistent and professional results. Here are some tips to consider when tackling large staining projects:
- Break it down: Divide the project into smaller sections or components. This will make the staining process more manageable and allow you to focus on one area at a time. Stain each section before moving on to the next, ensuring proper drying and recoating times.
- Work with a team: Enlist the help of friends or family members to make the process faster and more efficient. Assign specific tasks, such as applying the stain, wiping off excess, or moving equipment, to each team member to streamline the workflow.
- Timing and coordination: When staining large projects, it is essential to coordinate your efforts to ensure a consistent finish. Be mindful of the drying time for each coat and plan your workflow accordingly. Consider factors such as ventilation, lighting, and accessibility to optimize your staining process.
- Equipment and tools: Use appropriate staining tools and equipment, such as paint sprayers, staining pads, or brushes, depending on the nature of your project. Using quality tools can help you achieve a more consistent and professional-looking finish.
Remember, patience and meticulousness are key when staining large projects. Take your time, follow the recommended drying and recoating times, and maintain consistency throughout the process for a stunning end result.
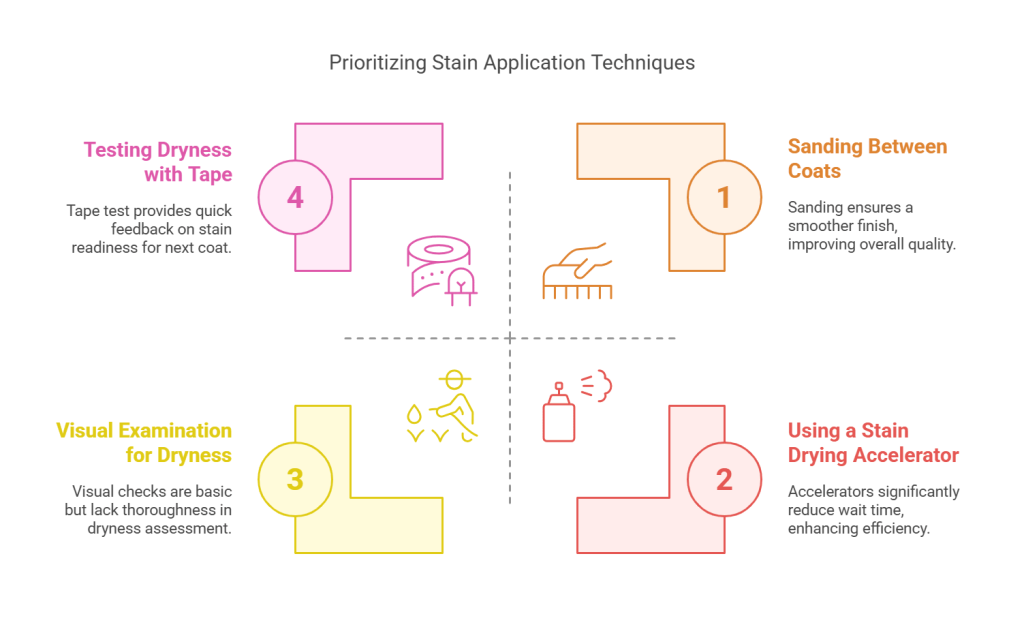
Testing Dryness Before Applying The Next Coat
Ensure optimal results when staining by testing the dryness before applying the next coat. Waiting the appropriate amount of time between coats is essential for a smooth and even finish. Get professional-looking results by following this important step in the stain application process.
After applying the first coat of stain to your wood project, it’s important to ensure that it is fully dry before proceeding with the next coat. This will help you achieve an even and flawless finish. In this section, we will discuss three simple tests to determine the dryness of the stain: visual examination, touch test, and tape test.
Visual Examination:
- Look closely at the surface of the stained wood.
- Check for any visible signs of wetness or moisture.
- The stain should appear matte and dry to the touch.
- If any wet spots or shiny areas are observed, wait for them to dry completely before applying the next coat.
Touch Test:
- Gently touch the stained surface with your finger.
- If the stain feels dry and does not transfer onto your finger, it is likely ready for the next coat.
- However, if the stain feels tacky or sticky, it needs more time to dry.
- Avoid applying another coat until the stain is no longer tacky to the touch.
Tape Test:
- Cut a small piece of masking tape and press it firmly onto the stained area.
- Peel off the tape gently and inspect the results.
- If the tape comes off clean, without pulling any stain residue, the surface is adequately dry for the next coat.
- However, if the tape sticks or pulls off some of the stain, it indicates that the previous coat is not completely dry.
Remember, rushing between coats can lead to an uneven finish and potential damage to your project. Take the necessary time to ensure each coat of stain is fully dry before applying the next one. By using these simple tests – visual examination, touch test, and tape test – you can confidently proceed with the next coat and achieve professional-looking results.

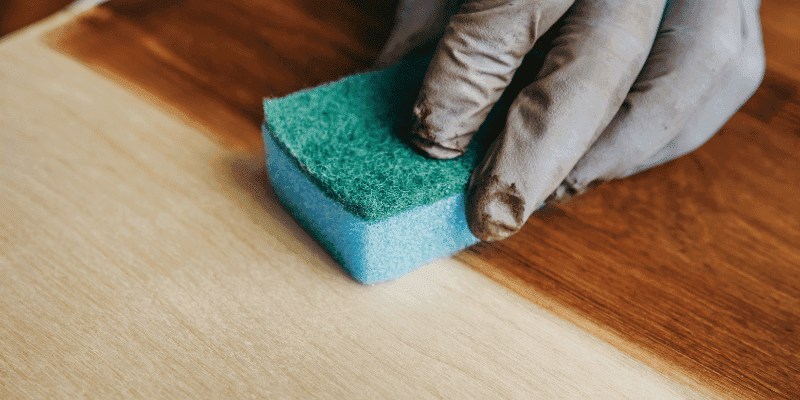
Sanding Between Coats For Smoother Finish
Waiting between coats of stain is crucial for a smooth finish. Sanding between coats helps to remove imperfections and allows for better adhesion, resulting in a professional-looking end result.
Importance Of Sanding
Sanding between coats of stain is a crucial step in achieving a smooth and flawless finish on your project. By sanding, you remove any imperfections, rough spots, or raised wood fibers, ensuring an even application of the stain. Here’s why sanding is so important:
- Prepares the surface: Sanding smooths the surface of the wood, creating a clean canvas for the next coat of stain. It removes any old finish, dirt, or debris, allowing the new coat to adhere properly.
- Enhances absorption: Sanding opens up the wood grain, allowing the stain to penetrate more effectively. This results in a deeper, richer color and a more vibrant finish.
- Evens out imperfections: Sanding helps to even out any uneven spots or blemishes in the wood. It smooths out rough areas, knots, or patchy sections, resulting in a more professional-looking and aesthetically pleasing finish.
- Improves durability: By sanding between coats, you create a solid foundation for the stain to bond with the wood. This improves the durability and longevity of the finish, ensuring it will withstand daily wear and tear.
Recommended Grits And Techniques
Choosing the right sandpaper grit and employing the correct sanding technique can make a significant difference in the final outcome of your stained project. Here are some recommendations:
- Grit selection: Start with a coarser grit sandpaper, such as 120 or 150, to remove any unevenness or imperfections. Then, move to a finer grit, such as 220, for a smoother finish. The final sanding before the last coat can be done with a very fine grit, like 320, for an extra smooth surface.
- Sanding technique: Always sand in the direction of the wood grain to prevent any scratches or damage. Begin with light pressure and gradually increase if needed. Keep the sandpaper flat and change it when it becomes clogged with residue. For detailed or hard-to-reach areas, use sandpaper wrapped around a sanding block or a small handheld sanding tool.
Remember, sanding between coats of stain is essential for achieving a flawless finish. By following the recommended grits and techniques, you can ensure a smooth and professional-looking result that will enhance the beauty of your project.
Using A Stain Drying Accelerator
Reduce the waiting time between coats of stain with the help of a stain drying accelerator. Speed up the staining process and achieve a professional finish in less time.
Accelerating the drying time of stain can be a game-changer, reducing the waiting time between coats and allowing you to finish your project faster. But how exactly does it work? In this section, we will explore the different types of accelerators available and provide some guidelines on using them effectively.
Types Of Accelerators:
- Mineral Spirits: By adding a small amount of mineral spirits to your stain, you can speed up the drying process. It thins the stain and helps it penetrate the surface more quickly, allowing for faster evaporation and drying.
- Naptha: Similar to mineral spirits, naptha can be mixed with stain to accelerate drying. It acts as a solvent, helping the stain evaporate faster and reducing the waiting time between coats.
- Drying Agents: Some manufacturers offer drying agents specifically designed for stains. These agents contain additives that promote faster drying without affecting the color or quality of the stain. They can be an excellent option if you prefer using a product specifically made for this purpose.
Proper Application Guidelines:
- Follow manufacturer’s instructions: Different accelerators may have specific guidelines and recommendations from the manufacturer. Read the instructions carefully before using any drying accelerator and follow them accordingly.
- Test on a sample piece: Before applying the stain with an accelerator directly on your project, test it on a scrap or sample piece of wood. This will allow you to observe how the stain reacts and dries with the accelerator, ensuring the desired results.
- Apply in thin coats: When using a stain drying accelerator, it’s crucial to apply thin and even coats. Thicker coats may take longer to dry, regardless of the accelerator used. Aim for a consistent and smooth application to maximize the drying effectiveness of the accelerator.
- Allow proper drying time: Even with the use of accelerators, it’s essential to allow each coat of stain to dry thoroughly before applying the next one. The drying time may vary depending on factors such as temperature, humidity, type of wood, and the specific stain you are using. Consult the stain manufacturer’s guidelines for recommended drying times.
- Sand between coats: To achieve a smooth and professional-looking finish, consider sanding lightly between coats. This will help remove any imperfections and prepare the surface for the next coat of stain. Ensure that the surface is completely dry before sanding to avoid damaging the stain or creating a blotchy appearance.
Accelerating the drying time of stain with the use of drying accelerators can be a valuable technique to expedite your project’s completion. By incorporating the appropriate type of accelerator and following the proper application guidelines, you can minimize waiting times between coats and achieve a beautiful, finished result faster than ever before.
Recommended Products For Faster, Cleaner Staining
A 1-hour dry time formula for projects where the standard wait times covered above are too slow.
Best for: single-coat color projects on a tight timeline.
Why we picked it: genuinely faster dry time rather than relying on a separate “accelerator” additive.
Main drawback: fewer color options than standard oil-based stains.


Magimate Stain Brush Set (4 Sizes)
Natural/synthetic blend bristles for even coat application.

Tack Cloth
Removes sanding dust before the next coat — skipping this traps grit in the finish.
As an Amazon Associate, we earn from qualifying purchases.
Common Mistakes To Avoid
Achieve a flawless finish on your staining project by avoiding the common mistake of not allowing enough time between coats. Waiting the proper length of time ensures optimal adhesion and a beautiful, long-lasting result.
When it comes to staining wood, there are a few common mistakes that people often make. These mistakes can lead to an uneven finish, longer drying times, or even damage to the wood. To ensure that your staining project goes smoothly, it’s important to avoid these common pitfalls:
Rushing The Drying Process
- Applying multiple coats of stain too quickly can prevent the previous coat from drying properly.
- This can result in a tacky finish, uneven color, or even damage to the wood surface.
- Always allow enough time for each coat to fully dry before applying the next one.
- Check the manufacturer’s recommendations for the specific product you are using for drying times.
Overlapping Wet Stain Coats
- Applying a new coat of stain over a wet or tacky previous coat can cause the layers to mix, leading to an uneven color or blotchy finish.
- Make sure to wait until the stain is completely dry before applying additional coats.
- If you’re unsure, lightly touch the surface with a clean finger – if it feels sticky, it’s not yet dry.
Ignoring Manufacturer’S Recommendations
- Every stain product is unique and comes with specific instructions from the manufacturer.
- It’s important to read and follow these recommendations to achieve the best results.
- This includes the recommended drying times between coats, the number of coats to apply, and any other specific instructions for the product.
- Ignoring these recommendations can result in poor adhesion, color variation, or other issues with the final finish.
Remember, taking the time to avoid these common mistakes will ensure that you achieve the best results when staining wood. By patiently allowing each coat to dry, avoiding overlapping wet coats, and following the manufacturer’s instructions, you’ll be able to achieve a beautiful, even finish that will enhance the natural beauty of the wood.
Frequently Asked Questions On How Long To Wait Between Coats Of Stain
When Can I Apply A Second Coat Of Stain?
Apply a second coat of stain once the first coat has dried completely.
How Long To Dry In Between Stain Coats?
Allow the stain to dry fully between coats for best results.
Do You Have To Let Stain Dry Between Coats?
Yes, it is important to let the stain dry between coats for best results.
Can You Apply 2 Coats Of Stain?
Yes, it is possible to apply 2 coats of stain for better coverage and durability.
Conclusion
To achieve the best results when staining, it is crucial to know how long to wait between coats. By allowing the proper drying time, you can ensure a smooth and professional-looking finish. Waiting too little can result in a sticky surface and an uneven application while waiting too long can lead to issues with adhesion.
Generally, it is recommended to wait at least 24 hours between coats of stain. However, factors such as humidity and temperature can affect drying times, so it is essential to check the manufacturer’s instructions for specific guidelines. Remember to lightly sand between coats to promote adhesion and remove any imperfections.
Patience is key when it comes to staining, as waiting for the appropriate drying time will ultimately result in a beautiful and long-lasting finish.