How to Master the Perfect 45 Degree Angle with Your Miter Saw
To adjust the miter saw to a 45-degree angle, follow these steps. Ensure the saw is turned off and unplugged.
Loosen the bevel lock or the miter locking knob, depending on your saw, and adjust the saw to the desired angle using the miter scale or bevel scale. Tighten the locking knob or bevel lock to secure the angle. Test the angle by cutting a scrap piece of wood and adjusting as needed until the desired 45-degree angle is achieved.
Getting the perfect angle with your miter saw is crucial for precise and accurate cuts. Whether you are a DIY enthusiast or a professional carpenter, knowing how to adjust your miter saw to a 45-degree angle will come in handy for various projects. In this guide, we will walk you through the step-by-step process to make this adjustment, ensuring that your cuts are spot-on every time. So, grab your miter saw, and let’s get started on mastering the art of adjusting it to a 45-degree angle.
What Is A 45 Degree Angle And Its Importance In Carpentry?
A 45-degree angle is an essential measurement in carpentry, especially when using a miter saw. Adjusting the miter saw to this angle allows for precise and accurate cuts, making it a crucial skill for carpenters to master.
Importance Of Precision In Woodworking Projects
Woodworking requires attention to detail and precision, especially when it comes to angles. One important angle that carpenters frequently work with is the 45-degree angle. Understanding how to adjust a miter saw to this angle is crucial for achieving accurate and seamless joints in carpentry projects.
Whether you’re building a picture frame or constructing furniture, knowing how to work with a 45-degree angle will greatly enhance the quality and aesthetics of your work. In this section, we will explore the importance of precision in woodworking projects and delve into the specifics of the 45-degree angle.
Introduction To The 45 Degree Angle
The 45-degree angle is a commonly used angle in carpentry, known for its versatility and aesthetic appeal. It can be used to create mitered corners, beveled edges, and neatly joined pieces. This angle is often employed in creating structures such as picture frames, door frames, and window trims.
By understanding how to adjust a miter saw to a 45-degree angle, you’ll be equipped with the skills needed to achieve professional-grade results in your woodworking projects.
Here are the main points we will cover:
- The significance of precision in woodworking projects
- The purpose of the 45-degree angle in woodworking
- Techniques for accurately setting a miter saw to a 45-degree angle
- Common applications of the 45-degree angle in carpentry
Now, let’s explore the importance of precision in woodworking projects and how it relates to achieving accurate angles such as the 45-degree angle.

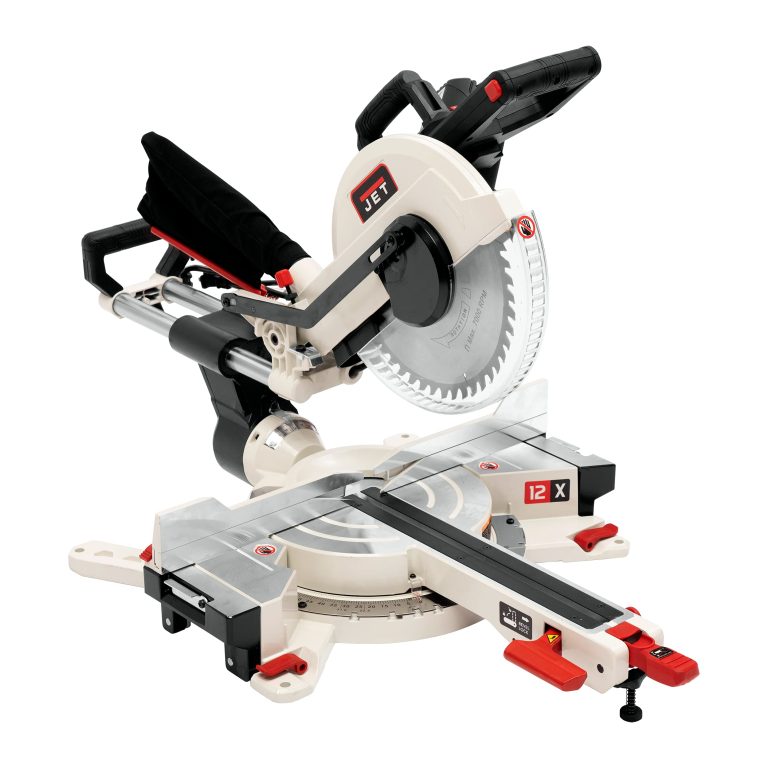
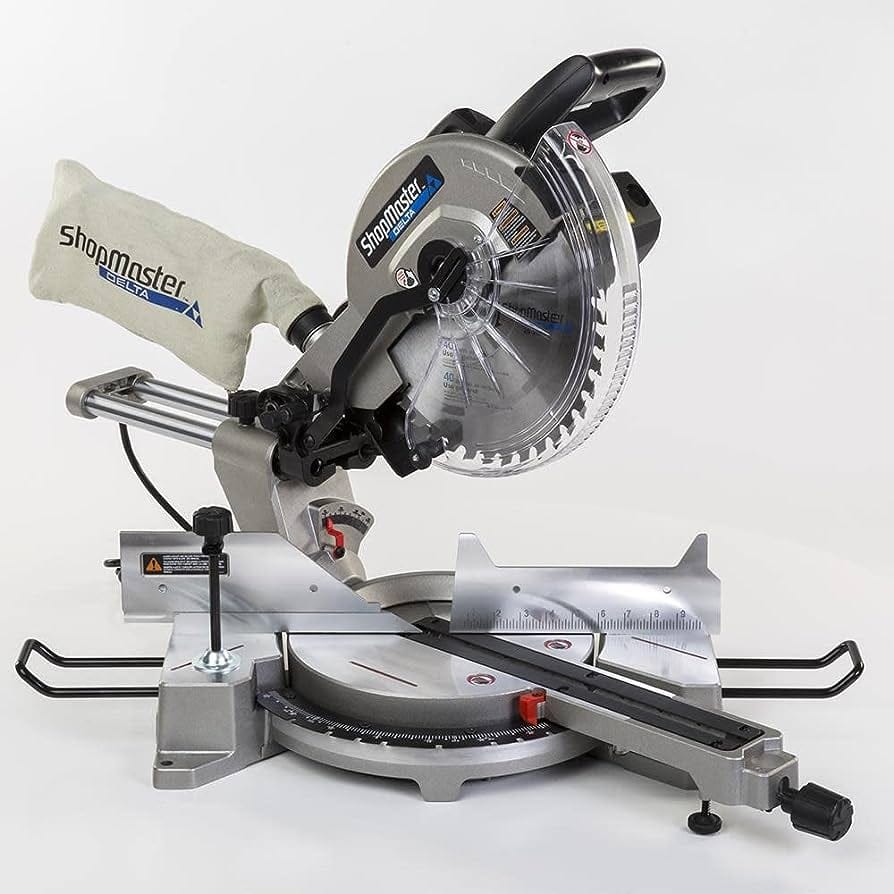
Types Of Miter Saws For Achieving The Perfect Angle
Miter saws come in different types to achieve the perfect angle, including compound miter saws and sliding compound miter saws. To adjust the miter saw to a 45-degree angle, simply loosen the bevel lock, tilt the saw blade to the desired angle, and tighten the lock.
If you’re a DIY enthusiast or a professional woodworker, having a miter saw is a must. It allows you to make precise and accurate angled cuts for woodworking projects. When it comes to adjusting the miter saw to a 45-degree angle, you need to choose the right type of miter saw that fits your needs.
Here are the different types of miter saws available:
Introduction To Different Types Of Miter Saws Available
Standard Miter Saw:
- Designed for making basic miter cuts, typically from 90 degrees to 45 degrees.
- Ideal for simple projects like framing or cutting baseboards.
- Features a rotating arm that allows the blade to pivot left or right for angled cuts.
Compound Miter Saw:
- Offers both miter and bevel cuts, making it more versatile than a standard miter saw.
- Capable of tilting the blade in addition to rotating it, allowing for compound angle cuts.
- Suitable for crown molding, trim work, and other intricate woodworking projects.
Features And Capabilities Of Compound Miter Saws
Compound miter saws can be either single bevel or dual bevel. Let’s explore their features and capabilities:
Single Bevel:
- Allows the blade to tilt only in one direction.
- Requires flipping the workpiece to make beveled cuts in the opposite direction.
- Ideal for beginners or those with simple cutting needs.
Dual Bevel:
- Offers the ability to tilt the blade in both left and right directions, eliminating the need to flip the workpiece.
- Provides more flexibility and efficiency when making beveled cuts.
- Preferred by professionals and advanced users.
Advantages And Limitations Of Sliding Compound Miter Saws
Sliding compound miter saws are an advanced version of compound miter saws designed to handle wider boards. Let’s look at their advantages and limitations:
Advantages:
- Greater cross-cutting capacity due to the sliding feature.
- Allows for cutting wider boards and larger crown moldings.
- Provides smoother and more accurate cuts.
Limitations:
- Bulkier and heavier compared to standard or compound miter saws.
- Requires more space due to the sliding mechanism.
- Higher cost compared to other types of miter saws.
Remember, choosing the right miter saw is essential to achieving the perfect angle for your woodworking projects. Consider the type of cuts you’ll be making, the level of precision required, and your budget before making a decision. With the right miter saw and proper adjustment techniques, you’ll be able to tackle any woodworking project with ease.
Tools You’Ll Need For Measuring And Marking
To adjust your miter saw to a 45-degree angle, you’ll need a few essential tools, including a protractor, a miter saw, and a wrench. By following a few simple steps, you can easily achieve accurate cuts for your woodworking projects.
So let’s dive in and learn how to make precise 45-degree angle adjustments with these necessary tools.
Overview Of Essential Measuring Tools:
- Tape Measure: A flexible measuring tool with a retractable ribbon used to measure lengths accurately.
- Combination Square: Consisting of a ruler and a square head, this tool allows for precise measurements and marking at 45 degrees.
- Protractor: Essential for measuring angles accurately, particularly for adjusting the miter saw to a 45-degree angle.
- Bevel Gauge: Useful for determining and transferring angles, ensuring accurate miter cuts.
Common Marking Tools And Their Uses:
- Pencil: Widely used for marking measurements and reference points on the material.
- Marking Knife: A sharp tool used to score a line accurately for improved precision during cutting.
- Chalk Line: Ideal for marking long and straight lines by snapping a taut string coated in chalk against the material.
- Try Square: A tool used for creating perpendicular lines and ensuring accurate right angles.
- Miter Marker: Specifically designed for marking precise angles on material to guide miter saw adjustments.
Remember, utilizing the right tools not only makes measuring and marking easier but also increases the accuracy of your miter saw cuts. These tools are readily available and essential for achieving the perfect 45-degree angle adjustment on your miter saw.

Choosing The Right Blade For Perfect Cuts
Discover the essential steps to adjust your miter saw to a 45-degree angle for precise cuts. From properly positioning the blade to calibrating the bevel gauge, this comprehensive guide ensures accurate and flawless results every time.
Importance Of Selecting The Correct Blade:
- The blade you choose for your miter saw plays a crucial role in achieving perfect and precise cuts. By selecting the right blade, you can ensure clean and accurate angles every time.
- Using the correct blade not only improves the quality of your work but also ensures safety and longevity of your miter saw.
- The right blade will help you achieve a smooth, clean cut, reducing the need for additional finishing work and saving you time and effort.
Factors To Consider When Choosing A Saw Blade:
- Material: Consider the type of material you will be cutting, such as wood, metal, or plastic. Different materials require different types of blades to achieve optimal results.
- Tooth count: The number of teeth on the blade impacts the smoothness and speed of the cut. Blades with higher tooth counts provide smoother cuts, while blades with lower tooth counts offer faster cutting speeds.
- Blade diameter: The size of the blade determines the cutting capacity of your miter saw. Ensure the blade diameter is compatible with your saw’s specifications.
- Kerf width: The width of the blade’s cut, known as the kerf, affects the material wastage and cutting speed. A thinner kerf width results in less material wastage and faster cutting speeds.
- Blade quality: Invest in high-quality blades that are durable and long-lasting. Cheaper blades may wear out quickly, leading to poor quality cuts and potentially compromising your safety.
Different Types Of Blades For Various Materials:
When it comes to choosing the right blade for your miter saw, there are several options available depending on the material you will be cutting. Here are different types of blades for various materials:
- Crosscutting blades: These blades are designed for cutting wood across the grain. They have a high tooth count and produce smooth, clean cuts.
- Ripping blades: Ideal for cutting wood along the grain, ripping blades have fewer teeth and can remove material more efficiently.
- Fine-tooth blades: Suitable for cutting delicate materials like plywood or laminates, fine-tooth blades minimize chipping and splintering.
- Carbide-tipped blades: With carbide tips, these blades are highly durable and can handle cutting through various materials, including hardwood, softwood, and even metals.
- Metal-cutting blades: If you need to cut metal, choose blades specifically designed for that purpose. These blades typically have a high tooth count and feature tooth geometry optimized for cutting through metal.
Remember, selecting the right blade for your miter saw is essential to achieve precise cuts and ensure the best possible results. With the right blade, you can make accurate 45-degree angle adjustments on your miter saw and accomplish your woodworking tasks effectively and efficiently.
Adjusting The Miter And Bevel Angles
Adjusting the miter and bevel angles on a miter saw to a 45-degree angle is a crucial step for accurate and precise cuts. By following the manufacturer’s instructions and using the appropriate controls, you can easily make these adjustments to achieve the desired angle.
Ensure you have a sturdy work surface and take all necessary safety precautions before making any changes.
Setting The Miter Angle To 45 Degrees
Adjusting the miter angle on a miter saw is an essential skill that every woodworker should master. Whether you’re working on a project that requires precise angled cuts or simply want to expand your woodworking abilities, understanding how to adjust the miter angle is crucial.
In this section, we’ll focus on setting the miter angle to 45 degrees, a common angle used in many woodworking projects.
To set the miter angle to 45 degrees, follow these steps:
- Start by locating the miter angle adjustment knob or lever. It is typically located at the front of the miter saw near the base.
- Loosen the miter angle adjustment knob or release the lever, depending on the type of miter saw you have.
- Set the miter gauge to 45 degrees by aligning the indicator on the gauge with the 45-degree mark.
- Tighten the miter angle adjustment knob or re-engage the lever to secure the miter angle in place.
- Double-check the miter angle by using a protractor or a square to ensure that it is precisely set at 45 degrees.
By following these steps, you can easily set the miter angle of your miter saw to 45 degrees, allowing you to create accurate angled cuts for your woodworking projects.
Understanding The Bevel Angle Adjustment
In addition to adjusting the miter angle, many miter saws also provide the option to adjust the bevel angle. The bevel angle refers to the tilt of the saw blade, allowing you to make beveled cuts at different angles. Understanding how to adjust the bevel angle is essential when working on projects that require angled or compound cuts.
Here are the steps to adjust the bevel angle on a miter saw:
- Locate the bevel angle adjustment knob or lever, typically positioned at the back of the miter saw near the blade.
- Loosen the bevel angle adjustment knob or release the lever, depending on the model of your miter saw.
- Tilt the saw blade to the desired bevel angle using the bevel scale located on the miter saw.
- Secure the bevel angle by tightening the adjustment knob or re-engaging the lever.
- To ensure accuracy, verify the bevel angle with a bevel gauge or a square.
Adjusting the bevel angle provides versatility and enables you to create angled cuts beyond simple 90-degree cuts. By mastering this adjustment, you can expand your creative possibilities in woodworking.
Knowing how to adjust both the miter and bevel angles on a miter saw is fundamental for any woodworker. By following the steps outlined above, you can confidently set the miter angle to 45 degrees and adjust the bevel angle.
These adjustments will allow you to achieve precise angled cuts, opening up a world of possibilities for your woodworking projects.
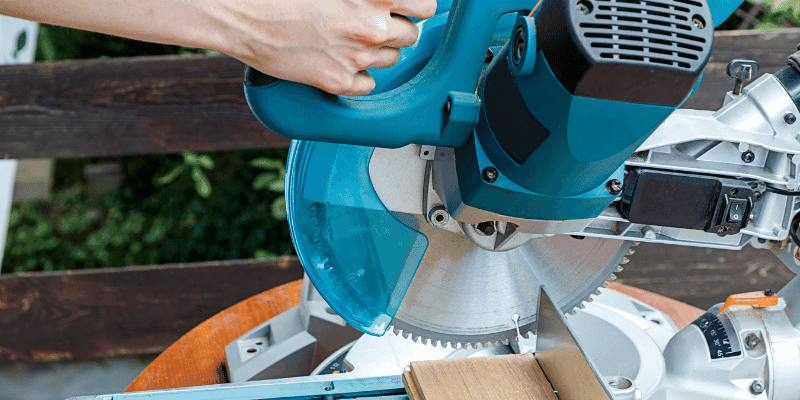
Aligning The Blade For Precise Cuts
Adjust the miter saw to a precise 45-degree angle for accurate cuts by aligning the blade. Follow these easy steps to ensure your cuts are clean and precise every time.
Importance Of Blade Alignment For Accuracy
Aligning the blade of your miter saw is crucial for achieving precise cuts. When the blade is properly aligned, you can be confident that your angles will be accurate, resulting in professional-looking projects. Here’s why blade alignment is important:
- Consistency: Properly aligned blades ensure consistent angles and cuts, giving your work a polished and professional appearance.
- Safety: A misaligned blade can cause kickbacks or inaccurate cuts, posing a safety risk. Aligning the blade reduces the chance of accidents and ensures a secure work environment.
- Efficiency: With a well-aligned blade, you can work faster and more efficiently. You won’t have to spend time correcting mistakes or re-cutting parts due to misaligned angles.
Steps To Align The Blade Of Your Miter Saw
To align the blade of your miter saw, follow these simple steps:
- Check for power: Before starting any adjustments, make sure your miter saw is unplugged and turned off. Safety should always be your top priority.
- Square the fence: Align the fence of your miter saw to ensure it is perfectly perpendicular to the blade. Use a square to verify the alignment and adjust as needed.
- Loosen the bevel lock: Locate the bevel lock on your miter saw and loosen it. This will allow you to tilt the blade for adjustment purposes.
- Set the bevel angle: Adjust the bevel angle to 45 degrees. Most miter saws have a bevel scale that allows you to precisely set the angle.
- Align the blade: Use a square or a miter saw alignment tool to check the alignment of the blade. Place the tool against the blade and the fence to ensure they are perfectly parallel. If they are not aligned, adjust the bevel angle until they are.
- Lock the bevel angle: Once the blade is aligned, tighten the bevel lock to secure the blade in place. Make sure it is tightened securely to prevent any movement during use.
- Recheck the alignment: After locking the bevel angle, double-check the alignment using the square or alignment tool. Ensure that the blade and fence are still parallel.
- Test the alignment: With the blade properly aligned, make test cuts to verify the accuracy of your angles. Use scrap wood to check the precision of your cuts before moving on to your actual project.
Remember to always practice caution and use safety gear when operating your miter saw. By following these steps, you can achieve accurate cuts and professional-looking projects with ease.

Using A Miter Gauge For Consistent Angles
For consistent angles, using a miter gauge is essential. Adjusting a miter saw to a 45-degree angle ensures precise and accurate cuts for your projects. Mastering this technique will help you achieve professional results every time.
A miter gauge is an essential tool when it comes to getting precise and accurate angles on your miter saw. It helps in achieving straight and clean cuts consistently. Let’s dive into how to use a miter gauge effectively to adjust your miter saw to a 45-degree angle.
Introduction To Miter Gauges And Their Purpose
- A miter gauge is a guiding tool that comes with your miter saw or can be purchased separately.
- Its purpose is to help you make accurate and repeatable angled cuts by guiding the workpiece through the saw blade.
- Miter gauges typically have a protractor scale for setting the desired angle and an adjustable fence to hold the workpiece securely in place.
How To Use A Miter Gauge For Accurate Measurements
Using a miter gauge requires proper setup and attention to details. Here’s a step-by-step guide to help you make precise cuts with your miter saw:
- Align the gauge: First, align the miter gauge’s protractor scale with the desired angle, in this case, 45 degrees.
- Secure the gauge: Make sure the miter gauge is securely locked into the miter slot of your miter saw table. This will ensure stability during the cutting process.
- Prepare the workpiece: Place the workpiece against the miter gauge fence, ensuring it is tightly butted against it. This will prevent any movement during the cut and maintain accuracy.
- Adjust the blade height: Set the blade height according to the thickness of your workpiece. The blade should extend enough to cut through without causing any tear-out.
- Turn on the saw: Before proceeding with the cut, double-check that the saw is properly powered and the blade is spinning smoothly.
- Make the cut: Start pushing the workpiece forward while keeping it firmly against the miter gauge fence. Maintain a steady and consistent feed rate, allowing the blade to smoothly cut through the material. Always keep your hands a safe distance away from the blade.
- Inspect the cut: Once the cut is complete, examine it for accuracy and smoothness. If required, make adjustments and repeat the process until you achieve the desired result.
Using a miter gauge helps ensure consistent angles and precise cuts. It’s important to practice safety precautions while handling power tools and always follow the manufacturer’s instructions for your specific miter saw and miter gauge model. So, get your miter gauge ready and start making those perfectly angled cuts for your woodworking projects!
Proper Technique For Cutting At A 45 Degree Angle
Looking to learn how to adjust your miter saw to a 45-degree angle? Follow these 3 simple steps to ensure you achieve the proper technique for cutting at this specific angle. With careful adjustments and precision, you’ll be able to make accurate 45-degree cuts with ease.
Miter saws are highly versatile power tools commonly used for making precise angled cuts in woodworking projects. Whether you’re a seasoned professional or a DIY enthusiast, knowing how to adjust your miter saw to a 45-degree angle is crucial for achieving accurate and clean results.
In this section, we’ll guide you through the proper technique for cutting at a 45-degree angle, along with some expert tips to ensure smooth and flawless cuts.
Step-By-Step Instructions For Making Precise Cuts:
- Prepare your miter saw: Ensure that your miter saw is in good working condition and securely fastened to a stable surface. Place the saw in a well-lit area with sufficient space for maneuvering your materials.
- Select the correct blade: Depending on your project, choose a blade with the appropriate number of teeth and tooth configuration for clean and accurate cuts. A blade with a high tooth count is recommended for fine woodworking projects.
- Set the miter angle: Locate the miter angle adjustment knob or lever on your miter saw. Loosen it and set the angle to 45 degrees. Make sure the angle is precisely aligned using a square or angle guide.
- Adjust the bevel angle: Most miter saws come with a bevel adjustment feature for tilting the blade. Check if your cut requires a bevel angle adjustment. If not, ensure the bevel angle is set at zero degrees.
- Secure the workpiece: Place your workpiece firmly against the fence, ensuring it is aligned with the marked cutting line. Use clamps or stop blocks to secure the workpiece in place, if necessary, to prevent movement during the cut.
- Safety precautions: Wear appropriate protective gear such as safety glasses and ear protection. Keep your hands at a safe distance from the blade, always gripping the workpiece firmly.
- Make the cut: Activate the miter saw, allowing the blade to reach its full speed, then gently lower it onto the workpiece. Apply consistent downward pressure and smoothly guide the blade along the marked cutting line. Maintain a steady pace throughout the cut to avoid splintering or rough edges.
- Inspect the cut: Once the cut is complete, carefully inspect it for accuracy and smoothness. If any adjustments are needed, repeat the process with a new piece of wood or make necessary adjustments before proceeding further.
Tips To Ensure Clean And Smooth Cuts:
- Use a high-quality, sharp blade to ensure clean cuts without splintering or tear-out.
- Take your time to measure and mark the exact cutting line on your workpiece before making any cuts.
- Make sure the workpiece is firmly secured against the fence to prevent any movement during cutting.
- Maintain a steady hand and avoid forcing the blade too quickly through the wood, as it can lead to rough cuts.
- Consider using a zero-clearance throat plate or sacrificial board to reduce tear-out on the underside of the workpiece.
- Always follow the manufacturer’s instructions for your specific miter saw model and apply proper maintenance to keep it in optimal working condition.
By following these step-by-step instructions and applying the provided tips, you’ll be able to adjust your miter saw to a 45-degree angle with ease and precision. This will empower you to create flawless cuts for various woodworking projects, enhancing the overall quality of your craftsmanship.
Remember to prioritize safety while working with power tools and take necessary precautions to avoid accidents. Now, let’s put these techniques into practice and elevate your woodworking skills to new heights!
Common Challenges And Troubleshooting Tips
Having trouble adjusting your miter saw to a 45-degree angle? Check out these troubleshooting tips to overcome common challenges and ensure precision cuts.
Addressing Common Issues With Achieving A Perfect 45 Degree Angle:
- Slippage: Ensure that the material is securely clamped before making any cuts to prevent slippage.
- Inaccurate measurements: Double-check your measurements to make sure you are setting the miter saw to the correct angle. Use a reliable measuring tool like a combination square or a protractor.
- Blade misalignment: Check if the blade is properly aligned with the miter gauge. Adjust it accordingly to ensure accuracy.
- Blade quality: A dull or low-quality blade can affect the precision of your cuts. Consider using a high-quality blade designed for clean and precise miter cuts.
- Incorrect bevel angle: Make sure that the bevel angle is set to zero degrees when adjusting the miter angle. This can help eliminate any potential complications.
Troubleshooting Tips For Getting Better Results:
- Practice cuts: Before starting a project, practice making cuts on scrap material to master the technique and adjust the miter saw accordingly.
- Check the miter saw’s alignment: Ensure that the miter saw is properly aligned and calibrated. Adjust the saw’s bevel and miter gauges if necessary.
- Gradual adjustments: If you’re struggling to achieve a 45-degree angle, make slight adjustments incrementally until you reach the desired angle.
- Test cuts: Test your adjustments by making small test cuts on scrap material. Measure and assess the accuracy of the cut before proceeding with the actual workpiece.
- Seek professional assistance: If you’re still experiencing difficulties, consider seeking guidance from a professional or consulting the miter saw’s user manual for specific troubleshooting steps.

Testing And Verifying The Accuracy Of Your Cuts
Discover the exact method to adjust your miter saw to a precise 45-degree angle, ensuring the accuracy of your cuts. This step-by-step guide helps you test and verify the angle, resulting in precise and professional woodworking projects.
Once you have adjusted your miter saw to a 45-degree angle, it is crucial to test and verify the accuracy of your cuts. By doing so, you can ensure that your cuts are precise and will result in properly aligned pieces of wood.
In this section, we will explore different methods to confirm the accuracy of your cuts and how to check for squareness.
Methods To Confirm The Accuracy Of Your Cuts:
- Crosscut Test: Begin by making a clean crosscut on a scrap piece of wood. To verify if the cut is accurate, check the two cut edges for any visible gaps or irregularities. If the edges fit tightly when placed together, the cut is accurate.
- Bevel Test: Tilt your miter saw to a 45-degree angle and make a bevel cut on another scrap piece of wood. Upon examining the edges, hold them together to check for a perfect fit. If there are no gaps or overlapping areas, your bevel cut is accurate.
- Measuring Test: Utilize a square or a measuring tool to check the angle of your cut. Place the tool against the edge of the piece you have just cut and inspect the angle display. A reading of exactly 45 degrees indicates an accurate cut.
- Dry Fit Test: Assemble the pieces of wood you have cut to form a 90-degree corner. Ensure that the edges fit together precisely without any gaps or misalignment. If the pieces align perfectly, your cuts are accurate.
How To Check For Squareness And Adjust If Needed:
- Squareness Check: To assess the squareness of your miter saw, use a square against the miter gauge and the blade. If the square aligns accurately with both the miter gauge and the blade, your saw is square. If not, you will need to make necessary adjustments.
- Adjusting Squareness: If the squareness check reveals that your miter saw is not square, adjust it by loosening the bolts that secure the saw’s fence. Gently nudge the fence until it aligns perfectly with the square. Once aligned, tighten the bolts to secure the fence in its new position.
By following these methods to confirm the accuracy of your cuts and checking for squareness, you can ensure that your miter saw is correctly adjusted to a 45-degree angle. Taking the time to verify the accuracy of your cuts will contribute to the overall quality of your woodworking projects.
Creating Compound Angles With Your Miter Saw
Learn how to create compound angles with your miter saw by adjusting it to a precise 45-degree angle. Master the technique for flawless cuts in your woodworking projects.
Have you ever wondered how to adjust your miter saw to a 45-degree angle? Well, you’ve come to the right place! In this section, we will explore the fascinating world of compound angles and learn some techniques for cutting them with precision using your miter saw.
Introduction To Compound Angles And Their Applications:
- Compound angles are when two angles are combined to create a complex cut. These cuts are commonly used in woodworking and carpentry projects, such as crown molding and picture frames.
- By adjusting your miter saw to the correct angles, you can create compound cuts that fit perfectly, enhancing the overall look of your project.
- Properly understanding and utilizing compound angles will help you take your woodworking skills to the next level and achieve professional results.
Techniques For Cutting Compound Angles With Precision:
- Measure and mark: Before making any cuts, measure and mark the dimensions of your desired compound angle on your workpiece. This will help ensure accuracy and precision throughout the process.
- Adjust the miter angle: Most miter saws have a rotating base that allows you to adjust the miter angle. Set the miter angle to the required angle for one side of your compound angle.
- Tilt the bevel angle: In addition to the miter angle, miter saws also have a bevel angle adjustment. Tilt the bevel angle to the required angle for the other side of your compound angle.
- Make a test cut: It’s always a good idea to make a test cut on a scrap piece of wood before cutting your actual workpiece. This will allow you to fine-tune your angles and ensure that everything is aligned correctly.
- Cutting process: Place your workpiece on the miter saw table and hold it firmly against the fence. Align the marked lines with the appropriate angles on the saw. Slowly lower the blade and make the cut, maintaining a steady and controlled motion.
- Check and adjust: After making the cut, check the accuracy of the compound angle by joining the cut piece with another workpiece. If the joint fits perfectly, congratulations! If not, make any necessary adjustments to your miter and bevel angles until you achieve the desired result.
Now that you have learned some techniques for cutting compound angles with precision, you can confidently tackle projects that require complex cuts. With practice and patience, you will soon be creating beautiful woodworking pieces that showcase your skills. Happy cutting!

Making Bevel Cuts At 45 Degrees
Learn how to adjust your miter saw to a precise 45-degree angle for making bevel cuts. Follow these simple steps to achieve accurate and clean bevel cuts without any hassle.
Understanding Bevel Cuts And Their Uses
A bevel cut is an angled cut made on the edge of a workpiece, allowing for more versatile and intricate woodworking projects. Adjusting a miter saw to a 45 degree angle is crucial for bevel cuts, which are commonly used in various applications such as picture frames, crown molding, and furniture-making.
By understanding the purpose and technique behind making bevel cuts, you can enhance your woodworking skills and take on more challenging projects. In this section, we will provide step-by-step instructions on how to adjust a miter saw to a 45 degree angle and make accurate bevel cuts.
Step-By-Step Instructions For Making Bevel Cuts At 45 Degrees
To ensure precise and clean bevel cuts at a 45 degree angle, follow these steps:
- Prepare your work area: Arrange your workpiece, miter saw, and necessary safety equipment in a well-lit and clutter-free workspace. Safety goggles and ear protection should always be worn when operating power tools.
- Identify the bevel adjustment: Locate the bevel adjustment on your miter saw. It is typically a large knob or lever positioned near the base or on the back of the saw. Refer to your miter saw’s manual if you’re unsure about the location of the bevel adjustment.
- Rotate the saw to the 45 degree angle: Turn on your miter saw and unlock the bevel adjustment. Gently rotate the saw until the bevel gauge reads 45 degrees, aligning the saw blade with the desired angle. Once in position, lock the bevel adjustment to secure the angle.
- Test the angle: Before cutting into your workpiece, it’s advisable to make a test cut on a scrap piece of material. This will help confirm that the 45 degree angle is accurately set and allows for any adjustments if needed.
- Secure the workpiece: Position your workpiece against the miter saw’s fence and clamp it securely. This will prevent any movement or slipping during the cutting process and ensure accurate and safe cuts.
- Activate the saw and make the cut: With the workpiece properly aligned and securely fastened, activate the miter saw and slowly lower the spinning saw blade onto the workpiece. Keep a steady and controlled motion as you guide the saw through the cut. Always maintain a firm hold on the workpiece and keep your hands clear of the saw blade.
- Inspect and refine the cut: Once the cut is complete, carefully examine the bevel cut for accuracy and smoothness. If necessary, use sandpaper or a file to refine any rough edges or imperfections.
- Continue the project: With your miter saw correctly adjusted to a 45 degree angle, continue making bevel cuts as required for your woodworking project. Remember to follow safety guidelines and take breaks as needed to avoid fatigue.
Making bevel cuts at a 45 degree angle is an essential technique for many woodworking projects. By following these step-by-step instructions, you can ensure accurate and professional-looking bevel cuts. Practice this skill regularly to improve your woodworking abilities and unlock new possibilities in your projects.

Designing And Building Projects With 45 Degree Angles
Learn how to adjust your miter saw to a 45-degree angle for designing and building projects. Achieve precise angled cuts with these simple steps.
Inspiration And Ideas For Incorporating 45 Degree Angles Into Woodworking Projects
Woodworking projects that incorporate 45 degree angles can add a touch of elegance and sophistication to your designs. Whether you’re crafting furniture, cabinets or decorative pieces, here are some ideas to inspire your creations:
- Geometric designs: Incorporate geometric patterns with 45 degree angles into your projects for a modern and stylish look. Use different types of wood and contrasting colors to create a visually striking effect.
- Chevron and herringbone patterns: These classic patterns can be achieved by cutting pieces of wood at 45-degree angles and arranging them in a zigzag or V-shaped pattern. Chevron patterns can be used on tabletops, flooring, or as decorative accents on cabinets and shelves.
- Angled joinery: Explore the art of creating sturdy connections with angled joinery techniques. Incorporate 45 degree angles in your joints such as miter joints, bevel joints, or dovetail joints for added stability and aesthetic appeal.
- Slanted legs and supports: Add unique and eye-catching elements to your furniture designs by incorporating slanted legs or supports. Chairs, tables, and benches can benefit from 45-degree angled legs, giving them a distinctive look.
- Diagonal panels: Create visually interesting panels on cabinets, doors, or walls by installing diagonal slats. Cutting the slats at 45-degree angles and placing them in a grid-like pattern adds depth and texture to your woodworking projects.
- Decorative inlays: Use 45 degree angles to create intricate decorative inlays on tabletops, trays, or boxes. Combining different wood species or incorporating contrasting materials like metal or acrylic can make these inlays truly stand out.
- Picture frames: Craft elegant and timeless picture frames by cutting 45 degree angles on the corners. This technique creates seamless joints and enhances the overall appearance of your frames.
- Hexagonal or octagonal shapes: Break away from traditional square or rectangular designs by incorporating 45 degree angles to form hexagonal or octagonal shapes. These geometric shapes can be used for tables, shelves, or even decorative wall panels.
Remember, the possibilities are endless when it comes to incorporating 45 degree angles into your woodworking projects. Let your imagination run wild and create unique pieces that showcase your skills and style.
Frequently Asked Questions For How To Adjust Miter Saw To 45 Degree Angle
How Do You Adjust A Ryobi Miter Saw To A 45 Degree Angle?
To adjust a Ryobi miter saw to a 45 degree angle, follow these steps:
1. Loosen the bevel lock knob.
2. Rotate the bevel scale to the 45-degree mark.
3. Tighten the bevel lock knob to secure the angle.
4. Use an angle finder or square to confirm the accuracy of the setting.
How To Cut A 45 Degree Angle With A Miter Saw For Baseboards?
To cut a 45 degree angle with a miter saw for baseboards, follow these steps:
1. Measure and mark the exact spot on the baseboard where the cut needs to be made.
2. Set the miter saw to a 45 degree angle, either left or right, depending on the desired direction of the cut.
3. Hold the baseboard firmly against the saw’s fence and align the marked spot with the blade.
4. Slowly lower the blade onto the baseboard and make the cut, ensuring that the blade stays aligned with the marked spot.
Why Is My Miter Saw Not Cutting 45?
Your miter saw may not be cutting at a 45-degree angle due to a misaligned fence or blade, dull blade, or incorrect bevel or miter settings.
How Do You Cut A 45 Degree Angle With A Miter Block?
To cut a 45-degree angle with a miter block, measure and mark the wood, align the saw blade with the mark, secure the wood, and carefully make the cut.
Conclusion
To sum it up, adjusting a miter saw to a 45-degree angle is a crucial skill for any woodworker or DIY enthusiast. By following the step-by-step instructions outlined in this blog post, you can confidently achieve precise and accurate cuts for your projects.
Remember to start by understanding the different parts of the miter saw and familiarize yourself with the adjustment features. Take your time to align the bevel and miter angles correctly, making use of the miter detent stops and bevel scale.
Don’t forget to double-check your measurements and practice a few test cuts to ensure accuracy. With proper care and attention, you’ll be able to achieve the perfect 45-degree angle on your miter saw and make clean, professional-looking cuts every time.
Happy woodworking!