How to Attach a Glass Table Top to a Wood Base (4 Methods)
The fastest, safest way to attach a glass table top to a wood base is with small non-adhesive silicone bumper pads set into the wood edge, not glue. Pads let the glass float slightly above the wood, absorb vibration, and come off cleanly if you ever need to replace the glass – a permanent adhesive bond doesn’t. Below we cover when adhesive, clips, or drilled standoffs make more sense instead, plus the one mistake (drilling tempered glass at home) that cracks more tabletops than any other step in this process.
Quick Answer: What to Use to Attach Glass to a Wood Base
Best Non-Adhesive Glass Table Top Fix
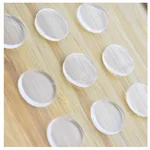 |
LINOUPOWER510 Glass Table Top Bumper Pads (20-Count) – $6.99 Sets a glass top on a wood base without glue, screws, or a permanent bond – the fix we recommend for most tables in this guide.
|
Bumper pads work for the majority of glass-topped tables because most glass tops don’t need a permanent bond – their own weight, combined with a few strategically placed pads, keeps them from sliding. If your table gets moved often, sits somewhere kids climb on furniture, or the glass overhangs the base significantly, pair pads with a centered dot of clear silicone adhesive (Method 2 below) for extra security without gluing the whole perimeter down.
Glass Thickness, Edge Finish, and Weight
Thickness is the decision that affects everything else – how the glass sits on the base, how much it weighs, and which attachment method will actually hold it. For a table top, three thicknesses cover almost every project:
- 1/4 inch (6mm): the minimum for a small side table or plant stand top, roughly 24 inches or under. Any larger and it flexes noticeably underfoot pressure or a dropped object.
- 3/8 inch (10mm): the standard choice for a dining table, coffee table, or desk top in the 30-48 inch range. This is what most pre-made glass table tops ship in.
- 1/2 inch (12mm): for anything larger than about 48 inches, or a base that only supports the glass at a few points (a pedestal or narrow trestle) instead of a full perimeter edge.
As a rough rule of thumb, glass weighs about 3.3 pounds per square foot for every 1/4 inch of thickness. A 36-inch round top cut from 3/8-inch tempered glass works out to roughly 35 pounds; the same top in 1/2-inch glass is closer to 45 pounds. That weight matters for two reasons: it’s most of what actually holds a bumper-pad-only installation in place, and it’s what your wood base’s joinery needs to support without racking. If your base uses thin legs and a light stretcher rather than a solid apron, size up the glass thickness or add a center support rather than relying on the base alone.
For the edge, order it polished rather than left raw off the cutting table – a raw-cut edge is sharp enough to cut skin and chips more easily. Flat polished gives a clean 90-degree edge; beveled angles the top edge for a slightly dressier look and catches less light glare along the rim. Either is fine functionally; it’s a style choice, not a structural one.
Tempered Glass, and the Drilling Mistake That Cracks It
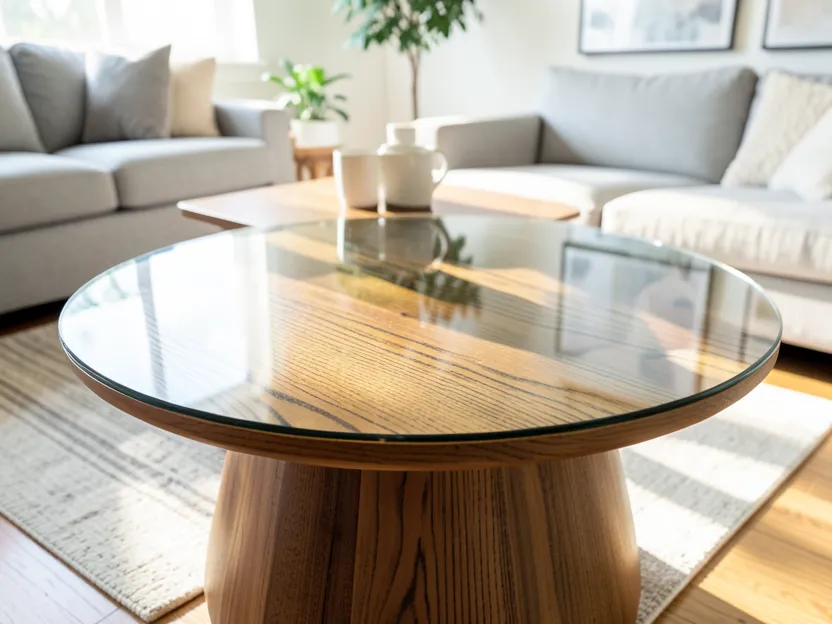
Use tempered glass for a table top, not regular annealed (float) glass – not as a nice-to-have, but as the safety-relevant choice. Tempering heats the glass and cools it rapidly, which puts the surface under compression and makes it roughly four times more resistant to impact than the same thickness of ordinary glass. If tempered glass does fail, it breaks into small, relatively dull pebbles instead of long blade-like shards. U.S. safety glazing standards (ANSI Z97.1 and the CPSC’s 16 CFR 1201) require tempered or laminated safety glass in furniture applications like this for exactly that reason, and most glass shops will default to tempered for a table order even if you don’t ask.
Here’s the mistake that trips people up: tempered glass cannot be drilled, cut, or edge-worked after it’s been tempered. The tempering process locks internal stress into the pane, and any attempt to drill through it afterward – even with a glass bit and water cooling – will shatter the entire sheet, not just chip a hole. If your attachment method calls for screw-mounted standoffs or bolted brackets that pass through the glass, that hole has to be specified when you order the glass, before it goes into the tempering oven. Annealed glass can be drilled after the fact by a professional with a diamond hole saw, but annealed glass is also the type that breaks into sharp shards, which is precisely why it’s a poor choice for a table top a family sits around. In practice: if you want a drilled/bolted look, order tempered glass pre-drilled to spec; if you’re using pads, adhesive, or clips instead, this doesn’t come up at all since nothing touches the glass surface.
Method 1: Non-Adhesive Silicone Bumper Pads
This is the method in the product box above, and it’s the right default for most glass-topped tables. Small silicone or rubber dots, roughly 3/4 inch to 1 inch across and 2-3mm thick, go on the wood base under where the glass will rest – typically one near each corner and one at the midpoint of each long edge for a rectangular top, or four to six evenly spaced around the rim for a round top. The pads create a small air gap between glass and wood (good for preventing scratches and trapped moisture), add just enough grip to stop sliding, and peel off cleanly if you ever swap the glass or refinish the base. Nothing bonds permanently, so there’s no adhesive residue to deal with later.
Method 2: Clear Silicone Adhesive
A 100% silicone adhesive (not silicone caulk with additives, and not a construction adhesive) gives a permanent, nearly invisible bond. Apply it in small dots or short beads – never a continuous line around the whole perimeter, since glass and wood expand and contract at different rates with humidity, and a fully sealed bond can crack the glass over a season as the wood moves underneath it. Four to six dots, similar spacing to the bumper-pad method above, is enough. Press the glass down with even pressure across the whole surface (not just the corners) and let it cure fully – check the product’s label, but most 100% silicone adhesives need 24 hours to reach handling strength and up to a week for a full cure. Because this bond is permanent, only use it if you’re confident you won’t need to remove the glass later.
Method 3: Clips and Brackets
Glass table top clips are small metal or plastic brackets that screw into the wood base and wrap over the glass edge, holding it in place mechanically instead of chemically. They’re a good middle ground: no adhesive residue, no drilling into the glass itself, and the glass lifts out if you ever need access to it. The tradeoff is visibility – clips sit at the edge of the glass and are visible from the side, so they suit a table where a bit of hardware showing fits the overall look (an industrial or trestle-style base, for example) more than a minimalist glass-and-wood piece meant to look seamless.
Method 4: Standoff Fittings (Drilled Mounting)
Standoffs are metal posts that bolt through a pre-drilled hole in the glass and anchor into the wood base, holding the top slightly raised above the surface. This gives the cleanest, most modern look of any method here, but it’s also the least forgiving: as covered above, the holes must be specified when the tempered glass is ordered and cut, not drilled afterward. It’s worth the extra lead time from the glass shop only if you specifically want the raised, hardware-visible standoff look – for most tables, bumper pads or adhesive get a comparable result with far less risk and no wait on a custom glass order.
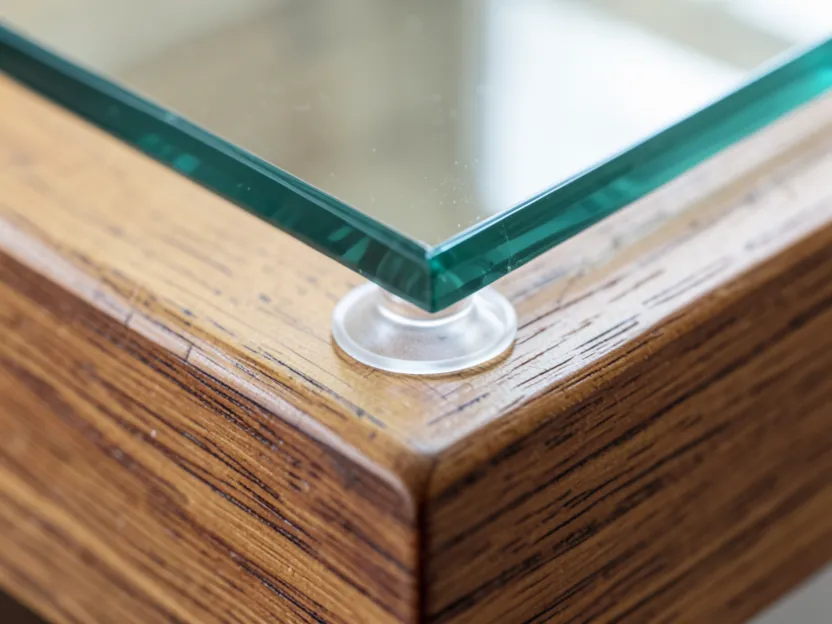
Step-by-Step: Installing Glass with Bumper Pads
- Clean the wood surface. Wipe down the top of the base with a soft cloth and a wood-safe cleaner, then let it dry completely. Any dust or residue under a pad will telegraph through as a bump under the glass.
- Mark the pad positions. Set the glass on the base first, dry, and use painter’s tape to mark where the edge lands. Remove the glass, then mark pad spots about an inch in from that line – near each corner, plus the midpoint of longer edges.
- Peel and press the pads. Most non-adhesive pads still need firm, even pressure to seat – press each one down for a few seconds rather than just setting it in place.
- Lower the glass straight down. Don’t slide it into position from the side; sliding is what scratches both the glass underside and the wood finish. Lower it flat, with a helper if it’s a large or heavy top.
- Check for rock. Press gently on each corner. If one corner rocks, the base isn’t perfectly flat or a pad is uneven – add a slightly thicker pad at that spot rather than forcing the base level, which can stress the glass.
Common Mistakes That Crack or Scratch Glass Table Tops
- Using annealed glass instead of tempered. It’s usually cheaper, which is exactly why it shows up by accident when ordering from a budget supplier – confirm “tempered” on the invoice, not just “glass table top.”
- Gluing a continuous bead around the full perimeter. Wood movement with humidity has nowhere to go, and stress cracks appear months later, often nowhere near the original bond line.
- Sliding the glass into place instead of lowering it. This is the single most common cause of visible scratches on a new glass top, and it happens during installation, not months of use.
- Skipping pads on a base with square, unfinished edges. Bare wood grain can scuff the underside of the glass over time even without sliding – pads solve this even when you don’t need them for stability.
- Drilling tempered glass after the fact to add a standoff or clip screw. Covered above, but worth repeating: this shatters the pane, it doesn’t just make a hole.
Cleaning and Long-Term Maintenance
Clean the glass with a standard glass cleaner and a microfiber cloth – paper towels can leave faint lint streaks on glass more than they do on other surfaces. Wipe in one direction rather than circles to avoid streaking, and avoid ammonia-based cleaners if the base has any tinted or oiled finish nearby, since overspray can dull a wood finish over time. Check bumper pads or adhesive dots every few months; silicone adhesive rarely needs attention, but non-adhesive pads can shift slightly with repeated cleaning or heavy use and are worth a quick push back into place. If you ever notice a corner sitting lower than the rest, that’s a pad that’s compressed or slipped, not a sign the glass itself is failing.
Frequently Asked Questions
How do you attach a glass table top to a wood base?
For most tables, set small non-adhesive silicone bumper pads on the wood base where the glass will rest, then lower the glass straight down onto them. This holds the top in place without a permanent bond. For a table that gets bumped often, add a few dots of 100% silicone adhesive at the center as well.
What type of adhesive should you use to attach a glass top to a wood base?
Use a 100% silicone adhesive, applied as small dots rather than a continuous bead around the edge. A full perimeter of adhesive doesn’t allow for the wood base expanding and contracting with humidity, which can crack the glass over time.
Can you drill holes in a glass table top to attach it to a wood base?
Only if the holes are specified before the glass is tempered. Tempered glass cannot be drilled afterward without shattering the entire pane. If you want a drilled, standoff-mounted look, order the glass pre-drilled to spec from the glass shop rather than trying to drill it yourself at home.
How do you maintain the attachment between a glass top and a wood base?
Check bumper pads every few months and press any that have shifted back into place. Silicone adhesive bonds rarely need attention once cured. If a corner starts sitting lower than the rest, it’s almost always a compressed or slipped pad, not a problem with the glass itself.
Conclusion
For the vast majority of glass-topped tables, non-adhesive bumper pads are the right call – they hold the top securely, protect both surfaces, and come apart cleanly if you ever need to change the glass or refinish the base. Reach for silicone adhesive only when you need a permanent bond, and skip drilled standoffs entirely unless you’re ready to special-order tempered glass with the holes cut in before it’s tempered, not after.
Sponsored / affiliate links. As an Amazon Associate I earn from qualifying purchases. I may earn additional commission from eligible campaigns.