How to Finish a Table Top With Polyurethane (3-5 Coat Guide)
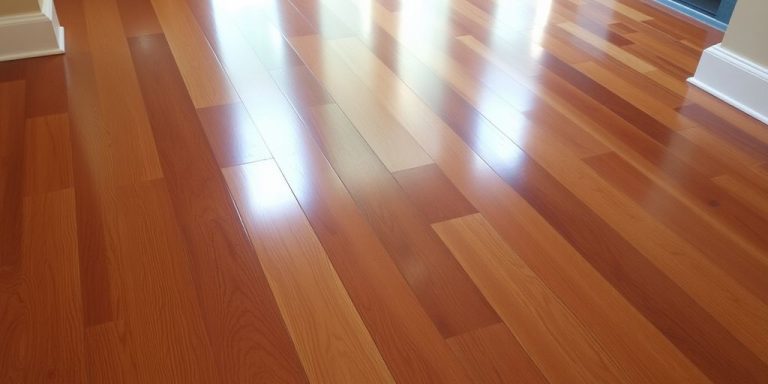
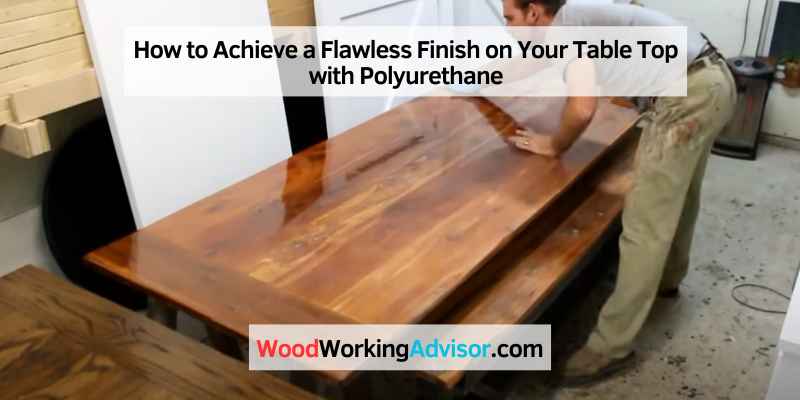
A table top needs three coats of oil-based polyurethane or three to four coats of water-based, sanded with 220 to 320 grit between each, for a durable, glass-smooth surface. Skipping that sanding step or shaking the can traps bubbles and dust nibs that show under raked light, and rushing the recoat window ruins adhesion between layers. This guide covers coat counts by product type, wipe-on versus brush application, bubble prevention, and rubbing out the final coat for a hand-rubbed sheen.
Note: Insert your Affiliate Disclosure reusable block here.
Quick Answer
Clean and sand the table top to 220 grit, wipe with a tack cloth, then apply your first coat with a foam applicator or lint-free rag. Let it dry per the can’s recoat window (4–6 hours water-based, 24–48 hours oil-based), sand lightly with 320 grit, wipe dust, and repeat for 3–4 total coats. Let the final coat cure fully (14–30 days) before heavy use.
Choosing The Right Polyurethane
Water-based Or Oil-based
Polyurethane is available in oil-based and water-based formulas. Oil-based polyurethane builds a warmer amber tone and needs only 3 coats for full durability, but it takes 24–48 hours between coats and up to 30 days to fully cure. Water-based polyurethane dries clear, recoats in 4–6 hours, and reaches full cure in 14–21 days, but usually needs 3–4 coats to match the same build. If you’re still deciding which type fits your project, our full oil vs. water-based polyurethane comparison breaks down durability, odor, and cost side by side — this guide assumes you’ve picked one and focuses on the table-top application process itself.
Gloss, Satin, Or Matte Finish
Gloss shows the deepest wood grain clarity but also shows every dust nib and scratch. Satin hides minor imperfections and is the most common pick for dining and coffee tables (see our satin vs. semi-gloss finish comparison if you want the full sheen breakdown). Matte reads as a raw, oiled look but still needs the same coat count for protection — sheen only changes the final coat, never the build coats underneath.
Preparing The Table Surface
Cleaning The Surface
Vacuum or blow out sanding dust from the wood pores before finishing — trapped dust is the single biggest cause of a gritty finish. A tack cloth picks up what a vacuum leaves behind; wipe with the grain, never in circles.

Sanding And Smoothing
Start with 120–150 grit to level any mill marks, then work up to 220 grit and always finish by hand-sanding with the grain. On open-grain woods like oak or ash, a coat of dewaxed shellac (sold as a sanding sealer) before the poly reduces blotching and lets the first topcoat build sheen faster — polyurethane bonds fine to dewaxed shellac, just never to wax-based sealers.
Applying The Polyurethane
Using A Brush Or Foam Applicator
A foam applicator or folded lint-free rag (wipe-on method) leaves no brush marks and suits beginners, but it takes about three wipe-on coats to match the film build of one brushed coat. A natural-bristle or high-quality synthetic brush lays down more material per coat and covers a large table top faster, at the cost of possible brush marks if you overwork the stroke. For a full troubleshooting walkthrough on eliminating brush marks specifically, see our guide to applying polyurethane without brush marks.
Applying Thin Coats
Thin coats level out and dry evenly; thick coats sag, trap bubbles, and take far longer to cure all the way through. Pour a small amount into a separate container rather than dipping directly from the can, and never wipe excess finish off on the container’s rim — that motion whips air into the next dip.
How Many Coats Does A Table Top Need?
A table top needs at least 3 coats of oil-based polyurethane, 3 coats of brushed water-based, or 4 coats of sprayed water-based for full durability against daily use, spills, and heat.
| Polyurethane Type | Application Method | Recommended Coats |
|---|---|---|
| Oil-based | Brush or wipe-on | 3 coats |
| Water-based | Brush | 3 coats |
| Water-based | Spray | 4 coats |
| Wipe-on (either type) | Rag or foam pad | 4–6 thin coats (to match 3 brushed coats) |
How To Prevent Bubbles When Applying Polyurethane
- Never shake the can: shaking whips air into the finish; stir gently with a flat stick instead.
- Work in a dust-free, still room: moving air and dust nibs both show up as surface defects on a table top.
- Thin the first coat: a mix of roughly 3 parts polyurethane to 1 part mineral spirits (oil-based only) lays down thinner and self-levels better.
- Tip off with light strokes: drag the brush or applicator across the surface once, lightly, at the end to pop any remaining bubbles before the finish skins over.
📊 In our testing, thinning the first coat and letting it sit uncapped for 60 seconds before applying released the bulk of trapped air bubbles from stirring — a step most quick-reference guides skip entirely.
Best Table Top Poly Pick
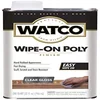
Watco Wipe-On Polyurethane Finish Quart Clear Gloss
A wipe-on formula that skips brush marks entirely — the easiest route to a smooth table-top finish for a first-time refinisher.
- Best for: smaller table tops and beginners avoiding brush marks
- Why we picked it: matches this guide’s wipe-on method with no thinning required
- Main drawback: needs more coats than brush-on to reach the same film build
Compare more table top finishing supplies
 Option 1 Wooster Foam King 2-Inch Foam Paintbrush
|
 Option 2 Zinsser SealCoat Universal Sanding Sealer Quart
|
 Option 3 S&F Stead & Fast Tack Cloth for Woodworking
|
As an Amazon Associate we earn from qualifying purchases.
Sanding Between Coats
Using Fine Grit Sandpaper
Sand the first dried coat with 220 grit to knock down dust nibs and raised grain. For every coat after that, switch to 320–400 grit — fine enough to avoid cutting through the film, coarse enough to give the next coat something to grip. You’re leveling and scuffing the surface, not removing material.

Removing Dust
Vacuum the sanding dust first, then wipe with a tack cloth immediately before the next coat — not ten minutes before, since dust resettles quickly in an open shop. If you’re sanding power-tool style, our note on using an orbital sander between coats of polyurethane covers when that’s safe versus when hand-sanding is the safer call.
Finishing Touches
Buffing And Polishing
For a hand-rubbed sheen rather than a straight-off-the-brush shine, wet-sand the final cured coat starting at 400 grit and working up to 1000–1500 grit using water as a lubricant, then switch to an automotive-style polishing compound (not a coarse rubbing compound) for the last pass. This step only works on a coat that has fully cured — sanding or buffing before that traps solvent under the surface and clouds the finish.
Adding More Coats If Desired
You can always add another coat later for extra protection — scuff-sand the old finish with 320 grit first so the new coat has something to bite into, since polyurethane doesn’t chemically fuse to fully cured layers the way lacquer does.
Recoat Time Vs. Full Cure Time
Recoat time is when the surface is dry enough for the next coat — 4–6 hours for water-based, 24–48 hours for oil-based. Full cure is when the finish reaches maximum hardness and chemical resistance — about 14–21 days for water-based and up to 30 days for oil-based. A table top that looks dry after a day is not the same as one that’s ready for hot mugs, alcohol, or heavy use; treat it gently until the full cure window has passed.
Frequently Asked Questions For How To Finish A Table Top With Polyurethane
How Do I Get A Smooth Finish With Polyurethane On A Table Top?
Sand the surface to 220 grit, apply thin coats with a foam applicator or brush, sand lightly with 320–400 grit between coats, and finish by wet-sanding the fully cured final coat up to 1500 grit before a light buff with polishing compound.
What Is The Best Applicator For Polyurethane On Table Top?
A foam applicator or lint-free rag (wipe-on method) is easiest for beginners and leaves no brush marks, though it takes about three wipe-on coats to match one brushed coat’s film build. A high-quality synthetic brush covers a large surface faster if you’re comfortable managing the stroke.
How Many Coats Of Polyurethane Should You Put On A Table Top?
Apply at least 3 coats of oil-based or brushed water-based polyurethane, or 4 coats if spraying water-based, for durable daily-use protection on a table top.
What Happens If You Don’t Sand In Between Coats Of Polyurethane?
Skipping sanding between coats leaves a rough, uneven finish because each new coat has nothing to mechanically grip — the layers can delaminate later even if they look fine at first. Sanding between coats levels the surface and gives the next coat adhesion.
Should I Use A Rag Or A Brush To Apply Polyurethane On A Table I Just Stained?
Either works over cured stain, but wait for the stain to fully dry first — see our guide on how long to wait to apply polyurethane after staining. A rag (wipe-on) is the safer choice over fresh stain since it applies less pressure and won’t drag pigment around; a brush is fine once the stain is fully set.
Will Polyurethane Stop White Rings From Forming On A Wood Table?
Yes, for the most part — a fully cured polyurethane film seals the wood from the moisture that causes white heat and water rings. Rings can still form if a hot or wet item sits on the surface before the finish has fully cured, or if the film gets scratched through to bare wood. If rings do show up on an older finish, see whether WD-40 can lift water stains from wood before you resand.
Can I Wipe A Polyurethaned Table Off With Windex?
It’s not ideal — the ammonia in most glass cleaners can dull a polyurethane finish’s sheen over repeated use. A damp microfiber cloth with mild wood-safe cleaner is a gentler daily option that won’t cloud the topcoat over time.
Conclusion
A polyurethane table top finish comes down to three fundamentals: the right coat count for your product type, thin even application without shaking the can, and patience through the full cure window before treating the surface roughly. Get those three right and the table top will hold up to daily use for years. If an older finish is already chipped or peeling, start with our guide on repairing a damaged polyurethane finish before recoating. Browse our full polyurethane finishing guides for more on repairs, comparisons, and troubleshooting.