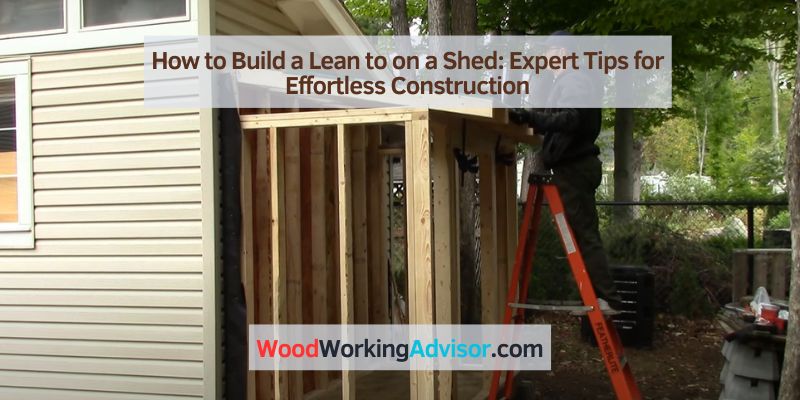
How to Build a Lean-To on a Shed
To build a lean-to on a shed, start by measuring and marking the location, then dig holes for the posts and set them in concrete. Next, attach the beams and rafters, and finally, install the roofing material and siding.
Building a lean-to on a shed can provide extra storage space or a covered area for outdoor activities. It’s a relatively straightforward project that can be completed with basic carpentry skills and tools. By following a few simple steps and using the right materials, you can create a functional and aesthetically pleasing addition to your shed.
In this guide, we’ll walk you through the process of building a lean-to on a shed, covering everything from planning and preparation to the final touches. Whether you’re looking to expand your shed’s storage capacity or create a shaded outdoor area, building a lean-to can be a practical and rewarding DIY project.
Assess The Shed Structure
In order to successfully build a lean-to on a shed, it is crucial to first assess the shed’s structure. By evaluating the existing shed’s stability and condition, and determining the attachment points for the lean-to, you can ensure a secure and durable structure.
Evaluate The Existing Shed’s Stability And Condition
Before adding a lean-to to your shed, it’s important to assess the stability and condition of the existing structure. Inspect the walls, roof, and foundation for any signs of damage or weakness. Look for cracks, rot, or any structural issues that may need to be addressed before proceeding with the lean-to construction. If the shed is not in good condition, it’s essential to make any necessary repairs or reinforcements before adding the lean-to.
Determine The Attachment Points For The Lean-to
Once you have confirmed the stability and condition of the shed, the next step is to determine the attachment points for the lean-to. Identify the most suitable areas on the existing shed where the lean-to will be attached. This could include securing the lean-to to the shed’s wall, roof, or foundation, depending on the design and structure of the shed. It’s important to ensure that the attachment points are strong and capable of supporting the additional weight and stress that the lean-to will impose on the shed.

Choose The Right Materials
When building a lean-to on a shed, choosing the right materials is crucial to ensure durability and longevity. From weather-resistant options to the comparison between wood, metal, and polycarbonate, selecting the appropriate materials will play a significant role in the success of your lean-to project.
Selecting Weather-resistant Materials For Longevity
When selecting materials for your lean-to, it’s imperative to prioritize weather-resistant options. Weather conditions can be harsh, and utilizing materials that can withstand these elements is key to ensuring the longevity of your lean-to structure. Consider materials that are specifically designed to withstand rain, snow, and prolonged exposure to sunlight. This will prevent premature deterioration, reducing the need for frequent maintenance and replacement.
Comparing Wood, Metal, And Polycarbonate Options
When it comes to the material options for your lean-to, it’s essential to compare the pros and cons of wood, metal, and polycarbonate. Each material has its own set of characteristics and benefits, so making an informed decision is vital. Wood provides a traditional and natural look, but it requires regular maintenance to ensure durability. Metal offers strength and durability, but it may be prone to rust and corrosion if not properly treated. Polycarbonate, on the other hand, offers a lightweight and durable option that provides natural light transmission, but it may have limitations in terms of load-bearing capacity.
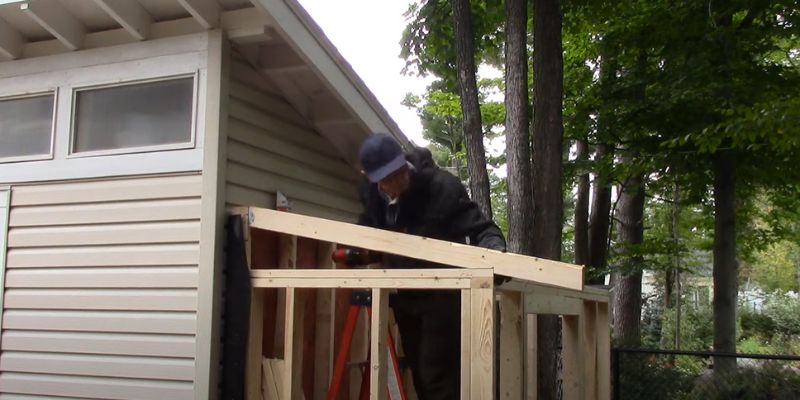
Expert Tips For Effortless Construction
When it comes to building a lean-to on a shed, expert tips for effortless construction can help simplify the process and ensure a successful outcome. By breaking down the construction process into simple steps, emphasizing the importance of accurate measurements, and providing advice on selecting tools and equipment, you can save time and effort while building a functional and sturdy lean-to.
Breaking Down The Construction Process Into Simple Steps
Breaking down the construction process into simple steps can make the task of building a lean-to on a shed much more manageable. By starting with a solid plan and carefully outlining each step, you can avoid confusion and ensure that each stage of the construction is completed effectively. From preparing the site and foundation to installing the roofing, a clear and systematic approach can streamline the process and minimize errors.
Emphasizing The Importance Of Accurate Measurements
Accurate measurements are crucial when building a lean-to on a shed. Taking the time to measure and mark your materials precisely can prevent costly mistakes and ensure that all components fit together seamlessly. When cutting, trimming, or positioning parts of the lean-to, precision is key to achieving a professional-looking result.
Advice On Selecting Tools And Equipment For The Job
Selecting the right tools and equipment for building a lean-to on a shed is essential for efficiency and safety. From basic hand tools to power tools, each item should be chosen carefully to match the specific requirements of the project. Investing in high-quality tools can also enhance the overall construction experience and contribute to the durability of the lean-to.
Roofing And Waterproofing Techniques
Roofing and waterproofing are crucial aspects when building a lean-to on a shed. It is essential to choose the right materials and follow the correct installation steps to ensure the roof is durable and weather-resistant.
Options For Lean-to Roofing Materials
When it comes to roofing materials for a lean-to, there are several options to consider. The choice of material will depend on factors such as budget, climate, and the desired aesthetic. Here are some popular options:
- Metal Roofing: Durable and long-lasting, metal roofing is a popular choice for lean-tos. It provides excellent protection against the elements and is low maintenance.
- Asphalt Shingles: Affordable and available in various colors, asphalt shingles are a common choice for lean-to roofs. They offer good weather resistance and are relatively easy to install.
- Polycarbonate Panels: Lightweight and translucent, polycarbonate panels allow natural light to filter through while providing protection from rain and UV rays.
Step-by-step Guide To Installing The Roofing
Once you have selected the roofing material, it’s important to follow a systematic approach to ensure proper installation. Here’s a step-by-step guide to installing the roofing for your lean-to:
- Prepare the Roof Deck: Ensure the roof deck is clean, dry, and free of any debris. Repair any damaged areas and install appropriate underlayment or sheathing as needed.
- Install Drip Edge: Attach a drip edge along the eaves to prevent water from seeping under the roofing material.
- Lay the Roofing Material: Start laying the roofing material from the bottom and work your way up, following the manufacturer’s instructions for the specific material.
- Secure the Roofing: Use appropriate fasteners to secure the roofing material in place, ensuring a tight fit and proper alignment.
- Seal the Seams: Apply sealant or appropriate flashing to seal any gaps or seams to prevent water infiltration.
By following these steps and using quality materials, you can effectively install the roofing for your lean-to, providing reliable protection from the elements.
Enhancing Structural Integrity
When building a lean-to on a shed, ensuring structural integrity is crucial to
the longevity and stability of the added structure. By enhancing the structural
integrity, you can create a safe and long-lasting lean-to that effectively
extends the functionality of your shed. Let’s explore the specific measures to
reinforce the structural integrity of your lean-to.
Reinforcing Points Of Attachment To The Shed
Securing the attachment points where the lean-to connects to the shed is
fundamental to its structural stability. It’s essential to use durable, heavy-
duty hardware that can withstand the elements. By reinforcing attachment
points with quality screws, brackets, or bolts, you can ensure a secure
connection that can endure various weather conditions.
Cross-checking All Installed Components
Thoroughly inspecting and cross-checking all installed components is
imperative to guaranteeing the structural integrity of the lean-to. Double-
check the alignment and fastening of beams, rafters, and supports to confirm
their proper installation. By executing this meticulous process, you can
identify any potential weak points or installation errors that could jeopardize
the stability of the lean-to.
Lean-to Longevity Essentials
When it comes to extending the functionality and versatility of your shed, adding a lean-to is an excellent way to maximize space and enhance its utility. However, to ensure the longevity of your new lean-to, it’s important to consider some essential factors. Proper maintenance, seasonal considerations, and weatherproofing are crucial for ensuring that your lean-to stands the test of time and remains in good condition.
Regular Maintenance Tips For Your New Lean-to
Regular maintenance is key to preserving the structural integrity and appearance of your new lean-to. Here are some important maintenance tips to keep in mind:
- Regularly inspect and clean gutters to prevent clogging and water damage.
- Check for any signs of wear and tear, such as loose or damaged roofing materials, and address them promptly.
- Apply a fresh coat of paint or sealant as needed to protect the wood from moisture and UV damage.
- Keep surrounding vegetation trimmed to prevent debris buildup and pest infestations.
Seasonal Considerations And Weatherproofing
Seasonal changes and extreme weather conditions can have a significant impact on the durability of your lean-to. To ensure its longevity, consider the following seasonal considerations and weatherproofing measures:
- Regularly inspect the roof and walls for any signs of damage, especially after heavy rain or storms.
- Apply weatherproof sealant to all exposed wood surfaces to prevent moisture infiltration.
- Consider installing overhangs or awnings to provide additional protection from harsh sunlight and rain.
- Install proper ventilation to prevent moisture buildup and mold growth, especially in humid climates.
- Consider investing in high-quality roofing materials and coatings that are designed to withstand harsh weather conditions.
Frequently Asked Questions For How To Build A Lean To On A Shed
How Much Does It Cost To Build A Lean-to?
The cost to build a lean-to varies based on size, materials, and labor, typically ranging from $1,500 to $5,000. Factors such as permits and site preparation can also impact the overall expenses. It’s best to consult with a contractor for an accurate estimate.
How Far Apart Should Post Be For A Lean-to Shed?
For a lean-to shed, posts should be spaced 6 to 8 feet apart for sturdiness and support. Close proximity ensures structural integrity.
What Materials Do I Need For A Lean-to Shed?
You’ll need pressure-treated lumber, plywood, roofing material, nails, screws, and a level surface.
How Do You Cut Rafters For A Lean-to Shed?
To cut rafters for a lean-to shed, measure the roof slope, mark the top plate, and cut the rafters accordingly with a saw. Make sure to account for overhang and any necessary adjustments. Always use proper safety equipment and double-check measurements to ensure a precise fit.
Conclusion
Building a lean-to on a shed is a great way to create additional storage or workspace. By following the steps outlined in this guide, you can successfully complete this project and enhance the functionality of your shed. With the right tools and materials, you can take your shed to the next level.