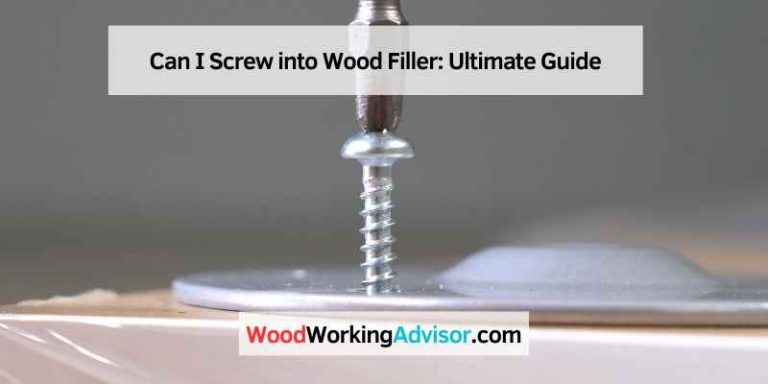
How to Install Thread Inserts – A Step-by-Step Guide for Seamless Installation!
To install thread inserts, first, drill a hole in the desired location, ensuring the hole is the correct size for the insert. Then, using a threading tool, screw the insert into the hole until it is flush with the surface.
Subheading: Essential Tools For A Seamless Thread Insert Installation
Discover the must-have tools for a seamless thread insert installation process. Easily learn how to install thread inserts with these essential tools for a hassle-free experience.
Essential Tools For A Seamless Thread Insert Installation
Installing thread inserts can be a straightforward process if you have the right tools at your disposal. In this section, we will discuss the essential tools needed for a seamless thread insert installation. From a screwdriver to a complete thread insert kit, having these tools on hand will ensure a successful installation process.
Screwdriver
A screwdriver is a versatile tool that is indispensable for installing thread inserts. Here are some key points to keep in mind about screwdrivers:
- Choose a screwdriver with the appropriate size and type of tip to match the thread insert you are installing.
- Ensure that the screwdriver has a comfortable grip for easy handling during the installation process.
- Use a screwdriver with a magnetic tip to conveniently hold the thread insert in place while screwing it into position.
- For manual installation, a flat-head or Phillips screwdriver is typically sufficient, depending on the type of thread insert being used.
Threaded Insert Installation Tool
A threaded insert installation tool is specifically designed to simplify the installation process and ensure accurate placement of the thread insert. Here’s what you should know about this tool:
- A threaded insert installation tool helps you apply the necessary force to install the thread insert securely.
- Look for an installation tool that is compatible with the particular type and size of thread insert you are working with.
- Consider investing in a tool with adjustable depth control to achieve consistent and precise installation depths.
- Some installation tools feature a ratcheting mechanism, making it easier to rotate the tool during installation.
Drill
A drill is an essential tool for creating the pilot hole required before installing a thread insert. Here’s what you need to know about using a drill:
- Choose a drill bit of the appropriate size for the pilot hole, matching the outer diameter of the thread insert.
- Ensure that the drill bit is securely attached to the drill’s chuck to prevent any accidents during the drilling process.
- Operate the drill at a moderate speed to avoid overheating and damaging the material.
- Use a higher drill speed for softer materials like wood, and a slower speed for harder materials like metal.
Tap
A tap is a tool used to create internal threads in the pilot hole, ensuring a perfect fit for the thread insert. Consider the following points when using a tap:
- Select a tap that matches the thread size and pitch of the thread insert you are installing.
- Apply cutting oil or lubricant to the tap to reduce friction and help facilitate the tapping process.
- Using a tap handle or a tap wrench, rotate the tap clockwise to cut the threads gradually into the pilot hole.
- Avoid applying excessive force while using the tap to prevent breaking or damaging the tap or the workpiece.
Thread Insert Kit
A thread insert kit is a comprehensive package that includes all the necessary tools and inserts for a seamless installation process. Here’s what you should know about thread insert kits:
- A thread insert kit typically includes a range of thread sizes and inserts to accommodate various applications.
- Look for a kit that offers high-quality thread inserts made from durable materials for long-lasting performance.
- Ensure that the kit includes installation tools such as drills, taps, and insertion tools, making it a convenient all-in-one solution.
- Always follow the instructions provided with the thread insert kit for proper installation techniques and guidelines.
Installing thread inserts can be a smooth process when armed with the right tools. Remember to choose the appropriate screwdriver, have a threaded insert installation tool on hand, use a drill for creating pilot holes, employ a tap to cut internal threads, and consider investing in a thread insert kit for convenience.
With these essential tools at your disposal, you’ll be well-equipped to achieve a seamless thread insert installation.
Subheading: Preparing The Workpiece For Thread Insert Installation
Preparing the workpiece for thread insert installation is an essential step in the process of installing thread inserts. This ensures proper fitting and durability of the inserts, leading to secure and long-lasting threaded connections.
Preparing The Workpiece For Thread Insert Installation
When it comes to installing thread inserts, proper preparation of the workpiece is crucial to ensure a successful installation. This involves a few important steps that we will cover in detail below.
Identifying The Correct Hole Size:
To begin, it is essential to determine the correct hole size for the thread insert. Follow these points to identify the appropriate hole size:
- Refer to the specifications provided by the manufacturer or supplier of the thread insert for the recommended hole diameter.
- If no specific recommendations are available, consider the material of the workpiece and the size of the desired thread insert.
- Use a drill bit gauge or measuring tool to accurately measure the size of the existing hole or select the appropriate drill bit size for the thread insert.
Drilling The Hole:
Once the correct hole size is identified, it’s time to drill the hole. Follow these steps for drilling the hole:
- Secure the workpiece firmly in a stable position using clamps or a vise to minimize any movement during drilling.
- Choose a drill bit with the exact size or slightly smaller than the required hole size.
- Align the drill bit perpendicular to the workpiece surface and gently apply pressure while drilling.
- Ensure a slow and steady drilling motion, periodically withdrawing the bit to clear away chips and prevent overheating.
- Drill the hole to the desired depth, considering the thread insert length and any necessary allowance.
Tapping The Hole:
Tapping the hole is the next critical step in preparing the workpiece for thread insert installation. Follow these guidelines for tapping the hole:
- Select a compatible tap size that matches the thread insert specifications.
- Apply tapping fluid or lubricant to minimize friction and aid in smooth threading.
- Align the tap perpendicular to the hole and gradually rotate it clockwise, exerting moderate and consistent pressure.
- Monitor the tap’s progress and periodically retract it to remove any accumulated chips or debris.
- Continue tapping until the desired depth is achieved, ensuring accuracy for proper thread engagement.
Cleaning The Hole:
Before inserting the thread insert, it is essential to clean the hole thoroughly. Follow these steps for cleaning the hole:
- Use compressed air or a cleaning brush to remove any remaining debris or loose particles from the tapped hole.
- Inspect the hole carefully to ensure it is free from any obstructions or contaminants that may affect the thread insert installation.
- If necessary, use a solvent or cleaner to remove any residual grease, oil, or dirt from the hole.
- Allow the cleaned hole to dry completely before proceeding with the thread insert installation.
By following these steps, you can effectively prepare the workpiece for thread insert installation. The proper identification of the hole size, accurate drilling, tapping, and thorough cleaning of the hole are vital to ensure a secure and reliable thread insert installation.

Subheading: Choosing The Right Thread Insert
Choosing the right thread insert is essential for a successful installation. With proper selection, you can ensure a secure and durable fit for your project. Here’s a guide to help you make the right choice and install thread inserts effectively.
Understanding Different Thread Insert Types:
There are various types of thread inserts available in the market, each designed to suit different applications. Understanding the differences between these types is crucial in choosing the right insert for your specific needs. Here are some common thread insert types:
Helical Inserts:
Helical inserts, also known as coil inserts, are widely used and offer excellent performance in a wide range of applications. They consist of wire coils with a helical shape. These inserts provide strong threads that can withstand heavy loads and are resistant to wear and tear.
Key-locking Inserts:
Key-locking inserts are designed for high-strength applications where vibration or torque resistance is essential. They have a unique design with keys that lock the insert into the surrounding material, providing a secure and permanent thread.
Self-tapping Inserts:
Self-tapping inserts, as the name suggests, have cutting threads that allow them to tap their own threads directly into the parent material. These inserts are commonly used in softer materials like plastics or wood, where it may not be possible to use conventional tapping methods.
Press-fit Inserts:
Press-fit inserts, also known as expansion inserts, are installed by pressing or hammering them into a pre-drilled hole. They have serrated or knurled exteriors that grip the surrounding material and create a tight bond. These inserts are ideal for applications where a strong fit is required.
Threaded Inserts:
Threaded inserts have internal threads that are designed to match the size and pitch of the bolt or screw being used. They are commonly used in metal applications and provide a reliable and durable threaded connection.
Selecting The Appropriate Insert For The Application:
Choosing the right thread insert for your application is crucial to ensure proper function and longevity. Here are some factors to consider when selecting an insert:
Material compatibility:
Ensure that the insert material is compatible with the parent material. Consider factors such as corrosion resistance, temperature resistance, and chemical compatibility to ensure that the insert will perform well in the given environment.
Application requirements:
Evaluate the specific requirements of your application, such as load-bearing capacity, vibration resistance, or torque resistance. Different inserts have varying capabilities, so choose one that can meet the demands of your application.
Installation method:
Consider the ease of installation and the required tools or equipment. Some inserts may require special installation techniques, while others can be easily installed with basic tools.
Size and thread type:
Determine the appropriate size and thread type of the insert based on the specific application. Incorrect sizing can lead to weak threads or improper fit.
Consider expert advice:
If you are not sure which insert to choose, consult with industry experts or manufacturers who can provide guidance based on their experience and knowledge.
Remember, choosing the right thread insert is essential for ensuring a secure and reliable threaded connection. By understanding the different types of inserts available and considering the specific requirements of your application, you can confidently select the appropriate insert.
Subheading: Installing The Thread Insert
Learn the step-by-step process of installing thread inserts easily with this comprehensive guide. From preparation to final installation, this article provides all the essential tips and tricks you need to successfully install thread inserts.
Aligning The Insert With The Hole:
Before installing a thread insert, it’s crucial to properly align it with the hole in the material. By following these steps, you can ensure accurate alignment:
- Determine the location of the hole where you want to install the thread insert.
- Use a marker or a center punch to mark the center of the hole.
- Align the tip of the installation tool with the marked center point.
- Hold the tool steady and make sure it is perpendicular to the material’s surface.
- Aligning the insert correctly is essential for ensuring the integrity of the threaded connection, preventing any issues with misalignment or imbalance.
Using The Installation Tool:
Once you have aligned the insert with the hole, it’s time to use the installation tool to secure the insert in place. Here’s how you can do it:
- Attach the installation tool to the thread insert.
- Make sure the tool is securely fitted to the insert to avoid any movement during installation.
- Hold the tool firmly, keeping it perpendicular to the material’s surface.
- Ensure that the installation tool is centered with the hole and the insert.
- Apply downward pressure while turning the installation tool clockwise to drive the insert into the material.
- Using the installation tool correctly ensures proper engagement of the insert with the material, creating a strong and reliable threaded connection.
Driving The Insert Into The Hole:
With the installation tool in place, it’s time to drive the thread insert into the hole. Follow these steps for successful installation:
- Apply consistent downward pressure on the installation tool while turning it clockwise.
- Continue driving the insert until it is fully seated in the material, flush with or slightly below the surface.
- Avoid excessive force, as it can damage the insert or the material.
- Take care not to overtighten the insert, as it could strip the threads or cause other issues.
- Driving the insert securely into the hole ensures a secure and durable threaded connection.
Ensuring Proper Insertion Depth:
After driving the insert, it’s crucial to ensure that it has been inserted to the correct depth. Here are some guidelines to follow:
- Use a depth gauge or a similar tool to measure the depth of the insert.
- The insert should be inserted flush with or slightly below the surface of the material.
- Check the manufacturer’s specifications for the recommended insertion depth.
- If necessary, adjust the insertion depth by driving the insert further or removing it partially.
- Confirming the proper insertion depth guarantees the effectiveness and reliability of the thread insert.
By following these steps, you can successfully install thread inserts, ensuring accurate alignment, using the installation tool correctly, driving the insert securely, and ensuring the proper insertion depth.
Subheading: Verifying The Thread Insert Installation
This subheading focuses on the crucial step of verifying the installation of thread inserts. Follow these guidelines to ensure a successful installation process.
Verifying The Thread Insert Installation
Once you’ve successfully installed thread inserts, it’s essential to verify their installation to ensure they are properly aligned, engaged, and possess sufficient strength. This verification process will help guarantee the longevity and effectiveness of your thread inserts. Here’s what you need to do:
Checking For Proper Alignment:
- Inspect the thread inserts visually, ensuring they are aligned with the surface of the material.
- Use a caliper or similar measuring tool to measure the thread insert’s position depth.
- Confirm that the thread insert is flush with the surface or has the desired protrusion, depending on the specific application.
Confirming Thread Engagement:
- Gently insert a mating fastener into the thread insert.
- Carefully thread the fastener in, ensuring it smoothly engages with the thread insert.
- If the engagement feels rough, difficult, or if the fastener does not thread in properly, it may indicate a misaligned or improperly installed thread insert.
Testing The Installed Insert’S Strength:
- Apply moderate torque to the fastener using an appropriate wrench or tool.
- Check for any signs of movement, rotation, or loosening of the thread insert.
- If the thread insert holds firmly without any signs of weakness or failure, it is considered to have sufficient strength.
By following these steps, you can effectively verify the installation of your thread inserts, ensuring proper alignment, engagement, and strength. This verification process is crucial for reliable and durable fastening in various applications.
Subheading: Dealing With Thread Insert Misalignment
Installing thread inserts can be a challenging task, especially when dealing with misalignment issues. Learn how to effectively navigate this obstacle and ensure proper installation in this informative guide.
Thread insert misalignment can be a common issue when installing thread inserts, but not to worry, there are solutions available. Let’s explore the causes of misalignment and the best ways to correct it.
Causes Of Misalignment:
- Incorrect drilling: Misalignment can occur if the hole drilled for the thread insert is not aligned properly. This can happen due to human error or using the wrong drill bit size.
- Improper tapping: When tapping the hole for the thread insert, if the tap is not aligned correctly, it can lead to misalignment. It is essential to ensure that the tap is perpendicular to the work surface to avoid this issue.
- Thread insert installation: Sometimes misalignment happens during the process of inserting the thread insert into the hole. Care must be taken to ensure that the insert is aligned properly before installation.
Solutions For Correcting Misalignment:
- Redrilling the hole: If misalignment is detected, you can correct it by redrilling the hole. Use a drill bit that matches the thread insert size and carefully create a new hole in the right position.
- Retapping the hole: In cases where misalignment has occurred during the tapping process, retapping the hole can solve the problem. Use a tap that matches the thread insert specifications and ensure it is aligned properly this time.
- Using rethreading tools: Another solution for misalignment is to use rethreading tools. These tools can help realign the threads and fix the misalignment without the need for drilling or tapping.
Remember, it is crucial to take your time and double-check the alignment at each step of the process to prevent misalignment. With the right tools and techniques, you can ensure a successful installation of thread inserts.
Subheading: Addressing Thread Insert Pull-Out Or Loosening
Ensure a secure fit for thread inserts with these essential steps. Prevent thread insert pull-out or loosening by following these guidelines for a successful installation process.
Thread inserts are a common solution for reinforcing threads in various applications, but occasionally, issues such as thread pull-out or loosening may arise. These problems can be frustrating, but with the right knowledge and preventive measures, you can ensure a secure and long-lasting thread insert installation.
In this section, we will discuss the reasons behind thread insert pull-out or loosening, preventive measures to avoid such issues, as well as effective remedies to fix them.
Reasons For Pull-Out Or Loosening:
- Inadequate thread engagement: Insufficient engagement between the thread insert and the parent material can lead to pull-out or loosening. This typically occurs when the threaded hole is not deep enough or when the insert is not fully screwed in.
- Improper installation technique: Incorrect installation techniques can greatly contribute to thread insert pull-out or loosening. This includes overtightening the insert, using excessive force during installation, or failing to apply the appropriate torque values.
- Vibrations and dynamic loads: Vibrations and dynamic loads can cause stress on the thread insert, leading to loosening over time. This is especially common in applications that experience constant movement, such as automotive or machinery components.
- Corrosion and environmental factors: Exposure to corrosive substances or harsh environments can degrade the integrity of thread inserts, resulting in pull-out or loosening. Factors like moisture, temperature fluctuations, and chemical exposure can weaken the bond between the insert and the parent material.
Preventive Measures:
To minimize the risk of thread insert pull-out or loosening, consider implementing these preventive measures:
- Proper thread engagement: Ensure the threaded hole is deep enough to provide ample engagement for the insert. The insert should be fully screwed in, allowing for sufficient contact with the parent material.
- Correct installation technique: Follow the manufacturer’s guidelines for installation torque values and techniques. Avoid overtightening the insert, as this can strain the threads and increase the likelihood of pull-out or loosening.
- Thread locking compounds: Applying thread locking compounds, such as adhesive or anaerobic compounds, can enhance the bond between the insert and the parent material. These compounds prevent vibrations from causing thread movement and minimize the risk of loosening.
- Material compatibility: Consider the compatibility of the thread insert material with the parent material. Using inserts made from materials that are resistant to corrosion or suited for the application’s environmental conditions can help prevent pull-out or loosening.
Remedies For Fixing Pull-Out Or Loosening Issues:
If you encounter thread insert pull-out or loosening problems, there are several effective remedies to address the issue:
- Reinforce with epoxy: Apply epoxy resin around the insert to reinforce its bond with the parent material. This can strengthen the grip and prevent further pull-out or loosening.
- Use larger inserts: In cases where the initial thread insert is insufficient for the application, using a larger insert can provide a more secure fit. Ensure that the threaded hole is appropriately sized to accommodate the larger insert.
- Helicoil or Recoil inserts: If the original thread insert is severely damaged or the parent material cannot sustain a solid thread, consider removing it and replacing it with a Helicoil or Recoil insert. These inserts create new threads that are stronger and more resistant to pull-out or loosening.
- Consult a professional: If the issue persists or if you lack the necessary expertise, it is advisable to consult a professional or an experienced technician who can assess the problem and provide suitable solutions.
By understanding the reasons for thread insert pull-out or loosening, taking preventive measures, and knowing effective remedies, you can ensure a successful and secure thread insert installation. Remember to implement proper installation techniques, choose suitable materials, and reinforce as necessary to maintain the integrity of threaded connections.
Credit: maydone.com
Subheading: Pre-Installation Considerations
Before installing thread inserts, it is important to consider the pre-installation aspects. These include assessing the material, ensuring proper tooling, and selecting the appropriate insert size and type for a successful installation process.
Pre-Installation Considerations:
Choosing the appropriate thread insert size:
- Determine the type of material you are working with to select the correct thread insert size.
- Consider the thread size and pitch requirements of the application.
- Verify the external and internal thread sizes to ensure compatibility with the thread insert.
Selecting the appropriate drill and tap:
- Use a drill bit that matches the recommended size for the thread insert.
- Ensure the drill bit is sharp and in good condition to create clean, precise holes.
- Select a tap that corresponds to the thread size of the insert and is suitable for the material being used.
Determining the required insert depth:
- Measure the length of the hole you have drilled to calculate the required insert depth.
- Take into account any protrusions or clearances that may affect the final depth.
- Consider the desired thread engagement length to determine the appropriate insert depth.
Installing the thread insert:
- Clean the drilled hole thoroughly to remove any debris or contaminants.
- Thread the insert onto the installation tool, making sure it matches the external thread size.
- Apply a thread locking compound if necessary to secure the insert.
- Slowly insert the thread insert into the hole, making sure it is aligned properly.
- Use the installation tool to drive the insert into the hole until it is flush with the surface.
By carefully considering these pre-installation factors, you can ensure a successful and secure installation of thread inserts. Remember to choose the appropriate size, select the right tools, and determine the correct insert depth for optimal results.
Subheading: Installation Tips
Ensure a smooth and efficient installation of thread inserts with these essential tips. Learn the proper techniques and guidelines to follow for a successful installation process.
Thread inserts are a popular solution for repairing or reinforcing threaded holes in various materials. Whether you are working on automotive repairs, furniture assembly, or any other related project, properly installing thread inserts is essential for achieving a strong and long-lasting result.
In this section, we will explore some valuable tips to make the installation process smoother and more efficient. Let’s dive right in!
Lubricating The Installation Tool:
- Apply a light coating of lubricant, such as cutting oil or thread lubricant, to the installation tool.
- Lubrication reduces friction, allowing the thread insert to be inserted more easily and preventing galling or seizing.
- Make sure to reapply lubricant periodically to maintain smooth operation throughout the installation process.
Ensuring Consistent And Steady Insertion Force:
- Apply steady pressure using a wrench or installation tool designed for thread inserts.
- Avoid applying excessive force, as it can lead to misalignment or damage to the insert or surrounding material.
- Maintain a consistent and controlled insertion force to ensure proper installation without compromising the integrity of the thread insert.
Properly Positioning The Insert During Installation:
- Position the thread insert squarely over the tapped or drilled hole.
- Ensure that the insert is aligned properly to prevent cross-threading or misalignment.
- Use a thread insert alignment tool if necessary to guide the insert into position with greater accuracy.
Applying Threadlocker For Added Security:
- After installing the thread insert, apply threadlocker to the external threads.
- Threadlocker helps secure the insert in place, preventing it from loosening or coming out under vibration or stress.
- Choose a threadlocker suitable for your specific application and follow the manufacturer’s instructions for proper application.
By following these installation tips, you can ensure a successful and reliable installation of thread inserts in your projects. Remember to lubricate the installation tool, maintain consistent insertion force, position the insert correctly, and consider using threadlocker for added security.
With these guidelines in mind, you’ll be well-equipped to handle thread insert installations like a pro. Happy installing!
Subheading: Post-Installation Recommendations
Discover essential post-installation recommendations for thread inserts. Learn step-by-step instructions on how to install thread inserts and ensure a seamless and efficient installation process. Increase your knowledge with expert tips and guidance to achieve optimal results.
Thread inserts are a crucial component in many industrial applications, providing strong and reliable threads in materials such as metal and plastic. After successfully installing thread inserts, it is essential to follow recommended post-installation practices to ensure their long-term effectiveness and prevent any potential issues.
In this section, we will discuss two key recommendations for post-installation: checking the tightened torque and conducting periodic inspections for maintenance. Additionally, we will highlight the importance of replacing damaged or worn inserts.
Checking The Tightened Torque
To ascertain the stability and reliability of thread inserts, it is vital to verify the tightened torque after installation. The tightened torque refers to the rotational force applied to the insert during installation. Here are some key points to consider:
- Inspect the inserts using a torque wrench to ensure they are tightly secured.
- Use the recommended torque value provided by the manufacturer to achieve the optimal performance of the inserts.
- If the tightened torque is insufficient, the inserts may loosen over time, potentially causing damage or failure in the threaded connections.
- Conversely, excessive torque can result in the deformation of the threaded components, diminishing their integrity.
It is crucial to strike a balance between these extremes, providing a secure and stable thread connection while avoiding any detrimental effects on the surrounding materials.
Conducting Periodic Inspections For Maintenance
Regular inspections are necessary to maintain the performance and reliability of thread inserts. By conducting periodic checks, any signs of wear, damage, or loosening can be identified and addressed promptly. Consider the following during inspections:
- Inspect the threaded connections for any visible signs of wear, corrosion, or damage.
- Check for any indications of loosening, such as thread backing out or decreased clamping force.
- Assess the surrounding components for potential issues, such as cracks or fractures.
- If any problems are discovered, take immediate action to rectify the situation and prevent further complications.
By conducting regular inspections, you can effectively identify and address any issues related to thread inserts, ensuring their proper functioning and extending their lifespan.
Replacing Damaged Or Worn Inserts
In some cases, thread inserts may become damaged or worn out over time, necessitating their replacement. It is crucial to address any compromised inserts promptly to maintain the integrity of the thread connections. Here are a few important points to remember:
- If an insert shows signs of excessive wear, stripped threads, or other forms of damage, it should be replaced immediately.
- When replacing the insert, ensure that the new one matches the specifications and dimensions of the previous insert.
- Follow the manufacturer’s guidelines to correctly install the replacement insert, paying attention to the recommended tightened torque.
By promptly replacing damaged or worn thread inserts, you can ensure the continued strength and reliability of the threaded connections, preventing potential failures and maintaining the overall performance of the assembly.
Remember, adhering to these post-installation recommendations is crucial in maximizing the effectiveness and longevity of thread inserts. By regularly checking tightened torque, conducting inspections for maintenance, and replacing damaged inserts, you can ensure the continued reliability and performance of your threaded connections in various industrial applications.
Frequently Asked Questions For How To Install Thread Inserts
How Do You Install Threaded Inserts Accurately?
To install threaded inserts accurately, follow these guidelines:
1. Prepare the surface and ensure it is clean and smooth.
2. Use a drill bit of the appropriate size to create a pilot hole.
3. Screw the insert into the pilot hole using a proper installation tool.
4. Make sure the insert is aligned and flush with the surface. By following these steps, you can achieve precise installation of threaded inserts.
Should You Glue Threaded Inserts?
No, it is not recommended to glue threaded inserts.
How Deep To Drill For Threaded Inserts?
Threaded inserts should be drilled to a depth that allows the insert to sit flush with the surface.
How Do You Install Threaded Insert Nuts On Wood?
To install threaded insert nuts on wood, follow these steps:
1. Drill a hole slightly smaller than the diameter of the insert.
2. Insert the insert into the hole and use a hammer or mallet to tap it in.
3. Apply some glue or epoxy to ensure a secure fit.
4. Allow the glue to dry before using the threaded insert nut. Note: It’s important to choose the right size and type of insert nut for your project.
Final Thought
Installing thread inserts can greatly improve the strength and durability of threaded holes, making them an essential component in various industries. With the right tools and techniques, anyone can successfully install thread inserts and enjoy the benefits they offer. By following the step-by-step process outlined in this blog post, you can ensure that your thread inserts are properly installed and ready for use.
Remember to choose the correct insert size and material for your specific application, as this will affect the overall performance. Taking the time to carefully prepare the hole, insert the thread insert, and properly secure it will result in strong and reliable threaded connections.
Whether you’re repairing damaged threads or reinforcing weak ones, installing thread inserts is a vital skill that every DIY enthusiast and industry professional should have in their toolbox. So, don’t hesitate to give it a try and experience the difference it can make in your projects.