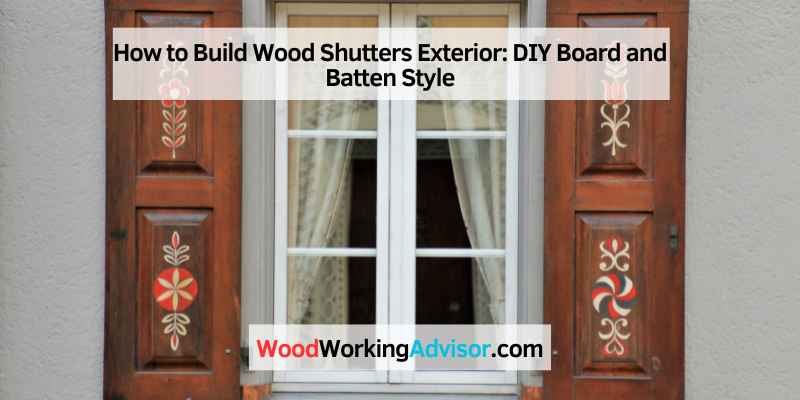
How to Build Wood Shutters Exterior: DIY Board and Batten Style
To build wood shutters exterior, use cedar as it is naturally resistant to rot, bacterial and fungal growth and changes in temperature. Wood shutters exterior can provide a charming appeal to any home and add a touch of rustic beauty.
Building wood shutters exterior can seem daunting, especially if you’re new to DIY projects. However, it can be a fun and rewarding experience. To build wood shutters exterior, you need to select the right type of wood, the right tools, and have an understanding of the correct dimensions.
When it comes to building wood shutters exterior, there are different types of wood to select from, but cedar is the most suitable option. Cedar is suitable for shutters and other exterior projects due to its natural oils that make it rot-resistant and growth-free. We’ll guide you through the step-by-step process of building wood shutters exterior while providing tips to make the process easier and seamless.
Introduction To DIY Wood Shutters
Learn how to build DIY wood shutters exterior with a few tools, basic skills, and cedar wood. Cedar wood is a popular choice for exterior shutters because of its resistance to rot, bacteria and fungal growth, and temperature changes. You can check out YouTube videos or DIY websites for detailed instructions on how to make your own wood shutters.
Are you looking for an affordable way to add some rustic charm to your home’s exterior? Building your own DIY wood shutters may just be the solution you need. Not only are these shutters durable and functional, but they also add character and a sense of authenticity to any home. With the right tools and materials, this is a project that even a beginner DIYer can tackle. In this guide, we will provide you with simple steps to build DIY wood shutters and list the benefits, materials, and tools required for the project.
Benefits Of DIY Wood Shutters
DIY wood shutters offer several benefits to homeowners. Here are some of the primary advantages:
- Cost-effective: DIY wood shutters are more cost-effective than buying pre-made shutters.
- Customizable: You can customize the size, style, and finish of your DIY shutters to match your home’s exterior.
- Durable: Wood is a sturdy and long-lasting material that can withstand harsh weather conditions.
- Rustic charm: DIY wood shutters add a touch of rustic charm, warmth, and texture to your home’s exterior.
- Increased privacy: Shutters increase the privacy of your home and keep the prying eyes of neighbors and passersby at bay.
Materials Required
To build DIY wood shutters, you will need the following materials:
- Cedar boards or other durable wood of your choice
- Battens (also made of cedar or another solid wood of your choice)
- Exterior wood glue
- Screws or nails for attaching the boards and battens
- Exterior wood stain or paint
- Water-resistant clear coat for added protection
Tools Required
To build DIY wood shutters, you will need the following tools:
- Tape measure and pencil for marking the boards
- Circular saw or table saw for cutting the boards to the desired size
- Screwdriver or drill for attaching the boards and battens
- Sanding block or power sander for sanding the edges and surfaces of the boards
- Paintbrush or sprayer for applying the wood stain or paint
- Level for ensuring the shutters are installed straight and even

Preparing For Building Wood Shutters
Building wood shutters for the exterior of your home adds beauty and functionality. To build them, you need the right tools, materials, and knowledge. From measuring the windows and cutting the wood to assembling and finishing the shutters, following a detailed plan can help you achieve a professional look while keeping the costs low.
Building wood shutters for your home’s exterior is a great way to add charm and character to your property. Wood shutters can add warmth and beauty to any style of home, from rustic farmhouse to modern urban design. Before starting your project, it’s essential to prepare carefully to ensure a successful outcome. This section will cover the necessary steps to follow when preparing for building wood shutters, including measuring windows for shutters, choosing the right wood, cutting and sanding wood.
Measuring Windows for Shutters
The first step for building wood shutters is to measure your windows to determine how much wood you’ll need. Measure both the height and width of the window opening to determine the size of the shutters needed. Be sure to measure the window at several points, as windows may not be perfectly square. Additionally, remember to factor in the shutter’s depth when measuring, which should be approximately 1″ thicker compared to the window’s framing to give them the desired depth and visual appeal.
Choosing the Right Wood
When it comes to finding the right wood for your shutters, selecting the right species is essential. Cedar is an excellent option for shutters and other exterior projects because the natural oils in cedar make it resistant to rot and bacterial and fungal growth. Additionally, cedar is known for its stability, making it less likely to swell or shrink due to changes in temperatures. Other great options include cypress, pine, and redwood. Remember to choose wood that’s suitable for exterior use and pressure-treated wood or redwood is the best option if you want the shutters to last longer.
Cutting and Sanding Wood
Once you have measured windows and chosen the right wood species, it’s time to cut and sand the wood. Start by cutting the boards to size, paying close attention to the straightness of the saw cuts, all shutter edges should be planed smooth before assembly. Be sure to sand all of the edges of the wood, paying extra attention to the smooth sides of the stiles and rails. Once all the shutters have been sanded and smoothed, they are ready to be assembled.
In conclusion, before you start building wood shutters for your home’s exterior, be sure to prepare yourself for the task carefully. Measuring windows to determine the correct size, choosing the right species of wood and sanding and cutting the wood correctly are all critical steps to ensure your project’s success. By taking your time and following these simple steps, you can build a beautiful set of shutters that will add charm and character to your home’s exterior for years to come.
Building The Exterior Wood Shutters
Learn how to build your own DIY exterior wood shutters with just a few simple steps. Using materials like cedar and board-and-batten, you can create beautiful and functional shutters that will add charm to your home’s exterior. Follow tutorials and videos online for guidance on cutting, sanding, staining, and attaching the shutters to your windows.
Building the Exterior Wood Shutters is an exciting and rewarding project for any DIY enthusiast. Wood shutters can add a charming farmhouse look to your home and provide a classic feel. In this section, we will go over the steps to build Board and Batten Style Shutters that can be easily assembled and attached. The board and batten style is popular due to its simplicity, and it complements any home exterior without overpowering it.
Building Board And Batten Style Shutters
Begin by measuring the size of your windows to determine the number of shutters needed. Next, cut the wood boards to length according to your measurements. It is important to plane the boards to a common thickness before assembling the panels. Use a saw to cut boards to size. Cedar is a great choice for shutters as it is naturally resistant to rot, fungal growth, and temperature changes, which makes it an ideal wood for exterior use.
Assembling The Panels
Once all the boards are cut, make square alignment marks across them to ensure they all line up evenly. Apply wood glue along the board edges to seal them. Then place the boards together to form the panel. Use clamps to secure the boards in place until the glue dries.
Attaching The Battens
Once the boards have been glued, it is time to attach the battens. Cut the battens to the required length and attach them to the panel using screws. The structured batten helps to prevent the panels from shifting over time and adds an additional element of charm and texture.
Finishing The Boards
After assembling and attaching the panels, pre-finish the boards with wood stain before attaching the battens. Once the stain has dried, apply a water-resistant clear coat to the front. This will help to protect the wood and give it a polished look. Finally, it is time to install the shutters. Using screws, mount the shutters onto your home’s exterior.
Building Board and Batten Style Shutters is an easy and satisfying outdoor project that adds utility and style to your home’s exterior. By following these simple steps, you’ll be on your way to creating beautiful shutters that will last for many years.
Installing The Wood Shutters
To build wood shutters exterior, start by measuring your windows and cutting the wood to length. Next, assemble the panels using wood glue and fasteners, and attach the battens. Sand and stain the shutters, then apply a water-resistant clear coat to the front.
Finally, install the shutters, securing them with wood screws. Cedar is an excellent choice of wood for exterior shutters due to its natural resistance to rot, bacterial, and fungal growth.
Positioning and Attaching the Shutters
Before positioning the wood shutters, make sure to clean the surface where you’ll be installing them. The shutters should sit flush against the window frame, so take accurate measurements before proceeding to position them. Aligning them with the center of the window is the best practice.
Attach the hinges to the shutters and then hold them up to the window to mark the position of the hinges on the window frame. After marking the positions, pre-drill holes into the frame, and then screw the hinges onto the frame.
Adding Pencil Bases
Finish off your exterior wood shutters with pencil bases. These are small pieces of wood that fit neatly under the bottom of the shutters, giving them an aesthetically pleasing look. Pencil bases are a great way to hide any gaps between the bottom of the shutters and the window frames.
Cut the pencil bases to size, and then sand them smooth. Once sanded, attach them to the bottom of the shutters with screws or nails. To make sure the pencil bases are visually appealing, they can be painted or stained to match the shutters.
In conclusion, positioning and attaching the wood shutters and adding pencil bases are important steps in the process of building exterior wood shutters. Make sure to take your time and evaluate everything before affixing or cutting anything. Remember to choose a suitable wood type such as cedar for the shutters as it naturally resists rot, bacterial, and fungal growth.
Tips And Tricks For Building Wood Shutters
Learn how to build wood shutters for your exterior windows with these helpful tips and tricks. Use cedar wood for its natural resistance to rot, bacterial and fungal growth, and changes in temperature. Follow DIY tutorials from HGTV and YouTube to make your own custom shutters and save on installation costs.
Building wood shutters for your home’s exterior can increase the curb appeal and add value to it. However, it’s essential to know some tips and tricks to build durable and beautiful shutters. Here are some suggestions to follow when building wood shutters for your home.
Leaving Space Behind The Shutters
When installing exterior wood shutters, be sure to leave some space behind them for proper ventilation. Proper ventilation prevents the buildup of moisture, which can damage the shutters and the structure behind them over time. A gap of half an inch is sufficient to keep the shutters well-ventilated while providing a beautiful look to your house.
Customizing The Shutters With Cutouts Or Hardware
Adding cutouts or hardware to your wood shutters can make them unique and add character to your home’s exterior. For example, you can create a design based on the architecture of your home or the landscape, or add some hardware to accentuate the look of the shutter. A wide range of cutouts and hardware options are available from which you can select.
What Kind Of Wood Should You Use For Exterior Shutters?
Cedar is an excellent choice for exterior wood shutters due to its natural resistance to decay and insects. Cedar has natural oils that protect against moisture and temperature changes, making it perfect for outdoor use. Other popular choices are Redwood, Cypress, and Hardwoods, which are also long-lasting options.
Conclusion
By following these tips and tricks for building wood shutters, you can enhance your home’s curb appeal and add value to it. Use high-quality materials, take precise measurements, and pay attention to the details for an elegant, professional look. Don’t hesitate to customize your shutters to reflect your personal style and add character to your home’s exterior.
Benefits Of Building Your Own Wood Shutters
Building your own wood shutters offers a cost-effective solution that gives your home a unique, stylish look. By making these shutters yourself, you can customize their size, shape, and color to fit your home’s exterior. Plus, using high-quality, natural wood like cedar ensures that they’ll last for years to come.
Cost Savings
Building your own wood shutters exterior can save you a lot of money compared to purchasing pre-made shutters. When you build your own shutters, you can purchase the materials for a fraction of the cost of pre-made shutters. The cost savings can be even greater if you have a large number of windows to cover. Additionally, you can choose the quality of materials to fit within your budget, ensuring that you get the most for your money.
Customization Options
When you build your own wood shutters exterior, you have the opportunity to create a personalized look that complements your home’s style and architecture. You can customize the size, shape, color, and design of the shutters to match the unique characteristics of your home. You also have the flexibility to choose from a variety of woods, such as cedar or pine, that are suited for exterior use.
Pride Of DIY Achievement
Building your own wood shutters exterior gives you a sense of pride and ownership in your home. You get to show off your creative talents and DIY skills as well as the unique beauty of your shutters. Not only will you gain satisfaction from the finished product, but also the actual process of building the shutters can be a rewarding experience. It is a satisfying feeling knowing that you completed a project that adds value to your home.

Frequently Asked Questions On How To Build Wood Shutters Exterior
What Kind Of Wood Should You Use For Exterior Shutters?
Cedar is a great choice for exterior shutters due to its natural resistance to rot, bacterial and fungal growth, and protection from temperature changes. It is less likely to swell or shrink. Use cedar wood to build your exterior shutters.
How To Make External Shutters?
To make external shutters, start by measuring your windows and cutting boards to the appropriate length. Plane the boards to a common thickness prior to assembling the panels, and attach square alignment marks to all boards. Apply wood glue along the board edges and attach battens.
Pre-finish the boards with wood stain before attaching the battens and apply a water-resistant clear coat to the front. Use cedar wood for better outdoor resistance. You can follow DIY tutorials available on HGTV, YouTube, and various blogs.
How Thick Should Wood Be For Shutters?
For exterior shutters, the wood thickness should be at least 1 inch. Cedar is an ideal choice for shutters due to its natural resistance to rot and fungal growth and protection from temperature changes. Use wood screws to secure the crosspieces equally on both ends.
Remember to measure the height and width of your windows and cut the boards to the appropriate length.
How Much Does It Cost To Build Wood Shutters?
The cost of building wood shutters varies depending on the materials used and the size of the shutter. However, cedar is a good option for exterior shutters because cedar is naturally resistant to rot and weather changes. You can follow DIY tutorials available online to build them for practically free.
Conclusion
Building your own wood shutters exterior can be a fun and satisfying DIY project. With the right tools, materials, and instructions, you can create beautiful and functional shutters that enhance the appearance and value of your home. Whether you opt for board and batten, farmhouse, or modern shutters, choosing the right type of wood is crucial for their durability and resistance to weather elements.
By following the steps outlined in this guide and applying your creativity, you can create stunning shutters that showcase your craftsmanship and DIY skills.