How to Chamfer a Hole in Wood: A Simple Guide
Chamfering a hole in wood is a process of cutting away the sharp edges of a hole so that it is easier to insert a dowel or screw. The most common way to chamfer a spot is with a drill bit, but you can also use a router bit or chisel. When using a drill bit, use one slightly smaller than the diameter of the hole you are trying to chamfer.
Start by drilling into the corner of the hole at an angle and then continue digging around the hole’s perimeter. If you are using a router bit, start routing along one edge of the hole and then move around the perimeter until all of the sharp edges have been removed. To finish, use a chisel to remove any roughness around the hole’s edge.
- Select the appropriate drill bit
- For a 45-degree chamfer, use a 1/8-inch or 3/16-inch drill bit
- For a 60-degree chamfer, use a 1/4-inch drill bit
- Center the tip of the drill bit on the edge of the hole you wish to chamfer
- Apply light pressure to the drill as you start to bore into the wood
- Keep your hand close to the workpiece for control, and continue drilling until you reach the desired depth
- If using a 1/8-inch or 3/16-inch bit, make several passes around the circumference of the hole, digging deeper with each access until you get the final depth
- If using a 1/4-inch bit, only one pass should be necessary, provided that you are careful not to apply too much pressure and overheat or damage the bit.
Credit: www.leevalley.com
What is the Best Tool to Chamfer a Hole?
There are many different chamfering tools, and the best one depends on the specific application. For instance, a countersink drill bit would be the best tool if you need to chamfer a large hole. Countersink bits have a sharp point that allows them to cut a clean, precise chamfer without leaving any burrs or sharp edges.
A deburring tool will be the best option if you need to chamfer a small hole. These tools have a small, rotating blade that can quickly remove any burrs or sharp edges from the inside of a hole.
What Tool Do You Use to Chamfer Wood?
Chamfering is the process of creating a beveled edge on a piece of wood. This can be done with various tools, but the most common is a chamfer bit. A chamfer bit is a specialized router with two cutting edges at different angles.
The primary cutting edge cuts the slope, while the secondary cutting edge cleans up any roughness left behind by the direct cutter. Chamfer bits come in various sizes and angles, so you can create whatever size and shape of chamfer you desire. When choosing a chamfer bit, pay attention to the tip (usually 45 degrees is standard) and the cut depth.
You’ll also want to ensure that your router can accommodate the size of the bit you’re interested in using.
Can You Chamfer With a Countersink?
If you’re looking to create a chamfer or beveled edge on a workpiece, you may wonder if a countersink can be used to complete the task. The answer is yes, you can use a countersink to chamfer an edge – but there are some things you should keep in mind before doing so. For starters, it’s important to note that not all countersinks are created equal.
Some have flutes (the spiral grooves cut into the bit) designed for drilling only, while others have flutes made explicitly for chamfering and reaming edges. If you use a countersink for chamfering, make sure you have one with the proper type of flute. Additionally, when using a countersink for chamfering purposes, it’s essential to keep the tool at a shallower angle than typically when drilling holes.
This will help prevent the bit from catching on the workpiece and potentially causing damage. Lastly, take care not to over-chamfer the edge of your workpiece. A slight chamfer is all that’s needed – anything more could weaken the piece’s structural integrity.
With these tips in mind, using a countersink to create a clean and professional-looking chamfer is easy!
What Does It Mean to Chamfer a Hole?
Chamfering is the process of cutting or grinding away material from the edge of a hole, typically at a 45° angle. This creates a beveled edge that can help reduce stress concentrations and allow smoother transitions between different materials. Chamfering can also create decorative effects on the edges of jewelry or other metalwork.
There are two main types of chamfers: internal and external. Internal chamfers are cut into the inside edge of a hole, while external chamfers are cut into the outside edge. Chamfers can be created using various tools, including end mills, routers, and even hand files.
The tool will depend on the machined material and the chamfer’s desired size and shape. When creating an internal chamfer, it is essential to avoid breaking through to the other side of the material. This can cause problems with alignment or weaken the overall structure.
External chamfers are less likely to cause these issues but should still be cautiously approached. Chamfering is a simple way to add strength and durability to any hole-based project. When choosing your tools and materials, you can ensure that your chamfered holes will stand up to whatever you throw at them – literally!
How to Chamfer a Hole
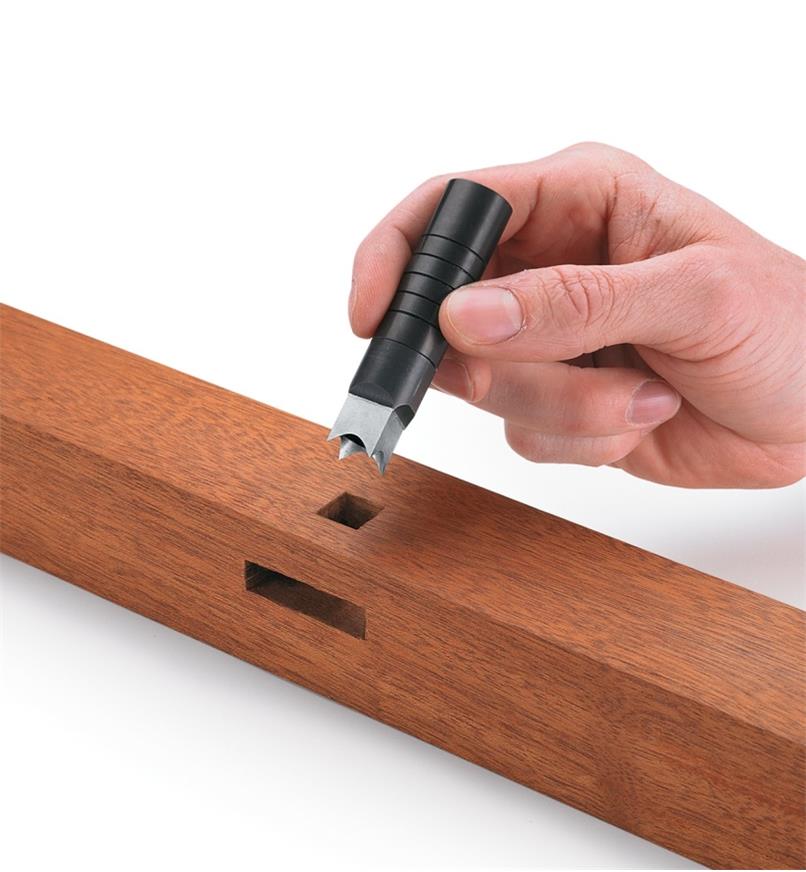
Hole Chamfer Tool
A hole chamfer tool is a handy little tool that can chamfer the edges of holes. This is useful when you want to create a smooth, finished edge on a spot that will be visible from the outside. The tool consists of a little, sharp blade mounted on a handle.
To use the tool, insert the blade into the hole and twist it around to create a smooth, even edge. There are many sizes and shapes of hole chamfer tools available so that you can choose the best suited for the task at hand. When shopping for a hole chamfer tool, remember the size of the holes you’ll be working with and the type of material you’ll use it on.
Some materials, such as metals, may require a different blade type than others. If you’re looking for a quality hole chamfer tool, we recommend checking out our selection at Toolbarn. We carry tools from top brands like Milwaukee and Dewalt, so you can rest assured knowing you’re getting a high-quality product.
Hole Chamfer Vs Countersink
If you’re working with metal, you’ve probably come across the terms “hole chamfer” and “countersink.” But what’s the difference between the two? Let’s take a closer look.
A hole chamfer is simply a beveled edge on a hole. This can be achieved with a drill bit or end mill that has a tapered cutting edge. The advantage of using a hole chamfer is that it provides a more robust connection than a countersink because there’s more surface area for welding or brazing.
On the other hand, a countersink is an indentation made around the perimeter of a hole. This is typically done with a specialized tool called a countersink bit. The benefit of using a countersink is that it allows screws to be flush with the material’s surface, giving your project a clean, finished look.
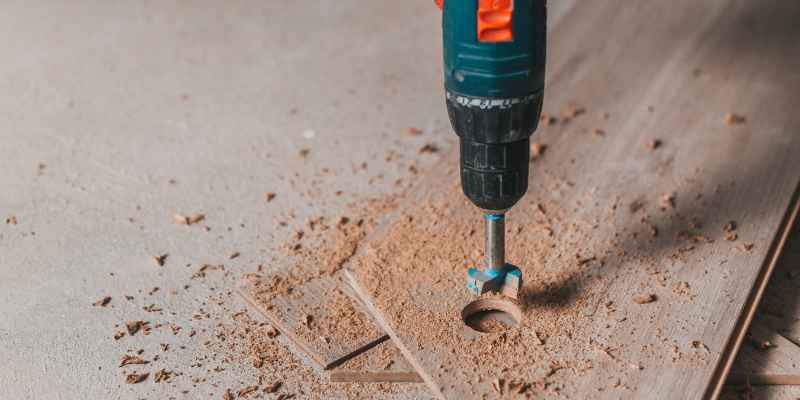
How to Counterbore a Hole in Wood
When it comes to drilling holes in wood, there are a few different ways you can do it. One method is called counterboring, and it’s used when you need to create a large, smooth-edged hole. Here’s how to counterbore a hole in wood:
First, drill a pilot hole that’s slightly smaller than the size of your desired finished hole. Next, use a countersink bit to enlarge the top of the pilot hole. Finally, use a Forstner or spade bit to widen the rest of the gap to the desired size.
Counterboring is an easy way to create smooth-edged holes in wood, and it’s ideal for situations where you need a large-diameter fix. Just remember to drill slowly and carefully, so you don’t damage your workpiece.
Chamfer Drill Bit
Chamfer drill bits are specialized drill bits used to create a chamfered or beveled edge on a workpiece. Chamfer drill bits can be used to develop both internal and external chamfers. Chamfer drill bits come in various sizes and shapes, depending on the size and shape of the chamfer desired.
Chamfer drilling is a process where a hole is drilled at an angle rather than perpendicular to the surface. The most common use for this is to avoid sharp edges when two pieces are joined together later, either by welding or bolting. When joining these pieces together, there mustn’t be any sharp corners because it could cause stress concentrations, eventually leading to failure.
There are different types of chamfers: – 90° External – This type of chamber is created by holding the bit at a 90° angle to the workpiece and feeding it into the workpiece from the outside edge towards the center. – 90° Internal – This chamfer is created by holding the bit at a 90° angle to the workpiece and feeding it into the workpiece from the inside edge towards the center.
– Countersink – A countersink chamber is shallower than other types of chamfers and has an angled bottom so that screws can sit flush with or below the surface of the materials they’re being driven into. Screws are inserted into this type of counterbore before fastening two materials together.
Conclusion
Chamfering is cutting away the sharp edges of a hole in wood. This can be done with a chisel, router, or knife. The goal is to create a smooth transition from the hole’s edge to the rest of the wood surface.
There are a few different ways to chamfer a hole in wood. The most common method is to use a chisel. First, mark out where you want to remove material.
Second, hold the chisel at an angle and push it into the wood. Finally, twist the chisel back and forth to create chips that are evenly removed from the surface. Another option is to use a router.
Routers can create cuts and do not require as much skill as using al. First, mark out where you want to remove material. Second, set up your router with a Chamfer bit.
Third, route around the hole’s perimeter following your line until you have achieved the desired depth and shape. Finally, you could also use a knife to remove material around the hole’s edge. This method requires more care as it is easy to slip and damage your workpiece.
First, score around the edge of the hole with light cuts. Second, make deeper cuts along your score line until you have removed enough material. Test this method on scrap wood before attempting it on your project piece.