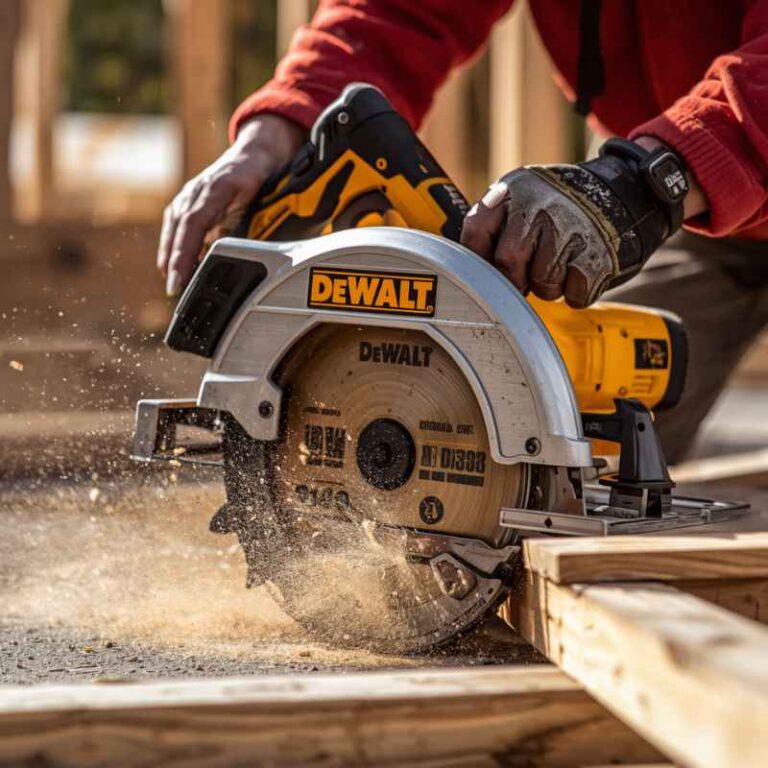
How to Change the Blade on a Skilsaw Circular Saw (All Models)
To change the blade on a Skilsaw circular saw: unplug it, lock the blade (using the blade lock button, or the spindle lock lever on models that don’t have one), loosen the arbor nut with a wrench, and swap the blade. The one detail most guides skip: which way you turn that nut depends on whether your Skilsaw is a sidewinder or a worm-drive model — get it backwards and you’ll tighten the nut instead of loosening it.
Install the new blade following the same steps in reverse order, and double-check that it’s aligned and fully tightened before you cut anything.
Skilsaw has sold dozens of circular saw models over the years — the 5150, 5400, 5480, 5500, 936, and 54HD among them — and not every one uses the same blade-lock mechanism. This guide covers the standard process below, plus the model differences and blade-compatibility questions that trip people up most. If you’re comparing this to a generic circular saw blade change, the steps are similar, but Skilsaw’s model lineup has a few quirks worth knowing.
Preparing To Change Your Skilsaw Blade
Changing the blade on your Skilsaw circular saw is an essential maintenance task that ensures optimal cutting performance and safety. Before diving into the process, it’s important to take a few preparatory steps to ensure a smooth blade replacement. In this guide, we’ll walk you through the necessary precautions and preparations, so you can confidently and efficiently change the blade on your Skilsaw circular saw.
Safety First: Unplugging The Saw
Prioritizing safety should be your first step before attempting any maintenance or repairs on your power tools. When it comes to changing the blade on your Skilsaw circular saw, it’s imperative to unplug the tool from the power source to avoid any accidental start-ups or electrical shocks.
Assembling The Required Tools
To change the blade on your Skilsaw circular saw, you’ll need a few essential tools that will make the process easier and efficient. Here’s a list of the tools you’ll need:
| Tools: | |
|
Set Up Your Workspace
Before changing the blade on your Skilsaw circular saw, it’s essential to set up your workspace properly. This will ensure a safe and organized environment for the blade replacement process. Here’s what you need to do:
- Find a well-lit area with sufficient space to accommodate your circular saw and working tools.
- Clean and clear the workbench or table from any unnecessary items or debris.
- Ensure the surface is stable and can support the weight of the circular saw when mounted.
- Keep the necessary tools within reach to avoid any distractions or delays during the process.
- Put on your protective gloves and safety goggles to shield yourself from any potential hazards.
By following these steps and taking the necessary precautions, you’ll be ready to confidently change the blade on your Skilsaw circular saw. Remember, safety should always be your top priority when working with power tools, so take your time and proceed with caution.
Identifying Skilsaw Model
Before you embark on changing the blade on your Skilsaw circular saw, it is important to first identify the specific model of your tool. Understanding the model is crucial as different models may have unique blade requirements and specifications. In this section, we will walk you through the process of identifying your Skilsaw model and familiarizing yourself with its specifications.
Understand The Specific Blade Requirements
Each Skilsaw model has specific blade requirements that you should be aware of when changing the blade. These requirements may include the blade diameter, arbor size, kerf width, and type of blade teeth. To find this information, refer to your Skilsaw’s user manual or examine the label or plate on the tool itself. It is important to adhere to these specifications to ensure the compatibility and optimal performance of your circular saw.
Familiarize With Your Skilsaw’s Specifications
In addition to the blade requirements, it is essential to familiarize yourself with your Skilsaw’s other specifications. This includes understanding the power rating, maximum cutting depth, bevel capacity, and any additional features specific to your model. By understanding these specifications, you will have a better understanding of your tool’s capabilities and limitations, enabling you to make the most out of your circular saw.
One way to easily identify your Skilsaw model and its specifications is by checking the manufacturer’s website. Skilsaw provides comprehensive information on their website, including user manuals, product descriptions, and specifications for each model. Simply navigate to their website and search for your specific model using the product name or model number. Once you have found your model, you can access all the necessary information to change the blade correctly.
By taking the time to identify your Skilsaw model and familiarize yourself with its specifications, you will ensure that you have the right blade and the necessary knowledge to change it properly. This attention to detail will not only optimize the performance of your circular saw but also contribute to a safer and more efficient cutting experience.
Blade Lock Button Differences By Skilsaw Model
Most of the confusion around changing a Skilsaw blade comes down to one thing: not every model locks the blade the same way. If you’ve been searching for “where is the blade lock button” on your specific saw and can’t find one, you’re not missing anything — some models genuinely don’t have one.
- Models with a dedicated blade lock button (most newer saws, including the 5400 and 5480): the button is a raised push-button located near the top of the motor housing, close to the blade guard. Press and hold it in, then rotate the blade by hand until you feel it click into place.
- Models with a spindle lock lever instead of a button (the 5150 and some older sidewinder models): there’s no push-button at all. Instead, a small lever or pin near the arbor engages the spindle when depressed. Look right around the arbor nut itself, not the top of the housing.
- Worm-drive models (54HD and similar): the lock mechanism sits near the worm-gear housing behind the handle rather than beside the blade, since the blade is mounted on the left side of the saw.
If you’ve checked all the usual spots and still can’t find a lock button or lever, there’s a reliable workaround: wedge an old flat-blade screwdriver into one of the blade’s gullets (the gaps between teeth) so it braces against the housing, then use your wrench on the arbor nut with your other hand. This holds the blade still without relying on a lock mechanism at all — useful on older or budget models where the lock has worn out.

Accessing The Blade Assembly
When it comes to using a circular saw, your safety and the overall performance of the tool depend on the condition of the blade. Over time, blades can become dull or damaged, affecting the quality of your cuts. If you notice your Skilsaw circular saw blade is not cutting as smoothly as it used to, it’s time to change it. In this article, we will guide you through the process of accessing the blade assembly on your Skilsaw circular saw.
Remove The Blade Guard
The first step in accessing the blade assembly is to remove the blade guard. The blade guard is a protective covering that shields your hands from the spinning blade. Here’s how to remove it:
- Unplug the circular saw from the power source to ensure your safety.
- Locate the lever or knob on the blade guard. It is usually located on the front or side of the saw.
- Slide or rotate the lever/knob to release the blade guard.
- Gently lift and remove the blade guard from the saw.
Now that the blade guard is removed, it’s time to lock the blade for removal.
Locking The Blade For Removal
Locking the blade ensures that it doesn’t spin while you loosen the bolt holding it in place. This step is essential for your safety. Follow these steps to lock the blade:
- Find the arbor or spindle lock on the Skilsaw circular saw.
- Depress the arbor lock button by pressing it in and holding it down.
- Rotate the blade until it locks into place.
- Use a wrench or a blade changing tool to loosen the bolt holding the blade in place by turning it counterclockwise.
Once the bolt is loose, you can unscrew it completely by hand. Now you can safely remove the old blade from your Skilsaw circular saw and install a new one.
Which way do you turn the arbor nut? It depends on the saw type. On a standard sidewinder Skilsaw (blade on the right, motor beside the blade), the arbor nut loosens counterclockwise, the same direction as a regular right-hand bolt. On a worm-drive Skilsaw (blade on the left, motor behind the handle — the classic “Skilsaw” style the brand is famous for), the nut is reverse-threaded and loosens clockwise instead. If the nut won’t budge and you’re turning it the “normal” way, you’re probably fighting a worm-drive thread. Not sure which type you have? See our sidewinder vs. worm-drive saw comparison for how to tell them apart at a glance.
Choosing The Correct Blade
One of the most crucial steps in maintaining the efficiency and accuracy of your Skilsaw circular saw is choosing the correct blade. Using the wrong blade can lead to poor cutting performance, damage to the material, and even pose a safety risk. In this section, we will explore the different types of circular saw blades and how to match the right blade with your woodwork needs.
Types Of Circular Saw Blades
Circular saw blades come in various types, each designed for specific cutting tasks. By understanding the different types, you can select the blade that best matches your woodworking needs.
Here are some common types of circular saw blades:
- Rip Blades: These blades are ideal for making lengthy cuts along the wood grain. They have fewer teeth and larger gullets to remove material quickly.
- Crosscut Blades: Designed for cutting across the wood grain, crosscut blades have more teeth and produce cleaner, finer cuts.
- Combination Blades: As the name suggests, these blades offer a combination of rip and crosscut capabilities. They are suitable for general-purpose cutting tasks.
- Finishing Blades: These blades have a large number of teeth and are ideal for achieving smooth and precise cuts on materials like plywood or melamine.
- Dado Blades: If you need to make grooves or dados, dado blades are your go-to choice. They consist of multiple blades that can be adjusted to create varying groove widths.
- Masonry Blades: For tasks involving cutting through concrete, brick, or other masonry materials, masonry blades with diamond-tipped teeth are the most suitable option.
Matching Blade With Woodwork Needs
Now that you are aware of the different types of circular saw blades, it’s important to select the right blade for your specific woodwork needs. The following factors should be considered when choosing a blade:
- Material: Identify the type of material you will be cutting, whether it is hardwood, softwood, plywood, metal, or masonry, and choose the blade accordingly.
- Tooth Count: Consider the number of teeth on the blade. Blades with fewer teeth are ideal for fast, rough cuts, while those with more teeth provide smoother finishes.
- Blade Size: Ensure that the blade size matches the saw’s arbor size, as using an incompatible size can result in improper functioning and pose safety hazards.
- Blade Quality: Invest in high-quality blades that offer durability and precision. A sharp and well-maintained blade will deliver cleaner cuts and prolong the lifespan of your saw.
By taking these factors into account, you can confidently choose the correct circular saw blade that will deliver optimal performance for your woodworking projects.
Do Aftermarket Blades Like Diablo Fit A Skilsaw?
Yes — as long as the size matches. Skilsaw’s 7-1/4″ circular saws use a standard 5/8″ arbor, which is the same size used by Diablo, Freud, DEWALT, Irwin, and most other major blade brands. You are not locked into Skilsaw-branded blades. This is actually the easiest way to upgrade cut quality: a Diablo 24-tooth framing blade is a common swap for rough framing work, while a 40-tooth finish blade gives noticeably cleaner cuts in plywood and trim. Just confirm the arbor size and outer diameter printed on the blade match your saw’s specs before buying, since a small number of compact or specialty Skilsaw models use a smaller blade diameter.
One clarification worth making: “Skilsaw” and “Skil” are the same brand (Skilsaw is the tool line, Skil is the parent brand name, both now owned by Chervon). If you’ve seen a blade-change guide reference a “Black & Decker Skil saw” or a “Milwaukee Skil saw,” that’s a mix-up — Skil was previously owned by Black & Decker decades ago, but it is not a Milwaukee product, and today’s Skilsaw tools are a separate brand from both. The blade-change process in this guide applies to Skilsaw/Skil-branded saws specifically.
Best Aftermarket Skilsaw-Compatible Blade
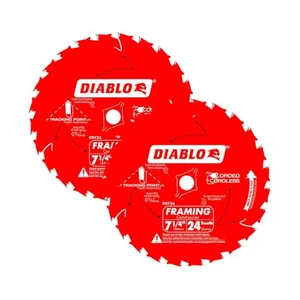
Diablo D0724A 7-1/4″ 24-Tooth Framing Blade (2-Pack)
Fits the standard 5/8″ arbor on nearly every 7-1/4″ Skilsaw model. A 24-tooth framing blade is the most common upgrade over the stock blade for rough cuts and pressure-treated lumber.
- Best for: framing, deck boards, and pressure-treated lumber
- Why we picked it: comes as a 2-pack, so you always have a spare on hand
- Main drawback: not the blade to reach for on fine finish cuts
Compare more Skilsaw-compatible blades
 Option 1 Diablo D0740A 40-Tooth Finish Blade
|
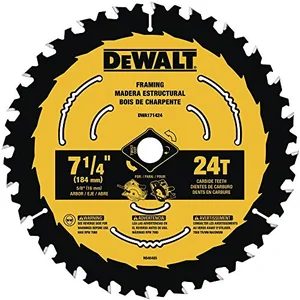 Option 2 DEWALT DWA171424, 24-Tooth
|
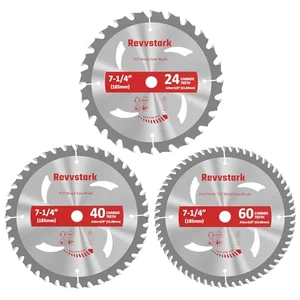 Option 3 3-Pack Combo: 24T/40T/60T
|
As an Amazon Associate we earn from qualifying purchases.
Execution: Blade Swap On Skilsaw
Changing the blade on your Skilsaw circular saw is a simple and essential maintenance task that ensures your saw continues to deliver top-notch performance. Whether you’re a seasoned DIY enthusiast or a professional carpenter, knowing how to replace the blade correctly is crucial for achieving clean and precise cuts. In this guide, we’ll walk you through step-by-step instructions on removing the old blade and installing a new one on your Skilsaw circular saw.
Steps For Removing The Old Blade
- Disconnect the saw from the power source to prevent any accidental starting.
- Prepare a safe and stable working surface to place the saw.
- Locate the blade lock button on the saw, usually located near the blade guard or motor.
- Press and hold the blade lock button to keep the blade from spinning.
- Use a wrench (typically provided with the saw) to loosen the arbor nut in a counterclockwise direction.
- Once the arbor nut is loose, remove it completely along with the outer blade washer.
- Slowly and carefully lift the old blade off the arbor, being cautious not to touch the teeth with bare hands.
Installing The New Blade Correctly
- Ensure the blade’s teeth are facing the right direction. Most saw blades have an arrow indicating the correct orientation.
- Place the new blade onto the arbor, aligning the center hole with the arbor shaft.
- Insert the outer blade washer onto the arbor, ensuring it sits flush against the blade.
- Tighten the arbor nut by hand until it is snug. Then, use the wrench to securely tighten the nut in a clockwise direction.
- Double-check that the blade is properly mounted and centered before using the saw.
By following these simple steps, you can easily and safely change the blade on your Skilsaw circular saw. Remember to always prioritize safety by disconnecting the saw from the power source before making any adjustments. Regularly replacing the blade when needed will ensure optimal cutting performance and extend the lifespan of your Skilsaw circular saw. Happy cutting!
Ensuring Proper Blade Installation
When it comes to using a Skilsaw Circular Saw, one of the most important aspects of proper maintenance is ensuring that the blade is installed correctly. The blade plays a crucial role in the performance and safety of the saw, so it’s necessary to know how to change it properly. In this section, we will discuss how to ensure proper blade installation by checking blade alignment and testing the blade’s rotation.
Check Blade Alignment
Before installing a new blade on your Skilsaw Circular Saw, it’s essential to check the alignment of the blade. This step ensures that the blade is properly aligned with the saw’s arbor, which is the spindle onto which the blade mounts. Improper alignment can lead to incorrect cuts, reduced cutting efficiency, or even accidents. To check the blade alignment:
- Disconnect the saw from the power source to avoid any accidental start-ups during the process.
- Inspect the arbor for any debris, rust, or damage. Clean it if necessary.
- Place the new blade onto the arbor, ensuring that the center hole of the blade fits snugly onto the arbor’s spindle.
- Tighten the blade’s retaining screw or bolt according to the manufacturer’s specifications. Use a wrench or the provided tool to secure it firmly.
- Manually rotate the blade to check if it moves freely without any wobbling or rubbing against the guard or other parts of the saw. A properly aligned blade will spin smoothly.
Testing The Blade’s Rotation
Once the new blade is aligned, it’s crucial to test its rotation before using the Skilsaw Circular Saw. This ensures that the blade is securely fastened and won’t come loose during operation, which can be hazardous. Testing the blade’s rotation involves the following steps:
- With the saw still disconnected from the power source, hold onto the blade guard to prevent any movement.
- Use your free hand to manually rotate the blade in the direction it should spin during operation. Typically, this is clockwise for most circular saws.
- Observe the blade’s movement, making sure it rotates smoothly without any resistance or grinding noises. A properly installed blade will rotate freely and quietly.
- If you notice any issues, such as excessive resistance or unusual sounds, immediately disconnect the saw from the power source and repeat the blade installation process to ensure proper alignment and fastening.
By following these steps to ensure proper blade installation, you can enhance the performance and safety of your Skilsaw Circular Saw. Remember to always refer to the manufacturer’s guidelines for specific instructions and safety precautions.

Skilsaw Blade Replacement Best Practices
Learn the best practices for replacing the blade on your Skilsaw circular saw. Discover step-by-step instructions for an easy and efficient blade change to enhance your cutting experience.
Maintenance Tips For Longevity
Maintaining your Skilsaw circular saw and replacing the blade regularly is essential for optimal performance and longevity. By following these maintenance tips, you can ensure that your saw remains in top shape and delivers precise cuts every time:
- Keep the saw clean: After each use, make sure to remove any debris or sawdust from the saw using a brush or compressed air. This prevents build-up and extends the life of your saw.
- Check for any loose parts: Before every use, inspect the saw for any loose screws or bolts. Tighten them if necessary to avoid any potential accidents or damage.
- Regularly lubricate the blade: Apply a few drops of lubricating oil to the blade before each use. This reduces friction and heat, allowing the blade to cut smoothly and ensuring its longevity.
- Store the saw properly: When not in use, store your Skilsaw circular saw in a dry and secure location to protect it from rust and damage.
Safe Saw Operation With New Blade
Once you have successfully replaced the blade on your Skilsaw circular saw, it is important to operate it safely to avoid accidents. Consider the following best practices:
- Wear protective gear: Always wear safety goggles, ear protection, and gloves when operating a circular saw. This protects you from any flying debris and potential injuries.
- Ensure proper blade installation: Double-check that the new blade is securely fitted and tightened onto the saw. A loose blade can cause it to become unstable during operation.
- Adjust the saw’s cutting depth: Set the cutting depth of the saw according to the thickness of the material you are working with. This helps prevent the blade from overcutting and improves cutting accuracy.
- Maintain a stable working surface: Ensure that the material being cut is firmly supported on a stable surface. This reduces the risk of kickbacks and allows for smoother and safer cutting.
- Exercise proper cutting technique: Use both hands to grip and control the saw, keeping a firm grip throughout the entire cutting process. Maintain a steady and controlled motion, allowing the blade to do the work.
Frequently Asked Questions Of How To Change Blade On Skilsaw Circular Saw
How Do You Change The Blade On A Skilsaw Circular Saw?
To change the blade on a Skilsaw circular saw, first, disconnect the saw from the power source. Then, locate the blade screw and use a wrench or blade wrench to loosen it. Remove the old blade and insert the new one, ensuring it is aligned properly.
Finally, tighten the blade screw securely before reattaching the power source.
Can I Change The Blade Of My Skilsaw Circular Saw Myself?
Yes, you can change the blade of your Skilsaw circular saw yourself. By following the proper safety precautions and using the right tools, it is a fairly simple process. Just make sure to disconnect the saw from the power source and handle the blades with care to avoid any injuries.
What Type Of Blade Should I Use For My Skilsaw Circular Saw?
For your Skilsaw circular saw, it is important to use the right type of blade. Look for blades specifically designed for circular saws and choose one that suits the material you will be cutting. Consider factors such as the blade’s size, tooth count, and the type of material you will be working with to ensure optimal performance and safety.
Does Every Skilsaw Have A Blade Lock Button?
No. Newer models like the 5400 and 5480 have a push-button blade lock, but older or budget models like the 5150 use a spindle lock lever near the arbor instead. If you can’t find a button, check for a lever right around the arbor nut, or use a screwdriver wedged between the blade’s teeth as a manual backup.
Do Diablo Blades Fit A Skilsaw?
Yes, Diablo blades fit any Skilsaw with a standard 5/8″ arbor, which covers nearly all 7-1/4″ Skilsaw models. Diablo, Freud, DEWALT, and Irwin blades are all interchangeable with Skilsaw-branded blades as long as the arbor size and blade diameter match.
Which Way Do You Turn The Blade To Loosen It On A Skilsaw?
On a sidewinder Skilsaw, the arbor nut loosens counterclockwise. On a worm-drive Skilsaw, it’s reverse-threaded and loosens clockwise instead. If the nut isn’t budging, you’re likely turning a worm-drive nut the sidewinder direction — try reversing.
Conclusion
Changing the blade on your Skilsaw circular saw is a simple task that can greatly enhance the performance and safety of your tool. By following the step-by-step instructions provided in this blog post, you can easily and confidently replace the blade and continue with your woodworking projects.
Remember to always prioritize safety and use the appropriate tools and techniques when working with power tools.