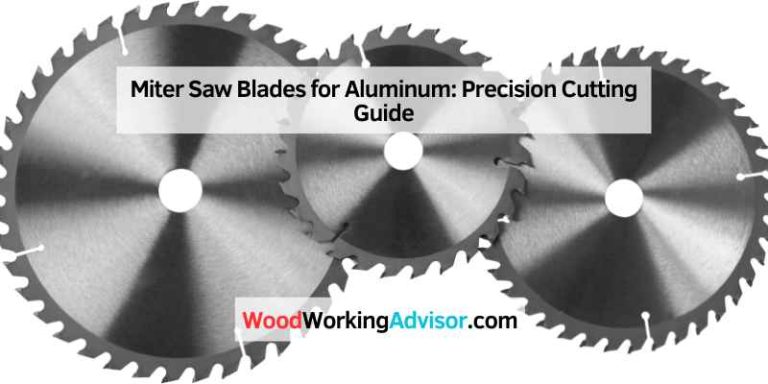
How to Easily Change Miter Saw Blade : Expert Tips
To change a miter saw blade, start by unplugging the saw and loosening the arbor nut with a wrench, then remove the old blade and replace it with a new one of the same size and type.
Understanding The Importance Of Properly Maintained Miter Saw Blades
Proper maintenance of miter saw blades is crucial to ensure optimal performance. Learn how to easily change the blade to keep your saw cutting smoothly and efficiently.
The Role Of A Miter Saw Blade In Achieving Precise And Clean Cuts
When it comes to using a miter saw, the blade plays a crucial role in achieving precise and clean cuts. The miter saw blade is responsible for making accurate crosscuts and angled cuts in various materials, including wood, metal, and plastic. Its design and quality determine the smoothness of the cut, the speed of the cut, and the overall performance of the miter saw.
A high-quality miter saw blade, such as a carbide-tipped blade, is designed to have sharp teeth that can effortlessly glide through the material, resulting in clean and accurate cuts. The sharpness of the blade allows it to make smooth cuts without tearing or splintering the material, ensuring professional-looking results.
How A Dull Or Damaged Blade Affects The Performance Of A Miter Saw
A dull or damaged miter saw blade can significantly impact the performance of the miter saw. When the blade becomes dull, its cutting efficiency decreases, making it harder to make clean, precise cuts. The dull blade may start to tear the material rather than cutting through it cleanly, leading to rough edges and jagged cuts.
Not only does a dull blade affect the quality of the cuts, but it also slows down the cutting process. A blade that struggles to cut through the material will require more effort from the user, reducing productivity and efficiency. This can be frustrating, especially when working on time-sensitive projects or large-scale cutting tasks.
Why Regular Blade Changes Are Necessary For Optimum Performance
Regular blade changes are essential for maintaining optimum performance with a miter saw. Over time, even with proper maintenance, blades can become dull or worn out due to constant use. By regularly replacing the blade, you ensure that your miter saw continues to function at its best.
When a new blade is installed, you regain the sharpness and cutting efficiency needed to achieve precise and clean cuts. This not only improves the quality of your work but also enhances your overall productivity. With a sharp blade, you can complete your cutting tasks more quickly and with less effort, allowing you to move on to other important aspects of your project.
In addition, regular blade changes can also contribute to the longevity of your miter saw. By replacing the blade on time, you minimize the chances of overworking the motor and other components of the saw. This reduces the risk of damage and extends the lifespan of your miter saw, ultimately saving you money in the long run.
Gathering The Necessary Tools And Safety Precautions
In order to change the miter saw blade safely, it is important to gather the necessary tools such as a wrench and safety goggles. Taking precautions like unplugging the saw and wearing protective gear ensures a smooth and accident-free process.
Essential Tools Required For Changing The Miter Saw Blade:
Before you embark on the task of changing your miter saw blade, it’s important to gather the necessary tools to ensure a smooth and efficient process. Here are the essential tools you will need:
- A new miter saw blade: Make sure to choose the right blade for your saw and the type of material you’ll be cutting. An incorrect blade can affect the performance and safety of your saw.
- A wrench or hex key: This tool is essential for loosening and tightening the arbor bolt that holds the blade in place.
- A blade stabilizer or arbor lock: This accessory prevents the blade from spinning while you’re removing or installing it.
- Safety glasses: Protect your eyes from potential flying debris during the blade replacement process.
- Work gloves: Ensure your hands are protected from sharp edges and potential accidents.
Importance Of Wearing Safety Gear During The Blade Replacement Process:
When it comes to safety, it’s crucial to prioritize the well-being of yourself and others around you. Wearing the appropriate safety gear during the miter saw blade replacement process is essential to minimize the risk of accidents and injuries. Here’s why:
- Protective eyewear, such as safety glasses, shields your eyes from flying debris when loosening or tightening the arbor bolt. It prevents dust, wood particles, and metal fragments from causing eye damage.
- Work gloves offer an extra layer of protection against potential cuts and injuries. They help maintain a firm grip on the blade, reducing the risk of accidents during the replacement process.
Double-checking The Power Source To Ensure Safety:
Prior to starting the blade replacement process, it’s crucial to double-check the power source to ensure your safety and the proper functioning of the miter saw. Here’s what you need to do:
- Make sure the miter saw is switched off and unplugged from the power outlet. This will prevent any accidental start-ups while handling the blade.
- Inspect the power cord for any visible damage or fraying. If you notice any issues, refrain from using the saw until the cord is repaired or replaced.
- Verify that the power outlet you’ll be using is in good condition and properly grounded. Faulty outlets can pose a risk of electrical hazards.
- Once you’ve ensured the power source is safe and secure, you can proceed with the blade replacement process confidently.
Step-by-step Guide: Changing A Miter Saw Blade
Changing the blade of your miter saw is a crucial task that every woodworker should know how to do. Whether you’re replacing a dull blade or switching to a different type of blade for specific cutting needs, properly changing your miter saw blade will ensure clean and precise cuts. In this step-by-step guide, we’ll walk you through the process of changing a miter saw blade, highlighting important safety measures, detaching the existing blade, selecting the appropriate replacement blade, and installing it securely into your miter saw.
Overall Process Overview With A Focus On Safety Measures
Before we dive into the step-by-step instructions, let’s first discuss the crucial safety measures you should adhere to when changing your miter saw blade. Safety should always be the top priority when working with power tools.
- Wear Protective Gear: Start by wearing safety goggles, ear protection, and gloves. This will prevent any potential injuries from flying debris or accidental contact with the blade.
- Unplug the Miter Saw: Ensure that the miter saw is completely unplugged from the power source. This will eliminate the risk of electric shock.
- Secure the Blade: Use a blade lock or a piece of scrap wood to immobilize the blade. This will prevent the blade from accidentally spinning while you’re changing it.
Detaching The Existing Blade From The Miter Saw
To begin the process of changing your miter saw blade, you need to remove the existing blade. Follow these steps carefully:
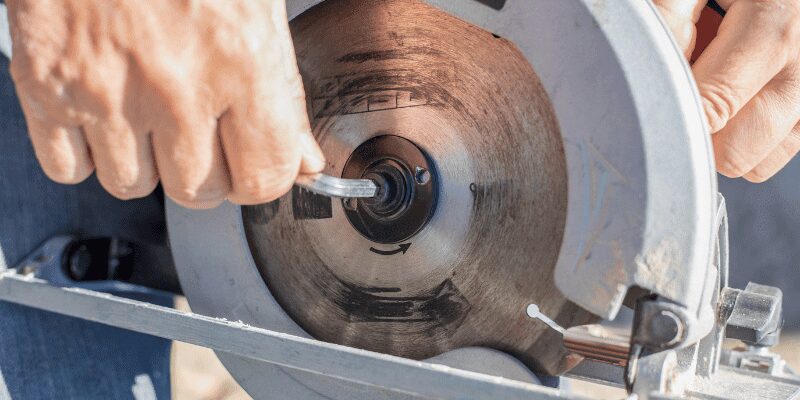
- Locate the Blade: Locate the blade lock button or the blade arbor nut on the miter saw. This is usually found on the motor housing.
- Lock the Blade: Engage the blade lock or use a wrench to secure the blade arbor. This will prevent the blade from rotating when you’re removing the nut.
- Remove the Arbor Nut: Use a suitable wrench to loosen and remove the arbor nut in a counterclockwise direction. Keep in mind that the nut may be tight, so apply steady pressure while turning it.
- Take Out the Blade: Once the arbor nut is removed, carefully lift the existing blade off the arbor and set it aside in a safe place.
Selecting The Appropriate Replacement Blade For Specific Cutting Needs
Now that you have removed the old blade, it’s time to select the right replacement blade for your specific cutting needs:
- Determine the Blade Size: Check the diameter of the old blade to ensure you select a replacement blade of the same size. Using a blade of the correct size is essential for the miter saw to function properly and for accurate cutting.
- Consider the Cutting Material: Depending on the type of material you’ll be cutting, such as wood, metal, or plastic, choose a blade with the appropriate tooth count and tooth configuration. Different blades are designed for specific materials to achieve optimal results.
- Choose the Right Blade Type: Blades come in various types, including crosscut, rip, fine finish, and combination blades. Consider the type of cuts you’ll be making to select the most suitable blade that will deliver clean and precise cuts.
Installing The New Blade Securely Into The Miter Saw
Once you have the correct replacement blade, it’s time to install it securely into your miter saw:
- Clean the Arbor: Before installing the new blade, remove any dust or debris from the arbor shaft to ensure a smooth and secure fit.
- Position the Blade: Align the mounting hole of the new blade with the arbor shaft.
- Secure the Blade: Reattach the arbor nut and tighten it in a clockwise direction. Ensure it is securely fastened, but be cautious not to overtighten.
- Test the Blade: Gently rotate the new blade by hand to ensure it spins freely without any obstruction.
Congratulations! You have successfully changed the blade of your miter saw. Remember to follow these steps carefully each time you need to change or replace the blade to ensure your safety and the accuracy of your cuts.
Pro Tips For Achieving A Smooth Blade Change
Changing the blade on a miter saw is a simple task that any woodworker should be familiar with. However, achieving a smooth blade change requires attention to detail and a few pro tips. In this article, we will walk you through the steps of changing a miter saw blade while highlighting important tips to ensure a seamless transition.
Cleaning And Inspecting The Miter Saw Before Installing A New Blade
Before you begin the blade change process, it’s crucial to give your miter saw a thorough cleaning. Sawdust and debris can accumulate over time, which may affect the performance of the new blade. Start by using a brush to remove any visible dust on the blade guard, motor housing, and base. Take the time to inspect the entire saw for loose or damaged parts that need attention or replacement.
Properly Aligning The New Blade To Prevent Wobbling And Vibrations
The key to achieving smooth and accurate cuts lies in the alignment of your miter saw blade. Improper alignment can lead to wobbling and vibrations, compromising both the quality of your cuts and your safety. To ensure proper alignment:
- Loosen the arbor nut and remove the old blade.
- Inspect the arbor flange for any dust or debris and clean if necessary.
- Place the new blade on the arbor, ensuring it sits flush against the arbor flange.
- Tighten the arbor nut securely, using a wrench to prevent any movement.
Adjusting The Miter Saw’s Settings For Optimal Cutting Performance
Now that you have a clean and aligned new blade, it’s time to fine-tune your miter saw for optimal cutting performance. Consider the following adjustments:
- Fence alignment: Ensure the fence is parallel to the blade to maintain accurate and square cuts.
- Miter gauge calibration: Calibrate the miter gauge to guarantee accurate angled cuts.
- Bevel angle adjustment: Set the bevel angle according to your desired cut angle.
- Blade height adjustment: Adjust the blade height to match the thickness of your workpiece.
Testing The New Blade To Ensure Functionality And Accuracy
Before you dive into your woodworking project, it’s crucial to test your newly replaced blade to ensure its functionality and accuracy. Follow these steps:
- Securely fasten a scrap piece of wood on the miter saw.
- Make small test cuts at various angles to evaluate the blade’s performance.
- Inspect the cuts for smoothness, accuracy, and any signs of burning or tear-out.
By following these pro tips throughout the blade change process, you can achieve a smooth transition, ensuring your miter saw performs optimally while delivering precise and clean cuts. Remember, regular maintenance and blade changes are essential to keep your miter saw in top shape for all your woodworking projects.
Maintenance And Blade Care Tips For Extending Lifespan
Proper maintenance and care are essential for extending the lifespan of your miter saw blade. By following a few simple tips, you can ensure that your blade stays in optimal condition, delivering precise and clean cuts project after project. In this section, we will discuss important maintenance and care practices that will help you maximize the lifespan of your miter saw blade.
Cleaning And Lubricating The Miter Saw After Blade Replacement
Once you have successfully changed the miter saw blade, it is crucial to clean and lubricate the saw to prevent any buildup of debris or dust. Regular cleaning will not only keep your saw in good condition, but it will also help maintain the accuracy and performance of the blade. Here’s how you can do it:
- Start by unplugging the miter saw to avoid any accidental activation during the cleaning process.
- Using a soft brush or compressed air, remove any sawdust or debris from the blade guard, motor housing, and other nooks and crannies of the saw.
- Inspect the blade guard for any residual buildup and clean it thoroughly, ensuring that it moves freely without any obstructions.
- Apply a few drops of lubricating oil to the blade arbor and pivot points, making sure to follow the manufacturer’s guidelines for your specific miter saw model.
- Wipe down the entire saw surface with a clean, damp cloth to remove any remaining dirt or dust.
- Once the saw is clean and dry, you can plug it back in and it’s ready for use.
Storing The Miter Saw And Blades In A Suitable Environment
Proper storage plays a crucial role in maintaining the performance and longevity of your miter saw and blades. When not in use, it is important to store them in a suitable environment to prevent damage and keep them in excellent working condition. Here are some tips for storing your miter saw and blades:
- Make sure the saw is unplugged and in the off position before storing it.
- Store the miter saw in a clean, dry area away from excessive humidity or moisture, which can lead to rust and corrosion.
- Consider using a dust cover or a storage case specifically designed for miter saws to protect it from dust and debris.
- Store the replacement blades in a separate, labeled container or case to minimize the risk of accidental damage.
- Avoid placing heavy objects on top of the miter saw, as it can cause misalignment or damage to the delicate parts.
Regularly Inspecting The Blade For Signs Of Wear And Tear
Inspecting the miter saw blade regularly is vital to identify any signs of wear and tear. Over time, blades can become dull, chipped, or warped, affecting the quality of your cuts. To ensure optimal performance, here’s what you should look for during your blade inspection:
- Check for any visible signs of chipping, missing teeth, or any damage to the blade edge.
- Inspect the blade for warping or bending, which can affect its cutting accuracy.
- Look for excessive buildup of pitch or resin on the blade surface, as it can impair the cutting ability.
- If you notice any of these issues, it’s time to consider sharpening or replacing the blade.
Sharpening Or Replacing The Blade As Needed
In order to maintain clean cuts and optimal performance, it is crucial to sharpen or replace your miter saw blade when needed. Here’s how you can ensure your blade is in top shape:
- If you notice a decrease in cutting performance or a decrease in the quality of your cuts, it may be time to sharpen the blade.
- Follow the manufacturer’s instructions or consult a professional to properly sharpen the blade.
- If the blade is severely damaged, has missing teeth, or is beyond repair, replacing it with a new one is the best course of action.
- Always ensure you choose the correct blade for your specific cutting needs and your miter saw model.
By following these maintenance and care tips, you can significantly extend the lifespan of your miter saw blade, ensuring that it continues to deliver precise and clean cuts project after project.
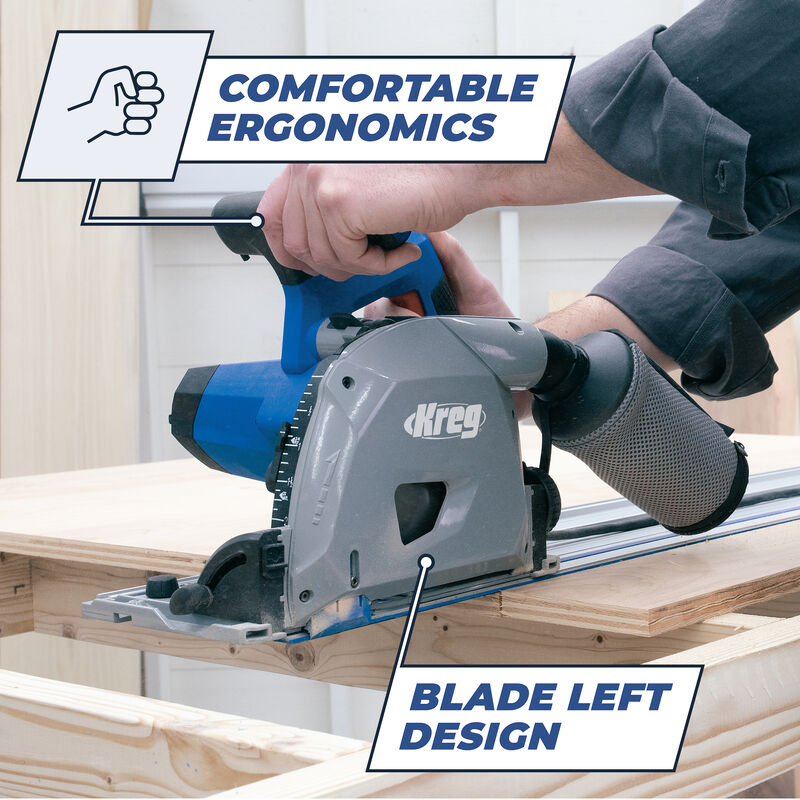
Credit: www.kregtool.com
Frequently Asked Questions For How To Change Miter Saw Blade
How Often Should You Change A Miter Saw Blade?
It is recommended to change the miter saw blade every 3 to 6 months, depending on the frequency of use and type of materials being cut. Regular blade changes ensure clean and accurate cuts, prevent binding, and reduce the risk of accidents.
What Tools Do You Need To Change A Miter Saw Blade?
To change a miter saw blade, you will need a hex key or wrench to remove the blade bolt, a blade guard to protect your hand, and possibly a blade changing tool, if your miter saw model, requires one. Always refer to the manufacturer’s instructions for specific tool requirements.
What Are The Steps To Change A Miter Saw Blade?
To change a miter saw blade, start by unplugging the saw for safety. Loosen and remove the blade bolt using a hex key or wrench. Lift the blade guard, remove the old blade, and replace it with a new one, aligning the teeth in the correct direction.
Finally, secure the blade with the blade bolt and tighten it according to the manufacturer’s instructions.
Conclusion
Changing the blade on a miter saw is a crucial skill every woodworking enthusiast should possess. By following the step-by-step instructions provided in this guide, you can confidently replace the blade without any hassle. Remember to prioritize your safety by using proper protective gear and practicing caution at all times.
With these tips, you’ll be able to enhance your cutting efficiency and achieve precise and accurate miter cuts for your projects. Happy woodworking!