How to Cut Baseboard Inside Corners With Miter Saw: Expert Tips
To cut baseboard inside corners with a miter saw, measure the length of one side and mark it on the material. Set the miter saw to 45 degrees and cut along the marked line.
Then, measure and cut the opposite piece with a matching 45-degree angle to create a precise inside corner joint. Whether you’re renovating your home or installing new baseboards, cutting inside corners with a miter saw is an essential skill. It requires accuracy and precision to ensure a seamless and professional finish.
By following the steps outlined in this guide, you’ll be able to achieve clean and tight inside corners for your baseboard installation. Understanding how to measure and cut the baseboards with a miter saw will help you achieve a perfect fit and a seamless finish in your interior spaces.
Essential Tools For Baseboard Corner Cuts
When it comes to achieving perfectly cut baseboard inside corners, having the right tools is crucial. To ensure precise and seamless cuts, it’s important to understand the function of a miter saw, choose the appropriate saw blade, and have additional tools on hand for a flawless finish.
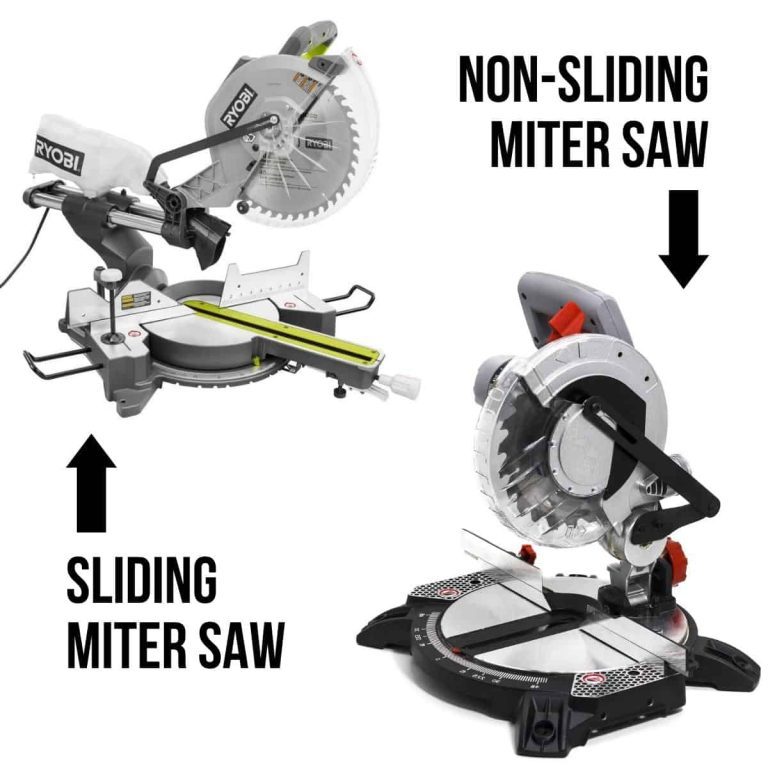
Understanding The Function Of A Miter Saw
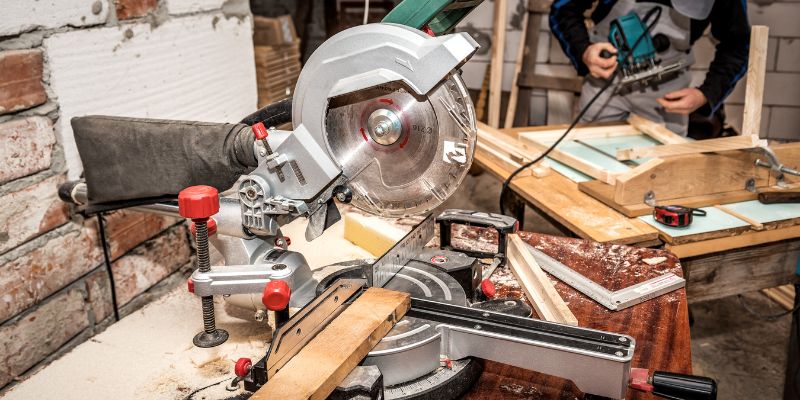
A miter saw is an essential tool for cutting baseboard inside corners with precision. It allows for accurate angle cuts, making it perfect for creating the seamless joints required for baseboard installations. The saw has a rotating blade that can be adjusted to various angles, enabling clean and tight cuts for professional-looking results.
Selection Of The Saw Blade For Precise Cutting
The selection of the right saw blade is crucial for achieving precise cuts when working with baseboards. Choosing a high-quality fine-toothed blade ensures clean and accurate cuts, minimizing the risk of splintering and imperfections. A blade with the appropriate number of teeth and the right material is essential for achieving smooth and professional-looking corner cuts.
Additional Tools Needed For Perfect Cuts
In addition to a miter saw and the appropriate blade, there are several additional tools that can contribute to perfect baseboard corner cuts. These may include a speed square for ensuring accurate angle measurements, a clamp for securing the baseboard in place during cutting, and a pencil for marking cut lines. Additionally, having a dust collection system or a vacuum attachment can help maintain a clean work environment and improve visibility while cutting.
Preparing Baseboard Cutting With A Miter Saw
When it comes to achieving seamless baseboard inside corners, using a miter saw can significantly simplify the process. Preparing baseboard cutting with a miter saw involves several crucial steps that ensure accurate and professional results. From safety measures to marking the baseboard for precise cuts, understanding each aspect is vital for a successful project.
Safety Measures Before Starting
- Wear protective eyewear to shield your eyes from flying debris.
- Use hearing protection to reduce noise exposure from the miter saw.
- Keep the work area clean and organized to avoid tripping hazards.
- Ensure that the miter saw is properly secured and stable before use.
- Adhere to all manufacturer’s safety guidelines for the specific miter saw being used.
Marking The Baseboard For Accurate Cuts
Precise measurements and markings are crucial before making any cuts with a miter saw. Prior to cutting, follow these steps to ensure accuracy:
- Measure and mark the length of the baseboard according to the required dimensions.
- Use a pencil to mark the exact points where the cuts will be made.
- Consider using a speed square to ensure the lines are perpendicular to the baseboard’s edge.
Expert Tips: Cut Baseboard Inside Corners
Efficiently cutting baseboard inside corners with a miter saw can enhance the aesthetics of a room. Expert techniques and precise angles are essential for a seamless finish. Follow these expert tips for mastering the art of cutting baseboard inside corners with a miter saw.
Analyzing The Corner To Decide The Cutting Angle:
Before making any cuts, it’s crucial to carefully analyze the inside corner to determine the miter and bevel angles. Use a bevel gauge to measure the angle formed by the meeting walls. Ensure the miter saw is set to match the corner’s angle perfectly for a seamless joint.
Step-by-step Guide To Cutting The Baseboard:
- Cut the first baseboard piece at a 45-degree angle. Be sure to cut the end that will be on the inside of the corner so that the longer piece will overlap it.
- Place the first piece into position and mark the back of the cut on the second piece. This will ensure the second piece fits perfectly against the first.
- Cut the second piece at a 45-degree angle in the opposite direction as the first.
- Fit the second piece against the first to form a tight inside corner joint
Fine-tuning Inside Corner Joints
Introductory paragraph about ‘Fine-Tuning Inside Corner Joints’
Properly cutting baseboard inside corners is crucial to achieving a professional finish in any trim carpentry project. While using a miter saw to make inside corner cuts can provide precise results, fine-tuning the joints is equally essential. In this section, we will explore effective techniques for achieving smooth and seamless joints, as well as methods for correcting imperfect cuts to ensure a flawless end result.
H3 heading: Techniques for smooth and seamless joints
Techniques For Smooth And Seamless Joints
Unordered list of techniques
- Ensure the miter saw is properly calibrated and adjusted for accurate angle cuts.
- Use a high-quality, sharp blade suitable for cutting baseboard material to minimize tear-out and achieve clean cuts.
- Make test cuts on scrap pieces to fine-tune the miter and bevel angles before cutting the actual baseboard.
- Consider using a coping saw to cope the inside corners for a tighter fit and seamless joint.
H3 heading: Methods for correcting imperfect cuts, ensuring
Methods For Correcting Imperfect Cuts, Ensuring
Ordered list of methods
- Adjust the miter saw to make slight angle adjustments to correct over or under-cuts.
- Utilize wood filler or epoxy putty to fill any gaps or imperfections in the joint after the baseboards are installed.
- Consider utilizing a corner clamp to hold the joints together firmly during installation and ensure a seamless alignment.
- If necessary, recut the baseboard pieces with the miter saw to achieve the desired angle and fit for the inside corners.

Finishing Touches After Miter Saw Cutting
After cutting baseboard inside corners with a miter saw, attention to the finishing touches is crucial to achieving a professional look. Sanding and perfecting the edges, as well as painting and caulking, are essential steps that can make all the difference in the final outcome.
Sanding And Perfecting The Edges
Smooth and flawless edges are a hallmark of a well-crafted baseboard installation. After using a miter saw, use fine-grit sandpaper to gently sand the cut edges, ensuring that any roughness or irregularities are removed. Pay close attention to detail to achieve a seamless transition between the mitered edges. This step will not only enhance the appearance but also allow for a more precise fit during installation.
Paint And Caulk For A Professional Finish
Once the baseboards are cut and the edges are sanded, it’s time to consider the final aesthetic touches. Applying a fresh coat of high-quality paint will not only provide a polished look but also protect the baseboards from wear and tear. Choose a color that complements the room’s decor and apply it evenly, paying special attention to the edges and corners.
- After the paint has dried, use a quality caulk to fill any small gaps or imperfections. Running a bead of caulk along the seams where the baseboards meet the walls will create a seamless and professional finish. Smooth the caulk with a damp cloth or finger to ensure a clean and precise appearance.
- Additionally, consider using a caulk gun for more controlled application and to achieve a consistent bead along the edges for a polished look.
Frequently Asked Questions Of How To Cut Baseboard Inside Corners With Miter Saw
What Is The Best Miter Saw For Cutting Baseboard Inside Corners?
For cutting baseboard inside corners, a compound miter saw with a sharp blade is ideal. Look for a saw that offers precise angle adjustments and a comfortable grip for accurate cuts.
How Do I Measure And Cut Baseboard For Inside Corners?
To ensure a perfect fit, measure the length of the baseboard and use a miter saw to cut a 45-degree angle for each corner. Ensure the molding is properly positioned and cut precisely to achieve seamless inside corners.
Can I Use A Coping Saw For Cutting Baseboard Inside Corners?
Yes, a coping saw can be used to cut baseboard inside corners by creating a cope joint. This method involves cutting the profile of one piece to fit the profile of the other, resulting in a seamless inside corner.
Conclusion
Cutting baseboard inside corners with a miter saw may seem daunting at first, but with the right technique and practice, it can be mastered. Remember to measure twice and cut once, and use the correct angle for a precise fit.
With these tips, you’ll be able to achieve professional-looking results in your woodworking projects.

![Chicago Electric vs Admiral Miter Saw: [Know Before You Choose]](https://cdn.woodworkingadvisor.com/2022/11/Chicago-Electric-vs-Admiral-Miter-Saw-_Know-Before-You-Choose_-768x384.webp)