
How to Cut Crown Molding Without a Miter Saw : Clever Techniques
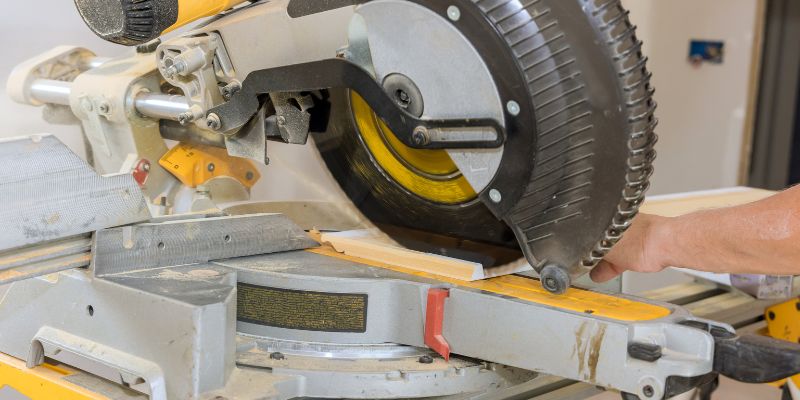
To cut crown molding without a miter saw, use a coping saw to make precise cuts. This method helps achieve seamless joints for professional-looking results.
Crown molding adds elegance and charm to any room, but cutting it can be challenging, especially without a miter saw. However, with the right technique, you can achieve clean and precise cuts using a coping saw. This versatile tool allows you to easily trim the molding to fit snugly against walls and ceilings, creating seamless joints.
By following a few simple steps and using this method, you can successfully cut crown molding without the need for a miter saw. Whether you’re a seasoned DIY enthusiast or a beginner tackling their first project, this guide will help you achieve professional-looking results with ease.
Understanding Crown Molding Angles
Crown molding adds a touch of elegance and character to any room, but cutting it can be a daunting task, especially without a miter saw. However, understanding crown molding angles is the key to making precise cuts without a miter saw. By knowing the geometric fundamentals and typical angle ranges, you can master the art of cutting crown molding without a miter saw.
Geometric Fundamentals For Crown Molding Cuts
When cutting crown molding without a miter saw, it’s crucial to understand the geometric fundamentals. Crown molding is typically installed at an angle, creating a compound miter joint where two pieces meet. This means that two cuts, the miter and bevel, are required to fit the molding properly. The miter angle is the horizontal angle formed by two adjoining walls, while the bevel angle is the slope of the crown molding away from the wall. These angles need to be accurately calculated and cut to achieve a seamless joint and a professional finish.
Typical Crown Molding Angle Ranges
Knowing the typical crown molding angle ranges is essential for achieving accurate cuts. The standard spring angle for crown molding is usually 45 degrees, but this can vary depending on the profile of the molding and the architectural style of the room. It’s important to measure the spring angle of the molding accurately to determine the correct angles for cutting. Additionally, understanding the typical range of ceiling and wall angles in different rooms will help you adapt the cuts to fit the specific requirements of your project.
Tools Required For Alternative Methods
When you’re unable to use a miter saw to cut crown molding, there are alternative methods that require specific tools. These tools are essential for achieving precise and clean cuts without a miter saw. Let’s explore the tools you’ll need for these alternative methods:
Hand Saws And Miter Boxes
Hand saws and miter boxes are essential tools for cutting crown molding without a miter saw. The miter box acts as a guide for the saw, allowing you to make accurate angled cuts. Hand saws with fine teeth are recommended for smooth and clean cuts. A back saw or a dovetail saw can be used for more precise cuts.
Coping Saws For Precise Cuts
Coping saws are invaluable for achieving detailed and precise cuts, especially for intricate designs on crown molding. The thin blade of a coping saw allows for tight curves and intricate patterns to be cut with ease. When making inside corner cuts, using a coping saw can help achieve seamless joints and a professional finish.
Hand Saw And Miter Box Precision
Cutting crown molding without a miter saw may seem like a daunting task, but with the right tools and precision, it can be achieved seamlessly. One popular method is using a hand saw and miter box – a cost-effective and efficient way to achieve accurate cuts. The combination of a hand saw and miter box allows for precise cutting angles, making it a suitable alternative for those without access to a miter saw.
Step-by-step Guide To Cutting With A Hand Saw
When using a hand saw and miter box to cut crown molding, following a step-by-step process is crucial for accuracy. Here’s a breakdown of how to effectively cut crown molding without a miter saw using a hand saw and miter box:
- Measure and mark the molding: Start by accurately measuring the length of the crown molding needed for the specific area where it will be installed. Use a pencil to mark the cut lines on the molding to ensure precise cuts.
- Secure the molding in the miter box: Place the crown molding securely within the miter box, ensuring that it sits flush against the back and bottom of the box to maintain stability during the cutting process.
- Set the cutting angle: Adjust the miter box to the desired cutting angle by loosening the locking mechanism and aligning the saw guide to the correct angle. This step is crucial for achieving precise mitered cuts.
- Sawing the molding: Carefully guide the hand saw through the marked cut lines, applying even pressure and maintaining a steady motion to ensure clean and accurate cuts. Take your time to prevent any splintering or uneven edges.
- Double-check the cuts: Once the cuts are complete, carefully inspect the edges of the crown molding to ensure they meet the desired angles and lengths. Make any necessary adjustments if the cuts require refinement.
Securing The Miter Box For Accurate Angles
Properly securing the miter box is essential for ensuring precise cutting angles when using a hand saw. The stability of the miter box directly impacts the accuracy of the mitered cuts, making it important to follow these steps to secure the miter box effectively:
- Stabilize the miter box: Place the miter box on a flat and stable surface, ensuring that it remains steady and does not wobble during the cutting process. The stability of the miter box is crucial for maintaining accuracy in the cutting angles.
- Clamp the miter box: To prevent any movement or shifting of the miter box while cutting, use clamps to secure it firmly to the work surface. This further enhances the stability of the miter box and ensures consistent and accurate cuts.
- Test the stability: Before making any cuts, ensure that the miter box is securely clamped and does not move or shift when pressure is applied. This step helps verify the stability of the miter box before commencing with the cutting process.
Coping Saw Methodology
Coping saw methodology is an excellent alternative for cutting crown molding without a miter saw. This method allows for precision and accuracy when creating miter joints, ensuring a seamless finish for your project. Here, we’ll delve into the detailed coping saw cutting technique and the finesse required to perfect the joint with files and sandpaper.
Detailed Coping Saw Cutting Technique
When using a coping saw to cut crown molding, it’s essential to begin by carefully marking the molding to ensure accurate cuts. Take your time to measure and mark the molding accurately, as this will determine the quality of the joint. Once the markings are in place, carefully use the coping saw to follow the traced line. Maintain a steady hand and make precise cuts to create the perfect miter joint.
When cutting the molding, it can be helpful to slightly angle the coping saw to create a beveled edge. This will allow for a tighter fit when joining the pieces together, minimizing the need for excessive filling and sanding later on.
Finessing The Joint With Files And Sandpaper
After the coping saw has been used to create the initial miter joint, it’s time to perfect the fit using files and sandpaper. Begin by using a fine file to carefully remove any excess material and ensure that the joint is snug. Take care to maintain the profile of the molding while refining the fit.
Once the fit has been perfected with the file, switch to a fine-grit sandpaper to smooth out any remaining imperfections. This step requires patience and attention to detail to achieve a seamless finish. Check the fit regularly as you sand to ensure that the joint maintains its precise shape.
Marking And Measuring Mastery
Mastering the art of marking and measuring is crucial when cutting crown molding without a miter saw. The accuracy of your measurements and markings directly impacts the quality of the final cuts. This section will delve into essential strategies for error-free marking and the role of templates and guides in ensuring precise cuts.
Strategies For Error-free Marking
When marking crown molding for cutting, precision is paramount. Utilize the following strategies to ensure accurate markings:
- Use a sharp pencil or marking knife to make clear, visible lines.
- Measure and mark each cut carefully, double-checking the measurements before proceeding.
- Consider using a combination square or a miter square to ensure angles are accurately marked.
- Secure the molding firmly in place before marking to prevent any movement that could lead to inaccuracies.
The Role Of Templates And Guides
Templates and guides are invaluable tools when cutting crown molding without a miter saw. They aid in achieving precise cuts and angles. Here’s how to leverage them effectively:
- Create templates for common crown molding angles to streamline the marking process and ensure consistency in cuts.
- Utilize purpose-made angle guides or jigs to facilitate accurate marking and cutting of complex angles.
- Clamp or secure templates and guides in place to prevent slippage during the marking and cutting process.
Perfecting The Art Of Cutting
Perfecting the art of cutting crown molding without a miter saw requires precision, technique, and a keen eye for seamless joint connections. Whether you’re a beginner or an experienced DIY enthusiast, mastering the skill of creating clean cuts by hand is essential for achieving professional-looking results. With attention to detail and the right approach, you can avoid common pitfalls and ensure that your crown molding installation is visually striking and structurally sound.
Common Pitfalls To Avoid
When cutting crown molding without a miter saw, several common pitfalls can lead to uneven joints and misaligned corners. These often include inconsistent measuring, improper use of cutting tools, and neglecting to account for the molding’s spring angle. By understanding and actively avoiding these pitfalls, you can achieve a seamlessly flowing crown molding installation without the need for specialized machinery.

Ensuring Seamless Joints By Hand
To guarantee that your crown molding joints are flawless, follow these steps:
- First, use a coping saw to carefully cut along the top edge of the molding’s profile, ensuring a precise fit at each corner.
- Second, create uniform bevel cuts by using a sharp utility knife and a miter box for accuracy.
- Finally, employ a sanding block to smooth any rough edges and achieve a seamless finish for an immaculate joint connection.
Securing And Aligning Crown Molding
Crown molding adds an elegant touch to any room, but cutting it without a miter saw can be a challenge. However, with the right techniques and tips, you can achieve a sturdy installation and precise angles. Securing and aligning crown molding is crucial for a professional-looking finish. In this section, we’ll explore the techniques for a sturdy installation and provide tips for adjusting angles on installed pieces.
Techniques For A Sturdy Installation
When cutting crown molding without a miter saw, it’s important to ensure that the pieces are securely installed to prevent gaps and inconsistencies. Here are some techniques to achieve a sturdy installation:
- Use a coping saw to create clean joints at inside corners, ensuring a snug fit and minimizing gaps.
- Secure the molding in place with nails or screws, ensuring they are driven into the studs for maximum stability.
- Apply a reliable adhesive to the back of the molding before installation, providing an additional layer of support.
Tips For Adjusting Angles On Installed Pieces
After installing the crown molding, it’s essential to adjust the angles for a seamless finish. Here are some tips for adjusting angles on installed pieces:
- Utilize a coping saw to fine-tune the fit of the molding at inside corners, ensuring a precise and seamless joint.
- Make use of a small hand plane to adjust the angles of the molding, allowing for minor adjustments to achieve a perfect fit.
- Check the alignment of the installed pieces using a level, making any necessary adjustments to ensure a straight and uniform appearance.
Frequently Asked Questions On How To Cut Crown Molding Without A Miter Saw
How Can I Cut Crown Molding Without A Miter Saw?
You can use a coping saw or a handsaw to cut crown molding without a miter saw. Coping involves cutting one piece to fit the profile of the other, while a handsaw can be used to make straight cuts.
What Are Alternative Tools For Cutting Crown Molding?
If you don’t have a miter saw, you can use a coping saw, handsaw, or even a jigsaw to cut crown molding. Each tool has its own technique but can achieve the desired results without the need for a miter saw.
Are There Any Specific Techniques For Cutting Crown Molding?
One technique for cutting crown molding without a miter saw is coping, which involves cutting the molding at an angle to fit the profile of another piece. Alternatively, a handsaw can be used for straight cuts, ensuring precise and accurate measurements.
Conclusion
Cutting crown molding without a miter saw is a feasible task with the right techniques. By using a coping saw or miter box, homeowners can achieve clean and precise cuts. With a bit of practice and patience, anyone can tackle this common DIY project with ease.
Mastering this skill can help save time and money on home improvement projects.