How to Cut Laminate Flooring Without Chipping: Proven Techniques
To cut laminate flooring without chipping, use a sharp blade and make sure to score the laminate multiple times before cutting through it. If you want to cut laminate flooring without chipping, it is essential to follow a few simple steps.
Using a sharp blade, such as a utility knife or a laminate cutter, carefully score the laminate material multiple times along the cutting line. This process weakens the material and prevents chipping. Once the scored line is established, make a slow and steady cut along the line with the blade, ensuring a clean and precise cut.
Taking your time and using the right tools will help you achieve a flawless cut on your laminate flooring without any visible chips or damage. By following these steps, you can achieve a professional finish and ensure your laminate flooring looks pristine.
Maintaining The Integrity Of Your Laminate Flooring
Maintain the integrity of your laminate flooring by learning how to cut it without chipping. Follow these simple steps for a flawless result every time.
The Significance Of Precision Cuts In Laminate Flooring Installation
When it comes to installing laminate flooring, precision cuts play a crucial role in maintaining the integrity of your floors. Properly cutting laminate flooring without chipping ensures a seamless and professional finish, enhancing the overall aesthetic appeal of your space.
To achieve this, it is important to follow some essential guidelines and techniques that prevent chipping and ensure accuracy during the cutting process. In this section, we will explore the significance of precision cuts in laminate flooring installation, as well as effective methods for preventing chipping.
Preventing Chipping For A Seamless And Professional Finish
To maintain the beauty and durability of your laminate flooring, it is essential to prevent chipping during the cutting process. Chipped edges can not only compromise the visual appeal but also create potential areas for moisture penetration, which may lead to warping or damage.
Here are some useful tips to help you achieve a seamless and professional finish:
- Measure twice, cut once: Accurate measurements are the foundation of precision cuts. Take precise measurements of the area where the laminate flooring needs to be cut, ensuring accurate dimensions for a perfect fit.
- Score your cuts: Before making the final cut, it is recommended to score the laminate surface with a utility knife. This scoring technique helps prevent chipping, as it weakens the laminate along the cut line.
- Use the right tools: Invest in high-quality cutting tools specifically designed for laminate flooring. A jigsaw with a fine-toothed blade or a laminate shear can be excellent choices as they minimize the risk of chipping.
- Employ the right cutting technique: When using a jigsaw, start your cut from the backside of the laminate flooring, as this helps reduce chipping on the visible surface. Additionally, using a steady hand and gentle, controlled movements can further minimize the chances of chipping.
- Protect exposed edges: Once the cuts are made, it is essential to protect the exposed edges of the laminate flooring. Applying a clear sealant or adhesive along the edges can help prevent moisture intrusion and enhance the overall durability of the flooring.
- Practice on scrap pieces: If you are new to cutting laminate flooring, it is advisable to practice on scrap pieces first. This allows you to refine your technique and gain confidence before tackling the actual installation.
By following these guidelines and techniques, you can achieve precision cuts and prevent chipping, resulting in a seamless and professional finish for your laminate flooring installation. Take your time, be patient, and prioritize accuracy to ensure the longevity and visual appeal of your floors.
Ensuring Accurate Cuts Every Time
For accurate cuts every time when cutting laminate flooring without chipping, follow these simple guidelines. Use a sharp blade, make sure your measurements are precise, go slow and steady, and use a scrap piece of flooring as a guide to ensure a clean cut.
Overview Of The Necessary Tools For Cutting Laminate Flooring:
- Circular saw: This versatile tool is ideal for making straight cuts and can easily handle thicker laminate flooring.
- Jigsaw: Perfect for cutting curves and intricate shapes, the jigsaw allows for more precise cuts.
- Miter saw: Essential for making angled cuts, the miter saw ensures a clean and professional finish.
- Table saw: Ideal for ripping long boards, the table saw provides accurate and consistent cuts.
Choosing The Right Cutting Tools For Your Project:
- Consider the type of cuts you’ll need to make: Whether it’s straight cuts, curves, or angles, choose a tool that is suitable for your specific needs.
- Take into account the thickness of the laminate flooring: If you’re working with thicker boards, a circular saw or table saw would be more appropriate. For thinner boards, a jigsaw might be sufficient.
- Evaluate your comfort level and experience with different tools: If you’re more comfortable using a circular saw, stick with that. It’s important to use a tool that you feel confident and safe using.
Importance Of Using Sharp Blades For Cleaner Cuts:
- Clean cuts: Sharper blades result in cleaner and more precise cuts, reducing the chances of chipping or splintering the laminate flooring.
- Efficiency: Dull blades can cause the laminate to tear or fray, leading to a longer and messier cutting process.
- Safety: Sharp blades require less force to cut through the material, reducing the risk of accidents or injuries.
Using the right cutting tools and ensuring that your blades are sharp are vital factors in achieving precise and chip-free cuts when working with laminate flooring. By following these guidelines, you’ll be able to complete your project with professional-looking results.
Happy cutting!
Step-By-Step Instructions For Flawless Cuts
Discover the secrets to flawlessly cutting laminate flooring without chipping with these step-by-step instructions. Perfect for DIY enthusiasts looking to achieve professional results at home.
Measure Twice, Cut Once: Accurate Measurements Are Crucial
- To ensure smooth and precise cuts, it is essential to start with accurate measurements.
- Begin by measuring the length and width of the laminate plank you need to cut.
- Use a tape measure to get precise measurements, and make sure to consider any gaps or allowances needed for installation.
- Write down the measurements to refer back to later.
- Double-check your measurements before making any cuts to avoid costly mistakes.
Using A Circular Saw For Straight Cuts
- A circular saw is an excellent tool for making straight cuts on laminate flooring.
- Ensure that you have a sharp blade suitable for cutting laminate material.
- Set the blade depth slightly deeper than the thickness of the laminate plank to minimize chipping.
- Mark the cutting line on the laminate plank using a straightedge or a chalk line.
- Position the saw’s blade on the waste side of the cut line, aligning it with the mark.
- Hold the saw firmly and start cutting slowly and steadily along the marked line.
- Allow the saw to do the work without applying excessive pressure.
- Make sure to wear appropriate safety gear, such as goggles and ear protection, when using power tools.
Employing A Jigsaw For Curved And Intricate Cuts
- A jigsaw is the ideal tool to make curved or intricate cuts in laminate flooring.
- Use a fine-toothed jigsaw blade designed for cutting laminate material smoothly.
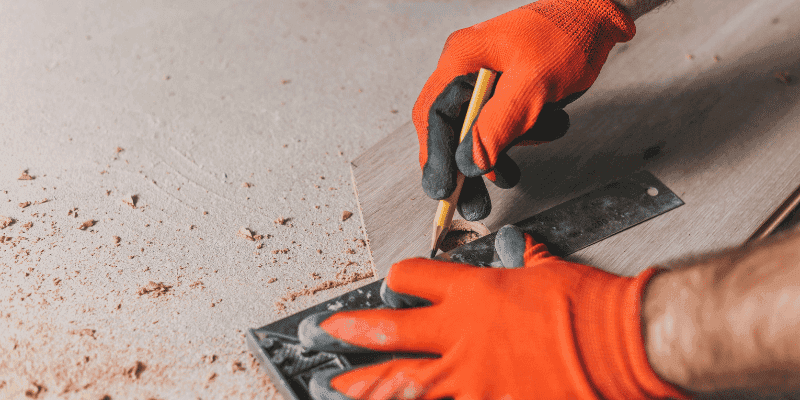
- Draw the desired curve or shape on the laminate plank using a pencil or template.
- Secure the plank firmly to a workbench or sawhorses to prevent it from moving during cuts.
- Begin cutting by positioning the jigsaw’s blade at the starting point of the marked curve.
- Guide the jigsaw slowly and steadily along the marked line, following the curve closely.
- Take care to maintain a consistent cutting speed to avoid chipping or splintering.
- Remember to wear safety equipment, such as goggles and gloves, while using a jigsaw.
The Role Of A Miter Saw In Achieving Precise Angled Cuts
- For precise angled cuts on laminate flooring, a miter saw is indispensable.
- Set the miter saw to the desired angle using the saw’s built-in angle adjustment feature.
- Ensure that the blade is suitable for cutting laminate material and is sharp.
- Mark the cutting line on the laminate plank, indicating the angle required.
- Align the plank with the saw’s fence, positioning it to make the cut on the waste side of the mark.
- Hold the plank securely against the fence and activate the saw.
- Slowly lower the blade onto the marked line, allowing the saw to cut smoothly through the laminate.
- Make sure to let the blade come to a complete stop before lifting it back up.
With these step-by-step instructions, you can achieve flawless cuts without chipping when working with laminate flooring. Remember to measure accurately, use the appropriate tools for straight or curved cuts, and prioritize your safety by wearing protective gear. By following these tips, your laminate flooring installation project will be a breeze, resulting in professional-looking and chip-free cuts.
Additional Tips And Tricks For Chip-Free Cuts
Discover additional tips and tricks to achieve chip-free cuts when cutting laminate flooring. These valuable techniques help you achieve flawless results without any unsightly chips, ensuring a professional finish for your flooring project. Improve your cutting skills and enjoy a smooth and precise installation.
When it comes to cutting laminate flooring, preventing chips and maintaining a clean finish are key priorities. Apart from the techniques mentioned in the previous sections, here are some additional tips and tricks to help you achieve chip-free cuts:
Proper Blade Selection For Optimal Results
- Choose the right blade: Opt for a fine-toothed blade specifically designed for laminate flooring. This will help minimize the chances of chipping and produce smoother cuts.
- Consider the teeth per inch (TPI): Higher TPI blades are ideal for laminate flooring as they provide cleaner cuts with minimal tear-out.
Minimizing Tear-Out With Masking Tape Or Painter’S Tape
- Apply masking tape or painter’s tape: Before making the cut, applying strips of tape along the cutting line can help reduce tear-out. This acts as a protective barrier and prevents the laminate from splintering while cutting.
Reducing Vibrations And Maintaining Control Throughout The Cut
- Stabilize the workpiece: To minimize vibrations, ensure the board is securely positioned and supported on a stable surface. This will help maintain control and reduce the chances of chip-out.
- Steady your hand: Maintain a firm grip on the saw and use steady, even strokes while cutting. Avoid rushing the process to prevent chipping and ensure a smooth finish.
Managing Chip-Out On The Underside Of The Board
- Cut from the backside: When possible, cut from the backside of the laminate flooring instead of the top surface. This can help hide any potential chip-out, as the visible side of the board remains largely unaffected.
- Use sacrificial backing: Place a sacrificial piece of scrap wood beneath the laminate flooring to act as a backing. This can help prevent tear-out and chip-out on the underside of the board.
By following these additional tips and tricks, you can enhance your cutting technique and achieve clean, chip-free cuts on your laminate flooring projects. Remember, proper blade selection, minimizing tear-out with tape, reducing vibrations, and managing chip-out will all contribute to a professional-looking finish.
What To Do If The Unexpected Happens
If you’re facing the challenge of cutting laminate flooring without chipping, there are several techniques you can employ to achieve clean and precise results.
Laminate flooring can undoubtedly enhance the aesthetic appeal of any space. However, despite our best efforts, unexpected chipping may occur during the installation or even after years of use. Don’t worry if this happens to you! In this section, we will explore effective ways to repair and camouflage minor chips, as well as replace damaged sections for more extensive chipping.
Repairing Minor Chips And Imperfections In Laminate Flooring:
- Begin by cleaning the chipped area thoroughly, removing any dust, dirt, or debris.
- Fill the chip with a color-matched laminate filler using a putty knife. Ensure that the filler is level with the surrounding flooring.
- Let the filler dry completely based on the manufacturer’s instructions.
- Gently sand the filled area using fine-grit sandpaper until it is smooth and flush with the surrounding floor surface.
- Clean the area once again to remove any residual dust from sanding.
- Apply a clear laminate repair sealant over the filled and sanded area for added protection and durability.
- Allow the sealant to dry completely before walking on the repaired section.
Blending And Camouflaging Chips For A Seamless Appearance:
- Start by assessing the color and texture of your laminate flooring, considering the manufacturer’s recommendations for touch-up kits or color-matching products. These kits typically include markers, crayons, or putty.
- Select the appropriate product that matches your laminate flooring color.
- Apply the touch-up marker, crayon, or putty over the chipped area, filling it in and ensuring a seamless blend with the surrounding floor.
- Gently wipe away any excess product using a cloth dampened with water.
- Allow the touch-up material to dry completely according to the manufacturer’s instructions.
- Inspect the repaired area and make any necessary adjustments to achieve a uniform appearance.
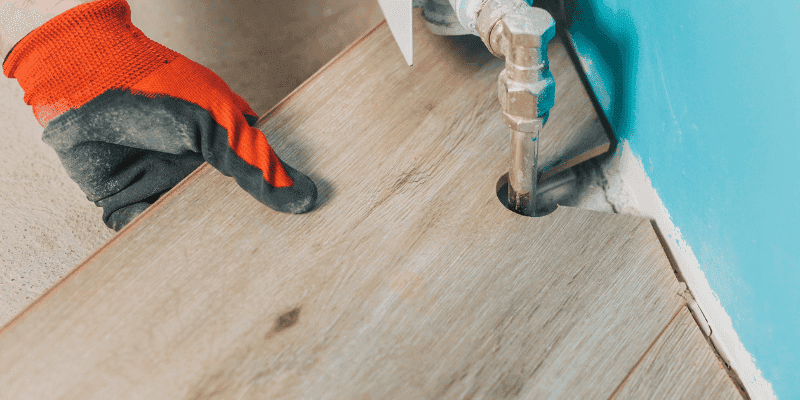
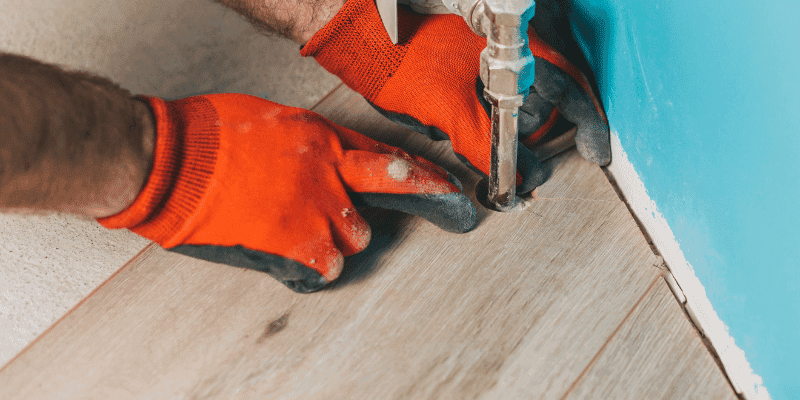
Replacing Damaged Sections For More Extensive Chipping:
- Start by removing the damaged laminate planks using a prying tool or a hammer and chisel. Ensure to wear safety goggles and gloves during this process.
- Take measurements of the damaged section to determine the size of the replacement.
- Purchase replacement laminate planks that match the color, style, and texture of your existing flooring.
- Cut the replacement plank using a circular saw, ensuring a precise fit. Remember to leave a small gap for expansion, as recommended by the manufacturer.
- Apply laminate adhesive to the exposed edges of the existing flooring and the replacement plank.
- Carefully insert the replacement plank into the gap, pushing it firmly and ensuring it is level with the surrounding flooring.
- Wipe away any excess adhesive using a damp cloth.
- Use heavy objects or clamps to apply pressure to the replaced plank until the adhesive dries completely.
- Once the adhesive is dry, remove any protective covering from the new plank.
- Clean the entire floor surface, ensuring a seamless transition between the replaced plank and the existing flooring.
By following these steps, you can effectively repair minor chips, camouflage imperfections, or even replace damaged sections of your laminate flooring. Remember that attention to detail and patience are key to achieving satisfactory results. With a little effort, your laminate flooring will regain its flawless appearance and continue to enhance your space for years to come!
Achieving Professional-Looking Results
Learn how to achieve professional-looking results when cutting laminate flooring without chipping. Follow these expert tips and techniques to ensure a flawless finish every time.
Creating chipping-free cuts is crucial for achieving professional-looking results when cutting laminate flooring. It requires a combination of patience, practice, and attention to detail. In this section, we will explore the importance of these aspects and discuss how maintaining a clean and safe work environment can significantly enhance the outcome of your laminate flooring cuts.
Importance Of Patience And Practice For Mastering Chipping-Free Cuts:
- Patience is key when cutting laminate flooring without chipping. Rushing through the process can result in mistakes and unsightly chips. Take the time to measure accurately and plan your cuts before making any incisions.
- Practice makes perfect. It is essential to familiarize yourself with the tools and techniques involved in cutting laminate flooring to achieve clean cuts. Consider practicing on scrap pieces before working on your actual flooring.
- Learn from your mistakes. If you encounter any chipping during the process, analyze what went wrong and adjust your approach accordingly. Continuous practice will help you develop the necessary skills for flawless cuts.
Maintaining A Clean And Safe Work Environment For Better Outcomes:
- A clean work area is essential for achieving professional-looking results. Remove any debris, dust, or obstacles from your workspace before starting your cutting process. This ensures that the flooring material remains free from potential particles that can cause chipping.
- Safety should be a priority. Ensure you wear appropriate protective gear, such as safety goggles and gloves, to prevent accidents and injuries while cutting laminate flooring. This precaution will enable you to focus on achieving accurate cuts without compromising your well-being.
- Utilize proper cutting techniques. Use a sharp saw blade designed for laminate flooring to minimize the chances of chipping. Apply steady and consistent pressure throughout the cut, maintaining control over the saw’s movements.
By emphasizing patience, practice, and a clean work environment, you can significantly enhance your ability to cut laminate flooring without chipping. Remember to measure twice, cut once, and be patient in mastering the necessary techniques. With practice and attention to detail, you will undoubtedly achieve professional-looking results that will elevate the overall appearance of your flooring installation.
Frequently Asked Questions For How To Cut Laminate Flooring Without Chipping
How Do You Keep Laminate Floors From Chipping When Cutting?
To prevent chipping when cutting laminate floors, follow these tips:
1. Use a sharp saw blade to make clean cuts.
2. Place masking tape on the cut line to reduce splintering.
3. Cut slowly and steadily to avoid putting too much pressure on the laminate.
4. Support the laminate with a stable base or clamps to prevent it from shifting during cutting.
What Is The Best Tool To Cut Laminate Flooring?
The best tool to cut laminate flooring is a miter saw or a circular saw.
What Is The Best Way To Cut Laminate Flooring Lengthwise?
The best way to cut laminate flooring lengthwise is to use a circular saw with a fine-toothed blade.
Is There A Special Blade To Cut Laminate Flooring?
Yes, there is a special blade designed specifically for cutting laminate flooring accurately.
Conclusion
Cutting laminate flooring without chipping is not only possible but essential for achieving a professional-looking installation. By following the right techniques and using the proper tools, you can minimize the risk of chips and maintain the integrity of your laminate flooring.
Start by measuring and marking your cuts accurately to ensure precision. Utilize a guide or fence when making straight cuts to maintain a steady hand and prevent slips. When it comes to curves or angled cuts, take it slow and steady, using a jigsaw or circular saw with a fine-tooth blade.
Additionally, choosing the right blade for your saw and adjusting the cutting depth can make a significant difference in preventing chipping. Remember to wear protective gear and keep your work area clean to avoid any accidents. By employing these methods, you can confidently cut laminate flooring without chipping and achieve a flawless result in your flooring project.