How to Cut Steep Angles on Table Saw
A steep angle is one of the most difficult cuts on a table saw. Most table saws only tilt up to 45 degrees, which isn’t enough for many projects. If you’re looking to cut more vertical angles, there are a few things you can do.
First, you’ll need to use a blade with more teeth. The more teeth there are, the smoother the cut will be. Second, you’ll need to take your time and go slowly.
Cutting too quickly will result in a rough edge. Finally, use a push block or feather board to keep the material from kicking back at you.
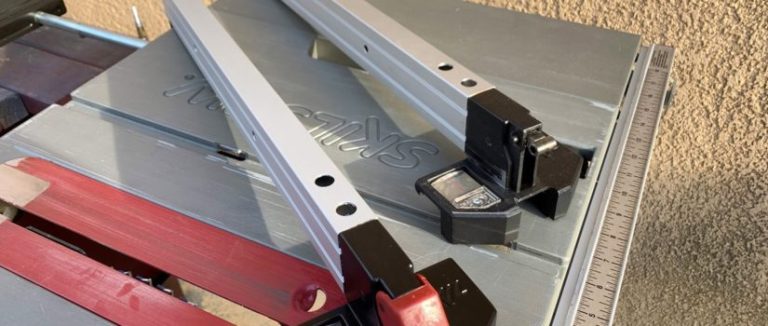
- Set the blade of your Table saw to the desired angle
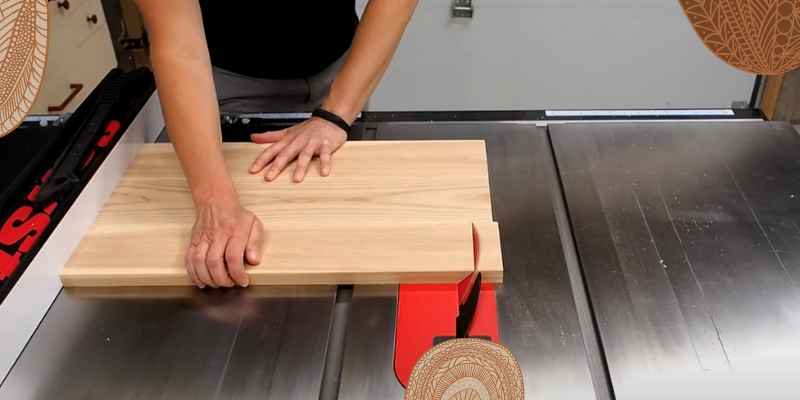
- Place the piece of wood you wish to cut on the Table, making sure it is secured firmly in place
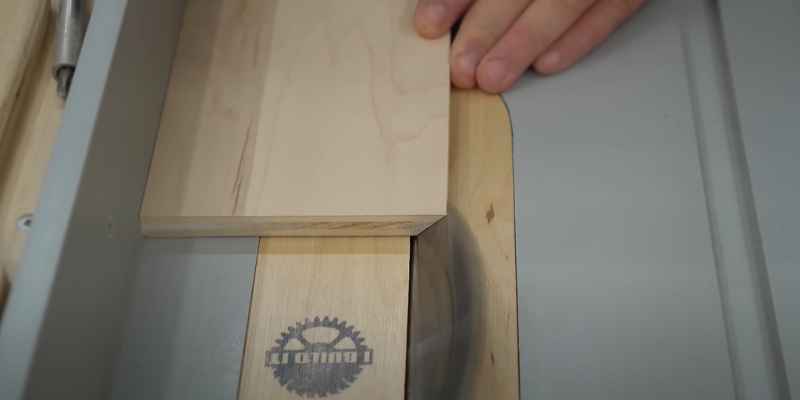
- Slowly and carefully guide the wood through the blade, keeping a firm grip on it at all times
- Once the wood has been cut, please remove it from the Table and proceed to sand or finish as desired.
How to Cut More Than 45 Degrees on a Table Saw
If you’re looking to make cuts over 45 degrees on a table or saw, there are a few things you need to know. First, you’ll need to adjust the blade of your saw. Most table saws have a bevel scale up to 45 degrees, so you’ll need to set it at 46 degrees.
Second, when cutting, you’ll need to use a push stick or feather board to keep your fingers away from the blade. Finally, go slowly and carefully when cutting – it’s easy to get too excited and end up with an accident. With these tips in mind, cutting more than 45 degrees on a table saw is easy and safe!
Cutting Angles on Table Saw
The Table saw is one of the most versatile tools in a woodworker’s arsenal. With a few simple jigs, it can handle everything from crosscuts and rip cuts to miters and bevels. In this blog post, we will focus on one type of cut – cutting angles on a table saw.
There are a few different ways to approach this, but we’ll focus on two main methods. The first use a site gauge, and the second is unsealed. Let’s take a look at each process in turn.
Miter Gauge Method The first step is to set your miter gauge to the desired angle. For most grades, you’ll want to use an auxiliary fence attached to the miter gauge (this helps keep the workpiece from tipping as you cut).
Once the miter gauge is set up, make your cut as you would for any other crosscut. Sled Method If you don’t have a miter gauge (or prefer this method), you can use a sled instead.
Start by making a base for your sled precisely 90 degrees – this will ensure that your cuts are nice and square. Then, add an auxiliary fence at the desired angle (again, this will help prevent tipping). To make your cut, line up your workpiece with the wall and push it through – easy peasy!
How to Cut 22.5 Angle on Table Saw
To make precise cuts on your Table saw, you’ll need to learn how to cut a 22.5-degree angle. This can be useful for various projects, such as creating picture frames or trim work. While it may seem daunting at first, cutting a perfect 22.5-degree angle is relatively easy once you know the steps involved.
You’ll need to adjust the blade on your Table saw to a 45-degree angle. Next, cut the length of scrap wood. Then, measure out half the width of the scrap wood and make another cut at a 90-degree angle.
Finally, align the two cuts you’ve made and mark where they intersect – this is your 22.5-degree line. Now line up your workpiece with this line and make your cut!
How to Cut 60-Degree Angle on Table Saw
Assuming you’re looking to cut a 60-degree angle on a table saw, there are a few different ways to do this. The first is by using a miter gauge. Miter gauges typically have angle markings up to 60 degrees, making it easy to line up your cuts.
If your miter gauge doesn’t have an angle marking for 60 degrees, you can still use it by aligning the blade at 30 degrees and making two passes (one on each side of the edge). Another option is to use a combination square or T-bevel set at 60 degrees. Line up the border with the measurement markings on either tool and make your cut.
If you need to make more than one cut at a 60-degree angle, it may be easier to use a jig. Various jigs are available specifically for cutting tips on a table saw, or you could make your own if needed. Whichever method you choose, take all safety precautions when operating a table saw.
Cutting a 45 Degree Angle With a Table Saw
The Table saw is one of the most versatile tools in a woodworker’s arsenal. With its ability to make rip, cross, and miter cuts, the Table saw can handle almost any cutting job. But one amount that can be tricky to execute on a table saw is a 45-degree angle.
There are several ways to cut a 45-degree angle on a table saw. The first way is to use an adjustable miter gauge. Most table saws have a built-in miter gauge, but you can also purchase an aftermarket gauge if your saw doesn’t have one.
To use the miter gauge, set it to the desired angle and make your cut. The second way to cut a 45-degree tip on a table saw is using a sled. A sled is a piece of wood you attach to your Table saw’s fence.
It acts as an extended fence, which allows you to make more precise cuts. To use a sled, attach it to your wall and then position your workpiece against it so the blade will cut at the desired angle. Then make your cut and remove the sled when you’re finished.
The third way to cut a 45-degree angle on a table saw is by using an auxiliary fence. An auxiliary fence is an extra piece of wood that you clamp onto your regular wall. This gives you more support for making precision cuts.
To use an auxiliary fence, clamp it onto your regular wall and position your workpiece so the blade will cut at the desired angle. Then make your cut and remove the auxiliary fence when you’re finished.
How to Cut a 67.5-Degree Angle on a Table Saw.
No matter what you’re cutting with a table saw, be it lumber for framing or trim for cabinetmaking, you’ll need to make sure your cuts are square. That means 90-degree angles at the corners. But sometimes, you must cut other tips, like mitering crown molding or beveling a workpiece edge.
For those cuts, you can use your Table saw if you have the right blade and know how to set up the fence. This article will show you how to cut two joint angles on a table saw: a 67.5-degree angle and a 22.5-degree angle. To make either of these cuts, start by installing an appropriate blade in your Table saw—one with as many teeth as possible.
The more teeth there are on the blade, the smoother the cut will be. You also want a knife with carbide tips because they hold an edge longer than steel blades and won’t dull as quickly when cutting more complex materials such as plywood or MDF (medium-density fiberboard). With the correct blade installed, raise it through its full range of motion until it protrudes about 1/8 in.
Above the tabletop surface (photo 1). Next, set your fence perpendicular to the miter gauge slots in the tabletop (photo 2). If your fence isn’t exactly 90 degrees to those slots, adjust it until it is—a misaligned fence is one of the leading causes of inaccurate cuts on a table saw.
Now position your workpiece against the fence with one end flush against the outside edge of the left miter slot (the “offside”) and measure over from that point to where you want your cutline to intersect with the far edge of your workpiece (the “near side”). Mark that spot on both sides of your workpiece so there’s no confusion about which side needs to stay against which part of the miter gauge slot during cutting operations (photo 3). photo 4 shows how we positioned our stock for making 67. Photo 5 After making sure both ends of our store were snug against stops clamped to our miter gauge slots, we were ready to make our crosscut.
We started by holding down the stock with our left hand and guiding it past the blade with our right hand, keeping firm Ripon. Both hands as we fed the store into the machine.
Cutting Acute Angles on Table Saw
If you’re looking to cut acute angles on a table or saw, there are a few things you need to keep in mind. First, you must ensure the blade is sharp and properly installed. A dull knife or one not installed correctly can cause the wood to bind, making it difficult to get a clean cut.
Second, you must use a fence or miter gauge when cutting angled pieces. This will help ensure that the work is cut at the correct angle. Finally, take your time and be careful when making cuts like this.
It’s easy to slip and cause serious injury if you’re not careful.
How to Cut a 2X4 at an Angle on a Table Saw.
Assuming you’re looking to cut a 90-degree angle: Place the 2×4 flat on the Table with the point you want to cut facing up. Line up the blade of the saw with the mark.
Carefully push the wood through the blade. Avoid putting your hands in line with the sword. Once you’ve cut through most of the wood, use your fingers to guide it through the rest of the way.
How Do You Cut an Angle on a Table Saw?
If you want to make precise cuts on your Table or saw, you’ll need to know how to cut angles. Luckily, it’s not as difficult as it might seem. With a bit of practice, you’ll be able to make perfect cuts every time.
You can cut angles on a table saw in two ways: with the miter gauge or with a sled. We’ll go over both methods so that you can decide which one is best for you. Using the Miter Gauge
The first method is cutting angles using the miter gauge that comes standard with most table saws. To do this, start by setting the miter gauge to the grade you want to cut. For example, if you’re going to miss a 45-degree tip, set the miter gauge at 45 degrees.
Once the miter gauge is set, clamp it into place so that it doesn’t move while you’re cutting. Then, make your cut as usual and remove the piece when you’re finished. It’s important to note that the miter gauge isn’t always 100% accurate.
If precision is essential to your project, it’s a good idea to test the accuracy of your miter gauge before making any cuts. You can do this by setting it at 90 degrees and then measuring the angle of your resulting cut with a protractor. If the tip isn’t exactly 90 degrees, adjust your miter gauge accordingly before making more cuts.
Using a Sled The second method for cutting angles is a sled. A sled is simply a platform that slides along the length of your Table saw’s blade, allowing you to make perfectly straight and precise cuts.
Using a sled is particularly useful when working with large pieces of wood or longboards. It’s also helpful if you need to make multiple identical cuts, as it ensures each one will be exactly alike.
To use a sled, start by attaching either an auxiliary fence or a stop block onto one end of your sled.
This will act as a guide for making your cuts and ensure they’re all perfectly straight. Next, set up your workpiece on the sled to rest against the fence or stop the block. Then, slide the whole assembly through the Table saw blade, and keep your hands away from the edge at all times.
When you reach the other side of the blade, remove your workpiece and repeat another cut needed. Remember that depending on the material you’re working with and its thickness, you may need to use the highest blade setting on your Table saw to avoid kickback when making these cuts.
How Do You Cut a 45 Degree Angle on a Table Saw?
You can do a few different ways when cutting angles on a table or saw. The most common way is by using a miter gauge. This tool attaches to the Table saw and allows you to make accurate cuts at any angle.
Another way to cut angles is by using a sled. This is a piece of wood that you attach your workpiece to and then push through the blade. Sleds are great for making repetitive cuts or cutting large wood pieces.
You can use a simple jig to make a one-time cut. Just clamp your workpiece in place and then use a pencil or Ruler to mark where you need to make your cut. Then, just set the blade at the correct angle and make your cut.
Be sure to use plenty of support underneath your workpiece so it doesn’t kick back when cutting. Regardless of your chosen method, always be cautious when using power tools like table saws. Always wear safety goggles and gloves, and follow all manufacturer’s instructions carefully.
How Do You Cut an Angle More Than 45 Degrees?
If you need to cut an angle greater than 45 degrees, there are a few different ways you can do it. One option is to use a jigsaw. Another option is to use a power miter saw.
If you are using a jigsaw, you will need to make sure that the blade can pivot. This will allow you to make the necessary cuts. You will also need to use a guide to ensure that your cuts are straight.
Using a power miter or saw, you need to adjust the blade accordingly. Most power miter saws have adjustable blades, so this should not be a problem. Once again, you will want to use a guide to ensure that your cuts are straight.
Can a Table Saw Make 45 Degree Angles?
Most table saws can make 45-degree angles with ease. Some might require some adjustment to the fence or blade, but most table saws can generally handle 45-degree cuts. If you want to make precise 45-degree cuts, it’s always best to consult your table saw’s manual beforehand.
This will ensure that you make the necessary adjustments correctly and avoid potential damage to your saw.
Conclusion
If you’re looking to cut steep angles on a table or saw, there are a few things you need to keep in mind. First, you’ll need to adjust the blade angle. Second, you’ll need to use a push stick or jig.
And third, you’ll need to be extra careful when cutting. Follow these tips, and you should be able to cut those steep angles with ease.