How to Slice through Rigid Core Vinyl Plank Flooring: A Step-by-Step Guide
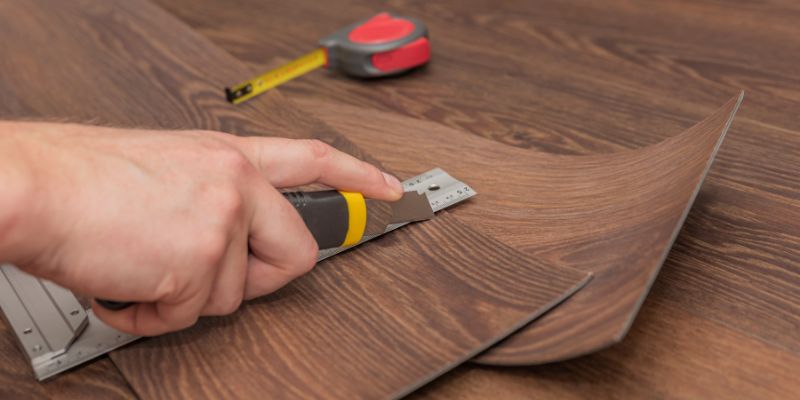
To cut rigid core vinyl plank flooring, use a utility knife or a power saw equipped with a fine-tooth blade. First, measure and mark the plank where you want to make the cut.
Then, use the utility knife to score the plank along the marked line. Next, bend the plank slightly to create a clean break. Alternatively, if using a power saw, set the blade to the appropriate depth and slowly cut along the marked line.
Be sure to wear safety goggles and gloves during the cutting process to protect yourself. With these steps, you can easily and accurately cut rigid core vinyl plank flooring to fit your space.
Step 1: Preparing The Necessary Tools
Prepare your tools for cutting rigid core vinyl plank flooring with these easy steps. Get everything you need in order to achieve smooth and precise cuts for your flooring installation.
Before you start cutting rigid core vinyl plank flooring, it’s essential to gather the right tools and ensure your safety. This will make the process easier and help you achieve precise cuts. Here are the steps to follow:
Getting The Right Cutting Tools
To cut rigid core vinyl plank flooring effectively, you need the following tools:
- Utility knife: A sharp utility knife will be your primary cutting tool. Make sure the blade is fresh and replace it if it becomes dull.
- Straight edge: A straight edge, such as a ruler or a T-square, will help guide your utility knife along a straight line, ensuring clean cuts.
- Safety goggles: Protect your eyes with safety goggles to prevent any potential harm from flying debris.
- Dust mask: Wearing a dust mask will prevent you from inhaling any particles or fumes produced during the cutting process.
- Tape measure: Measure twice, cut once! Use a tape measure to accurately determine the dimensions of the cuts you need to make.
- Pencil or marker: Marking your measurements on the vinyl plank flooring with a pencil or marker will help guide your cutting lines.
Ensuring Safety Measures
Before you start cutting, prioritize your safety by following these measures:
- Work in a well-ventilated area: Proper ventilation will help dissipate any fumes or dust that may be generated during the cutting process.
- Wear suitable clothing: Avoid loose-fitting clothes that can get caught in the cutting tools. Opt for snug-fitting attire and closed-toe shoes.
- Protect your hands: Consider wearing cut-resistant gloves to protect your hands from accidental slips or cuts.
- Secure the plank: Ensure the vinyl plank flooring is securely positioned and does not move while cutting. This will result in clean and accurate cuts.
By having the right tools and taking proper safety precautions, you are ready to move on to Step 2: Measuring and marking the vinyl plank flooring for cutting. Stay tuned!
Step 2: Measuring And Marking
Once you have gathered your tools and prepared your work area, it’s time to move on to step 2: measuring and marking the rigid core vinyl plank flooring for cutting. This crucial step ensures that you achieve accurate cuts and precise fit for your flooring installation.
Determining The Dimensions
Before you begin measuring, make sure you have a clear understanding of the dimensions you need for your vinyl plank flooring. Take into account the length of the area where you will be installing the flooring, as well as any obstacles such as doorways or cabinets that may require additional cuts or adjustments. Measure carefully, and don’t forget to account for any expansion gaps that may be required.
If you are installing the flooring in a rectangular room, the process is relatively straightforward. Measure the length and width of the room, and multiply these values together to calculate the total square footage of the area. This will help you determine how many planks you need and ensure that your cuts are accurate.
If you are working with an irregularly shaped room or need to make cuts around obstacles, you may need to take additional measurements and create a detailed plan to guide your cutting process. Consider creating a sketch or drawing of the area, noting the dimensions and any necessary cuts or adjustments.
Marking The Cutting Line
Once you have determined the dimensions and know where you need to make cuts, it’s time to mark the cutting line on the vinyl plank flooring. This will help you to guide your saw and ensure that your cuts are precise.
To mark the cutting line, use a pencil or a chalk line to create a straight line along the measurement you want to cut. Make sure your marking is clear and visible, as this will be your guide throughout the cutting process. You can also use masking tape to mark the line if you prefer.
Take your time and double-check your measurements and markings before proceeding with cutting. It’s always better to be cautious and ensure accuracy than to rush through this step and end up with improper cuts.
Step 3: Using A Circular Saw
Step 3 of cutting rigid core vinyl plank flooring involves using a circular saw. Follow these steps to ensure a precise and clean cut for a professional finish.
Selecting The Appropriate Blade
Before using a circular saw for cutting rigid core vinyl plank flooring, it is crucial to select the right blade for the job. For this task, a fine-toothed blade with carbide tips is highly recommended. This type of blade works well for cutting through resilient materials like vinyl.
Setting The Depth Of The Cut
Once you have the appropriate blade, the next step is to set the depth of the cut on your circular saw. The depth should be adjusted to match the thickness of your rigid core vinyl plank flooring. This can be easily done by loosening the depth adjustment lever on the saw, aligning it with the desired measurement, and tightening it back in place.
Guiding The Saw Along The Marked Line
With the blade and depth properly set, it’s time to start cutting. Begin by making sure the marked line on the flooring is visible and well-defined. Then, position the circular saw with the blade aligned along the marked line.
Hold the saw firmly and start the motor. Slowly guide the saw along the marked line, making sure to follow a steady and consistent motion. Keep the saw moving smoothly to avoid any jagged cuts or uneven edges.
Conclusion
Cutting rigid core vinyl plank flooring may seem like a daunting task, but with the right tools and techniques, it can be done smoothly and efficiently. In this blog post, we’ve discussed various methods such as using a utility knife, circular saw, and even a jigsaw.
Remember to take safety precautions, measure carefully, and follow the manufacturer’s guidelines for a precise cut. By mastering these techniques, you’ll be able to install your vinyl plank flooring with ease and achieve a professional-looking finish. Happy cutting!