How to Cut Trim With a Miter Saw
To cut trim with a miter saw, start by measuring and marking the trim, then align it with the saw blade and make the cut following the marked line. Engage the safety features of the miter saw before making the cut to ensure a precise and accurate trim cut.
Cutting trim with a miter saw can be a straightforward process when using the right techniques and safety precautions. Whether you’re a DIY enthusiast or a professional carpenter, knowing how to achieve clean and precise cuts on trim can elevate the finish of your projects.
In this guide, we will walk you through the steps and best practices for using a miter saw to cut trim effectively. By following these tips, you can achieve professional-looking results and enhance the overall aesthetic of your trim work.
Cutting Trim Like A Pro
Cutting trim with precision is crucial for achieving a professional finish in woodworking projects. Whether you’re working on baseboards, crown moldings, or other trim pieces, using a miter saw can help you achieve clean and accurate cuts. Let’s explore the importance of precision in trim work and the role of miter saws in achieving this.
Importance Of Precision In Trim Work
Precision in trim work is essential for creating seamless joints and achieving a polished look in any woodworking project. It not only enhances the overall aesthetic appeal but also ensures that the trim fits perfectly, contributing to the structural integrity of the installation.
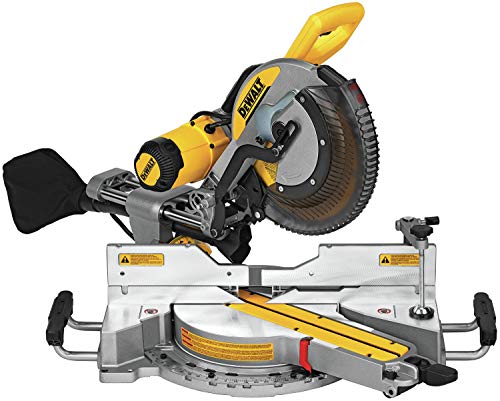
Brief On The Role Of Miter Saws In Cutting Trim
Miter saws play a pivotal role in achieving accurate and angled cuts for trim pieces. Their ability to make precise miter, bevel, and compound cuts allows woodworkers to create seamless joints and achieve the perfect fit for trim installations. The versatility of miter saws makes them an indispensable tool for achieving professional-grade results in trim work.

Safety First: Miter Saw Essentials
When working with a miter saw, safety should always be the top priority. To ensure a safe and efficient work environment, it’s crucial to understand the essential safety measures, personal protective equipment, and the features of the miter saw itself.
Preparing The Work Environment
Prior to using a miter saw, it’s important to prepare the work environment to minimize potential hazards. Follow these steps to ensure a safe workspace:
- Clear the area of any obstructions or debris that could cause tripping hazards.
- Ensure good lighting to clearly see the workpiece and the cutting area.
- Keep the work surface clean and organized to prevent clutter.
Personal Safety Gear Checklist
Proper personal protective equipment (PPE) is essential when operating a miter saw. Here’s a checklist to ensure you have the necessary gear:
- Safety goggles: Protect your eyes from flying debris and sawdust.
- Hearing protection: Use earplugs or earmuffs to prevent hearing damage from the loud noise of the saw.
- Dust mask: Shield your lungs from inhaling wood dust and particles.
- Gloves: Keep your hands protected from potential splinters and sharp edges.
- Appropriate clothing: Avoid loose clothing that could get caught in the saw, and wear closed-toe shoes for added safety.
Understanding Your Miter Saw’s Features
Before using a miter saw, it’s important to familiarize yourself with its features and functionalities. Understanding the following features will ensure safe and accurate operation:
- Blade guard: Check that the blade guard is functioning properly and always returns to cover the blade after a cut.
- Fence and bevel scale: Understand how to adjust and lock these features for precise cuts at different angles.
- Trigger and safety switch: Know how to operate the trigger and release it immediately after a cut, and be aware of the location and function of the saw’s safety switch.
- Dust collection system: Ensure the dust collection system is properly connected and functioning to minimize airborne sawdust and maintain a clean work area.
Miter Saw Mastery: The Ultimate Guide
Mastering the art of using a miter saw for trimming is essential for any DIY enthusiast or professional carpenter. By understanding how to make precise and clean cuts with a miter saw, you can elevate the finish and aesthetics of any woodwork project.
Adjusting The Miter Saw For Trim Cuts
Before diving into cutting trim with a miter saw, it’s crucial to ensure that the saw is properly adjusted to achieve accurate angles and dimensions.
To achieve the perfect miter or bevel cut for trim, follow these steps:
- Securely fasten the trim piece in place on the miter saw table.
- Adjust the miter angle to the desired degree for the corner joint.
- Ensure the bevel angle is set correctly if cutting pieces for an inside or outside corner.
- Double-check the accuracy of the angles using a speed square or protractor.
- Make test cuts on scrap trim to verify the accuracy of the angles before cutting the actual pieces.
Blade Selection For Clean Cuts
Choosing the right blade for your miter saw is crucial in ensuring clean and precise cuts for trim work.
Consider the following factors when selecting a blade:
- Tooth count: Opt for a blade with a higher tooth count (80-100) for smoother cuts on trim materials.
- Tooth configuration: Look for blades with an alternating top bevel (ATB) design for cleaner crosscuts on trim.
- Size and diameter: Ensure the blade size is compatible with your miter saw and suitable for the thickness of the trim material.
Measuring And Marking With Precision
Accurate measuring and precise marking are crucial steps in the process of cutting trim with a miter saw. When working with trim material, achieving precise measurements and markings ensures clean cuts and seamless joins. In this section, we will explore the techniques for accurate measurements and share tips for making precise markings on trim material, helping you achieve professional-looking results with your miter saw.
Techniques For Accurate Measurements
- Use a high-quality tape measure with clear markings and a reliable locking mechanism to ensure consistent measurements.
- For longer pieces of trim, consider using a measuring jig or a straight edge to maintain accuracy and consistency.
- When measuring for angled cuts, be sure to account for the correct miter and bevel angles, taking into consideration the specific angle at which the trim will be installed.
- Double-check all measurements before making any cuts to avoid errors and wastage of material.
Tips For Precise Marking On Trim Material
- Utilize a sharp pencil and a fine-point marking tool to create precise, easy-to-follow lines on the trim material.
- When marking for angled cuts, use an angle finder or protractor to accurately transfer the angle from the wall or corner to the trim.
- Consider using a combination square or a marking gauge to ensure consistent and accurate markings across multiple pieces of trim.
- Markup trim material with clear and bold lines to reduce the chances of misinterpretation during the cutting process.
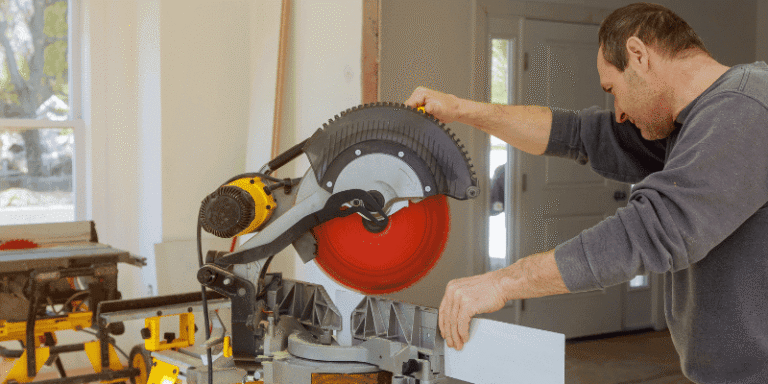
Making The Cut: How To Cut Trim With A Miter Saw
When it comes to cutting trim with a miter saw, following a systematic approach is crucial to achieving precise results. Here is a step-by-step guide:
- Measure the trim: Measure the trim piece accurately to determine the correct length for cutting.
- Adjust the miter saw angle: Set the miter saw to the desired angle for the cut, whether it’s a straight cut or a miter cut for corners.
- Secure the trim: Ensure the trim piece is firmly secured against the saw’s fence to prevent any movement during cutting.
- Make the cut: Carefully lower the saw blade onto the trim piece, applying a smooth and steady motion to create a precise cut.
- Verify the cut: Double-check the cut piece against the measurements to ensure accuracy.
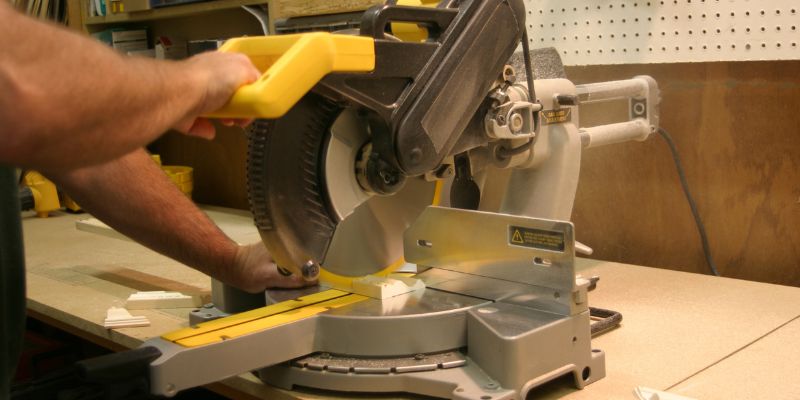
When cutting trim with a miter saw, it’s essential to handle different angles and corners to ensure a seamless installation. Here are some tips:
- For inside corners, use a miter saw to cut two pieces at 45-degree angles to form a perfect 90-degree angle when joined.
- When dealing with outside corners, cut the pieces at a 45-degree angle, ensuring they fit together snugly for a precise edge.
- Consider using a bevel cut when installing trim along sloped surfaces, such as staircases or pitched ceilings, to ensure a seamless transition.
Perfect Finishing Touches
When it comes to achieving that professional look for your home or woodworking project, perfect finishing touches are essential. Cutting trim with a miter saw can greatly enhance the aesthetics of your work, but it’s the final details that truly make the difference. In this guide, we’ll delve into the key steps required to achieve the perfect finishing touches for your trim work.
Sanding And Smoothing Cut Edges
Once the trim pieces have been cut with precision using a miter saw, it’s essential to sand and smooth the cut edges to ensure a seamless finish. This step not only enhances the overall appearance but also prevents any potential splinters. Start by using a medium-grit sandpaper to smooth out any rough edges, followed by a fine-grit sandpaper to achieve a polished look. Take care to sand along the grain of the wood to avoid any unsightly scratches.
Installing Trim: The Final Step In Precision Work
Installing trim is the final step in achieving precision work that elevates the aesthetic of a room or woodworking project. Careful measurement and cutting are crucial to ensure a seamless fit. When nailing the trim in place, use a nail set to sink the heads slightly below the surface, and fill any holes with wood putty for a flawless finish.
Frequently Asked Questions For How To Cut Trim With A Miter Saw
What Is A Miter Saw Used For?
A miter saw is used to make precise angled cuts in trim, molding, and other wood materials. It is commonly used in carpentry and woodworking for creating clean and accurate cuts at various angles.
How Do I Choose The Right Miter Saw For Cutting Trim?
When choosing a miter saw for cutting trim, consider the blade size, bevel capacity, and cutting capacity. Look for a saw that offers adjustable angles and precise cutting capabilities to ensure clean and accurate trim cuts.
What Are The Basic Steps For Cutting Trim With A Miter Saw?
Start by measuring and marking the trim, then set the miter saw angle and blade height. Secure the trim and make the cut, ensuring to follow safety precautions. Finally, check the fit and make any necessary adjustments for a precise finish.
What Safety Precautions Should I Take When Using A Miter Saw?
Always wear eye protection and use a dust mask when cutting trim with a miter saw. Keep hands away from the blade, and ensure that the workpiece is securely clamped or held in place to prevent kickback or accidents.
Conclusion
Mastering the art of cutting trim with a miter saw is essential for any DIY enthusiast or professional. By following the steps outlined in this guide, you can achieve precise and professional results. With practice and patience, you’ll soon be adept at creating seamless cuts and flawless finishes for your woodworking projects.