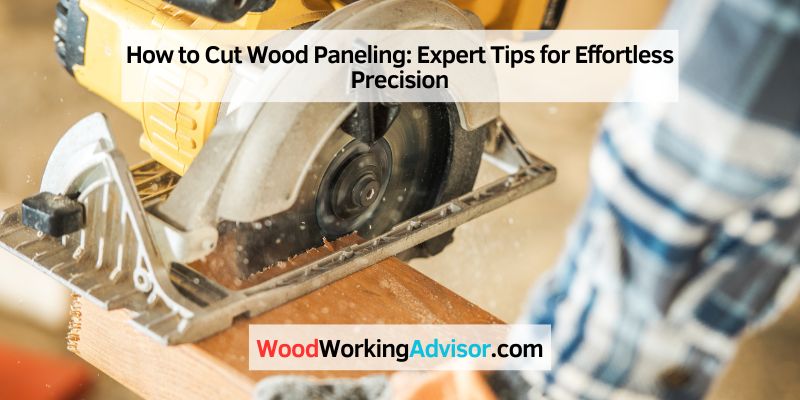
How to Cut Wood Paneling Without Chipping the Finish
To cut wood paneling, measure and mark the desired length, use a circular saw with a fine-toothed blade, and cut along the marked line. Cutting wood paneling is a simple process that can be done with the right tools and techniques.
Whether you’re planning to install new paneling or modify existing pieces, learning how to cut wood paneling allows you to achieve precise and clean cuts for a professional finish. By following a few steps and using the appropriate tools, you can ensure that your wood paneling fits seamlessly into your project.
Read on to discover the steps involved in cutting wood paneling.
Selecting The Right Tools
To cut wood paneling effectively, it’s crucial to select the right tools. Ensure you have a sharp saw, a sturdy measuring tape, and safety gear. Using the appropriate tools will result in precise and clean cuts, making your woodworking projects a success.
Choosing The Proper Saw
When it comes to cutting wood paneling, selecting the right tools is crucial for achieving clean and precise cuts. The first tool you’ll need is a saw. But with so many options available, how do you choose the proper saw for the job?
One of the most commonly used saws for cutting wood paneling is the circular saw. This versatile power tool allows you to cut straight lines with ease. It is perfect for beginners and professionals alike. Circular saws come in different sizes, so choose one that suits the thickness of your wood paneling.
Another option is the jigsaw. This handheld saw is great for making curved cuts or intricate designs in wood paneling. If you’re working with decorative paneling or need more flexibility in your cuts, a jigsaw might be the best choice for you.
Finally, if you prefer a more traditional approach, a hand saw can also be used to cut wood paneling. This option requires more effort and precision but can still yield excellent results if used correctly.
Determining The Correct Blade
Once you’ve chosen the right saw, it’s essential to determine the correct blade for the job. The blade you use will depend on the type of paneling you’re cutting and the desired outcome.
For cutting through solid wood paneling, a carbide-tipped blade is the best option. These blades are incredibly durable and can withstand the rigors of cutting through hardwood paneling without dulling quickly.
If you’re working with plywood or veneer paneling, a fine-toothed blade is recommended. This type of blade will prevent splintering and ensure clean and smooth cuts.
Pro tip: Before making your final selection, double-check the compatibility of the blade with your chosen saw. Each saw has specific blade requirements for optimal performance.
Now that you know how to choose the right tools and determine the correct blade, you’re ready to dive into the process of cutting wood paneling. Stay tuned to learn more!
Preparing The Work Area
Before cutting wood paneling, it’s important to prepare your work area properly. This will help ensure accurate measurements and a safe work environment. In this section, we will discuss two crucial steps: measuring and marking the cuts, and securing the paneling.
Measuring And Marking The Cuts
Accurate measurements are essential to ensure that your wood paneling fits perfectly in its intended location. To measure and mark the cuts, follow these steps:
- Start by using a measuring tape to measure the dimensions of the area where the wood paneling will be installed.
- Once you have the measurements, transfer them onto the wood paneling using a pencil or a marker. Use a straightedge or a level to ensure precise lines.
- If you need to make multiple cuts, mark each one clearly to avoid confusion later.
Remember: Measure twice, cut once is a golden rule in carpentry. Taking the time to double-check your measurements will save you from costly mistakes.
Securing The Paneling
Before you start cutting the wood paneling, it’s crucial to ensure that it is properly secured in place. Here are a few tips to help you achieve this:
- Clear the work area: Remove any obstacles or potential hazards from the work area to ensure a safe and clutter-free space.
- Use clamps or a vice: If you’re cutting a large piece of wood paneling, consider using clamps or a vice to securely hold it in place. This will prevent it from moving or shifting during the cutting process.
- Secure smaller pieces: For smaller sections of paneling, you can use a combination of clamps, adhesive tape, or a workbench with built-in clamps to hold them steady.
Tip: Safety should always be a priority, so don’t forget to wear safety goggles and protective gloves when working with wood paneling.
Techniques For Clean Cuts
Cutting wood paneling requires the right techniques to get clean cuts for a polished finish. By employing the correct cutting motion and taking precautions to avoid splintering, you can achieve precise results for your woodworking projects.
Using The Right Cutting Motion
When cutting wood paneling, utilize a smooth and steady motion to ensure a clean cut. Positioning the saw at the proper angle and applying even pressure as you move through the material will help prevent jagged edges and splintering.
Avoiding Splintering
To prevent splintering when cutting wood paneling, use sharp blades and apply masking tape along the cutting line to provide support and minimize tear-out. Additionally, cutting with a slower pace can reduce the likelihood of splintering, ensuring a clean and professional-looking result.
Finishing And Polishing
When it’s time to cut wood paneling, you not only want to ensure clean and precise cuts, but you also want the finished product to look polished and professional. The finishing and polishing process plays a crucial role in achieving this desired result. In this section, we will explore two essential steps: smoothing the edges and applying a protective finish.
Smoothing The Edges
Once you’ve cut the wood paneling, it’s essential to smooth the edges to give them a clean and polished look. Here’s how you can do it:
- Sand the Edges: Start by using coarse-grit sandpaper to remove any jagged or uneven edges. Sand in a smooth, even motion until the edges feel smooth and uniform.
- Switch to Fine-grit Sandpaper: Next, switch to a finer grit sandpaper to further refine the edges. This will help eliminate any remaining roughness and create a smooth surface.
- Round the Corners: To add an extra touch of refinement, use sandpaper to gently round the corners. This not only enhances the visual appeal but also prevents any sharp edges.
Sanding the edges of your wood paneling is a crucial step that ensures a professional and polished finish.
Applying A Protective Finish
To enhance the durability and appearance of your wood paneling, applying a protective finish is essential. Follow these steps:
- Clean the Panels: Before applying the protective finish, make sure the wood panels are clean and free from dust or debris. Use a soft cloth or vacuum to remove any loose particles.
- Choose the Right Finish: There are various finishes available, such as varnish, polyurethane, or paint. Consider the look you want to achieve and select a finish that best suits your preferences.
- Apply the Finish: Using a brush or roller, apply an even coat of the selected protective finish to the wood paneling. Ensure you follow the manufacturer’s instructions for the specific product you are using.
- Allow for Drying and Curing: Once the first coat has been applied, allow the wood paneling to dry and cure according to the recommended time frame. This will ensure the protective finish sets properly.
- Apply Additional Coats: Depending on the desired level of protection, you may need to apply additional coats. Repeat the application process, allowing each coat to dry and cure before applying the next.
By applying a protective finish to your wood paneling, you not only protect it from damage but also enhance its aesthetic appeal.
Troubleshooting And Faqs
In this section, we will address some common issues you may face when cutting wood paneling and provide answers to frequently asked questions to ensure a smooth and successful process.
Dealing With Warped Paneling
If you encounter warped wood paneling, don’t worry! Here are a few simple steps you can take to rectify the issue:
- Assess the extent of the warp: Start by identifying the specific areas of the paneling that are warped. Is it a slight curve or a more pronounced bend?
- Apply moisture: In many cases, warped paneling can be corrected by applying moisture. Use a spray bottle to dampen the concave side of the paneling, causing the fibers to expand and reduce the warp. Be sure not to over-saturate the wood as it can lead to other problems.
- Apply weight: Once the moisture has been applied, place heavy objects like books or weights on top of the warped area. This will help to flatten the wood while it dries. Leave the weights on for a few days to allow the paneling to acclimate.
- Sand and finish: After the wood has dried and the warp is reduced, lightly sand the surface to smooth out any imperfections. Then, proceed with the desired finish, whether it be staining or painting.
Common Questions And Answers
Let’s address some commonly asked questions about cutting wood paneling:
Q: Can I use a regular saw to cut wood paneling?
A: Absolutely! A regular saw, such as a circular saw or a jigsaw, can be used to cut wood paneling. Just make sure to use a fine-toothed blade to minimize splintering.
Q: What is the best way to measure and mark the cutting lines on wood paneling?
A: To ensure accurate cuts, use a tape measure or ruler to measure and mark the desired cutting lines on the paneling. It’s helpful to use a pencil or a light-colored marker for better visibility.
Q: How can I prevent the wood paneling from splitting while cutting?
A: To avoid splitting the paneling, there are a few techniques you can employ. First, make sure to use a sharp blade and apply gentle pressure while cutting. Additionally, you can place a sacrificial piece of wood beneath the paneling to provide support and reduce the chance of splitting.
Q: Should I wear protective gear when cutting wood paneling?
A: Safety should always be a top priority. Remember to wear safety goggles to protect your eyes from flying debris, and it’s advisable to wear ear protection as well, especially if using power tools.
Q: Can I cut intricate patterns on wood paneling?
A: Certainly! If you wish to cut intricate patterns on wood paneling, a scroll saw or a small coping saw can be used. Take your time and follow the lines carefully for accurate and detailed cuts.
Frequently Asked Questions On How To Cut Wood Paneling
What Is The Best Tool To Cut Paneling?
The best tool for cutting paneling is a circular saw. It is efficient, versatile, and provides clean and precise cuts.
What Is The Best Thing To Cut Paneling With?
The best tool to cut paneling is a saw.
What Is The Best Blade To Cut Paneling?
The best blade for cutting paneling is a fine-toothed saw blade. It provides a smooth and clean cut without splintering the paneling. It’s important to ensure the blade is sharp for the best results.
How Do You Cut Paneling By Hand?
To cut paneling by hand, follow these steps:
1. Measure and mark the cut line accurately.
2. Use a straightedge or level as a guide for your saw or utility knife.
3. Make multiple passes with the saw or score the paneling with the knife until it is cut through.
4. Smooth any rough edges with sandpaper.
5. Always wear safety goggles and gloves while cutting paneling by hand.
Conclusion
Cutting wood paneling is a manageable task that can be accomplished with the right tools and techniques. By following the steps outlined in this guide and taking proper safety precautions, you can achieve professional-looking results in your DIY projects. From measuring and marking to using the appropriate cutting tools, this process can be both rewarding and enriching.