How to Fix Uneven Stain: Expert Tips for Flawless Wood Finishing
To fix uneven stains, sand the surface to remove the existing stain and prep the wood for a uniform application of stain. Uneven stains on wood surfaces can be a frustrating problem.
Whether you’re working on a furniture project or staining your deck, achieving an even and consistent finish is essential for a professional-looking result. Uneven stains can occur due to various factors, such as improper application techniques, inconsistencies in the surface, or differences in the wood’s porosity.
However, there is a solution to fix this issue. The key to fixing uneven stains is to sand the surface. Start by removing the existing stain using sandpaper or a sanding machine. This will help level the surface and remove any inconsistencies. Be sure to sand evenly and thoroughly, paying attention to areas with excessive staining or lighter spots. After sanding, clean the surface to remove any dust or debris. Finally, apply a fresh coat of stain, using consistent strokes and overlapping the previous stained areas. This will help create a uniform finish and fix the problem of uneven stains.
Identifying The Issue
Uneven stain can be a frustrating problem when you’re trying to achieve a smooth, professional finish on your wood surfaces. It can leave unsightly patches and streaks, detracting from the overall appearance of your project. However, before you can fix this issue, it’s crucial to understand what causes uneven stains in the first place.
Understanding Uneven Stain
Uneven stain refers to the inconsistent coloring or shading of wood surfaces after applying stain. While stains are designed to penetrate the wood and enhance its natural beauty, they can sometimes behave unpredictably due to various factors. Understanding the nature of uneven stains will help you identify the specific cause and adopt the appropriate solution.
Common Causes Of Uneven Stain
Uneven stains can occur due to several reasons, including:
- Inconsistent Wood Absorption: Different areas of wood may absorb stains differently, resulting in uneven coloring. This can be caused by variations in wood density, grain patterns, or previous finishing treatments.
- Brush or Applicator Marks: Incorrect technique during application can leave visible brush or applicator marks on the surface, leading to uneven stains. Proper brush selection, smooth strokes, and even pressure are essential for a consistent finish.
- Uneven Surface Preparation: If the wood is not properly sanded, cleaned, or stripped beforehand, the stain may adhere unevenly. Smooth and clean surfaces allow for better absorption and distribution of the stain.
- Inadequate Stirring or Mixing: Properly stirring the stain before application ensures an even distribution of color pigments. Failure to mix the stain well can result in uneven shading.
- Uneven Stain Application: Applying too little or too much stain in certain areas can lead to uneven coloration. Additionally, rushing through the application process or not following the manufacturer’s instructions can cause unevenness.
- Humidity and Temperature: Environmental conditions can affect the drying process of the stain, leading to uneven results. High humidity or extreme temperatures can interfere with the stain’s ability to penetrate the wood evenly.
Identifying the specific cause of uneven stains is crucial for implementing the right solution. Once you have determined the underlying issue, you can take the necessary steps to fix the problem and achieve the flawless, uniform finish you desire.
Preparation Is Key
When it comes to fixing uneven stains on wood surfaces, preparation is key. Before you dive into the actual fix, it’s important to assess the condition of the wood surface, adequately sand, and clean it. By taking these necessary steps, you’ll ensure a smooth and even stain application that will bring out the natural beauty of the wood. Let’s dive into the key points of preparation to achieve the best results.
Wood Surface Inspection
Before you start any staining project, it’s crucial to thoroughly inspect the wood surface. Look out for any imperfections such as scratches, dents, or gouges that might affect the evenness of the stain. Make a note of these areas so you can address them during the preparation process.
Sanding And Cleaning
The next step in preparing your wood surface is sanding and cleaning. Sanding helps to smooth out any rough patches, remove old finishes or stains, and even out the surface. This step not only enhances the appearance of the wood but also ensures a better adherence to the new stain. Use sandpaper with a grit appropriate for the condition of your wood, and be sure to sand in the direction of the grain.
After sanding, it’s important to clean the wood surface thoroughly. Remove all the dust, dirt, and debris using a clean cloth or vacuum. Any remaining particles can interfere with the stain application, resulting in an uneven finish. Wipe the surface down with a gentle solvent or cleaner to ensure it is free from oils or residues that might prevent the stain from penetrating evenly.
By following these simple yet crucial steps of wood surface inspection, sanding, and cleaning, you’ll pave the way for a successful stain application. This thorough preparation will help you achieve a smooth, even, and professional-looking finish that enhances the natural beauty of the wood.
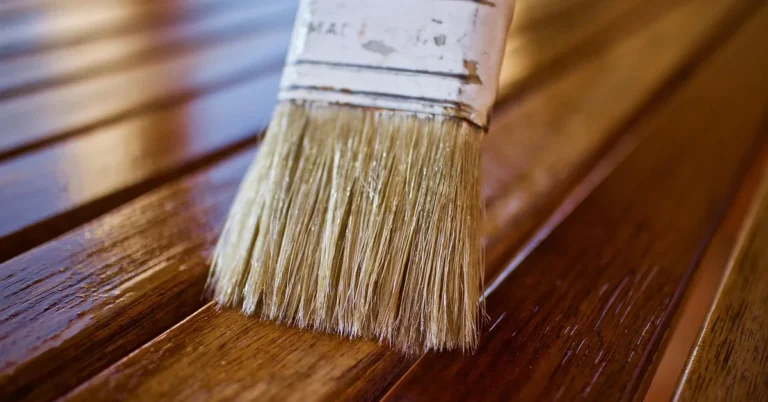
Application Techniques
When it comes to achieving an even stain on your wood surface, the application technique plays a crucial role. By choosing the right stain and applying it properly, you can ensure a consistent and professional finish.
Choosing The Right Stain
The first step in fixing uneven stains is choosing the right stain for your project. Ensure to select a stain that is compatible with the type of wood you are working with. Consider the color, opacity, and consistency of the stain to achieve the desired result. Always test a small area to see how the stain interacts with the wood before proceeding with the entire surface.
Even Application Methods
Once you’ve chosen the right stain, it’s crucial to apply it evenly for a consistent finish. Use the following techniques for a uniform application:
- Ensure the wood surface is clean and free of any dust or debris before applying the stain.
- Use a high-quality brush, sponge, or cloth to apply the stain, ensuring it works in the direction of the wood grain.
- Wipe off any excess stain after a few minutes to prevent uneven absorption.
- If using a sprayer, maintain a consistent distance and speed to avoid pooling or uneven distribution.
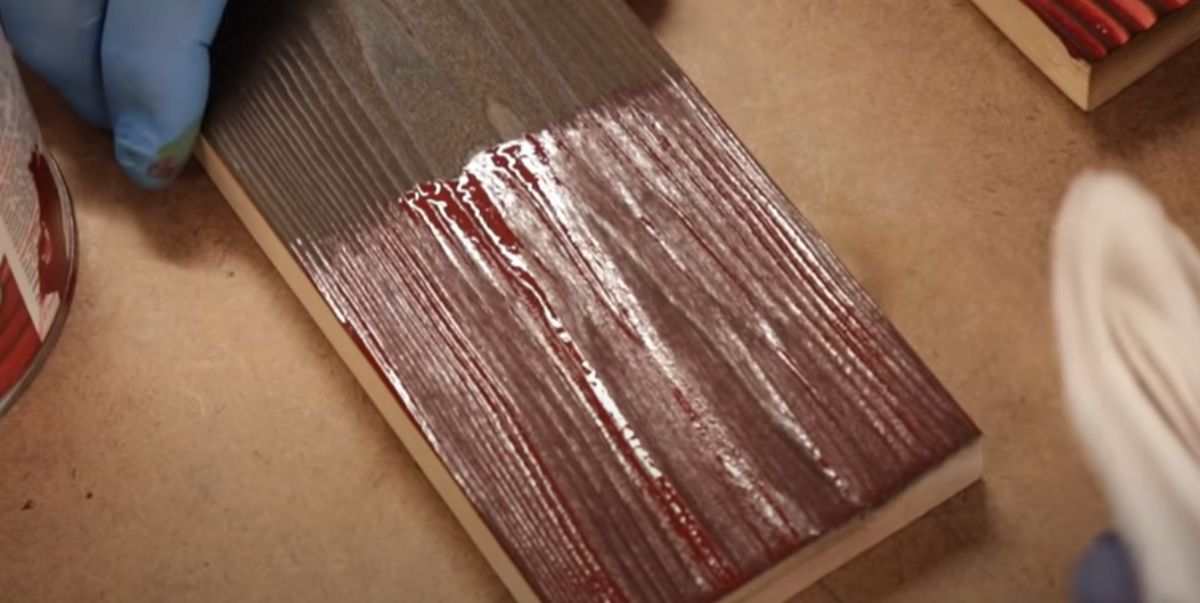
Troubleshooting Uneven Stain
If you’re dealing with uneven stains on your surfaces, fixing them is essential for a flawless finish. Begin by sanding the uneven areas to remove the excess stain, then reapply the stain evenly to ensure a consistent color. Afterward, finish with a protective coat to seal the surface.
Uneven stain can be a frustrating issue when trying to achieve a smooth and flawless finish on your wood surfaces. If you’ve encountered this problem, don’t worry! There are simple steps you can take to address dark spots and deal with blotchy stains. In this section, we will walk you through these troubleshooting techniques so you can fix uneven stains like a pro.
Addressing Dark Spots
Dark spots can occur when the stain is absorbed more in certain areas of the wood, resulting in uneven coloration. To tackle this issue, follow these steps:
- 1. Sand the surface: Start by sanding the entire stained area using fine-grit sandpaper. This will help remove any excess stains and even out the color.
- 2. Apply a colorless sealer: After sanding, apply a colorless sealer evenly over the entire surface. This will create a barrier and prevent the stain from further penetrating the wood.
- 3. Reapply the stain: Once the sealer has dried, reapply the stain to the entire surface, ensuring even coverage. Allow the stain to dry completely before applying a protective finish.
Dealing With Blotchy Stain
A blotchy stain occurs when the wood absorbs the stain unevenly, resulting in light and dark patches. To fix this issue, follow these steps:
- 1. Precondition the wood: Before staining, apply a wood conditioner to the surface. This helps the wood absorb the stain more evenly.
- 2. Apply multiple coats: Instead of applying a single heavy coat, consider using multiple thin coats of stain. This allows for better control over the color and minimizes blotchiness.
- 3. Wipe off excess stain: After applying the stain, gently wipe off any excess with a clean cloth. This will prevent the buildup of stains in certain areas and help achieve a more uniform finish.
By following these troubleshooting techniques, you can easily address dark spots and deal with blotchy stains, ensuring a smooth and even finish on your wood surfaces. Remember to always test the stain on a small, inconspicuous area before applying it to the entire surface, and make sure to follow the manufacturer’s instructions for the best results.
Achieving A Flawless Finish
To achieve a flawless finish when fixing uneven stains on wood, there are a few key techniques you can employ. By using wood conditioners, and applying sealants and topcoats, you can ensure an even and beautiful stain. Read on to learn more about these methods!
Using Wood Conditioners
Wood conditioners play a crucial role in ensuring an even stain on your wood surface. These products help to prepare the wood by penetrating the surface and creating a uniform base. By filling in porous areas and preventing blotchy stain absorption, wood conditioners ensure a smooth and consistent finish.
Here are some steps to follow when using wood conditioners:
- Begin by sanding the wood surface to remove any imperfections.
- Apply the wood conditioner using a clean cloth or brush.
- Massage the conditioner into the wood, ensuring even coverage.
- Allow the conditioner to penetrate the wood for the recommended amount of time.
- Wipe off any excess conditioner with a clean cloth, following the grain of the wood.
- Allow the wood to dry completely before proceeding with staining.
Applying Sealants And Topcoats
Once you have used a wood conditioner, it’s important to apply a sealant and topcoat to protect the stain and provide a professional-looking finish. Sealants and topcoats not only enhance the durability of your stained wood but also add depth and richness to the color.
Here are some tips for applying sealants and topcoats:
- Choose a sealant and topcoat that are compatible with your stain.
- Using a clean brush or cloth, apply a thin, even layer of sealant to the wood surface.
- Allow the sealant to dry according to the manufacturer’s instructions.
- Once the sealant is dry, lightly sand the surface to remove any imperfections.
- Apply the topcoat using the same technique as the sealant, ensuring even coverage.
- Allow the topcoat to dry completely before using or moving the stained wood.
By following these guidelines and using wood conditioners, sealants, and topcoats, you can achieve a flawless finish when fixing uneven stains on your wood. Remember to take your time, follow the instructions carefully, and enjoy the process of transforming your wood surface into a masterpiece!

Frequently Asked Questions On How To Fix Uneven Stain
Can I Stain Over Uneven Stain?
Yes, you can stain over uneven stains. However, the result may not be ideal. It is recommended to sand down the uneven stain to create a smooth surface before applying a new coat of stain. This will ensure a more even and consistent finish.
Will A Second Coat Of Stain Even Out?
Yes, applying a second coat of stain can help even out the color. The second coat allows for better coverage and can help achieve a more consistent appearance on your wood surface.
How Do You Fix Stain Mistakes On Wood?
To fix stain mistakes on wood, sand the affected area lightly to remove the stain. Then, apply a wood conditioner and restain the wood. Ensure thorough blending for a consistent finish. Sand between coats for a smooth result. Finish with a protective topcoat for durability and shine.
Why Is My Wood Blotchy After Staining?
Wood can become blotchy after staining due to uneven absorption of the stain. This can happen if the wood has inconsistent pores or if there are previous finish residues on the surface. To prevent blotching, use a wood conditioner before staining or sand the wood evenly to remove any previous finishes.
Conclusion
Fixing uneven stains can be achieved by properly prepping the wood surface, applying the stain evenly, and allowing sufficient drying time. By following these simple steps, you can ensure a beautifully stained wood surface that enhances the overall aesthetic of your project.
Don’t forget to consult with a professional if you encounter any challenges along the way.