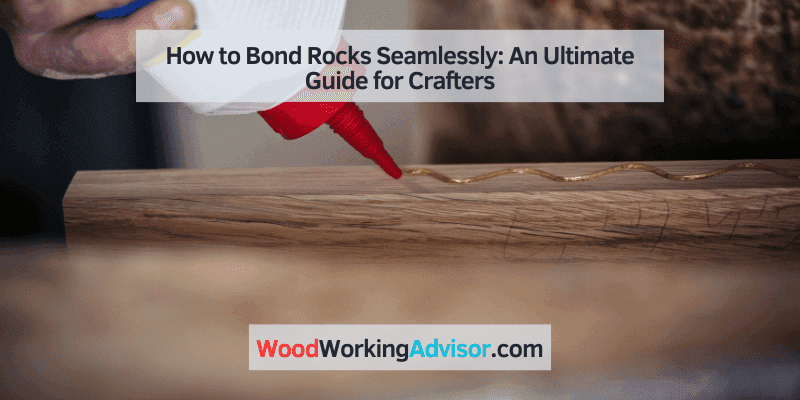
How to Bond Rocks Seamlessly: An Ultimate Guide for Crafters
To glue rocks together for crafts, use a strong adhesive designed for stone materials, applying it with a small brush or squeeze bottle. Craft projects often require the use of rocks, whether it’s for creating stone sculptures, decorating vases, or making jewelry.
Gluing rocks together can be a simple and effective way to achieve the desired artistic effect. However, it is crucial to use the correct adhesive to ensure a durable bond that will hold the rocks together securely. We will explore various methods and tips on how to glue rocks together for crafts, providing you with the knowledge and techniques to create beautiful and long-lasting rock crafts.
Let’s get started!
Why Seamless Rock Bonding Is Essential For Crafters
Crafters understand the importance of seamless rock bonding for their crafts. Learn how to expertly glue rocks together to create beautiful and durable creations.
The Significance Of Seamless Rock Bonding In Craft Projects
In the world of crafts, the ability to effectively bond rocks together is crucial for creating durable and visually appealing projects. Seamless rock bonding involves joining rocks in such a way that the resulting bond is strong, smooth, and virtually undetectable.
This seamless bond not only enhances the overall aesthetics of the craft but also ensures its longevity. It is an essential skill that every crafter should master to achieve professional-grade results. Let’s dive deeper into why seamless rock bonding is so significant in craft projects.
Benefits Of Achieving Seamless Rock Bonds
There are several advantages to achieving seamless rock bonds when working on craft projects. Here are the key benefits:
- Durability: Seamless rock bonding creates a reliable and sturdy bond between rocks, ensuring that the craft stays intact even under normal wear and tear. This durability is especially important for crafts that are meant to be displayed or handled frequently.
- Aesthetic Appeal: Crafting is all about creating visually stunning pieces, and seamless rock bonds play a crucial role in achieving a polished and professional look. The absence of visible gaps or rough edges creates a smooth and seamless finish, elevating the overall aesthetics of the project.
- Versatility: Seamless bonds allow crafters to experiment with various rock shapes, sizes, and textures while maintaining a cohesive and visually appealing outcome. This versatility opens up a world of creative possibilities, enabling crafters to design unique and intricate pieces.
- Longevity: Crafts created with seamless rock bonds have a better chance of withstanding the test of time. The bond is less likely to degrade or weaken over the years, providing the satisfaction of a long-lasting creation that can be cherished for years to come.
Common Challenges Faced In Achieving Seamless Rock Bonding
While seamless rock bonding offers numerous benefits, crafters often face challenges in achieving the desired results. Here are some common hurdles to overcome:
- Surface Preparation: Proper surface preparation is crucial for rock bonding success. The rocks need to be clean and free from dust, dirt, or any other debris that can hinder the bond. Achieving a smooth and even surface might require additional grinding or sanding.
- Adhesive Selection: Choosing the right adhesive is vital for seamless rock bonding. Depending on the type of rocks used and their intended purpose, crafters need to select adhesives that are specifically designed for bonding rocks. Factors like drying time, transparency, and strength should be considered to ensure an effective bond.
- Weight Distribution: Uneven weight distribution can strain the bond, leading to potential failures in the long run. Crafters need to carefully plan and position the rocks to achieve a balanced weight distribution, which helps maintain the integrity of the bond.
- Bond Visibility: Achieving a seamless bond can be challenging, as the adhesive may be visible despite efforts to hide it. Crafters need to pay attention to blending techniques, camouflage methods, and the strategic placement of rocks to minimize the visibility of the bond.
Mastering the art of seamless rock bonding takes practice, patience, and attention to detail. By understanding the significance of seamless rock bonds, appreciating their benefits, and acknowledging the common challenges faced, crafters can confidently create stunning and durable rock crafts.
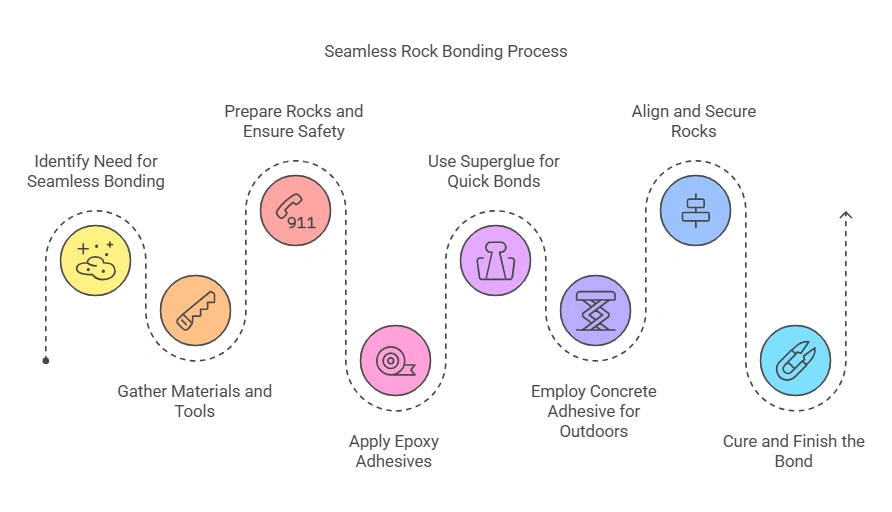
Materials And Tools Needed For Rock Bonding
Rock bonding for crafts requires certain materials and tools such as strong adhesive, sandpaper for roughening the surfaces, a brush for applying the glue, and clamps to hold the rocks together until the glue dries. These items are essential for creating durable and stable rock structures.
Essential Materials Required For Rock Bonding
To successfully glue rocks together for crafts, you’ll need a few essential materials. These items are crucial for creating sturdy and long-lasting bonds between rocks. Here are the materials you’ll need:
- Epoxy resin: This adhesive is perfect for bonding rocks due to its strong and durable properties. Choose clear epoxy resin for a seamless finish.
- Hardener: The hardener is a necessary component of epoxy resin. It helps the adhesive cure and provides extra strength to the bond.
- Mixing cups: These cups allow you to measure and mix the epoxy resin and hardener in the proper ratio.
- Stir sticks: Use these sticks to thoroughly mix the epoxy resin and hardener, ensuring a consistent and effective adhesive.
- Protective gloves: When working with epoxy resin, it’s important to protect your hands from any potential skin irritation. Disposable gloves are a great option.
- Safety goggles: Shield your eyes from any accidental splashes or spills by wearing safety goggles during the bonding process.
- Clamps or rubber bands: Depending on the size and shape of the rocks, you may need clamps or rubber bands to hold them together while the epoxy resin cures.
Recommended Tools For Achieving Seamless Rock Bonds
While the essential materials are crucial, having the right tools can greatly improve the quality of your rock bonds. Here are some recommended tools to achieve seamless and professional-looking results:
- Sandpaper or a file: Use sandpaper or a file to roughen the surfaces of the rocks that you intend to bond. This step helps create better adhesion between the adhesive and the rocks.
- Dust brush: Before applying the adhesive, use a soft brush to remove any dust or debris from the rock surfaces. A clean surface ensures a stronger bond.
- Craft stick or toothpick: These tools are handy for applying a small amount of epoxy resin to the rocks. They allow for precise and controlled application.
- Masking tape: In certain cases, masking tape can be used to secure the rocks in place while the epoxy resin cures. This helps to maintain a precise bond and ensures that the rocks do not shift during the drying process.
- Paper towels or a cloth: Keep paper towels or a cloth on hand to quickly wipe away any excess adhesive that may squeeze out during the bonding process.
- Acetone or isopropyl alcohol: To clean any adhesive spills or smudges, have acetone or isopropyl alcohol available. These solvents effectively dissolve epoxy resin and can help remove unwanted residue.
By gathering these essential materials and recommended tools, you’ll be well-equipped to create beautiful crafts by bonding rocks together.
Preparation And Safety Measures
Discover the best way to glue rocks together for crafts with these essential preparation and safety measures. Create stunning and durable craft projects by following these guidelines and ensuring a strong bond between your rocks.
To properly bond rocks together for crafts, it is essential to follow the necessary preparation and safety measures. Ensuring that you take the right steps in preparing the rocks and understanding the safety precautions will not only result in a successful craft project but also keep you safe throughout the process.
Here are some important guidelines to keep in mind:
Important Safety Precautions For Rock Bonding:
- Wear protective gloves to prevent any injuries while handling rocks.
- Always work in a well-ventilated area to avoid inhaling any potentially harmful fumes from adhesive materials.
- Use safety goggles to protect your eyes from any flying debris while working with rocks.
- Work on a stable and flat surface to prevent accidents or spills.
- Keep the adhesive materials away from children and pets to avoid any accidents or ingestion of harmful substances.
- Follow the manufacturer’s instructions and guidelines for the specific adhesive you are using.
- Keep a first aid kit nearby in case of any accidents or injuries.
- If working with power tools, make sure to follow all safety instructions and wear appropriate protective equipment.
Steps To Prepare Rocks For Bonding:
Preparing rocks before bonding is crucial to ensure a strong and lasting bond. Follow these steps for effective preparation:
- Clean the rocks: Remove any dirt, dust, or debris from the surface of the rocks. This can be done by rinsing them in water and scrubbing gently with a brush.
- Dry the rocks: Allow the rocks to dry completely before proceeding with the bonding process. Moisture can interfere with the adhesive’s effectiveness.
- Sand the surfaces: Use sandpaper to roughen the surfaces of the rocks that will be bonded together. This creates a better surface area for the adhesive to adhere to.
- Remove any loose fragments: Inspect the rocks for any loose fragments or uneven edges. These can be removed using a chisel, file, or sandpaper.
- Test the surfaces: Before applying the adhesive, test the bonding surfaces together to ensure they fit properly. This will help prevent any misalignments during the bonding process.
By following these safety precautions and preparing the rocks adequately, you are ready to embark on your rock bonding craft project. Remember, always prioritize safety and take your time for the best results. Happy crafting!
Epoxy Adhesives: The Ultimate Choice For Seamless Rock Bonding
Discover the ultimate solution for seamless rock bonding with epoxy adhesives. Perfect for craft projects, these high-quality adhesives provide a strong and long-lasting bond, ensuring your rocks stay securely glued together.
Are you looking to take your rock crafts to the next level? Look no further than epoxy adhesives for a seamless and durable bond that will make your creations stand out. Whether you’re a seasoned crafter or just starting out, epoxy adhesives offer a wide range of advantages that make them the ultimate choice for bonding rocks together.
In this section, we’ll explore the introduction to epoxy adhesives, their advantages, and provide you with some tips on how to use them effectively.
Introduction To Epoxy Adhesives:
- Epoxy adhesives are high-performance glues that consist of two components: Resin and hardener.
- When combined, these components create a chemical reaction that forms a strong and durable bond.
- Epoxy adhesives are commonly used in various industries, including crafts, woodworking, construction, and automotive.
Advantages Of Using Epoxy Adhesives For Rock Bonding:
- Exceptional bond strength: Epoxy adhesives create an incredibly strong bond that can withstand heavy loads and stress, ensuring your rock crafts stay intact for years to come.
- Versatility: Epoxy adhesives can bond various types of rocks, such as granite, marble, quartz, and even glass. This versatility allows you to explore endless possibilities in your craft projects.
- Weather resistance: With epoxy adhesives, your rock crafts can withstand extreme temperatures, moisture, and UV exposure without the bond deteriorating.
- Seamless finish: Unlike other adhesives that leave visible lines or residue, epoxy adhesives dry clear and create a seamless finish, enhancing the overall appearance of your crafts.
Tips For Using Epoxy Adhesives Effectively:
- Prepare the surfaces: Clean the rocks and remove any dirt, oil, or debris to ensure a strong bond.
- Mix thoroughly: Follow the manufacturer’s instructions and mix the epoxy adhesive resin and hardener thoroughly. Incomplete mixing can result in a weak bond.
- Apply sparingly: Apply a thin layer of epoxy adhesive to avoid excess seepage and to ensure a neat and clean finish.
- Use clamps or weight: Applying pressure using clamps or placing weights on the bonded rocks helps create a stronger bond and minimizes any gaps.
- Allow curing time: Patience is key when working with epoxy adhesives. Allow sufficient curing time as per the manufacturer’s instructions to achieve maximum bond strength.
With epoxy adhesives, you can take your rock crafts to new heights. The exceptional bond strength, versatility, weather resistance, and seamless finish make them the ultimate choice for bonding rocks together. By following our tips for effective use, you’ll achieve professional-looking results and create stunning crafts that will impress everyone.
So go ahead, grab your rocks and let your creativity flow with epoxy adhesives!

Superglue: A Quick And Reliable Option
Looking to glue rocks together for crafts? Superglue is a quick and reliable option that ensures a strong bond for your projects. Its fast-drying formula provides a secure hold, making it perfect for various rock crafting ideas.
Overview Of Superglue For Rock Bonding:
- Superglue is a quick and reliable option for bonding rocks together in craft projects.
- It is a type of adhesive that creates a strong and durable bond between surfaces.
- Superglue is suitable for bonding various types of rocks, including small pebbles, stones, and even larger rocks.
- It is easy to use and dries quickly, making it ideal for projects that require immediate results.
- Superglue comes in small tubes or bottles, allowing for precise application.
Benefits And Limitations Of Using Superglue:
Benefits:
- Creates a strong and durable bond that can withstand weight and pressure.
- Adheres well to different types of rocks, providing versatility in craft projects.
- Dries quickly, reducing the waiting time for completing projects.
- Easy to use and apply, even for beginners.
Limitations:
- Superglue may not be suitable for bonding certain types of rocks with uneven or porous surfaces.
- It can be messy if not applied carefully, as it dries quickly and may leave residue on surrounding areas.
- Can be difficult to remove if mistakes are made during bonding.
Best Practices For Using Superglue In Rock Bonding:
Prepare the rocks:
- Clean the surfaces of the rocks to ensure proper bonding.
- Remove any dirt, dust, or debris that may interfere with the adhesion.
- Sandpaper can be used to smoothen uneven surfaces for better alignment.
Apply the superglue:
- Apply a small amount of superglue to one of the rocks, using a toothpick or a small brush.
- Apply the glue evenly, covering the entire surface to be bonded.
- Avoid applying too much glue, as excess can cause overflow and messiness.
Position and bond the rocks:
- Carefully position the rocks together, aligning them as desired.
- Press the rocks firmly together to ensure proper adhesion.
- Hold the rocks in place for a few seconds to allow the glue to set.
Dry and cure:
- Let the bonded rocks dry for at least 24 hours to ensure maximum strength.
- Avoid moving or applying weight to the glued rocks during this curing period.
Clean up:
- Clean any excess glue immediately with a cloth or paper towel.
- Acetone or nail polish remover can be used to remove dried glue from surfaces.
- Remember, always follow the safety instructions provided by the manufacturer when handling and using superglue. With the right techniques and precautions, superglue can be a reliable and convenient choice for bonding rocks together in your craft projects. Enjoy creating unique and stunning rock crafts!
Concrete Adhesive: Ideal For Outdoor Projects
Concrete adhesive is the ideal solution for bonding rocks together in outdoor craft projects, providing a strong and long-lasting hold. Whether you’re creating a garden sculpture or a DIY rock pathway, this adhesive ensures your creations stay intact in all weather conditions.
Understanding The Applications Of Concrete Adhesive In Rock Bonding
- Concrete adhesive is a versatile and durable bonding agent that is ideal for gluing rocks together for various craft projects. It is especially suitable for outdoor projects due to its excellent weather resistance and strong adhesive properties.
- Concrete adhesive is commonly used for bonding rocks in projects like building stone walls, creating garden sculptures, or making outdoor decorative features. Its ability to adhere to different types of rocks, such as granite, limestone, or concrete, makes it a reliable choice for various crafts.
- This type of adhesive is also known for its ability to provide a seamless bond, making the rocks appear as if they are naturally connected. It creates a strong and long-lasting bond that can withstand the elements, ensuring your outdoor projects remain intact for years to come.
Factors To Consider When Using Concrete Adhesive
- Proper surface preparation is essential before applying concrete adhesive. Ensure that the rocks are clean and free from dust, debris, or any loose particles that could affect the bonding process. A clean surface allows the adhesive to adhere more effectively and create a stronger bond.
- Choose an appropriate concrete adhesive that is specifically designed for outdoor applications and can withstand exposure to sunlight, rain, and temperature changes. Check the product label or consult with a professional to ensure you select the right adhesive for your specific project.
- Consider the type and size of rocks you are bonding together. Larger rocks may require more adhesive to create a stable bond, while smaller rocks might require less. It is also important to apply the adhesive evenly to avoid any gaps or weak spots in the bond.
Tips For Achieving Seamless Rock Bonds With Concrete Adhesive
- Prioritize safety by wearing gloves and safety goggles when working with concrete adhesive. This will protect your hands and eyes from any potential contact with the adhesive.
- Apply the adhesive generously to both surfaces you are bonding. This ensures a strong and even bond between the rocks. Avoid using too much adhesive as it may seep out and create a messy appearance. Find the right balance to achieve a seamless and secure bond.
- Press the rocks firmly together after applying the adhesive. This will help to eliminate air pockets and improve the strength of the bond. Consider using clamps or weights to hold the rocks in place until the adhesive fully cures.
- Allow sufficient drying time for the adhesive. Follow the manufacturer’s instructions to determine the recommended drying time. Avoid disturbing or moving the rocks before the adhesive has fully cured to ensure the bond is strong and secure.
- Once the adhesive has dried, inspect the bonded rocks for any visible gaps or weak spots. If necessary, apply additional adhesive to reinforce any areas that may need extra support.
Remember to always follow the instructions provided by the manufacturer for the best results when using concrete adhesive for bonding rocks. With the right techniques and careful application, you can achieve seamless rock bonds that will enhance the beauty and durability of your crafts.

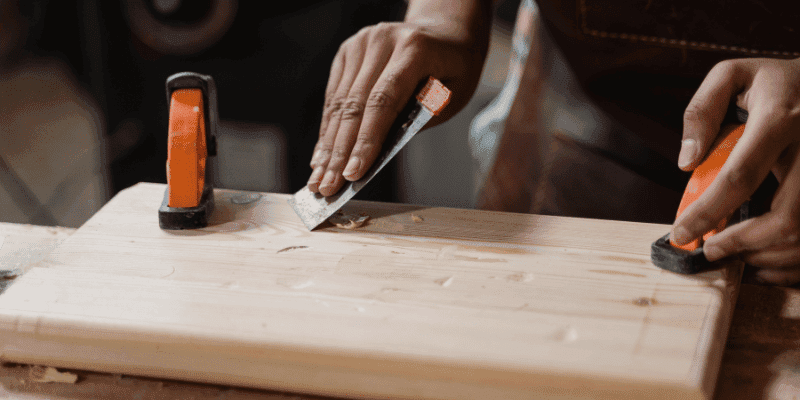
Surface Preparation For Rock Bonding
Surface preparation is crucial when it comes to bonding rocks for crafts. Follow these easy steps to ensure a strong and long-lasting bond between the rocks, giving your crafts a professional finish.
Craft projects involving rocks often require gluing them together to create interesting and unique designs. However, before you can start bonding rocks, it’s crucial to properly prepare the surfaces for optimal adhesion. In this section, we will go through the necessary steps to ensure your rocks are clean, debris-free, and ready for the bonding process.
Cleaning And Removing Debris From Rock Surfaces
To achieve a strong and durable bond between rocks, it’s essential to begin with clean surfaces. Here’s how you can effectively clean and remove debris from the rock surfaces:
- Inspect the rocks: Start by examining each rock closely, identifying any loose dirt, dust, or other foreign materials that may hinder the bonding process.
- Rinse with water: Use water to rinse the rocks thoroughly. For smaller rocks, you can place them in a colander and rinse them under running water. For larger rocks, simply use a hose or a bucket of water.
- Scrub with a brush: If there are stubborn stains or dirt on the rocks, gently scrub them using a soft-bristled brush. This will help remove any remaining debris or grime.
- Dry the rocks: After cleaning, allow the rocks to air dry completely. This will ensure that there is no moisture on the surface when bonding.
Sanding And Smoothing The Surfaces For Better Bonding
Sanding and smoothing the rock surfaces will create a rough texture, enhancing the bond strength between them. Follow these steps for effective sanding and surface preparation:
- Gather sandpaper: Obtain sandpaper with a medium to coarse grit, such as 80-120 grit. This will help in roughening the surface for a stronger bond.
- Sand the surfaces: Using the sandpaper, gently sand the areas of the rocks that will be bonded together. Apply light pressure and make sure to cover the entire bonding area.
- Check for smoothness: After sanding, run your fingers along the surfaces to ensure they feel rough and have a consistent texture. This will allow for better adhesion.
- Remove dust: Clean off any dust or debris resulting from sanding using a soft cloth or brush. This will prevent any particles from interfering with the bonding process.
By following these surface preparation steps, you’ll create a solid foundation for gluing rocks together with confidence. With thoroughly cleaned surfaces and properly sanded textures, you’ll increase the adhesion strength and ensure the longevity of your crafted rock designs.
Applying Adhesive For Rock Bonding
Learn how to effectively glue rocks together for your craft projects with our step-by-step guide on applying adhesive for rock bonding. Ensure strong and long-lasting results for your creations.
Proper Techniques For Applying Adhesive To Rock Surfaces
When it comes to gluing rocks together for crafts, applying adhesive properly is crucial for a strong and durable bond. Whether you’re working on a rock sculpture or a DIY project, following the correct techniques will ensure that your rocks stay securely in place.
Here are some tips to help you achieve even distribution and coverage of adhesive:
- Clean the rock surfaces: Before applying adhesive, it’s essential to clean the rock surfaces thoroughly. Use a brush or cloth to remove any dirt, dust, or debris. This will ensure better adhesion and prevent any interference with the bonding process.
- Select a suitable adhesive: Depending on your project and the type of rocks you are working with, choose an adhesive that is appropriate for bonding rocks. Epoxy, super glue, or construction adhesive are commonly used options. Read the instructions and check for any specific recommendations for rock bonding.
- Prepare the adhesive: Follow the manufacturer’s instructions to prepare the adhesive. Some adhesives require mixing of two components, while others can be used straight out of the tube. It’s important to mix or dispense the adhesive properly to ensure its effectiveness.
- Apply a thin layer: Apply a thin layer of adhesive evenly on the surfaces that need to be bonded. Use a brush, small spatula, or even a toothpick to spread the adhesive. Make sure to cover the entire surface to promote a strong bond.
- Work in small sections: To avoid the adhesive drying out before you can position the rocks, work in small sections at a time. Apply the adhesive to one section, position the rocks, and then move on to the next section. This will give you better control over the process.
- Press and hold: Once you’ve positioned the rocks together, apply pressure and hold them firmly in place for a few minutes. This will facilitate the bonding process and ensure that the rocks stick together securely.
- Allow proper curing time: Different adhesives have different curing times, so it’s essential to follow the instructions provided by the manufacturer. Avoid moving or disturbing the rocks until the adhesive has fully cured to prevent any weakening of the bond.
- Consider roughening the surfaces: If you’re dealing with smooth or polished rocks, it can be beneficial to roughen the surfaces slightly before applying adhesive. This will help create more surface area for the adhesive to cling to, resulting in a stronger bond.
- Test the bond: After the adhesive has cured, it’s a good idea to test the bond by gently trying to separate the rocks. If the bond feels weak or the rocks easily come apart, you may need to reapply the adhesive or try a different bonding technique.
By following these proper techniques for applying adhesive to rock surfaces, you can ensure that your crafts and projects will stand the test of time. Now that you have a strong foundation, let your creativity flow and enjoy the process of creating unique and beautiful rock crafts.
Aligning And Securing Rocks For Bonding
Aligning and securing rocks for bonding is essential when it comes to gluing rocks together for crafts. Follow these simple steps to ensure a strong bond and create beautiful rock crafts.
Crafting with rocks can be a fun and rewarding activity. Whether you’re creating a rock garden or making unique jewelry pieces, aligning and securing the rocks is imperative for a seamless bond. In this section, we will explore strategies for aligning rocks and various methods to securely hold them in place during the bonding process.
Strategies For Aligning Rocks For Seamless Bonding:
- Sorting by size: Sort the rocks by size, selecting pairs that match closely in dimensions. This will help create a more uniform and aesthetically pleasing final product.
- Trial and error: Experiment with different rock arrangements to find the perfect fit. Move the rocks around, flip them over, and try various combinations until you achieve the desired alignment.
- Visualizing the end result: Envision how the rocks will fit together and form a cohesive design. This will assist in identifying the best alignment strategy and ensure a visually appealing outcome.
- Using a template or base: If you have a specific design in mind, consider using a base or template to guide the alignment of the rocks. This will help keep everything aligned during the bonding process.
Methods To Secure Rocks In Place During The Bonding Process:
- Adhesive glue: Apply a suitable adhesive glue, such as epoxy or super glue, to the contact points between the rocks. Ensure that the rocks are pressed firmly together for a strong bond. Follow the manufacturer’s instructions for the specific glue you are using.
- Wire wrapping: Wrap wire around the rocks, securing them together and creating a unique decorative element. This method works well for smaller rocks or irregularly shaped ones.
- Netting or mesh: Place the rocks onto a piece of netting or mesh and secure them by wrapping the edges tightly around the rocks. This provides additional support and stability during the bonding process.
- Clamps or rubber bands: For larger rocks or complex designs, use clamps or rubber bands to hold them together while the adhesive glue dries. This ensures that the rocks maintain their alignment without shifting.
Remember to allow sufficient drying time for your chosen bonding method before handling or moving the rocks. By employing these strategies for aligning rocks and using secure methods for bonding, you can create stunning crafts that will impress friends and family alike.
Curing And Finishing Touches
Discover the perfect solution for gluing rocks together for your craft projects. Master the art of curing and finishing touches to ensure a long-lasting bond that will elevate your creations to the next level.
Understanding The Curing Process For Different Adhesives:
Different adhesives require different curing times and techniques. It’s essential to understand the curing process to ensure a strong and durable bond between the rocks. Here’s what you need to know:
Epoxy resin: Epoxy resin is a popular adhesive choice for gluing rocks together due to its strong bonding properties. To cure epoxy resin, follow these steps:
- Mix equal parts of the resin and hardener.
- Apply the mixture to the surfaces you want to bond.
- Carefully align and press the rocks together.
- Allow the epoxy resin to cure for the specified time mentioned on the product label.
Liquid glue: Liquid glues such as craft glue or strong bonding adhesives have a quicker curing process. Here’s what you should do:
- Apply a thin layer of liquid glue to each rock surface.
- Press the rocks firmly together.
- Hold the rocks in place for a few minutes to allow the glue to set.
- Leave the glued rocks undisturbed for the recommended time on the glue bottle to ensure complete curing.
Hot glue: Hot glue guns are a popular choice for quick and easy rock crafts. To ensure a secure bond, follow these steps:
- Heat the glue gun and load it with hot glue sticks.
- Apply a sufficient amount of hot glue to one rock surface.
- Quickly press the other rock onto the hot glue, aligning them accurately.
- Hold the rocks together firmly until the hot glue sets, which usually takes just a few seconds.
- Remember, each adhesive has its specific curing time and method, so always refer to the product instructions for accurate guidelines.
Final Steps To Enhance The Seamless Bond And Aesthetics:
Once you have allowed the adhesive to cure fully, there are some final touches you can apply to your glued rocks. These steps will not only improve the bond but also enhance the overall appearance of your craft:
- Remove excess adhesive: After the curing process, you might notice some excess adhesive squeezing out from between the rocks. To create a clean and professional look, gently scrape off any excess glue using a craft knife or a scraper. Be careful not to damage the rocks during this process.
- Sanding the edges: Smooth out any rough or uneven edges by lightly sanding the glued area with fine-grit sandpaper. This step will help create a seamless transition between the rocks, making your craft visually appealing.
- Paint or seal the rocks: Depending on your preference and the desired look of your craft, you can choose to paint the rocks or seal them with a clear varnish. Painting allows you to add color and creativity to your project, while sealing the rocks protects them from environmental factors and enhances their natural appearance.
- Applying a clear adhesive coating: For added durability and shine, you can consider applying a clear adhesive coating over the glued rocks. This transparent layer will provide an extra protective barrier and give your craft a glossy finish.
By following these final steps, you can ensure a seamless bond between the rocks and elevate the aesthetics of your craft. Now, it’s time to display and enjoy your beautifully glued rock creation!
Common Challenges In Rock Bonding And How To Overcome Them
Rock bonding for crafts can be challenging, but with the right techniques, it can be overcome. Some common challenges include finding the right adhesive and ensuring a strong bond. By using a strong adhesive specifically designed for bonding rocks, prepping the surfaces properly, and providing sufficient curing time, these challenges can be successfully overcome.
Rock bonding is a crucial technique for creating stunning crafts using natural materials. However, even with the right materials and tools, you may encounter some challenges along the way. In this section, we will explore the common issues you may face when gluing rocks together and provide effective solutions to overcome them.
Identifying Potential Issues In Rock Bonding:
- Adhesive compatibility: Not all adhesives work well with rocks, and certain types may not bond effectively. It is important to choose adhesives specifically designed for bonding rocks, such as epoxy or construction adhesive.
- Porosity of the rocks: Porous rocks can absorb the adhesive, making it less effective in creating a strong bond. Identifying the porosity of the rocks beforehand will help you choose the right adhesive and ensure a durable bond.
- Surface preparation: Insufficient preparation of the rock surfaces can hinder the bonding process. Dust, dirt, or grease on the rocks can prevent the adhesive from adhering properly. Thoroughly clean and dry the surfaces before applying the adhesive.
- Weight and size of the rocks: Large rocks or rocks with significant weight can pose challenges in achieving a secure bond. Ensuring proper support and pressure during the bonding process is crucial for a strong and durable bond.
Effective Solutions For Troubleshooting Common Problems:
- Choose the right adhesive: Research and choose adhesives that are specifically designed for bonding rocks. Epoxy or construction adhesive are commonly recommended options due to their strength and durability.
- Test the adhesive: Before applying the adhesive to your project, it is advisable to test it on a small inconspicuous area of the rocks. This will allow you to ensure compatibility and assess the bond’s strength and appearance.
- Sand the surfaces: If the rocks have a smooth or polished surface, it can be beneficial to lightly sand them to increase the adhesive’s grip. This will create a rougher surface for better adhesion.
- Apply pressure: Applying pressure during the bonding process helps the adhesive make better contact with the rocks. Use clamps or other suitable methods to secure the rocks together tightly while the adhesive cures.
- Allow sufficient drying time: Patience is crucial when bonding rocks. Follow the adhesive manufacturer’s instructions regarding the recommended drying time. Avoid moving or disturbing the project before the adhesive has fully cured.
By identifying potential issues and implementing effective solutions, you can overcome common challenges in rock bonding. With the right techniques and materials, you’ll be well on your way to creating beautiful crafts that showcase the beauty of natural rocks.
Tips For Achieving Seamless Rock Bonding
Get expert tips on achieving seamless rock bonding for your craft projects. Learn how to glue rocks together effectively with these easy-to-follow guidelines. Achieve professional-looking results with these helpful tips and tricks.
Expert Tips And Tricks For Achieving Seamless Rock Bonds:
- Prepare the rocks: Thoroughly clean the surfaces of the rocks to ensure proper adhesion. Remove any dirt, dust, or debris that may hinder the bonding process.
- Choose the right adhesive: Select a strong adhesive that is suitable for bonding rocks together. Epoxy or cyanoacrylate (super glue) are commonly used for this purpose.
- Apply adhesive strategically: Apply the adhesive sparingly, focusing on the areas where the rocks make contact. This will help create a seamless bond without excess glue oozing out.
- Use pressure to bond the rocks: Apply gentle pressure to the rocks once they are positioned together. This will help the adhesive penetrate any irregularities on the surfaces and promote a strong bond.
- Allow sufficient drying time: Follow the adhesive manufacturer’s instructions regarding the drying time. This step is crucial to achieve a durable bond between the rocks.
- Sand the surfaces if needed: If the rocks have uneven surfaces, consider sanding them down slightly to create a better bonding area. Smooth surfaces enhance the adhesive’s effectiveness.
- Fill gaps if necessary: If there are noticeable gaps between the rocks, use a filler material such as epoxy clay or grout to fill them. This will not only strengthen the bond but also improve the overall aesthetics.
- Consider reinforcement techniques: For larger or more challenging projects, you may want to reinforce the bond with additional materials like wire or mesh. These supports can be embedded in the adhesive to provide extra strength.
- Test the bond: Before finalizing your project, perform a simple stress test to ensure the rocks are securely bonded. Gently tap or twist the rocks to check if the bond holds up.
- Practice patience and precision: Achieving seamless rock bonds requires careful attention to detail and a patient approach. Take your time during the bonding process to ensure the best results.
Aesthetic Considerations For Enhancing The Overall Appearance:
- Choose rocks with complementary colors and textures: When crafting with rocks, selecting rocks that harmonize well together in terms of color and texture can greatly enhance the overall appearance of your project.
- Arrange rocks thoughtfully: Experiment with different arrangements and orientations to create visually appealing patterns or designs. Consider varying the sizes and shapes of rocks for added interest.
- Incorporate other decorative elements: Combine rocks with other decorative elements such as shells, beads, or small pieces of driftwood to add visual appeal and create a unique composition.
- Consider surface finishes: Apply a sealant or finish to the rocks to enhance their natural colors and protect them from weathering or fading over time. This can lend a polished and professional look to your crafts.
- Play with contrasting materials: Combine rocks with contrasting materials like metal, glass, or wood to create visually striking crafts. The juxtaposition of different textures and materials can make your project stand out.
- Experiment with different craft techniques: Explore various crafting techniques like painting, decoupage, or mosaic to transform the rocks into artistic masterpieces. These techniques can add depth and dimension to your crafts.
Remember, with a little creativity and attention to detail, you can achieve seamless rock bonds that not only withstand the test of time but also enhance the overall visual appeal of your crafts.
Maintaining And Caring For Bonded Rock Projects
Maintaining and caring for bonded rock projects is essential for preserving their durability and appearance. With the right technique and adhesive, you can easily glue rocks together for crafts and create stunning decorative pieces that will last for years to come.
Longevity And Maintenance Of Bonded Rock Projects:
Maintaining and caring for bonded rock projects is essential to ensure their longevity and preserve their aesthetic appeal. Whether you’ve created rock sculptures, jewelry, or decorative items, taking proper care and handling measures will prevent damage and extend the lifespan of your creations.
Here are some tips to help you maintain your bonded rock projects:
- Regular cleaning and dusting: Keep your bonded rock projects clean by dusting them regularly. Use a soft cloth or brush to gently remove any accumulated dirt or debris. Avoid using harsh chemicals or abrasive materials that could scratch or damage the rocks.
- Avoid direct sunlight and extreme temperatures: Direct sunlight and extreme temperatures can cause the rocks and adhesive to degrade over time. Place your bonded rock projects away from windows or areas exposed to direct sunlight. Similarly, avoid placing them in areas with extreme temperatures, as this can weaken the bond between the rocks.
- Handle with care: When handling bonded rock projects, be careful not to drop or mishandle them. Rocks may be fragile and prone to breakage, especially if they have sharp edges or fine details. Handle your projects with care to prevent any accidental damage.
- Store properly: When storing your bonded rock projects, choose a safe and secure location. Avoid stacking heavy items on top of them, as this can cause breakage or deformation. Depending on the size and shape of your projects, you can consider wrapping them in a soft cloth or placing them in individual boxes to protect them from dust and potential damage.
- Regular inspection: Periodically inspect your bonded rock projects to ensure that the rocks are still securely bonded together. If you notice any loose or weakened parts, it’s important to address them promptly. You can either reapply adhesive or consult a professional if needed.
- Avoid exposing to water: While some adhesive products are water-resistant, it’s generally advisable to avoid exposing bonded rock projects to water for extended periods. Water can weaken the bond between rocks, leading to potential damage or detachment.
Proper care and maintenance are key to preserving the beauty and longevity of your bonded rock projects. By following these tips, you can ensure that your creations remain intact and continue to be enjoyed for years to come.
Frequently Asked Questions For How To Glue Rocks Together For Crafts
How Do You Glue Pebbles Together For Crafts?
To glue pebbles together for crafts, use a strong adhesive specifically designed for stone materials.
What Is The Best Glue For Stone Crafts?
The best glue for stone crafts is epoxy adhesive. It is strong, durable, and bonds well.
What Is The Best Glue For Rocks And Stones?
The best glue for rocks and stones is epoxy. It provides a strong and durable bond.
Will Gorilla Glue Hold Rocks Together?
Yes, Gorilla Glue has the strength to hold rocks together.
Conclusion
To sum it up, gluing rocks together for crafts can be a fun and creative way to add a natural element to your projects. Whether you’re creating decorative sculptures, personalized pebble art, or even a DIY stone jewelry, the possibilities are endless.
By following the right techniques, using a suitable adhesive, and taking the necessary safety precautions, you can achieve strong and long-lasting bonds between your rocks. Remember to select rocks of similar sizes and shapes, clean and prepare them properly, and allow the adhesive to cure completely before handling or displaying your creations.
With a little practice and experimentation, you’ll discover the joy of working with rocks and the satisfaction of creating unique and eye-catching crafts. So go ahead, unleash your creativity, and start gluing rocks together for crafts that will impress and inspire.
Happy crafting!