How to Inlay Coins in Wood
Incorporating coins into woodwork through the art of inlay can add a unique and striking aesthetic to your projects. Whether you want to create a decorative piece, a commemorative item, or simply showcase your coin collection, inlaying coins in wood can be a captivating technique.
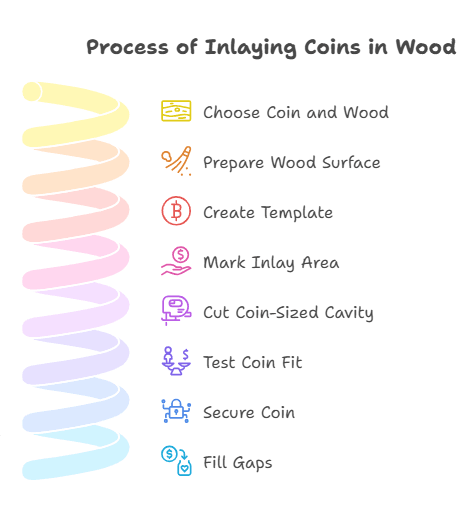
To inlay coins in wood, create a template for coin placement, and cut coin-sized cavities in the wood. Secure the coins in the cavities with adhesive. Fill any gaps around the coins with wood filler, and sand, and apply a finish. Lastly, sand and polish the inlaid coins for a professional look.
In this article, we will explore the process of how to inlay coins in wood and provide you with step-by-step guidance to help you achieve stunning results. Let’s explore the art of coin work on wood!
10 Steps To Inlay Coins in Wood: A Detailed Guide To Follow
Embedding coins on wood can be an excellent embellishment. However, to achieve a perfect finish, you must know the right way of doing it. Here is a step-by-step guide that you can follow to accomplish the task.
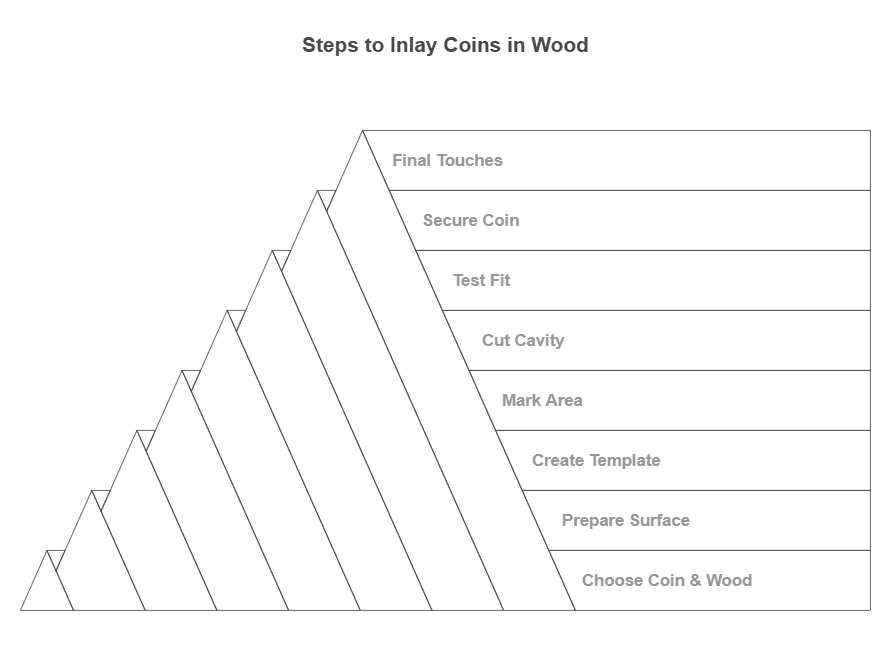
Step 1: Choose the Coin and Wood:
Select a coin that you want to inlay into the wood. Consider the size and thickness of the coin. Choose a suitable piece of wood with a smooth surface for the inlay.
Step 2: Prepare the Wood Surface:
Clean and prepare the wood surface by sanding it to ensure it’s smooth and free from any imperfections or debris. This will provide a good foundation for the inlay.
Step 3: Create a Template:
To ensure precise placement, create a template by tracing the outline of the coin onto a piece of cardboard or paper. Cut out the template carefully.
Step 4: Mark the Inlay Area:
Place the template on the wood surface and mark the area where the coin will be inlaid. Use a pencil or a fine-point marker to make accurate markings.
Step 5: Cut the Coin-Sized Cavity:
Using a small chisel or a router, carefully cut a cavity inside the marked area of the wood. Make sure the cavity is slightly smaller than the coin to ensure a snug fit.
Step 6: Test the Fit:
Test the fit of the coin in the cavity. It should fit securely without any gaps. If necessary, adjust the cavity by removing more wood until the coin fits perfectly.
Step 7: Secure the Coin:
Apply a thin layer of adhesive or epoxy resin inside the cavity. Place the coin into the cavity, pressing it firmly to ensure a strong bond. Wipe away any excess adhesive.
Step 8: Fill Gaps (Optional):
If there are any small gaps around the coin, use wood filler to fill them. Apply the filler carefully and smooth it out with a putty knife. Allow it to dry according to the manufacturer’s instructions.
Step 9: Sand and Finish:
Once the adhesive or filler has fully dried, sand the surface of the wood carefully. Apply your preferred finish, such as varnish or oil, to protect and enhance the wood.
Step 10: Final Touches:
Give the inlaid coin a final inspection and make any necessary touch-ups. Clean the surface to remove any dust or debris, and admire your beautifully inlaid coin in woodwork.
Alternatives Method to Inlay Coin In Wood: Know Other Options
Besides the process explained before, there are a few other ways of settling coins on wood. If you are finding an alternative technique, here are 5 methods that you may like to try.
- Burnishing:
Instead of cutting a cavity to fit the coin, burnishing involves embedding the coin’s edges into the wood surface. This technique requires a thin veneer or a soft wood surface. The coin is placed on the wood, and a burnishing tool is used to press and rub the edges of the coin into the wood, creating a flush and secure fit.
- Recessed Mounting:
In this technique, a recessed area is created on the wood surface to accommodate the coin. Instead of cutting a precise coin-sized cavity, a slightly larger recess is made. The coin is then mounted into the recess using adhesive or epoxy, and any gaps around the coin are filled with a suitable filler material.
- Coin Resin Casting:
Rather than inlaying the actual coin, a resin casting technique can be used to create a replica of the coin in the wood. A mold is created with the desired coin, and then resin is poured into the mold to form a coin-shaped piece. This resin coin is then inlaid into the wood, secured with adhesive, and finished to blend with the wood surface.
- Coin Decoupage:
Decoupage involves adhering a thin layer of paper or fabric with the coin image onto the wood surface. In this technique, a paper or fabric material with the desired coin design is carefully applied and sealed onto the wood using decoupage glue or a suitable adhesive. A protective topcoat can be added to ensure durability.
- Coin Filigree:
Filigree involves creating intricate metal wire designs around the coin and embedding them into the wood. Thin metal wires are bent and shaped into decorative patterns, forming a frame or design around the coin. These designs are then embedded into the wood, secured with adhesive or epoxy, and finished for a polished look.
Design Ideas To Inlay Coins In Wood: For Best Outcome
You can create multiple patterns and designs with coins embedded in the wood. Here are some amazing ideas that you must try.
- Geometric Patterns: Arrange multiple coins in a geometric pattern, such as a hexagon, starburst, or checkerboard. This creates a visually striking and symmetrical design.
- Borders and Frames: Inlay a coin along the border or frame of a wooden object, such as a picture frame or a tabletop. This adds a unique and decorative touch to the edges.
- Central Focal Point: Choose a larger coin as the central focal point of your design. Surround it with smaller coins or complementary woodwork patterns to highlight and draw attention to the centerpiece.
- Personalized Monograms: Inlay a coin featuring your initials or a significant year into a wooden plaque or jewelry box. This creates a personalized and meaningful design.
- Nature-inspired Motifs: Use coins with nature-related designs, such as animals, plants, or landscapes, and inlay them into a wooden surface with matching themes. This creates a harmonious blend of wood and natural imagery.
- Mosaic Effects: Inlay coins of different colors, sizes, or finishes into a wooden surface, creating a mosaic-like effect. This can be used to depict images, symbols, or abstract patterns.
- Coin Pathways: Arrange a series of coins in a meandering or curving pathway on a wooden surface, creating an interesting visual flow. This design idea works well on long wooden objects like trays or walking sticks.
- Contrast with Wood Grain: Select coins that contrast with the color or grain pattern of the wood. Inlay them in strategic places to create a striking visual contrast and highlight the uniqueness of both materials.
FAQs
What Types Of Coins Are Suitable For Inlaying In Wood?
Coins with relatively flat surfaces, moderate thickness, and interesting designs are ideal for inlay. Avoid coins with high relief or delicate features that may be difficult to secure properly.
How Do I Ensure A Precise Fit Between The Coin And The Wood Cavity?
Take accurate measurements of the coin and use a template to mark the cavity. Test the fit multiple times, gradually shaving off small amounts of wood until the coin fits snugly.
What Adhesive Or Epoxy Should I Use To Secure The Coin In The Wood?
Choose a strong adhesive specifically designed for wood and metal bonding. Epoxy resin is often recommended due to its durability and ability to create a firm bond.
How Can I Prevent Air Bubbles Or Gaps Between The Coin And The Wood?
Apply the adhesive or epoxy evenly and press the coin firmly into the cavity. Wipe away any excess adhesive and use clamps or weights to ensure even pressure during the drying process.
How Can I Protect The Inlaid Coin And Wood Surface?
Apply a finish, varnish, or polyurethane for example, to the entire wood surface. This will safeguard the coin from damage and enhance the overall appearance of the piece.
Can I Use Old Or Valuable Coins For Inlaying?
Inlaying with old or valuable coins may diminish their numismatic value. It’s generally recommended to use replica coins or coins with little collectible value to preserve their worth.
How Do I Maintain The Inlaid Coin In Wood Over Time?
Regularly clean the surface with a soft cloth to remove dust and debris. Avoid using abrasive cleaners that could damage the coin or the wood. Additionally, periodically check for any signs of loosening or damage and repair as needed.
Can I Inlay Coins In Any Type Of Wood?
Yes, you can inlay coins in various types of wood. However, it’s important to consider the hardness and stability of the wood. Hardwoods like maple, oak, or walnut are often preferred for their durability and ability to hold the inlay securely.
Conclusion
In conclusion, inlaying coins in wood is a fascinating and creative technique that adds a distinct and personal touch to woodworking projects. Whether you choose traditional inlay methods or alternative techniques, the process requires precision, patience, and attention to detail.
The result is a stunning fusion of craftsmanship, artistry, and numismatics that showcases the beauty and uniqueness of both the wood and the coins. Try out the techniques and design ideas mentioned above, and create a unique piece that stands out!