Effortless DIY Guide: Learn How to Install Stick on Backsplash Today
To install stick-on backsplash, clean the surface, peel off backing, and press tiles onto the wall. Stick-on backsplashes are an easy and cost-effective way to update the look of your kitchen or bathroom.
They come in various designs and can be customized to suit your style preferences. Whether you’re a DIY enthusiast or a beginner, stick-on backsplashes offer a simple and hassle-free installation process. In this guide, we will provide you with step-by-step instructions on how to install stick-on backsplash to achieve a professional and stylish finish.
With the right tools and proper technique, you can transform your space in no time. Let’s dive into the process of installing a stick-on backsplash and give your room a fresh new look.

Credit: www.amazon.com
Choosing The Right Stick-on Backsplash
Looking to upgrade your kitchen or bathroom? Installing a stick-on backsplash is a quick and easy way to add a fresh look to your space. With a variety of styles and materials available, you can easily find the perfect fit for your home décor.
Just peel and stick for a hassle-free installation process.
Considering the Material
When selecting a stick-on backsplash, start by assessing your desired material. Consider your budget and maintenance preferences. Tiles, metal, and vinyl are popular choices.
Explore Design Options
Various design options are available, including patterns and colors. Select a design that complements your kitchen or bathroom.
Incorporate bold colors for a statement or opt for subtle hues for a classic look.
Remember to measure your space accurately before making a purchase.
Preparing Your Kitchen For Installation
Before installing stick-on backsplash, it’s crucial to prepare your kitchen properly.
Gathering Necessary Tools And Materials
- Peel-and-stick backsplash tiles
- Measuring tape
- Scissors or utility knife
- Clean cloth
- Degreasing cleaner
- Primer (if needed)
Cleaning And Preparing The Surface
- Start by cleaning the wall where you will install the backsplash.
- Use a degreasing cleaner to remove any dirt or grease buildup.
- Wipe the wall with a clean cloth and let it dry completely.
- Measure the area to ensure the tiles will fit properly.
Ensuring your kitchen is clean and the surface is prepped will help the installation process.
Step-by-step Installation Process
If you’re looking to give your kitchen or bathroom a quick and stylish makeover, installing a stick-on backsplash is an excellent choice. With an easy installation process, you can achieve a professional look without the hassle of traditional tiling. In this post, we’ll guide you through the step-by-step installation process, making it simple for anyone to achieve a beautiful backsplash in no time.
Measuring And Cutting The Backsplash
Before you begin the installation process, ensure that you accurately measure the area where you plan to install the stick-on backsplash. Use a tape measure and take precise measurements of the length and height of the area. Additionally, take into account any obstacles such as outlets or switches.
After measuring, use a pencil and a straight edge to mark the measurements on the stick-on backsplash sheets. With a sharp utility knife, carefully cut the sheets to the proper size based on your measurements. Always cut with gentle and precise movements for the best results.
Peeling And Sticking The Backsplash Sheets
Once you have cut the stick-on backsplash sheets to the correct size, it’s time to begin the installation process. Start by cleaning the area where the backsplash will be applied. Wipe the surface with a mild cleaner and allow it to dry completely before proceeding.
Peel back a small portion of the protective backing on the stick-on backsplash sheet and carefully align it with the starting point of the installation area. Press the sheet firmly onto the wall, smoothing out any air bubbles as you go along. Repeat this process, peeling the protective backing little by little, until the entire area is covered with the stick-on backsplash sheets.
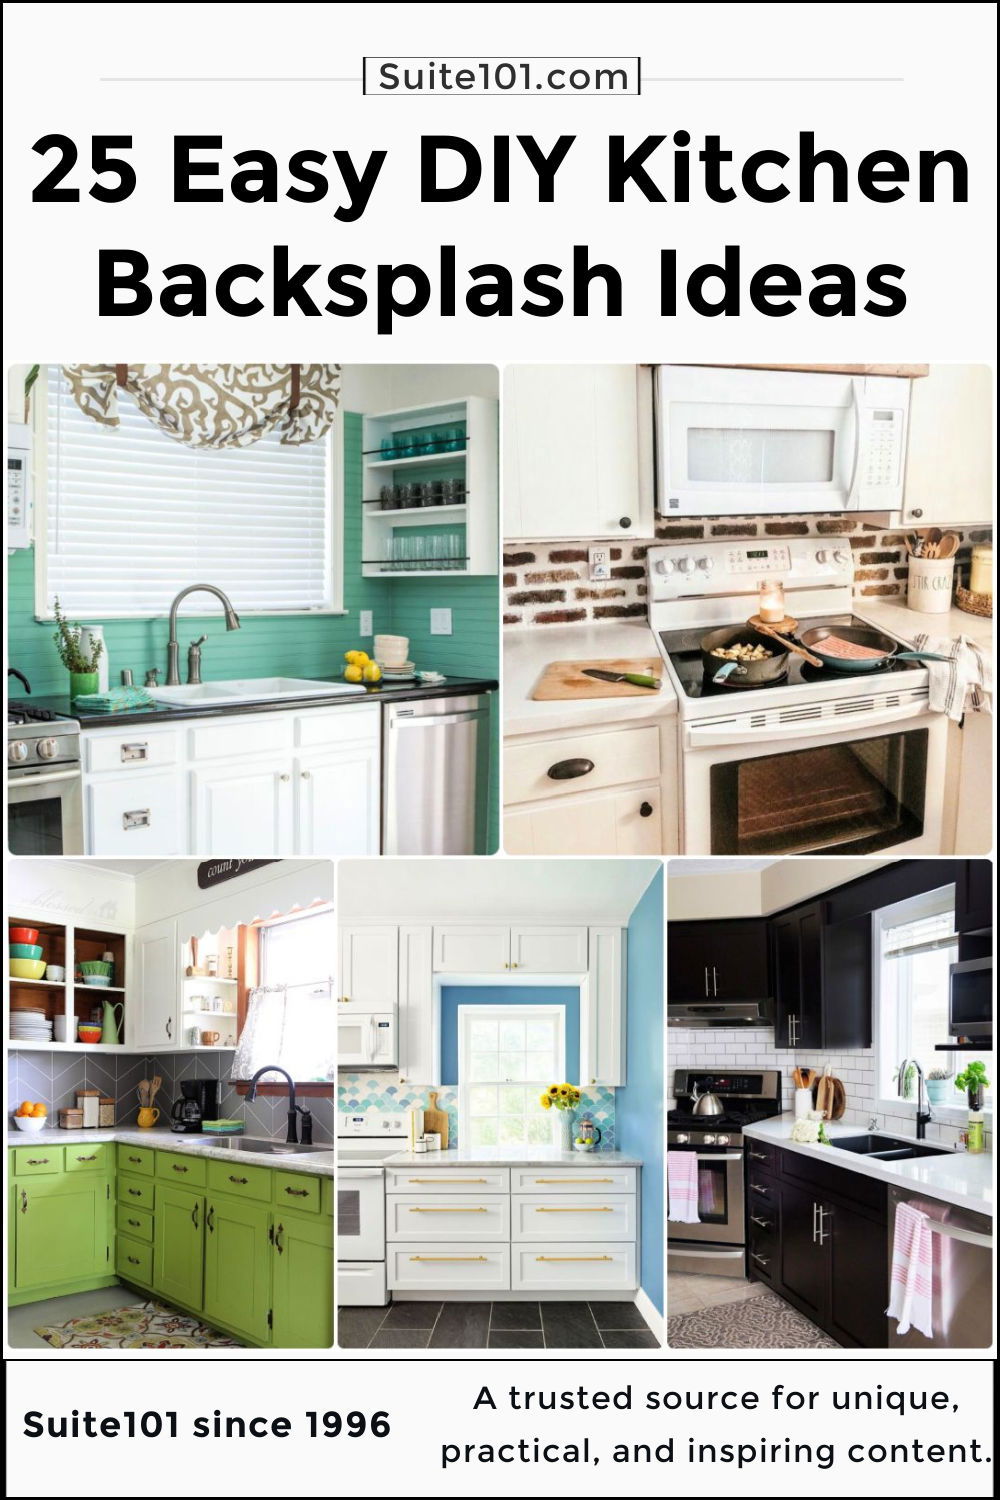
Credit: suite101.com
Finishing Touches And Maintenance
Installing a stick-on backsplash requires attention to finishing touches and regular maintenance. Ensuring a seamless application and cleaning routine will keep your backsplash looking fresh and vibrant for years to come. Make sure to follow the manufacturer’s instructions for best results.
Now that you have successfully installed your stick-on backsplash, it’s time to give it those final finishing touches. This section will guide you through trimming and sealing the edges of your backsplash as well as provide tips for cleaning and maintaining it to keep it looking fresh and beautiful for years to come.
Trimming And Sealing Edges
Trimming and sealing the edges of your stick-on backsplash is an essential step to ensure a polished and professional-looking finish. Here are some simple yet effective steps to follow:
- Measure the length of the edges that need trimming and cut the stick-on backsplash accordingly, giving a clean and seamless look.
- Apply a high-quality adhesive caulk to the trimmed edges to seal them and prevent any moisture or dirt from seeping underneath.
- Smooth out the caulk with a caulking tool or your finger to create a neat and even seal.
By trimming and sealing the edges of your stick-on backsplash, you not only enhance its appearance but also ensure its longevity in high-moisture areas like kitchens and bathrooms.
Tips For Cleaning And Maintaining The Backsplash
To keep your stick-on backsplash looking as good as new, regular cleaning and maintenance are essential. Here are some handy tips to help you:
- Use a mild dish soap or glass cleaner and a soft cloth to wipe away any dirt, grease, or stains from the surface of the backsplash.
- Avoid using abrasive cleaners or scrub brushes that can damage the adhesive or scratch the surface of the backsplash.
- For stubborn stains, you can gently scrub the affected area with a non-abrasive sponge or brush.
- After cleaning, ensure that the backsplash is completely dry to prevent any moisture from getting trapped underneath.
By following these simple cleaning and maintenance tips, you can preserve the beauty and functionality of your stick-on backsplash for years to come.
Customizing Your Stick-on Backsplash
Easily upgrade your space by installing a custom stick-on backsplash. Personalize your kitchen or bathroom with a simple DIY project. Transform your home with stylish, hassle-free stick-on backsplash solutions.
Adding Personal Touches
Is your stick-on backsplash looking a bit generic? Don’t worry, you can easily add your personal touch to make it stand out. Consider these creative ideas to customize your stick-on backsplash and give it a unique appearance:
- 1. Painting: Who says stick-on backsplashes have to be limited to their original design? Get creative and paint over them with any colors that match your style. This idea allows you to fully personalize your backsplash and make it fit seamlessly into your kitchen or bathroom decor.
- 2. Applying Stencils: Stencils are a great way to add patterns or designs to your stick-on backsplash. Whether it’s geometric shapes, floral patterns, or even your initials, stencils offer endless possibilities for customization.
- 3. Adding Decals: Decals are a fun and easy way to add a touch of personality to your stick-on backsplash. Choose decals that resonate with your interests, such as food icons, quotes, or nature-themed designs.
Exploring Alternative Uses
Did you know that stick-on backsplashes can be used for more than just protecting your walls against splatters? Here are a few alternative uses for stick-on backsplashes that you might not have considered:
- Accent Wall: Instead of limiting stick-on backsplashes to your kitchen or bathroom, why not create an accent wall in your living room or bedroom? With a variety of designs available, you can easily transform any wall into a focal point.
- Furniture Renewal: Give your old furniture a new lease on life by using stick-on backsplashes to cover and update their surfaces. From coffee tables to bookshelves, this creative idea will instantly transform the look of your furniture.
- Creative Crafts: Do you enjoy DIY projects? Stick-on backsplashes can be used in various crafts, such as creating custom laptop skins, decorating kitchen utensils, or even designing personalized wall art.
In conclusion, customizing your stick-on backsplash allows you to add your personal style and explore alternative uses for this versatile home decor element. Whether it’s through painting, applying stencils, or exploring alternative uses, you can transform a generic stick-on backsplash into a unique and eye-catching feature in any room of your home. So, let your imagination run wild and get creative with your stick-on backsplash!
Frequently Asked Questions Of How To Install Stick On Backsplash
How Do I Prepare The Surface Before Installing Stick On Backsplash?
Before installing the stick on backsplash, make sure the surface is clean, dry, and free from grease or dust. Use a degreaser to remove any oils or residue, and sand down any rough patches for a smooth application. Proper surface preparation ensures a strong adhesive bond and a long-lasting backsplash.
Can Stick On Backsplash Be Installed Over Existing Tiles?
Yes, stick on backsplash can be installed over existing tiles. However, it is important to thoroughly clean and prime the existing tiles before applying the stick on backsplash. This helps the adhesive adhere properly and ensures a smooth and seamless finish.
How Do I Cut Stick On Backsplash To Fit Around Outlets And Corners?
To cut stick on backsplash to fit around outlets and corners, use a sharp utility knife or scissors. Measure the area you need to cut, and then mark the measurement on the back of the backsplash. Carefully cut along the marked line, taking your time to ensure a precise fit.
Installing a small overlap of about an inch can also help to ensure a clean and professional finish.
Conclusion
Stick on backsplashes are an easy and cost-effective way to update your kitchen or bathroom. With the simple installation process, you can achieve a stylish and durable backsplash in no time. Whether you’re a DIY novice or a seasoned pro, stick on backsplashes offer a hassle-free solution for adding a touch of personality to your space.
So, why wait? Give your home a fresh new look today!