How to Remove Oil-Based Stain from Wood Without Damaging the Grain
Mineral spirits or a citrus stripping gel remove most oil-based stain from wood without damaging the finish — but only if you test an inconspicuous spot first, since some finishes react to solvents differently. This guide covers safe removal steps for bare and finished wood, what changes on baseboards, floors, and decks, and how to dispose of solvent rags without starting a fire.
Understanding Oil Based Stains
Best Oil-Based Stain Remover Pick
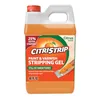
Citristrip Stripping Gel Citrus Paint & Stripper (40 oz) – $16.85
The citrus stripping gel referenced in the comparison table above — a slower-evaporating gel that clings to vertical surfaces like trim and furniture legs, giving deep, cured oil-based stain more time to lift before you scrape.
- Best for: deeply cured stains that survived detergent and vinegar
- Why we picked it: low-odor formula stays workable long enough for careful scraping instead of flash-evaporating like mineral spirits
- Main drawback: strips nearby finish too, so it’s a refinishing step, not a spot-treatment
Compare more oil-based stain remover options
 Option 1 Klean-Strip Odorless Mineral Spirits (1 Gal) – $18.22
|
 Option 2 Motsenbocker’s Lift Off Remover (32 oz) – $22.96
|
 Option 3 RMP Finishes Odorless Mineral Spirits (1 Qt) – $17.99
|
As an Amazon Associate we earn from qualifying purchases.
Before picking a removal method, it helps to know what you’re actually dealing with — an oil-based wood stain sits differently in the wood than a fresh grease spill, and the two respond to different treatments.
What Are Oil Based Stains?
An oil-based stain is a wood-finishing product that carries pigment or dye in a petroleum-based solvent, typically mineral spirits, rather than water. It penetrates the wood fibers instead of sitting on top of them, which gives it deeper, longer-lasting color but also makes it harder to lift once it has cured. Cured oil-based stain (24–72 hours old or older) behaves very differently from a fresh spill that hasn’t soaked in yet — treat them with different techniques below.
Common Examples Of Oil Based Stains
Oil based stains, as the name suggests, are stains that contain oils or petroleum-based liquids. These stains occur when oil-based substances are accidentally spilled or dripped onto wood surfaces. Unlike water-based stains, oil based stains don’t easily penetrate the wood as fast, but once cured they form a more substantial bond with the surface.
- Grease stains: These stains are often caused by cooking oil or foods containing fats coming into contact with wood surfaces, such as countertops or cutting boards — see our separate guide on removing plain oil stains from wood if the spill is cooking or motor oil rather than a wood finish product.
- Furniture oil stains: Certain furniture care products, such as furniture polish or oil-based wood conditioners, can leave stains if not applied or wiped correctly.
- Motor oil or automotive fluid stains: Accidental drips or spills from vehicles can leave stubborn oil based stains on wooden garage floors or workbenches.
- Leftover finish drips: Splatters or drips from applying an oil-based wood stain or varnish to a nearby project are one of the most common sources on trim and baseboards.
Preparation For Stain Removal
If you’re dealing with an oil-based stain on your wooden furniture or flooring, it’s crucial to prepare for the stain removal process properly. Taking the time to gather necessary materials and test an inconspicuous area beforehand can save you from damaging the wood further.
Gathering Necessary Materials
Before you start removing the oil-based stain from the wood, make sure you have all the necessary materials at hand:
- Protective gloves to keep your hands safe during the stain removal process.
- Lint-free cloths or paper towels to blot and clean the stained area.
- Mineral spirits or a citrus-based stripping gel designed for oil-based stains.
- Preparation solution, such as a wood cleaner or mild detergent, for preliminary cleaning.
- Soft-bristled brush or toothbrush to gently scrub the stained area.
- Warm water for diluting the cleaning solutions and rinsing the wood.
Testing An Inconspicuous Area
Before you proceed with stain removal on the affected area, it’s essential to test the solution or cleaner on an inconspicuous corner or spot of the wood. This test will help you ensure that the cleaner or solvent does not harm or discolor the wood surface.
To perform the inconspicuous area test, follow these simple steps:
- Dilute the cleaning solution or mineral spirits according to the instructions provided.
- Apply a small amount of the solution onto a clean cloth or paper towel.
- Gently rub the solution on a hidden corner or underneath the piece for about 30 seconds.
- Wait 5–10 minutes and check for any discoloration, softening, or dulling of the finish before treating the visible stain.
Fresh Spill Or Dried, Absorbed Stain?
A spill you catch within the first hour is still mostly sitting on the surface — blotting and a mild detergent solution will usually lift it. Once oil-based stain has soaked in and started to cure (past the 1–2 hour “dry to touch” mark), it has bonded into the wood fibers, and you’ll need a solvent like mineral spirits or a citrus stripping gel instead of just soap and water. On finished furniture, always assume the stain is dried unless you watched it happen.
Techniques For Removing Oil Based Stains
When it comes to removing oil-based stains from wood, there are a few tried and tested techniques you can use depending on how fresh the stain is and whether the wood is finished or bare. The comparison below shows which method fits which situation before you commit to one.
| Method | Works Best On | Risk To Finish | Best For |
|---|---|---|---|
| Dish detergent & water | Fresh spills, under 1 hour old | Very low | First response on any surface |
| Vinegar & baking soda | Light, partly-set stains | Low, test first | Sealed or finished wood |
| Mineral spirits | Cured, absorbed stains | Moderate on shellac/lacquer | Bare or oil-finished wood |
| Citrus stripping gel | Deep, cured stains + old finish | Removes finish along with stain | Refinishing projects |
| Wood bleach | Deep stains that survive sanding | High — strips color from wood too | Last resort before refinishing |
Blotting The Stain
To start the process of removing an oil-based stain from wood, you’ll want to begin by blotting the stain as soon as possible. Take a clean, absorbent cloth or paper towel, and gently blot the stain to soak up as much of the oil as you can. Avoid rubbing the stain as it may only spread the oil further. Remember to work inwards from the outer edges of the stain to prevent it from spreading.
Using Dish Detergent
- Start by creating a solution of warm water and a few drops of mild dish detergent.
- Dampen a clean cloth or sponge with the solution and gently scrub the stained area, working in circular motions.
- Rinse the cloth or sponge with clean water and continue to wipe the area, removing any soapy residue.
- Finally, dry the wood thoroughly with a clean towel or allow it to air-dry completely.
Applying Vinegar And Water Solution
- Mix equal parts white vinegar and water in a spray bottle or a bowl.
- Spray or apply the solution to the stained area and let it sit for a few minutes.
- Gently scrub the area with a soft brush or cloth, paying attention to the direction of the wood grain.
- Wipe away the solution with a clean, damp cloth.
- Dry the wood with a towel or let it air-dry.
Using Baking Soda Paste
- Create a paste by mixing baking soda with enough water to form a thick, spreadable consistency.
- Apply the paste directly to the oil-based stain, making sure to cover it completely.
- Leave the paste on the stain for a few minutes to allow it to absorb the oil.
- Gently scrub the stained area with a soft brush or cloth.
- Remove the paste with a clean, damp cloth and dry the wood thoroughly.
Remember, it’s essential to test these techniques in an inconspicuous area first to ensure they do not damage or discolor the wood. If the oil-based stain persists or the wood surface requires professional attention, consider consulting a wood care specialist.
Removing Oil-Based Stain From Baseboards, Floors, And Decks
The surface changes the approach. On painted baseboards and trim, mineral spirits and citrus strippers can also soften the paint — test a hidden spot and use the mildest method (dish detergent, then vinegar/baking soda) before reaching for solvents. On hardwood floors, work with the grain and avoid soaking the boards, since standing solvent can seep into seams and damage the subfloor adhesive below. On an outdoor deck, sun-baked stains are usually already partly cured by UV exposure, so mineral spirits or a citrus gel followed by a light sanding pass is typically faster than household remedies.
Additional Tips And Tricks
In addition to the main methods outlined above, there are a few additional tips and tricks that can help you effectively remove oil-based stains from wood.
Using Mineral Spirits
To tackle stubborn oil-based stains, one effective method is to use mineral spirits. This powerful solvent helps to dissolve and remove the stain from the wood. Here’s how to use mineral spirits to remove oil-based stains:
- Put on protective gloves and work in a well-ventilated area.
- Moisten a clean cloth or sponge with mineral spirits.
- Gently rub the stained area in a circular motion, applying slight pressure.
- Continue rubbing until the stain starts to lift.
- Wipe away any residue with a clean cloth, then let the wood air-dry 20–30 minutes before assessing the result.
📊 An estimated 900 U.S. home fires a year are started by oily rags left in a pile, out of roughly 1,700 home fires caused by spontaneous combustion overall — oil-based stain, boiled linseed oil, and varnish all generate heat as they cure, and a bunched-up rag traps that heat. Lay used rags flat outdoors to dry, then soak them in water in a sealed metal container before disposal. Source: National Fire Protection Association (NFPA)
Applying Wood Bleach
If the oil-based stain has penetrated the wood deeply and is difficult to remove, using wood bleach can be an effective solution. Wood bleach lightens the stained area, minimizing its visibility. Follow these steps to apply wood bleach:
- Prepare the area by removing any existing finish or sealant.
- Put on protective gloves and work in a well-ventilated area.
- Mix the wood bleach according to the manufacturer’s instructions.
- Apply the wood bleach to the stained area using a clean brush or sponge.
- Allow the bleach to sit for the recommended amount of time.
- Rinse the area thoroughly with clean water.
- Allow the wood to dry completely before proceeding with refinishing.
Sanding The Stained Area
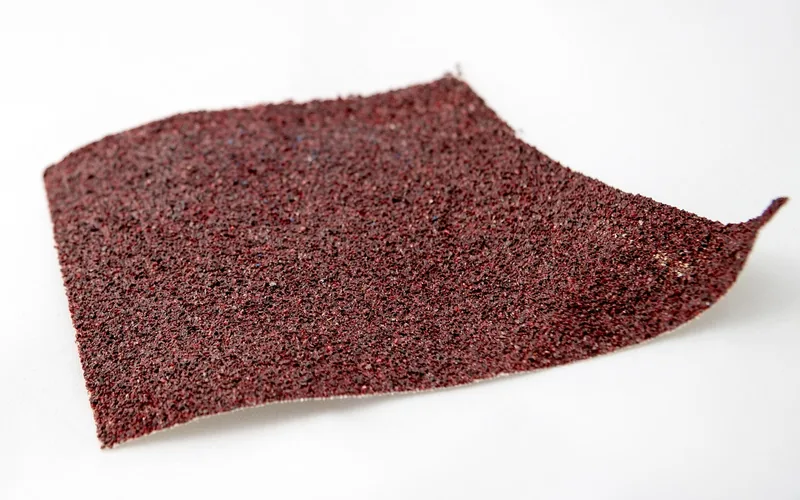
If the stain persists after attempting the above methods, you may need to resort to sanding the stained area. Sanding helps to remove the top layer of wood, including the stained portion. Follow these steps to sand the stained area:
- Ensure the wood is completely dry before sanding.
- Start with a coarse-grit sandpaper (80–100 grit) and gradually move to a finer grit (150–220 grit).
- Sand in the direction of the wood grain to avoid damaging the surface.
- Continue sanding until the stain is no longer visible.
- Wipe away the sanding dust with a clean cloth.
- Apply a suitable finish or sealer to protect the newly cleaned wood.
By incorporating these additional tips and tricks into your stain removal process, you can effectively banish oil-based stains from your wooden surfaces. Remember to always work carefully and take necessary safety precautions when using solvents and bleach.
Preventing Future Oil Based Stains
To prevent future oil-based stains on wood, it is essential to act promptly. Clean the affected area using a mixture of warm water and mild dish soap, and gently scrub the stain away. Afterwards, apply a wood sealant to protect the surface from potential stains.
If you want to keep your wooden furniture or flooring looking pristine and oil-stain-free, there are a few preventive measures you can take. By using protective coatings and cleaning spills immediately, you can ensure that your wood remains beautiful for years to come. For a broader look at how different stain types behave once applied, see our guide to interior wood stain types and safe application.
Using Protective Coatings
To safeguard your wood against oil-based stains, applying a protective coating is crucial. These coatings act as a barrier, preventing oil from penetrating the wood’s surface. Here are a few types of protective coatings you can consider:
- Varnish: A popular choice for sealing wood, varnish provides a durable layer of protection. It’s available in different finishes, including matte, satin, and glossy.
- Polyurethane: Known for its resistance to oil and water, polyurethane is an excellent option for protecting wood against oil-based stains.
- Shellac: Derived from natural sources, shellac forms a hard and protective coating. It is easy to apply and offers good resistance to oils.
With any protective coating, it’s important to follow the manufacturer’s instructions for application. Ensure that the wood is clean and dry before applying the coating. Apply multiple thin coats, allowing each coat to dry completely before adding the next one.
Cleaning Spills Immediately
Accidents happen, and if an oil spill occurs on your wooden surface, swift action is essential to prevent staining. Here’s what you can do:
- Act quickly: As soon as you notice a spill, grab a clean cloth or paper towel and blot the oil gently. Avoid rubbing, as it can push the oil deeper into the wood.
- Use absorbent materials: If the oil stain persists, sprinkle baking soda or cornstarch on top of the affected area. These absorbent substances can help pull out the remaining oil.
- Clean with mild soap: Mix a few drops of mild dish soap with warm water and dampen a cloth. Gently wipe the stain, being careful not to oversaturate the wood.
- Dry thoroughly: After cleaning, ensure the wood is completely dry to prevent moisture-related issues. Use a clean cloth or allow the wood to air-dry naturally.
Frequently Asked Questions
Does mineral spirits damage a wood finish?
Yes, it can on shellac and some lacquer finishes if left on too long or rubbed too hard — mineral spirits can soften and dull these coatings. Test an inconspicuous spot first and wipe it off promptly once the stain lifts. Polyurethane and modern varnish finishes generally tolerate brief mineral spirits contact without damage.
How do you remove dried oil-based stain from wood?
Dried, cured oil-based stain needs a solvent, not just soap and water. Apply mineral spirits or a citrus stripping gel with a soft cloth, working in the direction of the grain, then wipe away the residue. If the stain remains after solvent treatment, sand the area with 80–100 grit sandpaper and refinish.
Can you remove oil-based stain from wood without sanding?
Often, yes. Fresh spills usually lift with dish detergent and water, and cured stains frequently respond to mineral spirits or a citrus stripping gel without needing to sand. Sanding is a last resort for stains that have penetrated too deep for solvents to fully clear.
Is it safe to use vinegar and baking soda on finished wood?
Generally yes, in small amounts on sealed or finished wood, since both are mild and non-solvent-based. Always test a hidden spot first, since vinegar’s mild acidity can dull some wax finishes over repeated use. Rinse and dry the area promptly after treatment.
How long should oily rags dry before you throw them away?
Lay solvent- or stain-soaked rags flat outdoors on a non-combustible surface until fully dry, then soak them in water inside a sealed metal container before disposal — never pile damp rags together, since the heat they generate while curing is a documented house-fire cause.
Conclusion
Removing oil-based stain from wood comes down to matching the method to the stain: mild detergent for fresh spills, mineral spirits or a citrus stripping gel for cured stains, and sanding only as a last resort. Test an inconspicuous spot first, dispose of solvent rags flat and wet rather than balled up, and the wood underneath comes out undamaged.
Sponsored / affiliate links. As an Amazon Associate I earn from qualifying purchases. I may earn additional commission from eligible campaigns.