How to Level a Wood Floor in an Old House: DIY Solutions
To level a wood floor in an old house, use an underlayment, floor leveler, or floor patch product to fix low spots in the wood subfloor. These products help insulate, absorb sound, and reduce wear on the floor.
Additional steps may be required if the unevenness is due to foundation issues. Once the foundation is stabilized, have the floors professionally leveled. The cost of leveling depends on the severity of the floor’s unevenness and the repair method used.
Older homes are full of character, but they often come with their own set of challenges. Uneven floors are common in old houses due to the natural settling of the foundation or wear and tear on the wood subfloor. Walking on an uneven floor can be unpleasant and may even cause accidents. Luckily, leveling a wood floor is a DIY project that can be accomplished with the right tools and products. We will discuss how to level a wood floor in an old house using underlayment, floor leveler, or floor patch products. We will also explore additional steps that may need to be taken if the unevenness is caused by foundation issues.
Assessing The Floor
To level an old wood floor in a house, start by assessing the floor for any uneven areas or dips. Use an underlayment, floor leveler, or floor patch product to fix low spots on the wood or concrete subfloor. Additionally, you can use screws and wood to level the floor, but this requires more DIY skills.
Before you start the process of leveling your wood floor, you need to assess the condition of the floor. This step is crucial, as it will help you understand the severity of the problem and the type of subfloor you need to deal with. There are three main things you need to do to assess your wood floor:
Checking for dips and humps:
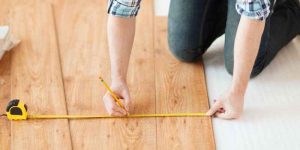
The first thing you need to do is check for any dips and humps in the floor. You can do this by using a straight edge or a level. Place the straight edge or level on the floor and see if it lays flat. If there are any gaps between the straight edge and the floor, it means that there are dips or humps. Use a tape measure to record the width and length of the uneven areas as this will help you determine the severity of the problem.
Identifying the type of subfloor:
The next step is to identify the type of subfloor you have. You need to know whether it’s made of wood or concrete, as this will affect the type of underlayment you use to level the floor. If you have a wood subfloor, you can use an underlayment, floor leveler, or floor patch product to fix low spots. If you have a concrete subfloor, you’ll need to use a self-leveling compound.
Determining the severity of the problem:
After you’ve identified any dips or humps and the type of subfloor, you can determine the severity of the problem. Measure the depth of any dips in the floor. If the measurement is less than 1/8 inch, you can use an underlayment. If the measurement is between 1/8 inch and 1/4 inch, you’ll need a floor leveler. However, if the depth is more than 1/4 inch, you’ll need a floor patch product or a self-leveling compound to level the floor.
By assessing your floor in this way, you can determine the best approach to take in leveling your old wood floor. This will help you avoid wasting time and money on products and methods that won’t work.
Preparing The Floor
Leveling a wood floor in an old house can be a challenging task, but it’s essential to prepare the floor before leveling it. Start by addressing any foundation issues and stabilizing the foundation. Then, use an underlayment, floor leveler, or floor patch product to fix low spots in the wood or concrete subfloor.
With proper preparation, you can level your old wood floor and create a smooth, even surface.
Before you start leveling your old wooden floor, you need to prepare the area first. Preparing the floor is crucial in ensuring that you achieve an even and stable surface. Here are the steps you need to follow:
Clearing the Room
The first step is to clear the room of all furniture and other items that can obstruct the work area. It’s important to have a clean and spacious area to work in, so you can move around freely and access all areas of the floor.
Removing the Existing Flooring
Next, you need to remove the existing flooring, which can be a painstaking and labor-intensive process. This step is crucial, as it allows you to inspect the subfloor and address any issues that may be causing the unevenness.
Fixing Any Loose Boards
After removing the flooring, you need to fix any loose or damaged boards in the subfloor. Make sure to tighten any loose screws or nails and replace any broken or damaged boards. This step is important, as any unstable boards can lead to further unevenness in the floor.
Once you’ve prepared the floor, you can start the leveling process. There are different methods you can use to level an old wooden floor, such as using an underlayment, floor leveler, or floor patch product. The choice of method depends on the severity of the unevenness and the type of subfloor you have.
By following the steps mentioned and preparing the floor before leveling it, you can ensure that you have a stable and even surface to work with. This will not only improve the aesthetics of your space but also make it safer and more comfortable to walk on.
DIY Solutions For Leveling Wood Floors
To level a wood floor in an old house, one solution is to use an underlayment, floor leveler or floor patch product to fix low spots in a wood or concrete subfloor. Another option is to use screws, wood and a level to DIY level the floor.
Addressing any foundation issues and stabilizing it may also be necessary before leveling the floors.
A major benefit of owning an old house is its unique charm and character, but homeowners may face specific challenges in maintaining the property. One common problem with old houses is uneven or sloping floors, which can be caused by structural issues, settlement, or natural warping over time. Fortunately, there are DIY solutions for leveling wood floors that don’t require professional assistance but may require some time and effort. Here are a few ways to level a wood floor by yourself.
Using shims or roofing paper
One strategy to level an uneven wood floor is by using shims or roofing paper. Begin the process by cleaning and clearing the floor of any debris and dust. Next, place a spirit level across the width and length of the room to identify the low areas of the floor. Cut shims to fit the dip in the floor, then slide them underneath and against the subfloor until you have leveled the low spots. If shims aren’t enough, you can also use roofing paper to fill in low spots. Simply cut the paper to the size of the low area and place it under the subfloor, using tape to secure it in place.
Installing plywood underlayment
Another DIY solution to level a wood floor is to install a plywood underlayment. Start by measuring the area and purchasing the appropriate amount of plywood. To install, first apply construction adhesive to the subfloor and lay the plywood over it, making sure to leave a gap between sheets. Fasten the underlayment with screws at intervals of 6 inches along the edges and 8 inches in the field. Ensure the screws are flush with the wood surface to prevent any bumps or ridges.
Pouring self-leveling compound
If the wood floor still isn’t completely level after trying the first two methods, the final option is to pour self-leveling compound. Read the manufacturer’s instructions to ensure proper mixing and application. Start by cleaning and preparing the floor, then pour the compound in the low areas. Use a trowel to spread the compound evenly across the floor and allow it to dry completely before sanding lightly to remove any rough spots.
Conclusion:
These DIY solutions will help you level your wood floor on your own. No matter which method you choose, ensure to prepare the area properly for the best results. Taking the time to level your floors can make a significant difference in the safety, appearance, and value of your home.
DIY Solution: Levelling With Screws
Leveling a wood floor in an old house can be challenging, but with a DIY solution using screws, wood, and a level, it’s possible to achieve a level floor. This method involves identifying where the joists and ribs are, laying out the boards, marking the floor, checking the levelness, determining the depth needed, setting up the boards and screwing them to the joist.
If you’re on a budget and looking for a DIY solution to level an old wood floor, levelling with screws is a feasible option. This method involves screwing down the subfloor in low spots to create an even surface.
Identifying where to place the screws
Before getting started, it’s important to identify the low spots in the floor. You can do this by using a level and measuring the height difference between each spot. Once you’ve identified the low spots, mark them with a pencil.
Marking the subfloor
Next, you’ll need to mark the subfloor where you’ll be screwing it down. Use a drill to create pilot holes in the subfloor along the marked areas. This will prevent the screws from splitting the wood.
Screwing down the subfloor
Once you’ve marked and drilled the pilot holes, screw down the subfloor using long screws. Make sure to countersink the screws slightly below the surface so they don’t stick out and create a tripping hazard. Check the level periodically to ensure you’re achieving a uniform surface.
Filling in remaining gaps
Finally, fill in any remaining gaps with wood putty. Allow the putty to dry and sand it down until it’s flush with the floor. This will ensure a smooth, level finish.
Conclusion
Leveling an old wood floor can be a challenging task, but levelling with screws can be a cost-effective and easy solution. By identifying problem areas, marking the subfloor, screwing it down, and filling in any remaining gaps with putty, you can achieve a level, even surface without breaking the bank.
Finishing The Floor
Leveling a wood floor in an old house can be done using underlayment, floor leveler, or floor patch products to fix low spots on the subfloor. It is also possible to sister the joists or lay down new hardwood to fix sagging and dipping floors.
Consider following a step-by-step guide to help ensure a successful leveling project.
Sanding The Wood Floor
Sanding the wood floor is a crucial step when it comes to leveling an old, uneven wood floor. Sanding helps to remove any unevenness and bumps on the floor surface. It also prepares the surface for the next steps involved in finishing the floor. However, sanding is a task that requires care and patience. Using a sanding machine will make the task much easier, but it is still important to take your time to ensure that the sanding is done evenly and without causing damage to the wood.
Staining Or Painting The Floor
Staining or painting the floor is the next step after sanding. This step gives the floor a new look and helps to hide any imperfections that may still be present. When choosing a color or stain, consider the style of the room and the rest of the decor. Make sure to apply the stain or paint evenly and allow ample drying time before proceeding to the next step.
Sealing The Floor
Sealing the floor is the final step in finishing the floor. This step ensures that the floor is protected against damage and moisture. There are a variety of sealers available, including polyurethane, wax, and oil-based sealers. Check the manufacturer’s instructions for the appropriate sealer for your specific type of wood. Apply the sealer evenly, starting at the farthest point in the room and working towards the door. Allow ample drying time before walking on the floor or moving any furniture back into the room.
In conclusion, finishing an old, uneven wood floor is a task that requires patience and care. From sanding the floor to sealing it, each step is crucial to ensuring that the final result is an even, beautiful floor that will last for years to come.
Costs And Considerations
Leveling a wood floor in an old house can be a challenging and expensive task. Before taking on this project, it’s important to consider factors such as the type of leveling compound or underlayment to use, the cost of materials and hiring a professional, and whether lifting the floors is necessary to address underlying foundation issues.
When it comes to leveling a wood floor in an old house, costs and considerations are essential factors that should not be overlooked. The cost of leveling a wood floor can vary depending on several factors, including the severity of the problem, the size of the affected area, and the extent of necessary repairs. While some DIY solutions may be cost-effective, hiring a professional is often the best choice to ensure your wood floor is level and safe for use. In this article, we’ll discuss the factors that affect the cost of leveling, how to estimate the cost of DIY solutions, and when to hire a professional.
Factors That Affect The Cost Of Leveling
Several factors can affect the cost of leveling a wood floor, including the type of material used for leveling, the severity of the problem, and the accessibility of the affected area. Here are some of the critical factors that can affect the cost of leveling a wood floor:
- The type of material used for leveling, such as wood shims, self-leveling compound, or floor patch products.
- The severity of the problem, such as how uneven the floor is and whether it can be fixed with a simple adjustment or requires extensive repairs.
- The accessibility of the affected area, such as whether the area is easily accessible or requires additional work to reach.
- The time required to level the floor, including the number of workers needed and the number of hours spent on the job.
- The cost of materials, tools, and equipment required for the job.
Estimating The Cost Of Diy Solutions
If you’re considering leveling your wood floor yourself, estimating the cost of DIY solutions is essential. While DIY solutions can be cost-effective, it’s crucial to understand the materials and tools required for the job. Here are some of the key steps involved in estimating the cost of DIY solutions:
- Measure the affected area to determine the amount of work required.
- Select the type of material or product you’ll use for leveling, such as wood shims or self-leveling compound.
- Research the cost of materials and tools required for the job, including any rental equipment you might need.
- Estimate the amount of time it will take you to complete the job, including any preparation or cleanup work.
- Add up the costs of materials, tools, and equipment, and divide by the estimated time required to determine an estimated cost per hour.
When To Hire A Professional
While DIY solutions can be a cost-effective option, sometimes, it’s best to hire a professional to ensure the work is done correctly. Here are some of the situations when it’s best to hire a professional to level your wood floor:
- If the problem is severe and requires extensive repairs beyond your level of expertise.
- If you’re not comfortable working with power tools or equipment.
- If you don’t have the time or resources to complete the job yourself.
- If you’re unsure of the safety risks involved in leveling a wood floor.
- If you want to ensure that the job is done correctly the first time, saving you time and money in the long run.
In conclusion, costs and considerations are essential factors that should not be overlooked when it comes to leveling a wood floor in an old house. Whether you choose a DIY solution or opt to hire a professional, understanding the factors that affect the cost of leveling, estimating the cost of DIY solutions, and knowing when to hire a professional can all help ensure a successful and safe outcome.
Frequently Asked Questions On How To Level A Wood Floor In An Old House
How Do You Fix An Uneven Floor In An Old House?
To fix an uneven floor in an old house, start by addressing any issues with the foundation. This may require adding additional support or repairing any damage. Once the foundation is stable, a professional may need to level the floors using an underlayment, floor leveler, or floor patch product.
Another DIY method involves using screws, wood, and a level to sister the joists and level the floor. The cost of leveling a floor in an old house varies depending on the extent of the damage and the chosen method of repair.
How Do You Level An Old Wood Floor?
To level an old wood floor, you can use an underlayment, floor leveler, or floor patch product. An underlayment is a thin layer of material that helps insulate, absorb sound, and reduce wear on your floor. Alternatively, you can use screws, wood, and a level for a DIY approach.
Fixing the foundation should be the first step before leveling the floor by a professional. Costs for leveling a floor depend on the extent of the damage and type of flooring. Avoid wasting materials by staggering the joints.
What Is The Cheapest Way To Level A Wooden Floor?
The cheapest way to level a wooden floor is by using an underlayment, floor leveler, or floor patch product to fix low spots in a wood or concrete subfloor. You can start the new row with the off-cut from the last row of sheets to reduce waste.
Ensure the joints are staggered and continue until the floor is covered. Alternatively, you can use screws, wood and a level for a DIY method.
How Much Does It Cost To Level A Floor In An Old House?
The cost of leveling a floor in an old house may vary depending on the scope of work required. Generally, it may cost anywhere from $500 to $5,000 and up. The final price will depend on factors such as the size of the room, the severity of the floor’s sloping, the condition of the existing floor, and the cost of materials and labor.
Consultation with a professional is recommended to get an accurate estimate.
Conclusion
Leveling a wood floor in an old house can be a daunting task, but with the right tools and techniques, it can be accomplished relatively easily. Start by addressing any foundation issues before moving on to the leveling process. Use underlayment, floor leveler or floor patch product to fix low spots in a wood or concrete subfloor.
Remember to stagger joints to reduce waste and keep in mind the cost of leveling a floor can vary depending on the method used. With patience and diligence, you can successfully level your old wood floor and enjoy a smoother, safer living space.