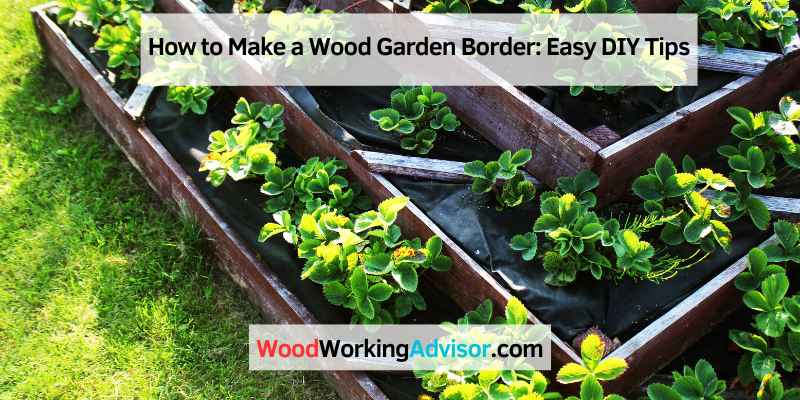
How to Make a Wood Garden Border: Easy DIY Tips
To make a wood garden border, choose the desired location, mark out its shape, prepare the ground, improve the soil, position the plants, water them, and begin planting. After planting, water the area well for successful growth.
Cedar, cypress, and redwood are great wood options for garden edging. These woods are durable, visually appealing, and suitable for outdoor use. Cedar is known for its red color and is a popular choice for landscape projects. Cypress is relatively durable, but its strength depends on the age of the tree.
Redwood is an excellent option for garden edging due to its beauty and resilience.
Choosing The Right Wood
When it comes to making a wood garden border, choosing the right type of wood is essential for both functionality and aesthetics. Different types of wood offer various benefits and drawbacks, so it’s crucial to select the most suitable one for your garden edging project.
Types Of Wood For Garden Edging
- Cedar
- Cypress
- Redwood
Pros And Cons Of Cedar Wood
| Pros | Cons |
| Beautiful red color | May be more expensive |
| Naturally resistant to insects | Requires sealing for longer life |
Benefits Of Using Cypress Wood
- Durable and long-lasting
- Resistance to decay and rot
- Natural insect repellent properties
Why Redwood Is A Great Option
- Highly durable and weather-resistant
- Naturally beautiful and versatile in design
- Low maintenance and long lifespan
Preparing The Ground
Creating a beautiful wood garden border starts with preparing the ground. This step is crucial for ensuring a long-lasting and visually appealing border for your garden. Here are the essential steps to prepare the ground for your wood garden border:
Marking The Border Path
Begin by marking the path where you want to install the wood garden border. Use a mason’s line tied around a stake to define the border’s layout. This will provide a clear guide for cutting through the turf and installing the timber edging.
Cutting Through The Turf
Next, cut through the turf along the marked border path to create a clear and defined space for the wood garden border. Carefully remove the grass and any unwanted vegetation to ensure a smooth and even surface for the border installation.
Leveling And Tamping The Ground
After cutting through the turf, it’s essential to level and tamp the ground to create a stable base for the wood garden border. Use a rake and a tamper to even out the soil and compact it to prevent shifting or unevenness in the border’s foundation.
Optional: Adding Landscape Fabric
If desired, consider adding landscape fabric before installing the timber edging. This fabric helps prevent weed growth and maintains the integrity of the border by creating a barrier between the soil and the wood edging.
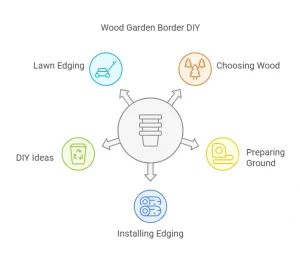
Installing Wooden Edging
Create a charming garden border by installing wooden edging with these simple steps. Mark the border path, cut through the turf, level and tamp the ground, then install the timbers and secure them with rebar for a durable and attractive garden edging.
Additionally, choose from various wood options such as cedar, cypress, or redwood for both visual appeal and durability.
Materials And Tools Needed
- Logs or landscape timbers
- Shovel
- Wood stakes
- Mallet
- Tape measure
- Level
- Hand saw or chainsaw
- Drill
- Screws
- Construction adhesive
- Landscape fabric (optional)
- Mason’s line
- Rebar (optional)
Step-by-step Guide For Installing Log Roll Edging
- Mark the border path using a mason’s line and stakes.
- Cut through the turf along the marked path.
- Level and tamp the ground to prepare it for the edging.
- Install the log rolls by positioning them and securing them with screws or construction adhesive.
- Construct the corners and make turns by cutting the logs at appropriate angles.
- Secure the log rolls with wood stakes or rebar for added stability.
Step-by-step Guide For Installing Landscape Timber Edging
- Mark the border path and cut through the turf as with log roll edging.
- If using landscape fabric, lay it down before installing the timbers.
- Position the timbers and secure them in place with screws or construction adhesive.
- Construct the corners and make turns by cutting the timbers at appropriate angles.
- Secure the timbers with wood stakes or rebar for added stability.
When constructing corners and making turns, ensure the edging remains level and aligned, adjusting as needed before fully securing in place. Taking the time to ensure proper alignment and stability will result in a well-constructed wooden garden border.
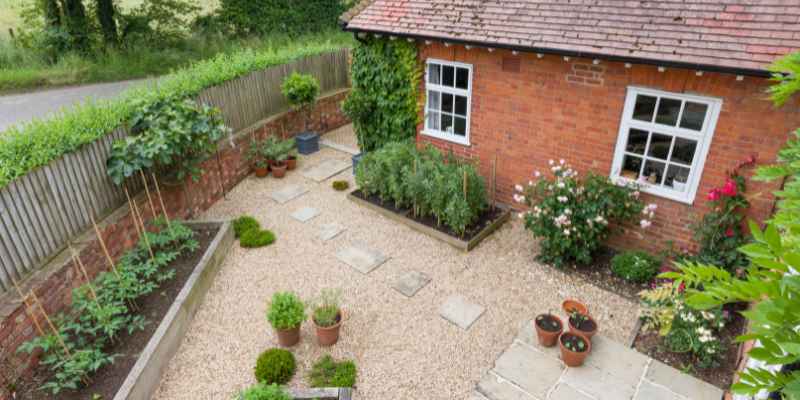
DIY Garden Bed Edging
Freshen up your garden with a DIY touch! Creating a wood garden border is an easy and budget-friendly way to enhance the look of your outdoor space. One of the essential aspects of this project is garden bed edging, which not only gives your garden a neat and polished appearance but also helps to define planting areas.
Simple Garden Edging Anyone Can Do
First mark out the border path, then cut through the turf to prepare the ground. Next, level and tamp the ground, and optionally add landscape fabric. Install the timbers, construct the corners and make angled turns. Finally, secure the timbers in place using rebar if needed.
Step-by-step Video Tutorial: Adding Construction Adhesive
Check out this video tutorial to learn how to add construction adhesive when creating your garden bed edging. This crucial step helps ensure the stability and longevity of your edging.
Step-by-step Video Tutorial: Installing The Ends
Watch this detailed tutorial on installing the ends of your garden bed edging. Properly securing the ends is essential for a professional and polished finish.
Step-by-step Video Tutorial: Cutting The Ends
Learn the correct technique for cutting the ends of your wood garden border in this informative video tutorial. Precision cutting ensures a seamless and professional look.
Tips For Double-checking Fitment And Anchoring The Edging
- Always double-check the fitment of your garden bed edging to ensure a seamless border.
- Secure the edging by anchoring it properly, preventing any shifting or movement over time.
Easy Lawn Edging Installation
For easy lawn edging installation, consider making a wood garden border using cedar or redwood for durability. Mark out and prepare your border, then position your plants and start planting. You can also secure your wooden edging by using a mason’s line, landscape fabric, and installing the timbers with rebar.
For a unique touch, consider DIY techniques for a different and appealing outcome.
Video Tutorial: Marking Out Your Edges
To start your lawn edging installation, the first step is to mark out the edges of your garden border. This can be done by tying one end of a mason’s line around a stake and stretching it along the desired path of the border. Use a shovel or garden hose to create curves and straight lines. Ensure that you have measured and marked out the exact dimensions you want for your border.
Video Tutorial: Removing The Grass
After marking out the edges, it’s time to remove the grass along the border path. Use a sharp spade or edging tool to cut through the turf, following the marked out line. Lift the turf carefully, starting from the edge, and roll it away. Be mindful of any underground utilities or irrigation systems that may be present in your garden.
Video Tutorial: Laying Out The Boards
Now that the grass has been removed, it’s time to lay out the boards for the garden border. Measure the length of each side of the border and cut the boards accordingly. Lay the boards along the marked out path, ensuring that they fit snugly and align with the desired shape. Use wooden stakes or pegs to temporarily hold the boards in place.
Video Tutorial: Using A Spirit Level To Find The Level Of The Ground
To ensure a level garden border, use a spirit level to check the height of the ground along the length of the border. Place the spirit level on top of the boards and adjust their position as needed to achieve a level surface. This will help in providing a uniform look to your garden border.
Video Tutorial: Attaching Boards To Posts
To secure the boards in place, attach them to wooden posts. Position the posts at regular intervals along the length of the border and use a drill or hammer to fix them firmly into the ground. Then, attach the boards to the posts using screws or nails. This will provide stability to your garden border and prevent the boards from shifting over time.
Tips For Leveling And Finishing The Edge
Once the boards are attached, it’s important to ensure that the edge is properly leveled and finished. Here are some tips to achieve a professional look:
- Use a straight edge or string line to check the alignment and straightness of the boards.
- Fill any gaps between the boards and the ground with soil or gravel to create a smooth transition.
- Compact the soil around the border to prevent sinking or shifting.
- Apply a weather-resistant sealant or stain to protect the wood from moisture and prolong its lifespan.
By following these easy lawn edging installation steps, you can create a beautiful and sturdy wood garden border that will enhance the overall look of your outdoor space. Now that you have learned how to mark out the edges, remove the grass, lay out the boards, find the level of the ground, and attach the boards to posts, you have all the necessary skills to take on this DIY project. Enjoy the process of creating your own garden border and take pride in the finished result!
Creative Wood Garden Edging Ideas
Enhance your garden with creative wood garden edging ideas for a beautiful natural border. Transform your space by making a wood garden edge, adding a touch of rustic charm. Upgrade your outdoor environment with these unique and easy DIY wood garden border ideas.
DIY Basic Garden Edging With Recycled Timber
Looking for a cost-effective and eco-friendly way to border your garden? Why not try DIY basic garden edging with recycled timber? Not only can you repurpose materials, but you can also add a rustic and natural appeal to your outdoor space. Here’s a step-by-step guide on how to make garden edging with recycled timber:
1. Measure and mark the area: Start by measuring the length of your garden bed and marking where you want your border to be.
2. Prepare the timber: Gather your recycled timber and cut it into equal lengths according to your measurements. Sand down any rough edges for a smoother finish.
3. Dig a trench: Use a shovel to dig a shallow trench along the marked area to accommodate the timber. The depth should be approximately half the height of the timber.
4. Lay the timber: Place the timber lengths vertically inside the trench, ensuring they are level and tightly packed together. You can use a mallet to gently tap them into place.
5. Secure the timber: Drive wooden stakes into the ground behind the timber at regular intervals to anchor it firmly. This will prevent the edging from shifting or falling over.
6. Finishing touches: Fill the trench with soil, pressing it firmly against the timber to provide stability. You can also add mulch or gravel along the garden bed to enhance the overall look.
How To Make Garden Edging From Pallet Wood
If you’re looking for a unique and budget-friendly solution for your garden border, consider making garden edging from pallet wood. Pallets can be easily transformed into stylish and functional edging that adds character to your outdoor space. Here’s a simple guide to get you started:
1. Collect and prepare the pallets: Find sturdy and clean pallets that are in good condition. Remove any nails or staples and sand the wood to eliminate splinters.
2. Measure and cut the pallets: Measure the length of your garden bed and cut the pallets into sections of equal length, keeping in mind the desired height of your edging.
3. Connect the pallet sections: Depending on the size of your garden bed, you may need to connect multiple pallet sections. Use screws or nails to join the sections together securely.
4. Dig a trench: Dig a shallow trench along the border of your garden bed to accommodate the pallet edging. The depth should be approximately half the height of the pallets.
5. Install the pallets: Place the pallet edging inside the trench, ensuring it is level and aligned with the garden bed. Use a spirit level to make any necessary adjustments.
6. Secure the pallets: To prevent the edging from shifting, use wooden stakes or metal garden pegs to anchor the pallets into the ground at regular intervals.
7. Finishing touches: Fill the trench with soil, pressing it against the pallets to provide stability. Add decorative rocks or mulch along the garden bed to enhance the visual appeal.
Exploring Wood Garden Edging Ideas
Wood offers endless possibilities when it comes to garden edging ideas. Aside from the basic recycled timber and pallet wood edging, there are several creative options to explore. Here are a few wood garden edging ideas to inspire you:
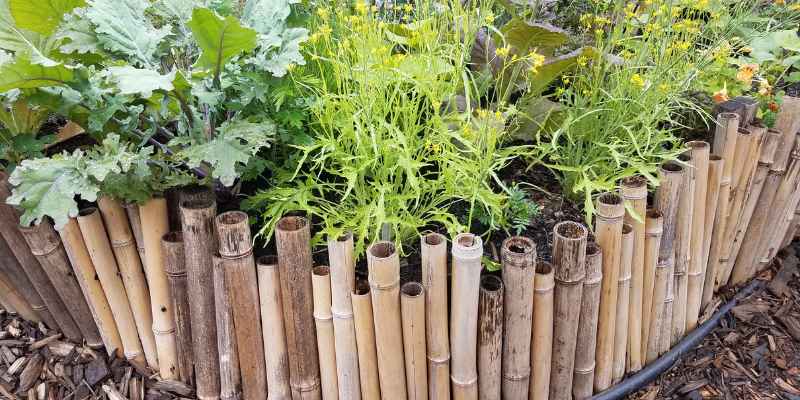
1. Log roll edging: Utilize round logs of varying lengths to create a charming and natural-looking border. Simply dig a trench, place the logs vertically inside, and secure them with stakes.
2. Split rail fencing: Give your garden a rustic and country-style look with split rail fencing. This type of edging involves arranging horizontal timber rails between vertical timber posts.
3. Curved wooden borders: Add visual interest to your garden by creating curved wooden borders. Use flexible lumber or bendable timber to achieve smooth curves that complement the organic shapes of your plants.
4. Tiered raised beds: Build tiered raised beds using timber boards of different heights. This not only provides a distinct border but also creates depth and dimension in your garden.
5. Reclaimed wood panels: Salvage old wooden panels or picket fences and repurpose them as garden edging. The weathered appearance adds character and a vintage touch to your outdoor space.
Remember to choose wood that is durable and resistant to rot, such as cedar or redwood, for long-lasting garden edging. Experiment with these wood garden edging ideas to create a unique and personalized border that complements your garden’s style.
Inexpensive Garden Edging Ideas
Creating a stunning garden border doesn’t have to break the bank. With a little creativity, you can achieve beautiful and inexpensive garden edging. Here are a few ideas to get you started:
1. Upcycled bricks or stones: Look for free or discounted bricks or stones from construction sites or local salvage yards. Arrange them in a pattern or stack them to create a simple and affordable edging.
2. Plastic landscape edging: Affordable and easy to install, plastic landscape edging comes in various colors and styles. Simply insert it into the ground along the border of your garden bed.
3. Decorative border fencing: Explore affordable decorative border fencing options such as wire mesh or plastic lattice panels. These offer a stylish and budget-friendly way to define your garden.
4. Recycled rubber or plastic edging: Using recycled rubber or plastic materials is not only cost-effective but also eco-friendly. These materials are flexible, easy to install, and provide a clean and modern look.
5. Flower bed borders with mulch: Utilize mulch as a natural edging material by creating a defined border around flower beds or pathways. This simple technique instantly gives your garden a neat and organized look.
Remember, creativity and resourcefulness are key when it comes to inexpensive garden edging. Look for materials that are readily available or repurpose items you already have to create a unique border that suits your budget and style.
Frequently Asked Questions Of How To Make A Wood Garden Border
What Wood Is Best For Garden Edging?
Cedar, cypress, and redwood are excellent choices for garden edging due to their durability and visual appeal. It’s best to use aged cypress for enhanced durability. Properly prepare the ground, install landscape fabric if desired, and secure the edging with appropriate methods such as rebar or adhesive.
How Do You Edge A Garden With Wood?
To edge a garden with wood, follow these steps:
1. Mark out the border shape in your garden.
2. Prepare the ground by removing grass and rocks and leveling the area.
3. Choose and install wooden boards or timbers along the border, using construction adhesive if desired.
4. Cut the ends of the boards to fit corners and ensure a seamless fit.
5. Anchor the edging with posts and finish the edge. Remember to use appropriate wood, such as cedar or redwood, for durability and aesthetics.
How Do You Build A Garden Border?
To build a garden border, mark the border shape, prep the ground, improve soil, position plants, water well, and plant.
How Do You Secure Wooden Edging?
To secure wooden edging, first mark out the border, then cut through the turf and level the ground. Install the timbers and construct the corners. Optionally, use landscape fabric or pin the timbers with rebar for added security. You can also add construction adhesive and anchor the edging for a secure hold.
Conclusion
Enhance your garden with a beautiful wood border using these simple steps. Create a distinctive edge that adds charm and defines your garden space effortlessly. With the right wood and techniques, you can achieve a stunning garden border that complements your landscape.
Let your creativity flourish!