How to Make a Wooden Fishing Tackle Box: A DIY Guide
To make a wooden fishing tackle box, gather materials, measure and cut wood, assemble pieces, and add compartments for storage. Crafting a custom tackle box allows for personalization and creativity.
Whether you are an experienced woodworker or a beginner, this DIY project can be a rewarding and practical addition to your fishing gear. By following a few simple steps and using basic woodworking tools, you can create a functional tackle box that meets your specific needs.
In this blog post, we will guide you through the process of making your own wooden fishing tackle box, providing tips and tricks along the way to ensure a successful outcome.
Introduction To DIY Wooden Tackle Box
Welcome to the world of DIY wooden tackle boxes! Crafting your own tackle box is not only a rewarding and fulfilling experience, but it also allows you to customize and tailor the design to perfectly fit your fishing gear. In this guide, you’ll learn the benefits of crafting your own tackle box and the basic skills required to embark on this woodworking project.
Benefits Of Crafting Your Own Tackle Box
Designing and building your own wooden tackle box offers a myriad of advantages. Firstly, personalization is key – you can create a box that fits your specific needs and preferences. Secondly, it provides a sense of pride and satisfaction in using a tool you’ve crafted with your own hands. Additionally, constructing a tackle box from scratch allows you to optimize the layout to accommodate your fishing equipment efficiently.
Basic Skills Required
Embarking on a DIY wooden tackle box project requires a few essential skills. Basic woodworking techniques such as measuring, cutting, and assembling wood are essential. Additionally, knowledge of using woodworking tools such as saws, drills, and sanders is crucial. Familiarity with wood joinery techniques for constructing the box is also beneficial. Lastly, having a good understanding of wood finishing methods will ensure the tackle box not only looks great but is also protected from the elements.
Designing Your Tackle Box
Determining Size And Compartments
When designing your wooden fishing tackle box, it’s important to consider the size and number of compartments. The size of your tackle box will depend on the type and amount of fishing gear you plan to store. A larger box may be suitable for storing a variety of lures, lines, and reels, while a smaller box may be ideal for a more streamlined collection of tackle. Additionally, consider the number of compartments you need, keeping in mind the different sizes and shapes of your fishing equipment. This will help you stay organized and find your gear easily.
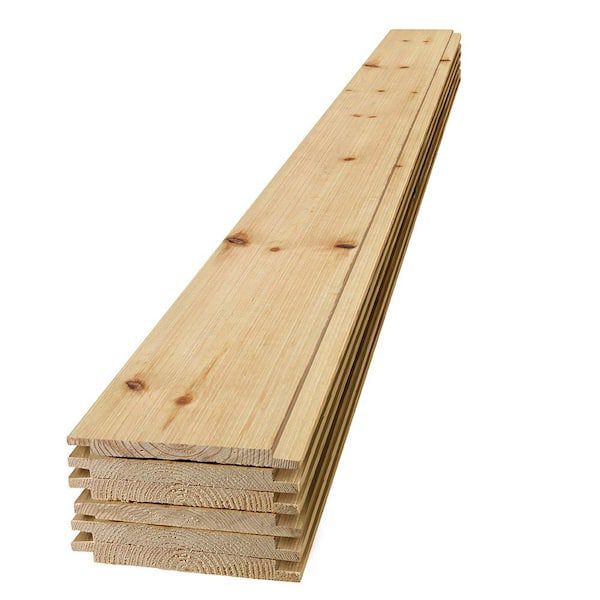
Choosing The Right Wood
Choosing the right wood is crucial for the durability and aesthetics of your tackle box. Look for sturdy and moisture-resistant woods such as cedar, teak, or mahogany. These woods are less prone to warping or rotting when exposed to water, making them ideal for a fishing tackle box. Additionally, consider the weight of the wood, as you’ll want a balance between durability and portability. Selecting the right wood will ensure that your tackle box stands the test of time and keeps your fishing gear safe and organized.
Gathering Your Materials And Tools
Building a wooden fishing tackle box is a fun and rewarding project for any angler who loves woodworking. Before you start, you need to gather all the necessary supplies and tools. Here’s what you’ll need:
List Of Necessary Supplies
- Wood (such as pine, cedar, or oak)
- Screws or nails
- Wood glue
- Hinges
- Latch
- Handles
- Sandpaper (various grits)
- Stain or paint
- Brushes or rollers
- Wood filler
These supplies will ensure that you have everything you need to build a sturdy and functional fishing tackle box.
Selecting Quality Tools For Woodworking
When it comes to woodworking, having the right tools is essential. Here are some of the tools you’ll need:
| Tool | Description |
|---|---|
| Saw | A saw is necessary for cutting the wood to size. |
| Hammer or drill | Depending on whether you’ll be using screws or nails, you’ll need either a hammer or drill. |
| Clamps | Clamps are necessary for holding the wood in place while you’re working on it. |
| Chisel | A chisel is useful for removing any excess wood or for creating grooves. |
| Sandpaper | You’ll need sandpaper of various grits to smooth out any rough edges. |
| Stain or paint brush | You’ll need a brush or roller to apply the stain or paint. |
Make sure you select quality tools that will last for a long time. Investing in good quality tools will ensure that your tackle box turns out beautifully and that you enjoy working on the project.
Cutting And Assembling The Pieces
When making a wooden fishing tackle box, precision in cutting and assembling the pieces is crucial for a sturdy and functional end product.
Measuring And Cutting Wood
Start by measuring and marking the wood according to the dimensions required for each part of the tackle box.
- Use a tape measure and pencil to ensure accurate measurements.
- Double-check the measurements before cutting the wood to avoid errors.
Joining Pieces Together
Once the wood pieces are cut, focus on joining them together securely for a durable tackle box.
- Apply wood glue along the edges that need to be joined.
- Use clamps to hold the pieces together tightly while the glue dries.
- For added strength, screw or nail the pieces together after the glue has set.
Creating Compartments And Dividers
Craft a custom wooden fishing tackle box by incorporating compartments and dividers for organized storage of your fishing gear. Enhance the box’s functionality and aesthetics by customizing the sizes and layouts of the compartments to suit your specific tackle needs.
Designing For Functionality
Creating compartments and dividers in your wooden fishing tackle box is essential for organizing your gear efficiently. Plan the layout considering the size of your tools. Optimize space usage for easy access.
Installation Techniques
Use dividers made of wood or acrylic to separate sections. Secure dividers with screws for stability. Customize compartments based on the gear you have.
Finishing Touches
Add the finishing touches to your handmade wooden fishing tackle box by sanding the edges and applying a coat of varnish or paint. Personalize it with your own unique design to make it truly yours.
Sanding For Smoothness
Before applying any finish, the wooden tackle box should be sanded to smooth out any rough patches and splinters. Start with a coarse grit sandpaper and work your way up to a finer grit for a smooth finish. Sand in the direction of the grain to avoid creating scratches on the surface. Use a sanding block to keep the surface flat and even. Clean the surface with a tack cloth to remove any dust before applying the finish.
Applying Varnish Or Stain
To protect the wooden tackle box and give it a polished look, you can apply varnish or stain. Varnish will give it a clear, shiny finish while stain will add color and depth to the wood. Use a natural bristle brush to apply the finish in long, even strokes. Be sure to work in a well-ventilated area and wear protective gloves. Allow the first coat to dry completely before applying another coat. Depending on the type of finish you choose, you may need to sand lightly between coats.
Final Thoughts
Adding the finishing touches to your wooden fishing tackle box is essential to protect it from wear and tear and give it a professional look. Sanding for smoothness and applying varnish or stain are easy steps that can make a big difference in the final result. With a little bit of patience and attention to detail, you can create a wooden tackle box that will last for years to come.
Hardware Installation
Crafting a wooden fishing tackle box involves precise hardware installation. Begin by selecting quality hinges, latches, and handles, ensuring they complement the box’s design. Carefully measure and mark the placements before securely attaching the hardware to the box for a functional and aesthetically pleasing outcome.
When it comes to making a wooden fishing tackle box, the hardware installation plays a crucial role in the functionality and overall aesthetic of the box. In this section, we will discuss the important aspects of hardware installation, including choosing the right hinges and handles, as well as securing fittings and locks. By following these steps, you can ensure that your wooden tackle box is not only practical but also visually appealing.
Choosing Hinges And Handles
To begin with, selecting the appropriate hinges and handles is essential for a sturdy and functional tackle box. Here are a few factors to consider when making your choice:
| Considerations for Hinges | Considerations for Handles |
|---|---|
|
|
Securing Fittings And Locks
In addition to hinges and handles, securing fittings and locks are vital components to consider for a secure tackle box. Here are some tips on how to properly secure these elements:
- Choose fittings made of strong and durable materials, such as stainless steel or brass, to prevent rusting and ensure longevity.
- Ensure fittings are securely attached to the box to avoid any loose components during transportation.
- Install locks that are reliable and provide adequate security for your fishing gear.
- Consider locks that are easy to operate and have a smooth locking mechanism.
- Test the locks to ensure they are working correctly before finalizing the installation.
By carefully selecting hinges, handles, fittings, and locks, you can enhance the functionality and security of your wooden fishing tackle box. Remember to take into account durability, ease of use, and overall aesthetics when making these hardware installation choices. With the right selection, your tackle box will not only serve its purpose but also be a stylish companion on your fishing adventures.
Customization And Personalization
Create a one-of-a-kind wooden fishing tackle box by incorporating customization and personalization. Add compartments, dividers, and labels to suit your specific fishing needs. Personalize the exterior with unique carvings or a custom paint job to make it truly your own.
Adding Personal Designs
Making a wooden fishing tackle box allows you the opportunity to truly make it your own. One of the best ways to do this is by adding personal designs to the exterior. This could be anything from a simple monogram to intricate hand-carved patterns. By customizing the design, you can create a tackle box that reflects your unique style and personality.
Optional Features To Consider
When making a wooden fishing tackle box, there are several optional features you can consider to enhance its functionality and convenience. These features include:
- Removable dividers: Adding dividers inside the box allows you to organize your fishing tackle in separate compartments, making it easier to find what you need.
- Extra storage compartments: Consider including additional storage compartments to hold small accessories like hooks, sinkers, and lures.
- Integrated rod holders: To keep your fishing rods secure and easily accessible, you can incorporate built-in rod holders into the design of your tackle box.
- Locking mechanism: If you want to keep your fishing gear safe and secure, you can add a locking mechanism to your tackle box.
- Waterproofing: To protect your fishing tackle from water damage, consider applying a waterproof sealant or using waterproof materials during the construction process.
Adding these optional features can greatly enhance the functionality and convenience of your wooden fishing tackle box, ensuring that it meets your specific needs and preferences.
Maintenance And Care For Your Tackle Box
Once you’ve crafted your wooden fishing tackle box, it’s important to keep it in good condition to ensure it lasts for years to come. Proper maintenance and care can also help protect your fishing gear from damage and deterioration. Here are some tips on how to clean, store, and preserve your tackle box:
Cleaning And Storage Tips
Regular cleaning is essential to keep your tackle box in top condition. Here are some tips on how to clean it:
- Use a damp cloth to wipe down the exterior and interior of the box. Don’t use harsh chemicals or solvents as they can damage the wood.
- Remove any dirt or debris from the corners and crevices of the box.
- Allow the box to air dry completely before storing it away.
When it comes to storing your tackle box, here are some important things to keep in mind:
- Store your tackle box in a cool, dry place to prevent moisture damage.
- Avoid storing it in direct sunlight or near a source of heat as this can cause warping or cracking of the wood.
- Store your fishing gear in the box to keep them organized and protected from damage.
Wood Treatment And Preservation
Wood treatment and preservation are essential to keep your tackle box in top condition. Here are some tips on how to preserve the wood:
- Apply a coat of wood sealer or varnish to protect the wood from moisture damage.
- Apply a coat of wood wax or polish to give the wood a shiny finish and protect it from scratches and stains.
- Don’t expose the wood to extreme temperatures or humidity as this can cause warping or cracking of the wood.
By following these tips, you can keep your wooden fishing tackle box in excellent condition for years to come, ensuring that your fishing gear stays organized and protected from damage.
Conclusion: Ready For The Water
Embark on your fishing adventures with a handcrafted wooden tackle box ready to hold your gear.
Reflection On The Diy Process
Create memories building a tackle box and hone your woodworking skills along the way.
The Satisfaction Of Self-made Gear
Experience pride using gear you crafted yourself, tailored to your fishing needs.
Frequently Asked Questions
How Can I Make A Wooden Fishing Tackle Box?
To make a wooden fishing tackle box, you will need to gather the necessary materials, such as wood, screws, and hinges. Then, measure and cut the wood to the desired dimensions for your box. Assemble the pieces using screws and attach the hinges for the lid.
Finally, sand and finish the box to your liking.
What Are The Benefits Of Using A Wooden Tackle Box?
Using a wooden tackle box offers several benefits. Firstly, wood is durable and can withstand the wear and tear of fishing trips. Additionally, wooden tackle boxes provide better insulation for sensitive fishing gear. They also have a classic and aesthetic appeal that many anglers appreciate.
Can I Customize The Design Of My Wooden Tackle Box?
Yes, one of the advantages of making a wooden tackle box is the ability to customize its design. You can choose the type of wood, the dimensions, and even add compartments or dividers based on your specific needs. Personalizing your tackle box allows you to create a functional and stylish storage solution for your fishing gear.
Conclusion
Incorporating a handcrafted wooden tackle box into your fishing gear brings a touch of tradition and personalization. By following the steps outlined in this guide, you can create a unique and functional tackle box that reflects your individual style. Embracing the art of woodworking will not only enhance your fishing experience, but also provide a sense of pride and accomplishment.