How to Make Cedar Oil: A Step-by-Step DIY Guide
To make cedar oil, steam distill cedarwood chips or sawdust. Collect the oil that condenses in the distillation apparatus.
Cedar oil is valued for its aromatic and therapeutic properties. It’s derived from the wood of cedar trees, commonly found in North America and the Himalayas. This essential oil is popular in aromatherapy, massage, and skincare products. Making cedar oil at home involves steam distillation, a process that extracts the oil from cedarwood chips or sawdust.
People use cedar oil for its calming effects and insect-repellent qualities. The oil’s warm, woody scent makes it a favorite in perfumery and natural wellness practices. For those interested in natural remedies, cedar oil offers numerous benefits and versatile uses.
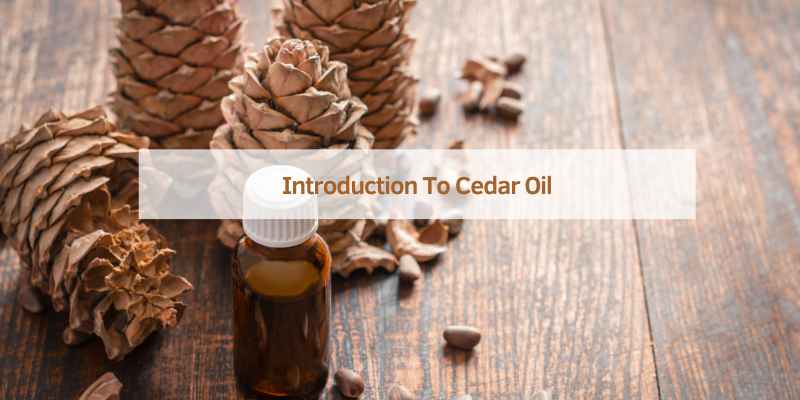
Introduction To Cedar Oil
Cedar oil comes from cedar trees. It has a strong, woody scent. People use cedar oil for many things. It helps keep bugs away. It also makes things smell nice. Cedar oil is useful at home and in the garden.
Cedar oil can be used in many ways. It can be added to lotions. It makes your skin feel good. Spray cedar oil in your home to keep bugs away. Use cedar oil in your garden. It helps plants grow better.
Making your own cedar oil saves money. You know it is pure. DIY cedar oil has no chemicals. It is good for the environment. Homemade cedar oil can be used for many things. It is easy to make at home.
Essential Tools And Ingredients
Creating cedar oil requires cedarwood, a distiller, and a container for the oil. Fresh cedarwood chips provide the best results.
Gathering Cedar Leaves And Branches
Fresh cedar leaves and branches are key. Make sure to gather healthy, green leaves. Avoid dry or brown parts. Trim branches carefully with clean shears. This keeps the tree healthy.
Choosing A Carrier Oil
Use a high-quality carrier oil. Good options are jojoba, coconut, or olive oil. Ensure the oil is cold-pressed and organic. This helps preserve the cedar’s natural properties.
Required Equipment
You will need some basic equipment. A large glass jar with a lid is essential. Use a clean cloth for straining. Measuring spoons and a funnel will help. A dark glass bottle for storage is best.
Preparation Before Extraction
Start by gathering fresh cedar wood or leaves. Clean the cedar material by removing dirt and debris. Rinse thoroughly with water. Pat dry with a clean towel. Place the cedar material in a dry, ventilated area. Allow it to dry completely for several days. Turn the material daily to ensure even drying. Properly dried cedar will produce better oil.
Always wear gloves when handling cedar. Cedar can cause skin irritation. Work in a well-ventilated area. This prevents inhaling harmful fumes. Keep children and pets away from the workspace. Store cedar oil in a cool, dark place. Label the container clearly.
Extraction Methods
Steam distillation uses heat and steam to extract cedar oil. The cedarwood is placed in a distillation chamber. Steam passes through the chamber, releasing the essential oils. The steam carrying the oil is then cooled. This condenses the steam back into water and oil. The oil is then separated from the water.
The cold press technique involves pressing the cedarwood to extract the oil. This method does not use heat, preserving the oil’s natural properties. The wood is ground into a paste and then pressed to release the oil. Filtering is done to remove any solid particles.
Solvent extraction uses chemical solvents to dissolve the oil from the cedarwood. The wood is soaked in the solvent to extract the oil. The mixture is then filtered to remove wood particles. The solvent is evaporated, leaving pure cedar oil behind.
Step-by-step Guide To Making Cedar Oil
Gather fresh cedar wood chips and place them in a large pot. Add enough water to cover the wood chips completely. Stir the mixture well to ensure even distribution.
Heat the pot over medium heat. Bring the water to a gentle boil. Keep the heat steady and monitor the mixture closely. The water will start to evaporate, releasing cedar oil.
Once the water has evaporated, allow the mixture to cool. Use a fine mesh strainer to separate the cedar oil from the water. Collect the cedar oil in a clean, dry container.
Storing Your Homemade Cedar Oil
Use a dark glass bottle. This keeps the oil fresh longer. Avoid plastic containers. They may react with the oil. Glass is best for storage.
Store cedar oil in a cool place. Avoid direct sunlight. Heat can spoil the oil. Cedar oil lasts for up to one year. Keep the bottle tightly sealed. This prevents air from entering.
Uses For Your Cedar Oil
Cedar oil has a calming effect. It can reduce stress and anxiety. Many people use it during meditation. The scent is soothing. It creates a peaceful environment. Just add a few drops to your diffuser. Enjoy the relaxing aroma all day.
Cedar oil repels insects. It is a safe alternative to chemical pesticides. Use it in your garden. Keep bugs away from your plants. Mix it with water in a spray bottle. Spray it around your home to keep pests out.
Cedar oil is great for skin care. It can help with acne. Add it to your lotions or creams. It also works well in shampoos. It can improve scalp health. Use it in your bath for a refreshing soak. Your skin will feel soft and smooth.
Troubleshooting Common Issues
Cedar oil should have a strong smell. If the fragrance is weak, use more cedarwood. Make sure to use fresh cedarwood for the best scent. Store the oil in a cool, dark place. Light and heat can weaken the fragrance.
Oil separation can happen. Shake the bottle well before each use. Use an emulsifier to keep the oil mixed. A good emulsifier will help blend the oil and water. Always check the quality of your ingredients.
Keep the equipment clean and dry. Avoid touching the oil with bare hands. Use clean utensils and containers. Store the oil in sterilized bottles to keep it pure. Contamination can ruin the quality of cedar oil.
Complying With Safety Standards
Crafting cedar oil involves strict adherence to safety standards. Proper ventilation, protective gear, and careful handling ensure a safe and effective process.
Understanding Dilution Ratios
Cedar oil must be diluted before use. Use a carrier oil to mix with cedar oil. A common ratio is one drop of cedar oil to one tablespoon of carrier oil. This makes it safe for skin use. Never use cedar oil undiluted. It can cause irritation or burns.
Skin Patch Testing
Always test the oil mixture before full use. Apply a small amount to your arm. Wait 24 hours to see if there is any reaction. If your skin turns red or itchy, do not use the oil. This test helps avoid allergic reactions.
When To Consult Professionals
If unsure about using cedar oil, talk to a health expert. They can give advice on safe use. Consult professionals for any serious skin issues or allergies. This ensures you use cedar oil safely.

Frequently Asked Questions
How Do You Extract Oil From Cedar Wood?
To extract oil from cedar wood, use steam distillation. Heat the wood, collect the steam, and condense it into oil.
How Do You Make Infused Cedar Oil?
To make infused cedar oil, combine dried cedar leaves with a carrier oil. Let it sit for 2-3 weeks. Strain the mixture. Store the oil in a dark bottle.
What Is The Mixture For Cedar Oil?
Cedar oil is a mixture of essential oils extracted from cedar trees. It typically includes cedrol, cedrene, and thujopsene.
Is Cedar Oil And Cedar Wood Oil The Same?
Cedar oil and cedarwood oil are the same. They are extracted from the wood of cedar trees. This essential oil is used for aromatherapy, insect repellent, and skincare products. Always check the label for pure and natural ingredients.
Conclusion
Creating cedar oil at home is a rewarding and simple process. Following these steps ensures pure, natural oil. Enjoy the benefits of cedar oil for health, relaxation, and more. Start your oil-making journey today and experience the wonders of this versatile essential oil.