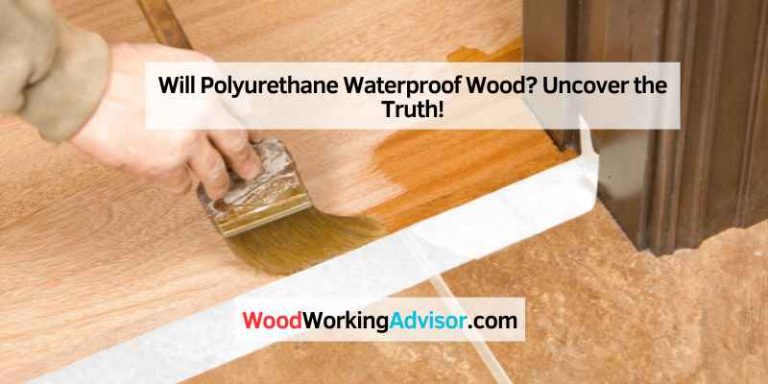
How to Make Wipe-On Polyurethane by Mixing It 50/50 With Mineral Spirits
To make wipe on polyurethane, mix polyurethane with a mineral spirit and apply it using a lint-free cloth or sponge brush, following the wood grain. Use long, smooth strokes and let each coat dry before applying another.
Wipe on polyurethane is a popular finish for wood surfaces as it is easy to apply, provides a protective layer, and enhances the natural beauty of the wood grain. Whether you are a DIY enthusiast or a professional woodworker, learning how to make wipe on polyurethane can be a valuable skill.
We will guide you through the process of making wipe on polyurethane and provide some tips for achieving a smooth and flawless finish. So, let’s dive in and learn how to make wipe on polyurethane for your next woodworking project.
Understanding Polyurethane Finish
Polyurethane finish is a popular choice among woodworkers and DIY enthusiasts for its durability and protective properties. It is a clear liquid coating that creates a hard, protective film when applied to wood surfaces. Understanding how polyurethane works and its benefits can help you achieve a professional and long-lasting finish on your woodworking projects.
What Is Polyurethane Finish?
Polyurethane finish is a type of varnish that is made from synthetic resins. It is commonly used to protect and enhance the natural beauty of wood surfaces such as furniture, flooring, and cabinets. This type of finish comes in various forms, including wipe-on polyurethane.
Wipe-on polyurethane is a user-friendly version of the traditional brush-on polyurethane. It is thinner and easier to apply, making it ideal for beginners or those who prefer a simpler application process.
Benefits Of Using Polyurethane Finish:
Polyurethane finish offers several benefits that make it a popular choice for protecting wood surfaces:
- Durability: One of the primary reasons people choose polyurethane is its exceptional durability. It creates a tough barrier against moisture, chemicals, and everyday wear and tear, ensuring your wood surfaces stay looking beautiful for years to come.
- Protection: Polyurethane acts as a protective shield, preventing damage from spills, scratches, UV rays, and temperature changes. This makes it an excellent choice for high-traffic areas or furniture that is exposed to sunlight.
- Enhancement: Not only does polyurethane offer protection, but it also enhances the natural beauty of the wood. It adds depth and richness to the grain, highlighting its unique characteristics and giving your project a professional and polished appearance.
- Easy Application: Wipe-on polyurethane is especially user-friendly, making it a great option for beginners or those who prefer a hassle-free application process. It can be effortlessly applied with a cloth, eliminating the need for brushes or sprayers.
- Quick Drying Time: Unlike other finishes that can take hours or days to dry, polyurethane has a relatively quick drying time. This means you can apply multiple coats in a single day and finish your project sooner.
- Compatibility: Polyurethane is versatile and compatible with various wood types, including hardwoods and softwoods. It can be used on bare wood or over existing finishes, making it a versatile choice for a wide range of projects.
Understanding the benefits of polyurethane finish can help you make an informed decision when it comes to protecting and enhancing your wood projects. Whether you are a seasoned woodworker or a DIY enthusiast, polyurethane finish is an excellent option for achieving a professional, durable, and beautiful finish.

Preparing The Surface
To achieve a smooth application of wipe on polyurethane, it is crucial to properly prepare the surface by sanding it thoroughly, ensuring it is clean and free from any dust or debris. This will help in achieving a flawless finish.
Sanding The Wood
Sanding the wood is an essential step in preparing the surface before applying wipe-on polyurethane. Sanding smooths out any rough spots, ensures even absorption of the finish, and creates a perfect base for the polyurethane to adhere to. Here’s how you can effectively sand the wood:
- Start by using a medium-grit sandpaper (around 120 grit) to remove any old finish, stains, or imperfections on the wood surface.
- Always sand with the grain to avoid scratching the wood.
- After sanding with the medium-grit sandpaper, switch to a fine-grit sandpaper (around 220 grit) to further smooth the surface.
- Be sure to sand the edges and corners of the wood as well, paying extra attention to achieving a smooth finish.
Cleaning And Removing Dust
Before you start applying wipe-on polyurethane, it’s crucial to clean the wood surface and remove any dust. Cleaning ensures that the finish will adhere properly and provides a smooth, flawless result. Follow these steps to clean the wood and remove dust:
- Use a vacuum or a soft bristle brush to carefully remove any loose debris or dirt from the wood surface.
- Next, dampen a clean cloth or sponge with warm soapy water and gently wipe down the entire surface to remove any grease, oils, or stains.
- Rinse the cloth or sponge thoroughly and wipe down the surface again to remove any soap residue.
- Allow the wood surface to dry completely before proceeding to the next step.
Applying The Polyurethane Finish
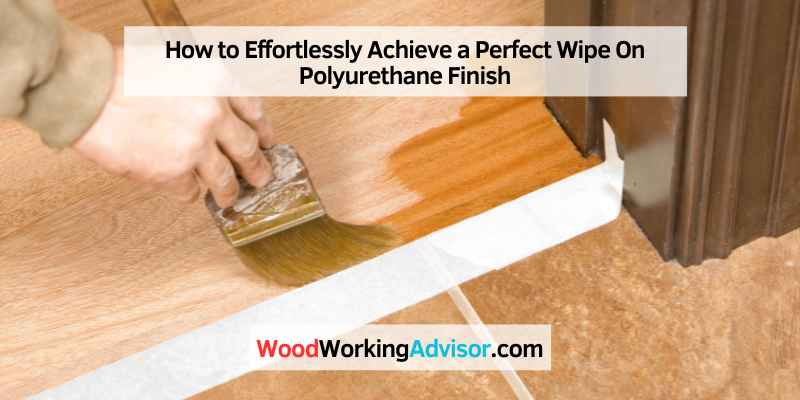
Applying a polyurethane finish is a crucial step in protecting and enhancing the beauty of your woodwork. Whether you are working on a piece of furniture, cabinetry, or a wooden floor, a wipe-on polyurethane can be an excellent choice. Not only is it easy to apply, but it also provides a durable and smooth finish. In this section, we will guide you through the process of applying a wipe-on polyurethane finish, from choosing the right application method to applying subsequent coats.
Choosing The Right Application Method
Choosing the right application method is essential to achieve a flawless finish. There are primarily two methods you can use to apply wipe-on polyurethane: using a cloth or using a foam brush. The method you choose depends on personal preference and the size and shape of the surface you are working on.
Using a cloth is the most common and straightforward method. Take a lint-free cloth, such as cheesecloth or an old cotton t-shirt, and fold it into a pad. Apply a small amount of polyurethane onto the cloth and start wiping it onto the surface, keeping the strokes parallel to the wood grain. This method allows for a thin and even application, giving you better control over the finish.
If you are working on a larger surface, a foam brush can be a more efficient option. The foam brush offers quick coverage and reduces the risk of leaving lint or dust particles on the surface. Dip the brush into the polyurethane, allowing it to soak just enough without dripping. Apply the polyurethane using long and even strokes, again following the wood grain.
Applying The First Coat
Before applying the first coat, make sure the surface is clean and smooth. Remove any dust or debris using a tack cloth or a lightly dampened cloth. This step is crucial to prevent imperfections from showing up in the finish. Once the surface is clean, you can begin applying the first coat.
To apply the first coat, dip your cloth or foam brush into the polyurethane. Start at one end of the surface and work your way to the other, applying a thin and even layer. Avoid overloading the cloth or brush with too much polyurethane, as this may lead to drips or uneven coverage. Work in small sections, maintaining a wet edge to prevent lap marks.
Sanding Between Coats
After the first coat has dried completely, you need to sand the surface before applying subsequent coats. Sanding between coats helps to smooth out any imperfections, enhances adhesion, and allows for better layering of the finish.
Using a fine-grit sandpaper, such as 220-grit, lightly sand the entire surface. This step helps to remove any dust nibs, drips, or unevenness from the previous coat. Remember to sand in the direction of the wood grain to avoid scratching the surface. Once you have completed sanding, wipe away the dust with a tack cloth or a clean, lint-free cloth.
Applying Subsequent Coats
Applying subsequent coats follows a similar process as the first coat. However, it is essential to sand between each coat for optimal results. Each coat builds upon the previous one, gradually creating a more protective and smooth finish.
Continue applying thin and even coats, sanding between each coat to ensure proper adhesion and a flawless finish. Three to four coats are generally recommended, but you can apply more if desired. Remember to let each coat dry completely before sanding or applying the next one.
With these steps, you can confidently apply a wipe-on polyurethane finish to your woodwork. Remember to choose the right application method, apply thin and even coats, sand between coats, and patiently build up the layers for a stunning and long-lasting finish.
Achieving A Perfect Wipe On Finish
Achieve a flawless wipe on finish by mastering the technique of applying wipe-on polyurethane. This easy-to-follow guide will help you create a perfect, professional-looking finish on your woodworking projects.
Using the Right Technique
To achieve a perfect wipe on finish with polyurethane, it is essential to use the right technique. Following these steps will help you achieve professional results:
1. Prepare your surface: Before applying polyurethane, ensure that your surface is clean, smooth, and free from dust and debris. Sanding the surface with fine-grit sandpaper and wiping it with a tack cloth will help ensure a smooth finish.
2. Choose the right applicator: When it comes to applying polyurethane, the type of applicator you use plays a crucial role in achieving a perfect finish. It is recommended to use a lint-free cloth, such as a cotton rag or a microfiber cloth, for a wipe-on application.
3. Apply thin and even coats: One of the key secrets to a flawless wipe on finish is to apply thin and even coats. Pour a small amount of polyurethane onto your cloth and evenly spread it across the surface using smooth, long strokes. Avoid applying too much pressure, as it can create uneven patches.
4. Allow each coat to dry: After applying a coat of polyurethane, it’s important to allow it to dry fully before applying the next one. This will prevent any streaks or bubbles from forming. Follow the manufacturer’s instructions regarding drying time, as it may vary depending on the type and brand of polyurethane you are using.
Wiping On the Polyurethane Finish
To achieve a perfect wipe on finish, follow these steps for wiping on the polyurethane:
1. Pour a small amount of polyurethane onto a clean section of your cloth.
2. Start applying the polyurethane in a circular motion, ensuring even coverage across the surface.
3. Work in small areas at a time, overlapping each section slightly to avoid streaks.
4. Continue wiping on the polyurethane until the entire surface is covered.
Avoiding Common Mistakes
To ensure a flawless wipe on finish, it’s important to avoid these common mistakes:
1. Applying too much polyurethane: Applying too much polyurethane at once can result in an uneven and blotchy finish. Remember to apply thin and even coats for the best results.
2. Not allowing enough drying time: Rushing the drying process can lead to imperfections in the finish. Always allow each coat to dry fully before applying the next one.
3. Overworking the polyurethane: While it’s important to evenly spread the polyurethane, overworking it by excessive wiping or strokes can result in streaks and bubbles. Be gentle and avoid excessive pressure.
In conclusion, achieving a perfect wipe on finish with polyurethane requires the right technique, using the appropriate applicator, applying thin and even coats, and avoiding common mistakes. By following these guidelines, you can achieve a professional-looking finish that enhances the beauty and longevity of your project.
Final Tips And Recommendations
Making a wipe-on polyurethane finish requires a few final tips and recommendations to ensure a smooth application and long-lasting results.
Dry Time And Curing
After applying the wipe-on polyurethane coat, it is important to consider the drying time and curing process to achieve the desired finish. Here are some key points to keep in mind:
- Allow the first coat to dry completely before applying additional coats. This ensures each layer adheres properly.
- Consider the temperature and humidity in the application area, as they can affect the drying time. Higher temperatures and lower humidity levels expedite the drying process, while cooler temperatures and higher humidity may require additional drying time.
- Typically, wipe-on polyurethane takes around 24 hours to dry, but it is recommended to consult the product label for specific instructions.
- Once the coat is dry, it is time to focus on the curing process. Full curing usually takes approximately 30 days, but the surface can be used lightly after 24 hours.
Finishing Touches
To achieve a professional-looking finish, paying attention to the finishing touches is essential. Here are a few suggestions:
- Inspect the surface for any imperfections or dust particles before applying subsequent coats. Lightly sand the surface with fine-grit sandpaper to remove any flaws.
- Apply thin and even coats of wipe-on polyurethane, using long, smooth strokes in the direction of the grain. This ensures a seamless and uniform finish.
- After each coat, gently rub the surface with steel wool or a fine sanding pad to smoothen any bumps or rough spots.
- Between coats, be sure to clean the application tools thoroughly to avoid any dried polyurethane residue from contaminating the finish.
Maintaining The Polyurethane Finish
To keep your polyurethane finish looking great for years to come, follow these maintenance tips:
| Do | Don’t |
|---|---|
| Regularly dust the surface using a soft cloth or microfiber duster. This prevents the buildup of dirt and grime. | Use abrasive cleaners or harsh chemicals, as they can damage the finish. |
| Wipe up spills immediately to prevent staining or damage to the finish. | Place hot objects directly on the surface without using coasters or trivets. |
| Use coasters or felt pads under objects to prevent scratching or scuffing. | Drag heavy objects across the surface, as this can leave marks or indentations. |
By following these final tips and recommendations, you’ll be well on your way to achieving a beautiful and long-lasting wipe-on polyurethane finish that enhances the natural beauty of your wood projects.
Frequently Asked Questions Of How To Make Wipe On Polyurethane
How Do You Make Your Own Wipe On Polyurethane?
To make your own wipe on polyurethane, mix equal parts of polyurethane and mineral spirits. Stir well and then apply it onto your project using a soft cloth or sponge. Allow it to dry completely before adding additional coats. Sand lightly between coats for a smooth finish.
What Is Wipe-on Poly Made Of?
Wipe-on poly is made of a combination of polyurethane resin, solvents, and drying agents. It is a liquid finish that can be easily applied by wiping it onto the surface using a cloth or brush. The polyurethane resin provides durability and protection, while the solvents help with application and drying.
Can You Use Paint Thinner To Make Wipe-on Poly?
No, you can’t use paint thinner to make wipe-on poly. They are different substances with different compositions.
What Is The Best Cloth To Use For Wipe-on Poly?
The best cloth to use for wipe-on poly is lint-free microfiber cloth. It provides a smooth and streak-free application.
Conclusion
Making your own wipe-on polyurethane is a cost-effective and efficient way to achieve a smooth and durable finish on your wood projects. By following the easy steps outlined in this blog post, you’ll be able to create a customized finish that enhances the natural beauty of the wood while providing protection against wear and tear.
Give it a try and see the difference it makes in your woodworking projects!