How to Make Wood Flowers: 3 Techniques & Best Wood Types
Wood flowers are made by shaving, cutting, or pre-forming thin basswood, birch, or balsa into petal shapes, then gluing, shaping, and stemming them — the method depends on whether you plane paper-thin curls, cut sheet stock with a scroll saw, or start from pre-made sola blooms. Use a dense wood like oak instead and petals split instead of curling. This guide compares all three techniques, the best wood and dye choices, and how to keep petals from cracking.
Wood Flowers: 3 Real Techniques Compared
“Wood flowers” actually covers three different crafts that use different tools and different wood. Loose wood wool (excelsior) is a filler material, not an individual bloom — if you want an actual flower, you’re choosing between hand-shaved curls, scroll-saw cutout petals (the method this guide focuses on), or pre-made sola blooms. For a rose-specific version of the cutout method, see our step-by-step wooden roses guide.
| Technique | How Petals Are Shaped | Best Wood | Best For |
|---|---|---|---|
| Wood wool / excelsior | Machine-shaved into loose curled strands; used as filler, not individual blooms | Aspen | Vase filler, wreath backing, packing material |
| Hand-planed shavings | Planed into paper-thin curls, glued in overlapping layers around wire | Basswood | Ruffled, rose-style blooms with a natural curl |
| Scroll-saw cutout petals | Cut from flat sheet stock into petal shapes, then sanded and layered | Birch, poplar, basswood | Beginners, template-based consistent shapes |
| Sola wood flowers (pre-made) | Hand-carved from dried tapioca root, sold pre-shaped and ready to dye | Sola/tapioca root (not tree wood) | Weddings, buyers who don’t want to cut anything |
📊 Thin wood petals typically need about 10 minutes of water soaking to become pliable enough to shape without cracking. — Source: SolaWoodFlowers.com sola-flower shaping guides
Choosing The Right Wood For Your Flowers
Choosing the right wood for your flowers is crucial in making wood flowers that are both visually appealing and durable. Consider factors like the type of wood, its grain pattern, and its ability to hold paint or stain.
Factors To Consider When Choosing Wood For Flower Making:
Wood is a versatile material for crafting beautiful and long-lasting wood flowers. However, not all types of wood are suitable for this artistic endeavor. When selecting wood for your flower-making projects, keep in mind the following factors:
- Density: Opt for wood that is neither too soft nor too hard. A medium-density wood will be easier to work with and will provide the right balance of durability and flexibility for your wooden flowers.
- Grain Pattern: Consider the grain pattern of the wood. An interesting and distinctive grain pattern can add depth and character to your flower designs. Experiment with different wood species to find the grain pattern that best complements your artistic vision.
- Availability: Choose wood that is readily available in your area. This will make it easier to source and replenish your supply as you embark on multiple flower-making projects.
- Sustainability: Consider the environmental impact of your wood choice. Select wood that comes from sustainable sources or consider using reclaimed wood to minimize your carbon footprint.
- Cost: Take into account the cost of the wood. Some wood species may be more expensive than others, so factor in your budget when making a selection.
Best Types Of Wood For Crafting Wood Flowers:
Certain types of wood are particularly well-suited for crafting wood flowers, due to their unique characteristics and ease of working. Here are some of the best types of wood to consider for your flower-making projects:
- Basswood: Basswood is a popular choice among wood flower crafters due to its softness and ease of carving. It has a fine and even grain pattern, making it ideal for achieving intricate details.
- Birch: Birch wood offers a smooth and fine texture, making it a great option for creating delicate and realistic petals. Its light color also allows for easy painting and staining.
- Maple: Maple is known for its durability and strength, making it a solid choice for crafting wood flowers that will withstand the test of time. It has a pleasant grain pattern that adds a touch of elegance to your creations.
- Poplar: Poplar wood is affordable and readily available, making it a popular choice for beginners. Its medium density and light color make it versatile to work with, allowing for various design possibilities.
- Mahogany: If you’re looking for a wood with rich, warm tones, mahogany is an excellent choice. Its density and durability make it suitable for creating statement flower pieces.
Remember, the type of wood you choose will impact the final aesthetic and quality of your wood flowers. Consider your preferences, artistic vision, and the characteristics of each wood species to find the perfect match for your flower-making projects.
Preparing Your Tools And Materials
To make wood flowers, it is essential to start by preparing your tools and materials. Gather all the necessary items such as wooden dowels, paint, brushes, and a hot glue gun. Ensure everything is organized and ready before beginning the project.
Essential Tools Needed For Making Wood Flowers:
- Hot glue gun: This versatile tool is essential for securely attaching petals and stems.
- Wire cutters: Perfect for trimming floral wire and creating precise cuts.
- Scissors: Use scissors to cut out flower templates, trim fabric, and shape petals.
- Wood burning tool: Ideal for adding intricate designs and patterns to wooden flowers.
- Craft knife: Handy for more delicate precision cutting and shaping.
- Pliers: A must-have for any wood flower crafter, pliers help shape wire stems and secure embellishments.
- Sandpaper: Smooth rough edges and create a polished finish on wooden flower petals.
- Paintbrushes: Ensure you have a variety of brushes in different sizes to achieve different effects.
Recommended Materials For Wood Flower Crafting:
- Wooden dowels: These make sturdy and durable flower stems.
- Floral wire: Essential for attaching petals and creating a realistic appearance.
- Wood slices: Use pre-cut wood slices or cut your own for flower bases.
- Fabric or paper: Choose your preferred material for creating flower petals. Silk, crepe paper, or cardstock work well.
- Floral tape: Wrap stems and secure petals with floral tape for a professional finish.
- Foam balls: Perfect for creating the core of larger wood flowers.
- Craft foam or felt: Use these materials for adding texture and depth to your flower designs.
Types Of Paint And Brushes To Use:
- Acrylic paint: This versatile water-based paint works well on wood and is available in a wide range of colors.
- Paint sealant: Apply a sealant to protect the painted wood flowers from moisture and external elements.
- Paintbrushes: Use synthetic brushes for acrylic paint, with different sizes for more precise or broader strokes. Round brushes work well for petals, while flat brushes are ideal for larger surfaces.
Glues And Adhesives Suitable For Wood Flowers:
- Hot glue: A tried and tested adhesive for wood flower crafts, providing a strong bond and quick drying time.
- Wood glue: Use wood glue for permanent, long-lasting bonds between wooden parts.
- Craft glue: Ideal for attaching fabric or paper petals to wooden stems or bases.
- E6000 or similar adhesive: Great for more complex wood flower designs and securing embellishments.
Gather these tools and materials before starting so the glue doesn’t dry mid-project.

Best Wood Flower Cutting Tool Pick
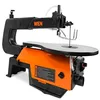
WEN 16-inch Variable Speed Scroll Saw
A variable-speed scroll saw is the tool most cutout-method petals are actually cut with.
- Best for: Cutting consistent petal shapes from sheet wood like birch or basswood
- Why we picked it: Variable speed control lets you slow down for delicate curved cuts without splintering thin stock
- Main drawback: Larger footprint than a hand tool — needs bench space
Compare more wood flower crafting options
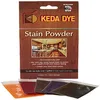 Option 1 Aniline Wood Dye 5-Color Kit
|
 Option 2 3mm Baltic Birch Plywood Craft Sheets
|
 Option 3 Merriway 18-Gauge Galvanized Floral Wire
|
As an Amazon Associate we earn from qualifying purchases.
Creating The Flower Petals
Crafting wood flowers is an art that allows you to create beautiful and unique floral arrangements. Learn the step-by-step process of creating the intricate flower petals to add a touch of elegance to your creations.
Wood flowers are a fantastic alternative to real flowers, offering a durable and everlasting option for various purposes. To create gorgeous wood flowers, the first step is to cut and shape the wooden pieces into petals. This process requires precision and careful execution to achieve a realistic and aesthetically pleasing outcome.
In this section, we will explore different techniques for cutting wood, using templates for consistent petal shapes, sanding and smoothing the petals, and achieving a polished and professional look by removing any rough edges.
Cutting And Shaping Wood To Create Petals:
- Begin by selecting the type of wood suitable for your project, considering its density, grain, and flexibility.
- Measure and mark the dimensions of the petals on the wood, ensuring accuracy for a uniform appearance.
- Opt for a high-quality scroll saw or bandsaw to cut out the petal shapes smoothly.
- Take your time when cutting, following the marked lines precisely to maintain consistency.
- Experiment with different petal shapes to add diversity and visual interest to your wood flowers.
Different Techniques For Cutting Wood:
- Straight cuts: The simplest technique involves cutting the wood across the grain in a straight line, ideal for basic petal shapes.
- Curved cuts: Create elegant and organic petals by maneuvering the wood through the saw along curved lines.
- Compound cuts: For intricate petals, employ compound cuts by tilting the saw blade at various angles while cutting.
Using Templates For Consistent Petal Shapes:
- Templates provide a reliable and efficient way to ensure consistent petal shapes throughout your project.
- Design or download pre-made templates that suit your desired petal styles and sizes.
- Attach the template securely onto the wood with tape or adhesive, ensuring it won’t move during cutting.
- Follow the outline of the template carefully with the saw to create uniform petals every time.
Sanding And Smoothing The Petals:
- After cutting the petals, sanding is crucial to achieve a refined finish.
- Start with rough-grit sandpaper and gradually progress to finer-grit sandpaper for a smoother surface.
- Sand every side of the petal thoroughly, paying close attention to the edges to eliminate any jaggedness.
- Use a sanding block or wrap the sandpaper around a small wooden block to maintain even pressure and prevent accidental rounding of the petals.
Achieving A Polished And Professional Look:
- To elevate the appearance of the wood flowers, it’s essential to remove any rough edges left during the cutting and sanding process.
- Utilize a fine-grit sandpaper to carefully smooth out any imperfections or splinters.
- Inspect the petals from various angles, ensuring a clean and polished look from all sides.
- Take extra care not to oversand, as this can result in the loss of intricate details or the overall shape of the petal.
Crafting wood flower petals requires attention to detail and patience, but the final result will be worth the effort. With the proper techniques for cutting and shaping wood, the use of templates, thorough sanding, and meticulous finishing, you can achieve stunning wood flowers with a polished and professional appearance.

Soaking And Curling Wood Petals For Shape
Dry wood petals crack when you try to bend them. Soak thin basswood shavings or cutout petals in water for about 10 minutes — just enough to dampen the fibers, not saturate them — then shape them by hand while damp and let them air-dry for 12 to 24 hours so the curve holds. Basswood absorbs water quickly and holds moisture well, which is exactly why it stays pliable long enough to shape; denser woods like cherry or ash dry out mid-shaping and won’t hold a curl.
Skip the open flame: dry wood shavings are thin and highly flammable, so holding a petal over a candle to “set” a curl is not a safe substitute for the soak-and-dry method. If a petal needs extra shaping after it’s dry, a hairdryer on its lowest, coolest setting held several inches away can soften the fibers enough to nudge a curl — the soak-and-dry cycle above is still what actually creates the shape.
“Basswood shavings cut from a block about 1¾ inches wide and 8 to 10 inches long worked best for consistent petals — cherry and ash are denser and don’t absorb or hold moisture as well, so they didn’t stay pliable long enough to shape.”
Assembling The Wood Flower
Learn the art of assembling wood flowers with these simple steps. Create beautiful and unique wood flower arrangements with your own hands.
Attaching petals together is an essential step in making wood flowers. There are various methods you can use to achieve a secure and stunning result. Let’s explore the two most popular methods: using wire or floral tape, and gluing petals at the base.
Methods For Attaching Petals Together
Using wire or floral tape:
- Wrap a piece of wire around the base of the petal and twist it tightly to secure it in place. Repeat this step for each petal, ensuring they are evenly spaced.
- Alternatively, you can use floral tape to attach the petals. Start by wrapping the tape tightly around the base of the first petal, then continue wrapping it around each additional petal until they are all securely attached.
Gluing petals at the base:
- Apply a small amount of craft glue or hot glue to the base of the first petal. Press it firmly against the second petal to create a strong bond.
- Continue gluing each petal together until the desired flower shape is achieved. Make sure to hold each petal firmly in place for a few seconds to ensure the glue sets properly.
- Adding a stem to the wood flower will give it a finished and realistic look. In this step, choosing the right stem material and securely attaching it is crucial.
Adding A Stem To The Wood Flower
Choosing the right stem material:
- Consider using floral wire, wooden dowels, or even real plant stems, depending on the look you want to achieve.
- Floral wire and wooden dowels offer flexibility and easy manipulation, while real plant stems provide a more authentic appearance.
Attaching the stem securely:
- Insert the stem material into the base of the wood flower by either twisting it into the wire used for the petals or applying glue to the stem before inserting it into a small hole drilled into the wooden flower’s base.
- Ensure the stem is held firmly and securely attached, giving your wood flower stability and durability.
By following these methods to attach petals together and adding a stem to your wood flower, you’ll create stunning handmade floral arrangements that will impress anyone who sees them.
Painting And Finishing Touches
Learn the art of painting and finishing touches to create stunning wood flowers with this easy step-by-step guide. Discover the techniques and tools required for a flawless finish, and bring your wooden blooms to life with vibrant colors and intricate details.
Master the art of wood flower painting and add a unique touch to your home decor or craft projects.
Preparing the wood for painting:
- Clean the wood surface thoroughly to remove any dust, debris, or oils.
- Ensure that the wood is dry before proceeding to avoid moisture-related issues.
Sanding and priming the surface:
- Use sandpaper to smooth out any rough areas and create an even surface.
- Apply a suitable primer to help the paint adhere better and promote durability.
Choosing the right paint colors:
- Consider the overall look you want to achieve with your wood flowers.
- Opt for acrylic paints as they work well on wood and offer a wide range of colors.
- Experiment with different shades and tones to create depth and variety.
Applying paint to achieve desired effects:
- Use brushes or sponges to apply paint, depending on the desired effect.
- Apply multiple thin coats to prevent drips and achieve a smooth finish.
- Blend colors gently for a seamless transition between shades.
Techniques for adding dimension and texture:
- Use a dry brushing technique to add texture and highlights.
- Create depth by layering different shades of paint.
- Experiment with stippling or dabbing to create interesting textures.
Blending colors for a natural look:
- Start by applying the base color and allow it to dry completely.
- Overlay other colors by blending them gently with a dry brush.
- Gradually build up layers to achieve a natural and realistic look.
Adding embellishments and details to the flower:
- Use small brushes or fine-tip paint pens to add details like veins or patterns.
- Consider adding highlights or shading to create depth and dimension.
- Let your creativity flow and personalize each wood flower.
Using beads, glitter, or other decorative elements:
- Apply a clear adhesive and carefully place beads or glitter on desired areas.
- Experiment with other decorative elements like sequins or small trinkets.
- Ensure the glue or adhesive is suitable for wood to prevent any damage.
Enhancing the flower’s appearance with additional touches:
- Paint the flower stem or add leaves to complete the overall look.
- Consider adding a clear varnish or sealant to protect the paint and add a glossy finish.
- Use a small brush to touch up any areas that may need additional attention.
Dyeing Wood Flowers For Deeper, Grain-Through Color
Acrylic paint sits on top of the wood; dye soaks into the fibers, so the color doesn’t chip or crack at the folds and creases where petals bend. Alcohol-based aniline dyes penetrate porous woods like basswood and balsa evenly, without the blotchy patches plain wood stain can leave. Sand petals to 220-grit before dyeing, apply with a foam brush or lint-free cloth for even coverage, let each coat dry fully, then seal with a clear varnish once the color is set. If you’d rather decorate flat wood surfaces with floral designs instead of building 3D petals, see our wood burning flower designs guide for a different technique entirely.
Painting and adding finishing touches to wood flowers allow you to unleash your creativity and create unique pieces of art. Follow these tips and techniques to achieve stunning results that will impress everyone who sees your wood flowers.

Care And Maintenance Of Wood Flowers
Discover the essential care and maintenance tips for wood flowers in this helpful guide. Learn how to make wood flowers last longer and maintain their beauty for years to come.
Tips For Preserving The Longevity Of Wood Flowers
Wood flowers are a beautiful and hassle-free alternative to traditional fresh flowers. While they require less maintenance overall, there are still some steps you can take to ensure their long-lasting beauty. Here are some tips to help you care for and maintain your wood flowers:
Protecting from Moisture and Direct Sunlight:
- Keep your wood flowers in a dry and well-ventilated area to prevent moisture buildup. Excessive humidity can cause the wood to warp or mold to develop.
- Avoid placing your wood flowers in direct sunlight for prolonged periods as this can lead to fading or discoloration.
Cleaning and Dusting Wood Flowers:
- Gently remove dust from your wood flowers using a soft brush or a hairdryer on the cool setting. This will help maintain their natural look and prevent the accumulation of dirt or debris.
- Avoid using water or any cleaning solutions on your wood flowers, as this can cause damage to the wood and its coloration.
Making Necessary Repairs or Touch-ups:
- Inspect your wood flowers regularly for any signs of wear or damage. If you notice any broken petals or stems, attend to them promptly.
- Use a strong adhesive that is suitable for wood, such as wood glue, to reattach loose petals or stems. Apply a small amount of glue to the affected area and hold it in place until the adhesive sets.
Refinishing or Repainting as Needed:
- Over time, the finish or paint on your wood flowers may start to wear off. If desired, you can refinish or repaint them to restore their original appearance.
- To refinish, lightly sand the surface of the wood flowers to remove any existing finish. Then apply a new coat of stain or sealant, following the manufacturer’s instructions.
- For repainting, choose a high-quality acrylic paint that adheres well to wood surfaces. Apply thin coats of paint using a brush, allowing each layer to dry before applying the next.
By following these simple care and maintenance tips, you can prolong the lifespan and maintain the beauty of your wood flowers. With a little attention and occasional touch-ups, they will continue to bring a touch of nature into your life for years to come.

Frequently Asked Questions On How To Make Wood Flowers
How Do You Make A Simple Wooden Flower?
To make a simple wooden flower, follow these steps: cut a wooden block, shape it into petals, attach them together, and add a stem.
What Kind Of Wood Are Wood Flowers Made Of?
Wood flowers are made of various types of wood, such as birch, poplar, and pine.
How Sola Wood Flowers Are Made?
Sola wood flowers are made by hand from the bark of the tapioca plant.
How Do You Make Sola Wood Flowers Look Real?
To make sola wood flowers look real, add realistic details like paint, texture, and greenery.
How Long Should You Soak Wood Petals To Make Them Pliable?
Soak thin wood petals or shavings in water for about 10 minutes before shaping — just enough to dampen the fibers without saturating them, since over-soaking can make basswood or balsa petals tear. Reshape while damp, then let the flower air-dry for 12 to 24 hours so it holds the new curve.
What’s The Difference Between Sola Wood Flowers And Wood-Shaving Flowers?
Sola wood flowers are hand-carved from dried tapioca root and sold pre-shaped, not cut from tree wood at all. Wood-shaving flowers are made from real basswood or birch that you plane or cut into petals yourself — more effort, but cheaper and gives you control over the exact wood and finish.
Conclusion
Making wood flowers is a fun and rewarding craft that allows you to unleash your creativity and create unique, long-lasting decorative pieces. By following these simple steps, you can easily bring life to plain pieces of wood and transform them into beautiful flowers that will never wilt.
Remember to start with a good quality wood, choose colors that complement each other, and practice blending techniques to achieve a realistic look. Invest in the right tools and take your time to sand and shape the petals, as this will greatly enhance the final result.
Whether you want to adorn your home with handmade wood flowers or give them as gifts, the technique you pick — shaved, cut, or sola — matters more than any single tool or paint color.