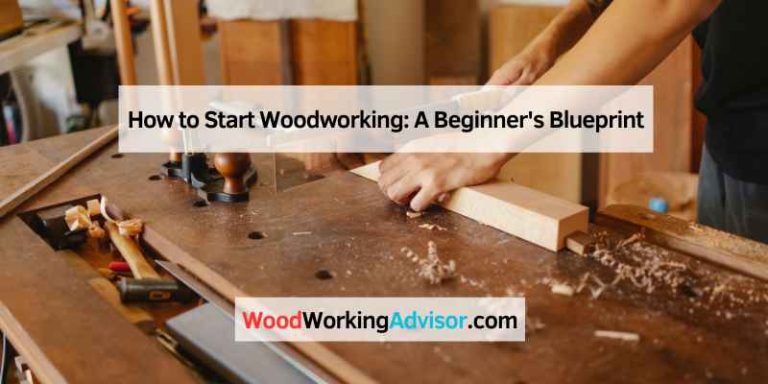
How to Make Wooden Hinges: Butt, Knuckle & Living Hinge Methods
Wooden hinges are cut into the workpiece as a butt hinge, a pivot (knuckle) joint, or a kerf-cut living hinge — not installed as separate hardware. Carve the knuckle across the grain instead of with it and the pin holes split within weeks; pine wears sloppy at the pivot in months, not years. This guide compares all three types, shows which hardwood holds up at the wear point, and walks through cutting a working knuckle hinge.
Introduction To Wooden Hinges
Wooden hinges add a touch of old-world charm to any woodworking project. They are not only functional but also aesthetically pleasing. In this post, we will explore the art of making wooden hinges, their applications in woodworking, and the steps involved in creating these charming and versatile components.
The Charm Of Wooden Hinges
Wooden hinges are a timeless and elegant addition to furniture and cabinetry. Their natural beauty and warm, organic appeal make them a popular choice for both traditional and contemporary woodworking projects. Crafted from high-quality wood, wooden hinges offer a unique blend of durability and visual appeal, making them a standout feature in any piece of furniture.
Applications In Woodworking
Wooden hinges find a wide range of applications in the realm of woodworking. From creating custom-made chests and cabinets to adding a touch of sophistication to doors and gates, wooden hinges offer versatility and charm. Their ability to blend seamlessly with the surrounding woodwork makes them an ideal choice for artisans and woodworkers looking to elevate the visual appeal of their creations.

Types of Wooden Hinges: Butt vs. Pivot/Knuckle vs. Living Hinge
There are three real ways to make a hinge out of wood, and they are not interchangeable. A butt hinge uses two interlocking wood leaves joined by a dowel pin. A pivot (knuckle) hinge carves rounded interlocking “fingers” directly into two adjoining boards around a single dowel pintle — the same interlocking principle as how a standard hardware hinge works, just cut entirely from wood. A living hinge is not a joint at all: it is a grid of closely spaced kerf cuts through a single board or plywood sheet that lets the wood itself flex, rather than installing a separate hardware hinge into a mortise.

| Hinge Type | Strength & Durability | Complexity | Best For |
|---|---|---|---|
| Butt Hinge | Moderate — two-leaf dowel joint wears at the pin under heavy use | Low — cut with a saw and chisel | Light lids, small doors |
| Pivot / Knuckle Hinge | High — interlocked “fingers” spread load across multiple wear points | Medium-high — needs precisely matched curves | Box lids, cabinet doors, gates |
| Living Hinge (kerf-cut) | Low load-bearing — thin wood bridges can fatigue or crack with repeated flexing | Low-medium — needs even kerf spacing (table saw or laser) | Curved lids, fold-flat panels, decorative boxes |
Choosing The Right Wood
When it comes to making wooden hinges, selecting the right wood is crucial for the functionality and aesthetic appeal of the finished product. The choice of wood will determine the durability, strength, and overall look of the hinges. Understanding the various types of wood available, and considering their properties, will help you make an informed decision.
Types Of Wood For Durability
Durability is a key factor in choosing the right wood for making hinges. Look for hardwoods such as oak, maple, or cherry, which are known for their strength and resilience. These woods are less prone to warping or breaking, ensuring that your wooden hinges will withstand frequent use and last for years to come.
Aesthetics And Wood Grain Considerations
Consider the aesthetics of the wood in relation to the overall look of your project. For a traditional or rustic appearance, woods with prominent grain patterns such as walnut or mahogany can add character to your hinges. Alternatively, if you prefer a more modern and sleek look, consider using woods with a finer and more uniform grain, such as birch or ash.
How Grain Direction Affects Hinge Strength
Grain direction determines whether a carved hinge knuckle holds together or splits during its first few uses. Orient the board so the grain runs the length of the knuckle’s cylindrical section — the same principle as running a table leg’s grain vertically for strength — because cutting a knuckle across the end grain leaves short, weak fibers around the pintle hole that crack out under normal opening and closing.
Which Hardwood Wears Best at a Hinge Pivot? Oak vs. Maple
Hard maple’s tight, dense grain resists wear at a hinge’s pivot point better than oak’s more open grain structure, though both far outperform any softwood at a moving joint.
📊 Hard maple rates about 1450 on the Janka hardness scale, versus roughly 1290–1360 for red and white oak. The tighter grain resists the pivot wearing into an oval faster than oak’s more open grain. — Source: Janka hardness scale (standard wood-hardness measurement)
“In our shop, hinges carved from straight-grained hard maple have stayed tight years longer than the same design cut from pine — the pivot simply doesn’t wear into an oval the way a softwood knuckle does.”
Designing Your Hinges
Designing your own wooden hinges can be a rewarding and challenging experience. While designing your hinges, you need to keep in mind both the functional and decorative aspect of the hinge. In this section, we will discuss how to determine the size and shape of your hinges and the functional and decorative designs that you can use to make your hinges stand out.
Determining Size And Shape
The size and shape of your wooden hinge should be determined by the weight and size of the door or lid that it will be holding. The thickness of the hinge should be proportional to the thickness of the door or lid. Additionally, you should consider the aesthetics of the hinge and how it will look on the finished product.
One way to determine the size and shape of your hinge is to use graph paper to draw out the design. This will allow you to see what the hinge will look like before you start cutting the wood.
Functional And Decorative Designs
When designing your hinges, you need to consider both the functional and decorative aspects. Functional designs include butt hinges, strap hinges, and pivot hinges. Butt hinges are the most common type of hinge and are used for doors and lids that need to open and close. Strap hinges are decorative and are often used for heavy doors or lids. Pivot hinges are used for doors or lids that need to pivot in both directions.
Decorative designs include shapes, cut-outs, and patterns. These designs can add visual interest to the hinge and make it stand out on the finished product. For example, you could create a hinge with a heart shape cut-out or a hinge with a chevron pattern.
When designing your hinges, keep in mind that they should be symmetrical and fit snugly against the door or lid. This will ensure that the hinge functions properly and looks good on the finished product.
Tools And Materials Needed
To make wooden hinges, you will need essential tools and materials such as a chisel, saw, wood glue, sandpaper, and a marking gauge. These items are crucial for accurately shaping and assembling the wooden hinges. Additionally, having high-quality wood is important for crafting durable and functional hinges.
Essential Woodworking Tools
When making wooden hinges, having the right tools is crucial. Let’s take a look at the essential woodworking tools you’ll need:
- Saw
- Chisel
- Drill
- Wood glue
- Clamps
Supplementary Materials And Accessories
In addition to the essential tools, there are supplementary materials and accessories that will come in handy:
- Sanding block
- Wood stain
- Wood filler
- Measuring tape
- Safety goggles
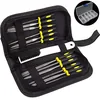
Best Wooden Hinge Carving Set Pick
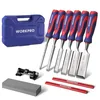
WORKPRO 10-Piece Wood Chisel Set
A full range of chisel widths for roughing out a knuckle blank and cleaning up the fine curves of the interlocking fingers.
- Best for: Roughing and finish-paring hinge knuckles and mortises
- Why we picked it: Ten sizes cover both the wide waste-removal cuts and the tight paring needed around a pintle hole
- Main drawback: Factory edge needs honing before first use
Compare more wooden hinge-making tools
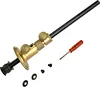 Option 1 iGaging Mortise Marking Gauge
|
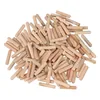 Option 2 Wooden Dowel Pins (3/16 in.)
|
 Option 3 Wood Rasp Needle File Kit
|
As an Amazon Associate we earn from qualifying purchases.
Preparing The Wood
Before you begin making wooden hinges, it is essential to prepare the wood properly. This step ensures that your hinges will be durable, functional, and aesthetically pleasing. The process involves cutting the wood to size and sanding it for smoothness.
Cutting To Size
To start, you’ll need to cut the wood into pieces of the desired length for your hinges. Use a measuring tape and a pencil to mark the measurements accurately. Remember to account for the thickness of the wood when determining the final dimensions.
Once you have marked the measurements, it’s time to cut the wood. You can use a hand saw or a power saw, depending on your preference and the availability of tools. Make sure to follow the marked lines carefully and use steady, controlled movements to ensure clean and precise cuts.
Sanding For Smoothness
After cutting the wood to size, the next step is to sand it for smoothness. Sanding not only improves the appearance of the hinges but also helps them function smoothly. Start by using coarse-grit sandpaper to remove any rough edges or imperfections.
Once you have smoothed out the rough areas, switch to finer-grit sandpaper for a more polished finish. Sand the wood in the direction of the grain, applying even pressure to avoid creating uneven surfaces. Repeat the process until the wood feels smooth to the touch.
Remember to clean the wood after sanding to remove any dust or debris. You can use a soft cloth or a brush to gently wipe away the particles. This step ensures that the hinges will fit together properly and function effectively.
Summary
Preparing the wood is a crucial step in making wooden hinges. By cutting the wood to size and sanding it for smoothness, you lay the foundation for creating hinges that are both functional and visually appealing. Take your time during this process to ensure accuracy and quality in your woodworking project.
Carving The Hinge Mechanism
Carving the hinge mechanism for wooden hinges involves precise craftsmanship and attention to detail. By carefully shaping the wood and creating the necessary grooves and notches, you can achieve a functional and visually appealing hinge that adds character to your woodworking projects.
Creating The Joint
Ensuring Movement And Fit
- Use sharp tools for precise cuts
- Test movement frequently during the carving process
- Ensure the hinge fits snugly in place
| Tip: | Carve slightly smaller than needed for a tight fit |
|---|---|
| Apply lubricant for smoother movement |
Assembling The Hinge Components
Now that you have created the hinge arms and the knuckles, it’s time to assemble the components and test the swing action of your wooden hinge. Here are the steps you need to follow:
Attaching The Hinge Arms
First, take one of the hinge arms and apply a small amount of wood glue to the end. Insert the knuckle into the hole of the hinge arm and make sure it is flush with the surface. Repeat this process with the other hinge arm and knuckle.
Next, clamp the hinge arms together with the knuckles facing each other. Use a scrap piece of wood to protect the hinge from the clamps. Allow the glue to dry completely before removing the clamps.
Testing The Swing Action
Once the glue is dry, remove the clamps and test the swing action of your wooden hinge. If the hinge swings smoothly, you can proceed to install it on your project. If the hinge is stiff or binding, you may need to sand the knuckles slightly to ensure a smooth swing.
It’s important to test the hinge before installation to avoid any issues down the line. Once you have confirmed that the hinge swings smoothly, you can attach it to your project using screws or glue.
With these simple steps, you can create a wooden hinge that is not only functional but also adds a unique touch to your project.
Finishing Touches
Crafting wooden hinges adds unique charm to your project’s finishing touches. Enhance your woodworking skills with precision and patience. Master the art of making wooden hinges for a bespoke touch to your creations.
Staining Or Painting
To enhance the appearance of your wooden hinges, staining or painting is a great option. It is essential to choose a paint or stain that is suitable for wooden surfaces. You can choose from a wide range of colors to match your project’s aesthetics. It is advisable to apply a thin layer of paint or stain using a brush or sponge and let it dry completely. You can repeat the process until you achieve the desired finish.
Sealing For Protection
Applying a sealant to your wooden hinges is necessary to protect them from moisture and other environmental factors. You can use a clear polyurethane sealant or any other suitable sealant to increase the life of your hinges. Before applying the sealant, ensure that the hinges are clean and free from dust or debris. Apply a thin layer of sealant using a brush or sponge and let it dry completely. You can repeat the process until you achieve the desired level of protection.
In conclusion, finishing touches are essential to enhance the appearance and increase the life of your wooden hinges. Whether you choose to stain or paint, or apply a sealant, ensure that you follow the correct procedure to achieve the desired results. With proper care, your wooden hinges can last for many years.
Installation Tips
When it comes to installing wooden hinges, following precise steps is crucial. Here are some installation tips to help you achieve a professional result.
Aligning Hinges On Your Project
Align the hinges with precision to ensure smooth operation.
Securing With Fasteners
Use appropriate fasteners to secure the hinges firmly in place.
Maintenance And Care
Learn the art of crafting wooden hinges with proper maintenance and care techniques. Ensure the longevity of your wooden hinges by applying regular oiling and keeping them free from dust and moisture. Mastering these practices will enhance the durability and functionality of your wooden hinges.
Proper maintenance and care are essential for ensuring the longevity and functionality of your wooden hinges. By following a few simple steps, you can keep your hinges in excellent condition for years to come. In this section, we will discuss cleaning wooden hinges, as well as regular check-ups and adjustments.
Cleaning Wooden Hinges
Cleaning your wooden hinges regularly is crucial to prevent the build-up of dirt, dust, and grime that can hinder their performance. To clean your hinges effectively, follow these steps:
1. Start by removing any visible debris or dust using a soft-bristle brush or a dry cloth. Gently brush or wipe the surface of the hinges, ensuring you reach all the crevices.
2. For more stubborn dirt or stains, dampen a cloth with a mild soapy solution. Wring out any excess water to avoid saturating the wood. Gently wipe the hinges, paying extra attention to the areas with dirt buildup.
3. After cleaning, use a clean, dry cloth to remove any remaining moisture from the hinges. Ensure they are completely dry before moving on to the next step.
Regular Check-Ups and Adjustments
Regular check-ups and adjustments are necessary to maintain the proper functioning of your wooden hinges. Follow these guidelines to keep your hinges in optimal condition:
1. Inspect your wooden hinges regularly for signs of wear, such as loose screws, cracks, or misalignment. Address any issues immediately to prevent further damage.
2. Check the tightness of the screws that hold the hinges in place. If any screws are loose, tighten them carefully using a screwdriver. Avoid overtightening, as this can cause the wood to split.
3. Ensure that the hinges open and close smoothly without any resistance or sticking. If you notice any friction, apply a small amount of lubricant to the pivot points. Be sure to use a lubricant suitable for wooden surfaces.
4. If your wooden hinges become squeaky, you can apply a thin layer of wax or beeswax to the pivot points. This will help reduce friction and eliminate the noise.
5. Keep an eye out for any signs of wood shrinkage or expansion, as these can affect the hinge’s performance. If necessary, adjust the hinges accordingly to ensure a proper fit.
By following these maintenance and care practices, you can extend the lifespan of your wooden hinges and enjoy their smooth operation for years to come. Remember to clean them regularly and perform check-ups and adjustments as needed. With proper care, your wooden hinges will continue to enhance the beauty and functionality of your woodworking projects.
Advanced Techniques
Advanced Techniques:
Incorporating Metal Accents
Enhance wooden hinges with metal accents for durability and style.
Creating Hidden Hinges
Craft hidden hinges to add a touch of mystery to your wooden projects.
Troubleshooting Common Issues
Learn how to troubleshoot common issues when making wooden hinges. Discover tips and tricks to overcome challenges and ensure successful hinge construction.
Dealing with Swelling, Fixing Loose Hinges
Wooden hinges can add a touch of elegance to any project, but they can also be prone to swelling and loosening over time. Fortunately, troubleshooting common issues with wooden hinges is relatively simple. Here are some tips for dealing with swelling and fixing loose hinges.
Dealing With Swelling
One common issue with wooden hinges is swelling, which can cause the hinge to bind and become difficult to operate. This is often caused by changes in humidity or exposure to moisture. To deal with swelling, you can try the following:
- Apply a lubricant: If the hinge is just slightly swollen, applying a lubricant like wax or oil can help it move more easily.
- Remove the hinge pin: If the hinge is more severely swollen, you may need to remove the hinge pin and sand down the swollen areas until the hinge moves smoothly again.
Fixing Loose Hinges
Another common issue with wooden hinges is that they can become loose over time, which can cause the door or lid they’re attached to to sag or become misaligned. To fix loose hinges, try the following:
- Reposition the hinge: Sometimes, simply repositioning the hinge can help it fit more snugly and reduce wobbling.
- Use a filler: If the hinge is still loose, you can try using a filler like wood glue or toothpicks to fill in any gaps between the hinge and the wood.
- Replace the hinge: If all else fails, you may need to replace the hinge with a new one that fits more securely.
By following these tips, you can troubleshoot common issues with wooden hinges and ensure that your project stays functional and beautiful for years to come.
Inspiring Projects With Wooden Hinges
Wooden hinges are a versatile and captivating addition to any woodworking project. They add a touch of timeless elegance and can elevate the aesthetic appeal of your creations. From small boxes to large cabinets, wooden hinges can be used in a variety of inspiring projects that showcase craftsmanship and creativity. In this section, we’ll explore some captivating ideas for using wooden hinges in your woodworking endeavors.
Gallery Of Handcrafted Items
Explore a diverse array of handcrafted items featuring wooden hinges in our gallery. From intricately designed jewelry boxes to finely crafted cabinets, these pieces demonstrate the beauty and functionality of wooden hinges. Each item tells a unique story of creativity and skill, inspiring woodworkers to explore the endless possibilities of incorporating wooden hinges into their projects.
Sharing Your Own Creations
Share your own wooden hinge creations with our community. Whether you’ve crafted a unique jewelry box, a custom chest, or any other innovative item featuring wooden hinges, we invite you to showcase your work. Join the conversation, inspire fellow woodworkers, and celebrate the artistry of wooden hinges in your craft.
Reflecting on Your Finished Wooden Hinges
Crafting DIY wooden hinges can be a satisfying and rewarding experience. The process involves precision and creativity, resulting in functional and aesthetically pleasing hinges for your projects. Embracing the art of making wooden hinges adds a personal touch to your creations, showcasing your craftsmanship and attention to detail.
Reflecting On The Crafting Process
Making wooden hinges is a fulfilling and rewarding DIY project that allows you to add a unique touch to your woodworking creations. The process of crafting wooden hinges involves precision, creativity, and a deep appreciation for the art of woodworking. Reflecting on the crafting process, you gain a sense of accomplishment as you witness the transformation of raw wood into functional hinges that seamlessly integrate with your projects.
Future Projects And Ideas
After successfully creating your own wooden hinges, you may find yourself inspired to explore more woodworking projects that incorporate this skill. Whether it’s designing custom cabinets, crafting jewelry boxes, or constructing unique furniture pieces, the ability to make wooden hinges opens up a world of creative possibilities. As you delve into future projects, the satisfaction of DIY wooden hinges serves as a reminder of your craftsmanship and the endless potential for innovation in your woodworking endeavors.

Frequently Asked Questions
How Do You Make Wooden Hinges?
To make wooden hinges, start by selecting suitable wood and cutting it into the desired shape. Then, carefully carve out the hinge using a chisel and drill. Finally, test the fit and make any necessary adjustments for smooth movement.
What Tools Are Needed To Make Wooden Hinges?
To make wooden hinges, you will need basic woodworking tools such as a chisel, drill, saw, and sandpaper. Additionally, a marking knife, coping saw, and small files may be helpful for intricate work. Select tools based on the type and size of the hinge needed.
What Type Of Wood Is Best For Making Hinges?
For making wooden hinges, choose hardwoods such as oak, maple, or cherry, as they offer durability and strength. Avoid softwoods like pine, as they may not withstand the constant movement of a hinge. Select a wood that complements the overall aesthetic of your project.
What Is a Living Hinge in Woodworking?
A living hinge is a series of closely spaced parallel saw or laser kerf cuts through a single piece of wood or plywood, leaving thin flexible bridges that let the rigid panel bend like fabric. It replaces a mechanical hinge entirely and works best on thin plywood around 1/8 inch thick for curved lids or fold-flat panels, not for load-bearing doors.
How Do You Stop a Wooden Hinge From Squeaking?
Rub paste wax into the pivot pin and the inside of the knuckle joint, then work the hinge back and forth to spread it evenly. Gently warming the joint with a heat gun before waxing helps the wax penetrate and stick, and re-waxing every few months keeps a wooden hinge moving quietly.
Conclusion
Mastering the art of making wooden hinges can greatly enhance your woodworking skills and open up a world of creative possibilities. By following the step-by-step instructions provided in this blog post, you can create beautiful and functional hinges that add a unique touch to your projects.
With practice and patience, you’ll soon be crafting custom hinges that impress and inspire. So, grab your tools and get ready to elevate your woodworking game with the art of making wooden hinges. Happy crafting!