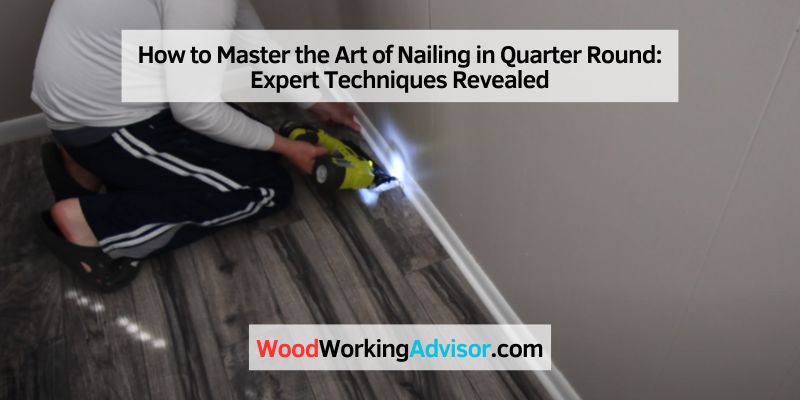
How to Master the Art of Nailing in Quarter Round: Expert Techniques Revealed
To nail in a quarter round, measure and mark the desired placement, position the quarter round against the wall and use a hammer or nail gun to secure it in place with nails.
Choosing The Right Tools And Materials
When it comes to nailing in quarter-round, having the right tools and materials is essential. By selecting the best options for your project, you can ensure a successful installation that not only looks great but also lasts for years to come. In this section, we will explore the key factors to consider when choosing your tools and materials, including the essential tools for nailing and selecting the best quarter-round materials. Let’s dive in!

Essential Tools For Nailing
Before you begin nailing in the quarter round, there are a few essential tools that you will need to have on hand:
| Tool | Purpose |
|---|---|
| Hammer | To drive nails into the quarter round and secure it to the wall or baseboard. |
| Nail Set | To countersink the nails below the surface of the quarter round, ensuring a clean finish. |
| Tape Measure | To accurately measure and cut the quarter round to fit your space. |
| Miter Saw | To make precise angled cuts for seamless corner connections. |
| Utility Knife | To score and trim the quarter-round for a perfect fit. |
Selecting The Best Quarter Round Materials
When selecting the materials for your quarter round, there are a few key factors to consider:
- Type of Wood: Choose a wood species that complements your existing trim or flooring. Popular options include pine, oak, and maple.
- Size: Quarter round comes in various sizes, typically ranging from 0.75 inches to 1.25 inches. Select a size that suits your aesthetic preferences and complements the scale of your room.
- Finish: Decide whether you want pre-finished quarter-round or unfinished wood that you can stain or paint to match your trim.
- Quantity: Calculate the amount of quarter rounds you will need based on the perimeter of the room. It’s always beneficial to have a little extra for any mistakes or future repairs.
By carefully considering these factors and choosing the right tools and materials, you are well on your way to nailing in the quarter round like a pro. Now that you have all the information you need, it’s time to get started on your project!
Preparing The Work Area
Before you start nailing in the quarter round, it’s important to properly prepare your work area. This will ensure a smooth and successful installation process, allowing you to achieve the perfect finishing touch for your project. There are a few key steps to follow when it comes to preparing the work area, including measuring and cutting the quarter round, sanding and priming it, and ensuring that everything is in place for a seamless installation.
Measuring And Cutting Quarter Round
The first step in preparing the work area is to accurately measure and cut the quarter round. This will ensure that you have the right lengths and angles to fit the corners and edges of your project. To measure, use a tape measure and take precise measurements of the areas where the quarter round will be installed. Once you have your measurements, use a miter saw or a miter box and hand saw to cut the quarter round at the appropriate angles. It’s important to double-check your measurements and make accurate cuts to ensure a proper fit.
Sanding And Priming Quarter Round
After you’ve cut the quarter round, the next step is to sand and prime it. Sanding helps to smooth out any rough edges or imperfections, ensuring that your quarter round will have a clean and professional appearance. Use a fine-grit sandpaper or sanding block to gently sand the edges and surfaces of the quarter round. Once sanded, apply a coat of primer to the quarter round to help seal the wood and create a smooth base for your paint or stain. Make sure to let the primer dry completely before moving on to the next step.
Here’s a step-by-step guide for sanding and priming quarter round:
- Sand the cut edges and surfaces of the quarter round with a fine-grit sandpaper or sanding block.
- Wipe away any dust or debris with a clean cloth.
- Apply a coat of primer to the quarter round, using a brush or roller.
- Allow the primer to dry completely before moving on to the installation process.
By sanding and priming the quarter round, you’ll ensure a professional finish and enhance the longevity of your installation.
Applying Nails With Precision
Nailing quarter round trim may seem simple, but doing so with precision is crucial for a polished and professional finish. Here’s how to achieve it:
Positioning The Quarter Round
Before nailing in the quarter round, ensure it is properly positioned to create a seamless and stylish look. Place the trim snugly against the wall and flooring, ensuring there are no gaps or uneven spaces.
Utilize a level tool to guarantee that the quarter round is accurately aligned, thereby minimizing the need for heavy adjustments later on.
Choosing The Correct Nail Size
When selecting the nail size for your quarter round, opt for nails that are slightly smaller than the trim itself. This will prevent the nails from protruding through the quarter round, resulting in an unsightly finish.
Use a nail gauge to confirm the proper size and prevent the risk of splitting the trim. For thicker quarter-round pieces, consider using finishing nails to ensure a secure hold without damage.
Expert Tips For Nailing Techniques
Master the art of nailing quarter-round with these expert tips, ensuring precision and seamless installation. Discover the best techniques for achieving professional results in this essential finishing touch for your home.
When it comes to nailing quarter rounds, using the right techniques can make a significant difference in the final result. To help you achieve a flawless finish, we have compiled a list of expert tips that will ensure your quarter round is nailed in securely and without any splitting.
Avoiding Splitting Of The Quarter Round
One of the most common issues when nailing quarter-round is the splitting of the wood. To prevent this, follow these simple yet effective tips:
- Use a pilot hole: Before hammering in the nails, it is recommended to create a pilot hole with a thin drill bit. This will help prevent the wood from splitting.
- Choose the right size nails: Select nails that are the appropriate length for the thickness of your quarter round. Using nails that are too long can increase the likelihood of splitting.
- Position the nails correctly: Place the nails along the thicker side of the quarter round, as this is less likely to split. Avoid nailing too close to the edges where the wood is more prone to splitting.
Achieving A Clean Finish
To ensure a clean and professional-looking finish, pay attention to the following tips:
- Prevent hammer marks: Before hammering, place a small piece of scrap wood or a nail punch on top of the nail. This will prevent hammer marks on the surface of the quarter round.
- Use a nail set: After hammering in the nails, use a nail set to sink them slightly below the surface of the wood. This will allow you to fill the holes with wood filler for a seamless finish.
- Finish the quarter round: Once the nails are in place, you can sand the quarter round and apply a coat of paint or stain to match your baseboard or flooring. This will enhance the overall look and provide a polished appearance.
By following these expert tips for nailing techniques, you can confidently install a quarter-round without any splitting and achieve a clean and professional look. Remember to take your time and pay attention to detail for the best results.
Troubleshooting And Finishing Touches
To perfectly secure quarter-round trim, ensure the nail goes through the molding and into the underlying surface for stability and a clean finish. Proper positioning and careful hammering will help you achieve the desired result effortlessly.
Dealing With Nail Protrusion
If you notice that the nails you’ve used to secure the quarter round are protruding, don’t worry – it’s a common issue that can easily be addressed. Hammering the nails too far can cause them to stick out, creating an unsightly appearance and potentially causing safety hazards. To fix this, follow these simple steps:
- Assess the extent of the protrusion: Start by examining the nails to determine how much they are sticking out. If it’s just a minor protrusion, you can use a nail punch to drive the nail slightly deeper into the material.
- Use a nail set: If the nails are sticking out significantly, you may need to use a nail set. Place the nail set on top of the nail head and gently tap it down with a hammer until the nail is flush with the quarter round.
- Fill the indentation: After driving the nails deeper or setting them, you may notice small indentations around the nail heads. To fill these, use a bit of wood filler. Apply the filler with a putty knife and smooth it out, removing any excess.
Applying Caulk And Paint
Once you’ve successfully secured the quarter round, it’s time to give it a clean and finished look. Applying caulk and paint can help achieve a polished and professional appearance. Take note of these steps:
- Prepare the surface: Before applying caulk or paint, ensure that the quarter round is clean and free from dust or debris. Wipe it down with a damp cloth and allow it to dry completely.
- Apply caulk: Using a caulk gun, carefully apply a thin bead of caulk along the edges of the quarter round where it meets the wall or baseboard. Make sure to fill any gaps or cracks. Smooth the caulk with your finger or a caulk smoothing tool for a neat finish.
- Allow the caulk to dry: Let the caulk dry according to the manufacturer’s instructions. This typically takes a few hours.
- Prime and paint: Once the caulk is dry, it’s time to prime and paint the quarter-round to match the surrounding area. Apply a coat of primer, allowing it to dry before proceeding with your chosen paint color. Apply multiple coats of paint as needed, allowing each coat to dry before adding the next.
Following this troubleshooting and finishing touches will help ensure that your quarter-round installation looks seamless and professional. It’s the final step to completing your trim project and achieving a polished result.
Frequently Asked Questions Of How To Nail In Quarter Round
How Do You Secure Quarter Round Trim?
To secure quarter-round trim, follow these steps:
1. Measure and cut trim to fit the desired length.
2. Use finishing nails to attach the trim to the baseboard or wall.
3. Make sure to place the nails near the top of the trim and at an angle.
4. Fill nail holes with a matching wood filler.
5. Finish by painting or staining the trim for a polished look.
What Is The Best Nail For Quarter-Round Trim?
The best nail for quarter-round trim is a 4d finishing nail. It provides a secure hold without splitting the trim.
How Do You Install Quarter Round Without A Nail Gun?
To install a quarter-round without a nail gun, you can use an adhesive like construction glue or a brad nailer. Apply a bead of adhesive along the back of the quarter round and press it into place. Alternatively, use a brad nailer to secure the quarter round to the wall or baseboard.
How Do You Hide Nails In Quarter Round?
To hide nails in a quarter round, follow these steps:
1. Use a nail punch to countersink the nail slightly below the surface.
2. Fill the hole with wood putty that matches the color of the quarter round.
3. Smooth and level the putty with a putty knife.
4. Once dry, sand the area to blend it with the surrounding surface.
5. Finally, apply a coat of paint or stain to finish the quarter round.
Conclusion
Nailing in the quarter round is a straightforward process that can enhance the aesthetics of your home. By following the steps outlined in this blog post, you can achieve professional-looking results with ease. As a final tip, don’t forget to use the right tools and take your time for a precise finish.
Happy nailing!