How to Master Miter Saw Angles: Cut with Precision!
To use a miter saw for cutting angles, follow these steps: set the angle on the saw, secure the workpiece, align the cutting line with the saw’s blade, and make the cut with a smooth motion. Miter saws are versatile tools used for making precise angled cuts in various woodworking and DIY projects.
Whether you’re a beginner or an experienced woodworker, mastering the art of using a miter saw is essential for achieving accurate and clean angle cuts. We will guide you through the step-by-step process of using a miter saw to cut angles effectively.
So, let’s get started and explore the world of angle cutting with a miter saw!
Understanding Miter Saw Basics
Learn the fundamentals of using a miter saw to cut angles effectively. Discover the key steps and techniques needed for accurate and precise cuts.
Whether you’re a seasoned woodworker or just starting out with DIY projects, understanding the basics of a miter saw is essential. This versatile tool allows you to make precise angled cuts, making it ideal for various woodworking tasks. In this section, we’ll explore the different types of miter saws, discuss their main components, and highlight safety precautions to keep in mind.
Types Of Miter Saws:
- Standard Miter Saw: Also known as a chop saw, this is the most common type of miter saw. It provides basic cutting angles up to 45 degrees on either side.
- Compound Miter Saw: This type of saw not only allows you to make angled cuts, but also bevel cuts. It can tilt in one or two directions, enabling you to create more complex cuts for crown molding or other intricate woodworking projects.
- Sliding Compound Miter Saw: By adding a sliding feature to the compound miter saw, you can now make cuts with a wider range. This is particularly useful when working with larger or wider pieces of wood.
Main Components Of A Miter Saw:
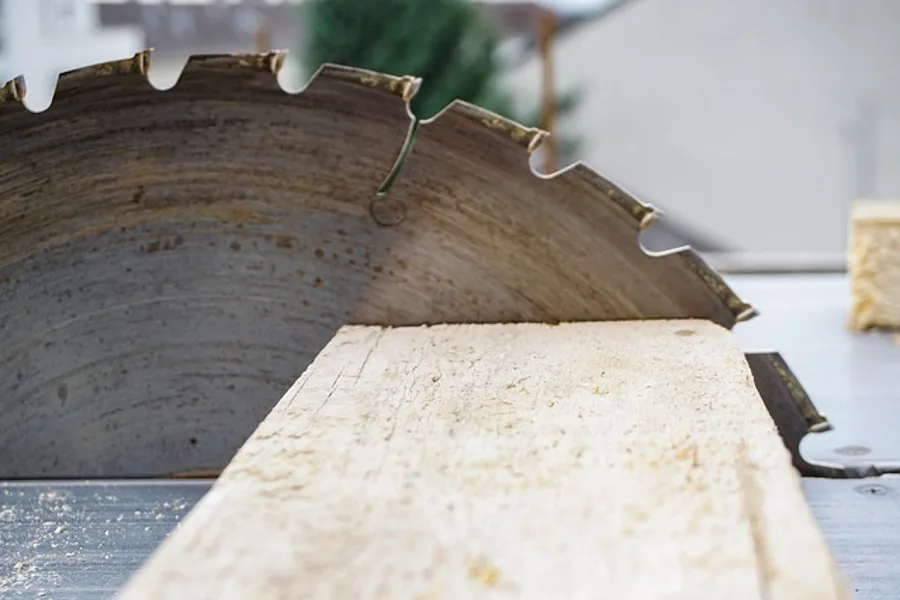
- Blade: The blade is the heart of a miter saw. It’s responsible for making the cuts, so choosing the right blade for your project is crucial. Different blades are designed for specific materials and cutting tasks.
- Base and Table: The base provides stability and support for the entire saw. It usually has pre-marked angles to help guide your cuts accurately. The table, on the other hand, is where you place your workpiece for cutting.
- Fence: The fence acts as a guide for your workpiece to ensure straight and precise cuts. It helps maintain consistent positioning and prevents any unwanted movement while cutting.
- Miter Gauge and Bevel Lock: The miter gauge allows you to set the desired angle for your cuts. It can be adjusted to various angles to achieve the specific angle you need. The bevel lock, on the other hand, locks the saw in place at the desired bevel angle.
Safety Precautions:
- Read the Manual: Before using a miter saw, familiarize yourself with the manufacturer’s instructions and safety guidelines. This will ensure that you’re using the tool correctly and avoiding any potential risks.
- Wear Protective Gear: Always wear safety glasses to protect your eyes from flying debris. Additionally, wearing ear protection and a dust mask is recommended to protect your hearing and respiratory system.
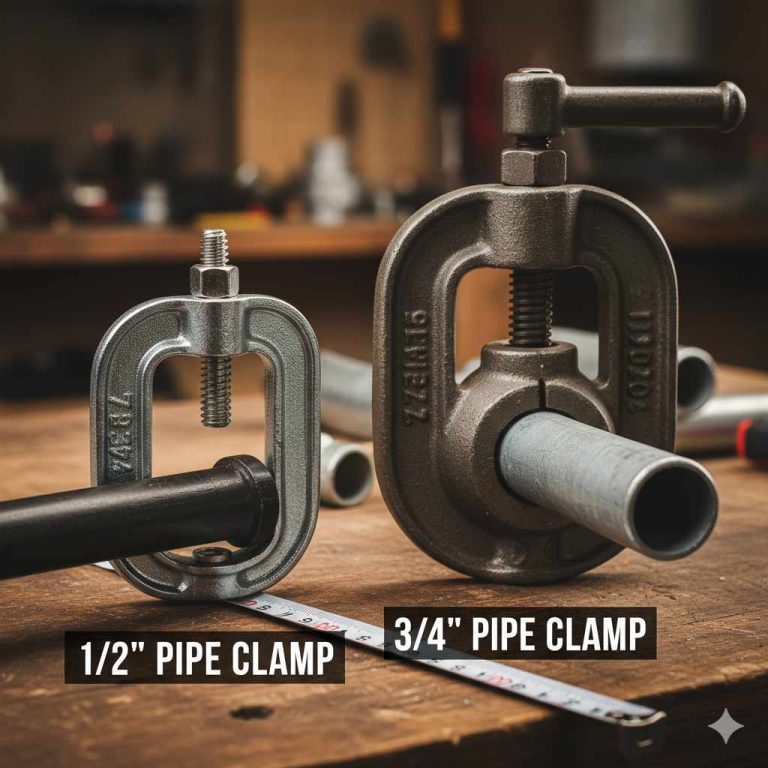
- Secure Your Workpiece: Ensure that your workpiece is properly secured against the fence and the table. This will prevent any movement or wobbling during the cutting process.
- Keep Hands Clear: Always keep your hands clear of the blade path. Use clamps or other tools to push the workpiece through instead.
- Wait for the Blade to Stop: Never remove or adjust the workpiece until the blade has come to a complete stop. This prevents accidental contact with the moving blade.
By understanding the types of miter saws, their main components, and the safety precautions to follow, you’ll be well-equipped to use a miter saw confidently and efficiently. Remember to always prioritize safety and take your time to ensure accurate and clean cuts for your woodworking projects.

Accurate Angle Measurements
Achieve precise angle measurements with ease using a miter saw. Learn how to accurately cut angles without any hassle.
To achieve precise cuts when using a miter saw, accurate angle measurements are of paramount importance. Whether you’re working on a DIY project or a professional woodworking task, getting your angles right can make all the difference in the final result.
In this section, we will explore the importance of precise angle measurements, the utilization of a protractor and angle guide, as well as some tricks to ensure accurate angle settings.
Importance Of Precise Angle Measurements
- Ensures precision: Accurate angle measurements are crucial for achieving precise cuts. Even a slight error in the angle can lead to poorly fitting joints or uneven edges.
- Enhances project quality: Precise angle measurements contribute to the overall quality of your project. With properly cut angles, your finished piece will look more professional and seamless.
- Saves time and material: Getting your angles right the first time saves you valuable time and prevents wastage of expensive materials. By avoiding mistakes, you can complete your project efficiently and cost-effectively.
Protractor And Angle Guide Utilization
To measure and set angles correctly, you can utilize tools like a protractor or an angle guide. These tools help in achieving the desired angle with accuracy and ease.
- Protractor: A protractor is a widely used tool for measuring and marking angles. By aligning the center point of the protractor with the reference point and the base edge of your material, you can read the angle measurement accurately on the scale.
- Angle guide: An angle guide is a handy tool that can be attached to your miter saw to ensure precise angle settings. It provides a reference surface that aligns with the saw’s base and allows you to adjust the angle quickly and accurately.
Tricks For Accurately Setting Angles
When working with angles, there are a few tricks you can employ to ensure accurate measurements and precise cuts:
- Double-check your measurements: Always verify your measurements before making any cuts. Use a ruler or tape measure to confirm the angle and eliminate any potential errors.
- Practice on scraps: If you’re unsure about a particular angle or technique, it’s always a good idea to practice on scrap material first. This way, you can fine-tune your skills and ensure accurate cuts on your actual project.
- Use a digital angle gauge: For those seeking utmost precision, a digital angle gauge can be a game-changer. It provides digital readings, allowing you to set angles with extreme accuracy.
- Secure the workpiece: To avoid any slippage or movement during the cutting process, securely clamp or hold down your workpiece. This stability will contribute to precise cuts and consistent angle measurements.
With these tips and tricks, you can confidently use a miter saw to cut angles accurately, resulting in professional-looking woodworking projects. Remember, practice makes perfect, so don’t be afraid to experiment and refine your technique to achieve the best results.
Mastering Bevel Cuts
Learn how to master bevel cuts with a miter saw for precise angled cuts. Enhance your woodworking skills with step-by-step instructions and expert tips.
Bevel cuts are an essential technique to master when using a miter saw. They allow you to create angled cuts on the edge of a workpiece, adding versatility and precision to your projects. In this section, we will explain bevel cuts, how to adjust the bevel angle on a miter saw, and provide some valuable tips for achieving precise bevel cuts.
Let’s get started!
Explanation Of Bevel Cuts:
Bevel cuts involve tilting the blade of a miter saw to create angled cuts along the edge of a workpiece. These cuts are commonly used when creating chamfers, angled edges, or joining pieces at various angles. By adjusting the bevel angle, you can cut precise bevels ranging from 0 to 45 degrees or even beyond, depending on the capabilities of your miter saw.
To achieve bevel cuts, you need to make two adjustments: the miter angle and the bevel angle. The miter angle determines the cut’s angle relative to the workpiece’s face, while the bevel angle determines the cut’s angle relative to the workpiece’s edge.
With practice and proper technique, you can create clean and accurate bevel cuts for your woodworking projects.
Adjusting The Bevel Angle On A Miter Saw:
To adjust the bevel angle on your miter saw, follow these steps:
- Start by loosening the bevel locking handle located on the back or side of your miter saw.
- Tilt the saw’s blade to the desired bevel angle. Most miter saws have positive stops at common angles like 0, 22.5, and 45 degrees, making it easier to set the bevel angle accurately.
- Once you’ve set the desired bevel angle, tighten the bevel locking handle to secure the blade in place.
- Always double-check the angle before making any cuts to ensure accuracy and safety.
Tips For Achieving Precise Bevel Cuts:
Here are some helpful tips to improve your bevel-cutting skills:
- Use a reliable and accurate miter saw with clear bevel angle indicators and positive stops to simplify the adjustment process.
- Take your time to align the workpiece properly, ensuring it is securely held in place with clamps or a vice.
- Make practice cuts on scrap pieces of wood before cutting your actual workpiece, especially when working with new angles or materials.
- Consider using a sacrificial fence or backing board to prevent tear-out or splintering on the cut edge.
- Always wear appropriate safety gear, including safety glasses and hearing protection, when operating a miter saw.
By following these tips and practicing the techniques, you can achieve precise bevel cuts that enhance the quality and aesthetics of your woodworking projects.
Remember, mastering bevel cuts takes patience and practice. Take the time to understand your miter saw’s capabilities, and gradually test different angles to expand your skills. Happy cutting!
Proper Blade Selection
When using a miter saw to cut angles, proper blade selection is key. Choose a blade that is suitable for the material you are cutting to ensure clean and accurate cuts every time.
Choosing The Right Blade For The Task
When it comes to using a miter saw to cut angles, selecting the right blade is essential for achieving clean and accurate cuts. The blade choice will vary depending on the material being cut and the specific task at hand.
Here are some considerations to keep in mind when choosing a blade for your miter saw:
- Material compatibility: Different blades are designed to cut through specific materials effectively. Ensure that the blade you select is suitable for the material you will be working with.
- Tooth count: The number of teeth on a blade determines the cutting speed and finish quality. Blades with a higher tooth count provide smoother cuts, while blades with a lower tooth count are better for faster cuts. Consider the intended purpose of your cuts to determine the appropriate tooth count.
- Blade size: Miter saw blades come in various sizes, typically ranging from 7.25 inches to 12 inches in diameter. The size of the blade you choose depends on the maximum cutting capacity of your miter saw and the size of the material you need to cut.
- Blade type: There are different blade types designed for specific purposes, such as crosscutting, ripping, or general-purpose cutting. Determine the type of cuts you will be making most frequently and select a blade that is optimized for that purpose.
Blade Considerations For Different Materials
Different materials require specific blade features and characteristics to ensure optimal cutting performance. Here are some blade considerations for common materials:
- Wood: Use a blade with a high tooth count and a negative hook angle to minimize tear-out and produce clean cuts in wood.
- Aluminum and non-ferrous metals: Opt for blades with carbide-tipped teeth specifically designed for cutting non-ferrous metals. These blades have a special geometry to prevent clogging and maintain sharpness.
- Plastic and laminate: Choose a blade with a high tooth count and a triple-chip grind to prevent melting and produce smooth cuts in plastics and laminates.
- Composite materials: Select a blade that is designed for cutting composite materials like MDF or particle board. These blades typically have special coatings or tooth geometry to handle the unique properties of composite materials.
Remember to always refer to the manufacturer’s recommendations for blade selection when working with specific materials.
Maintaining And Replacing Saw Blades
To ensure optimal performance and prolong the life of your miter saw blade, regular maintenance and timely replacement are crucial. Here are some tips for maintaining and replacing saw blades:
- Clean the blade: Remove any sawdust, resin, or other debris from the blade after each use. This can be done using a stiff brush or a blade cleaning product.
- Check for damage: Inspect the blade for any signs of wear, cracks, or missing teeth. A damaged blade can lead to poor cutting performance and safety hazards. Replace any damaged blades immediately.
- Sharpen the blade: If the blade becomes dull, consider sharpening it to restore its cutting efficiency. This can be done using a specialized sharpening tool or by taking it to a professional sharpening service.
- Replace when necessary: Over time, blades will wear out and lose their cutting effectiveness. It’s important to replace the blade when it no longer produces clean and precise cuts.
By choosing the right blade for the task, considering the material being cut, and properly maintaining and replacing the blade, you can optimize the performance of your miter saw and achieve accurate and professional-looking angled cuts.

Marking And Measuring
Discover the art of marking and measuring angles with a miter saw. Unlock your woodworking potential by mastering this essential technique.
Tips For Accurate
Marking and measuring accurately is crucial when using a miter saw to cut angles. It ensures precise cuts and reduces any mistakes or errors. Here are some essential tips to help you achieve accurate marking and measuring:
- Begin by selecting the appropriate measurement tool for the job. A combination square or a protractor is ideal for marking angles. A tape measure, ruler, or measuring tape will help you measure lengths accurately.
- Before making any marks, double-check the measurements. It’s better to take a little extra time for accurate measurements than rushing and ending up with incorrect angles.
- Keep your workspace well-lit to avoid misreading the measurements or making inaccurate marks. A well-lit area allows you to see clearly and work more efficiently.
- Use a sharp pencil or marking tool to make your marks. Dull pencils or worn-out markers can create imprecise lines, which can affect the accuracy of your cuts.
- Always mark on the waste side of your cut. This means marking on the side of the material that will be discarded. It prevents any errors from affecting the final piece.
- For angular cuts, mark both the starting and the ending points of the cut on the material. This helps you visualize the angle and ensures you are cutting in the right direction.
- When making multiple cuts, mark each piece individually rather than relying on measurements or markings from previous cuts. This extra step avoids any cumulative errors that may occur.
- Consider using a marking knife or scoring tool to create deeper and more visible marks on the material. It can provide greater precision and accuracy when aligning the saw blade with the mark.
- Take your time and be patient with the marking and measuring process. Rushing can lead to mistakes, potentially resulting in wasted material or inaccurate cuts.
- Finally, always double-check your marks before proceeding with the cut. Measure twice, cut once is an old adage that still holds true.
Essential Tools For Marking Angles
Having the right tools at hand is essential when marking angles for your miter saw cuts. Here are the key tools you’ll need to ensure accurate marking:
- Combination square: This versatile tool allows you to measure, mark, and verify angles accurately. It typically consists of a ruler and a sliding head that can be set at various angles.
- Protractor: A protractor is specifically designed for measuring and marking angles. It provides a precise way to set the correct angle for your miter saw cuts.
- Tape measure or ruler: These basic measuring tools are fundamental in any woodworking project. They allow you to measure lengths accurately and can be used for both straight cuts and angle marking.
- Marking pencil or marker: A sharp and reliable marking tool is necessary to make clear and visible marks on your material. Opt for a pencil or marker that won’t easily smudge or fade during the cutting process.
Marking Techniques For Various Cuts
Different cuts require different marking techniques to ensure accuracy. Here are some marking techniques to keep in mind for various types of cuts:
- Straight cuts: For straight cuts, use a ruler or tape measure to mark the desired length. Place the marking tool against the material’s edge and draw a straight line along the measured length.
- Angle cuts: When marking angles, use a combination square or protractor to determine the desired angle. Align the tool with the edge of the material and make clear marks at the starting and ending points of the cut.
- Bevel cuts: For bevel cuts, which involve tilting the miter saw blade, mark the angle as well as the bevel direction on the material. This ensures accurate positioning of the saw blade for the desired bevel cut.
- Compound cuts: Compound cuts involve both angle and bevel settings. Begin by marking the angle of the cut, then proceed to mark the bevel direction on the material. This combination of markings helps you achieve precise compound cuts.
Remember to always follow safety guidelines when handling a miter saw and be cautious when marking and measuring angles. By using the right tools and implementing accurate marking techniques, you’ll be able to make clean and precise cuts with your miter saw.
Achieving Precision Cuts
Achieve precise cuts effortlessly with a miter saw by mastering the art of cutting angles. Maximize the efficiency of your woodworking projects with these expert tips.
Aligning Workpieces For Precise Cuts
To achieve accurate and precise cuts with a miter saw, proper alignment of the workpiece is crucial. Here are some tips to ensure your workpieces are aligned correctly:
- Begin by marking your desired cutting line on the workpiece. Use a pencil or a marking knife to make a clear and visible line.
- Position the workpiece securely on the miter saw’s table. Make sure it is flush against the fence, which acts as a guide during the cutting process.
- Align the marked cutting line with the saw blade. Check from various angles to ensure perfect alignment. Adjust and reposition the workpiece if necessary.
- Take extra caution when cutting small or narrow pieces. Use auxiliary fences or sleds to provide additional support and stability, preventing any potential movement during the cut.
- Prioritize safety by using push sticks or clamps to keep your hands at a safe distance from the blade while maintaining the workpiece’s alignment.
Utilizing Clamps And Jigs For Stability
Stability is key in achieving precision cuts with a miter saw. The use of clamps and jigs can greatly enhance stability during the cutting process. Consider these points to ensure stability:
- Utilize adjustable clamps to secure your workpiece firmly to the miter saw table. This ensures the workpiece does not move or shift while cutting, providing precise and accurate results.
- When working with longer or wider pieces, consider employing additional supports such as workbench-mounted stops or custom-made jigs to maintain stability and eliminate any potential warping or bowing of the workpiece.
- Use hold-down clamps or toggle clamps to secure small or irregularly shaped workpieces. This prevents any accidental movement and minimizes the risk of injury.
- Always double-check the stability of your clamped workpiece before making any cuts. Ensure it is tightly secured and won’t budge during the cutting process.
Cutting Techniques For Different Angles
Different angles require specific cutting techniques to achieve precise results. Here are some techniques to consider for various angle cuts:
- For miter cuts, which are angled cuts across the width of the workpiece, adjust the miter saw’s table or bevel scale accordingly. Use the marked angle as a guide and align the workpiece with the fence before making the cut.
- When making bevel cuts, which are angled cuts across the thickness of the workpiece, adjust the bevel angle on the miter saw. Remember to align the marked cut line with the blade and securely position the workpiece against the fence.
- Compound cuts involve both miter and bevel angles simultaneously. Begin by adjusting the miter angle, then set the bevel angle accordingly. Align the workpiece with the fence and the marked cut line with the blade, ensuring stability throughout the cut.
- It is essential to practice and test cuts on scrap pieces of similar material to familiarize yourself with the cutting techniques required for different angles. This will help you achieve precise and accurate cuts when working on your actual project.
These alignment techniques, along with the use of clamps, jigs, and appropriate cutting techniques, will greatly contribute to achieving precise cuts with your miter saw. Take your time to ensure everything is properly aligned and secure before making any cuts, and always prioritize safety throughout the process.
Happy cutting!

Setting And Fine-Tuning Miter Saw Angles
Discover the art of setting and fine-tuning miter saw angles with this comprehensive guide. Learn how to effectively use a miter saw to cut angles with precision and accuracy. Master the technique and elevate your woodworking projects to new heights.
Calibrating The Miter Saw’S Angle Settings:
To ensure accurate angle cuts, start by calibrating your miter saw’s angle settings. Here are the steps to follow:
- Begin by loosening the bevel lock lever, allowing the bevel angle adjustment to move freely.
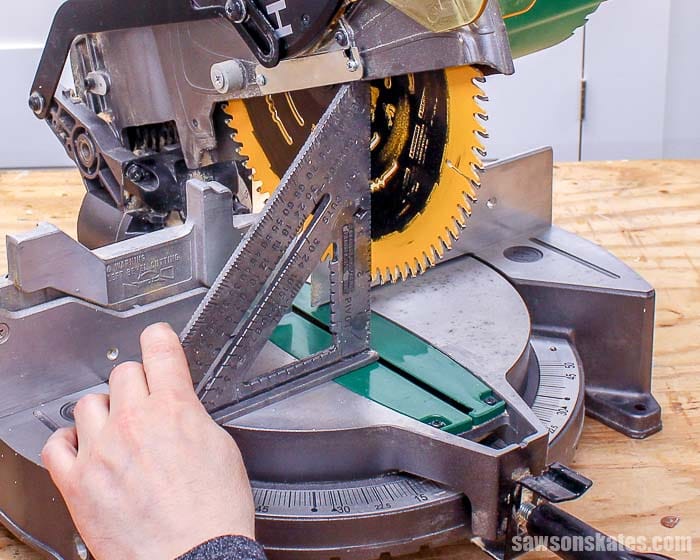
- Use a combination square to confirm the accuracy of the miter scale and bevel angle.
- Adjust the bevel angle adjustment until it aligns perfectly with the combination square’s edge.
- Tighten the bevel lock lever, securing the bevel angle in place.
By calibrating the miter saw’s angle settings, you lay the foundation for precise and accurate angle cuts.
Fine-Tuning Angles For Improved Accuracy:
While the initial calibration ensures a good starting point, fine-tuning the angles on your miter saw can further enhance accuracy. Follow these steps:
- Use a protractor or angle finder to measure the desired angle accurately.
- Adjust the bevel angle adjustment or miter gauge to match the desired angle.
- Make small adjustments and verify the angle accuracy with the protractor or angle finder.
- Repeat the process until the desired angle is achieved.
Fine-tuning the angles on your miter saw helps you achieve the exact cuts needed for your project, ensuring precision and accuracy.
Confirming Accuracy With Test Cuts:
Before cutting your actual workpiece, conducting test cuts is crucial to confirm the accuracy of your miter saw’s angle settings. Here’s how to do it:
- Select a scrap piece of wood of the same size and material as your workpiece.
- Set the miter saw to the desired angle and securely clamp down the scrap piece.
- Make the cut and inspect the resulting angle.
- Use a combination square or angle finder to verify the accuracy of the cut.
- Adjust the angle settings as needed and repeat the test cuts until the desired accuracy is achieved.
Conducting test cuts allows you to make any necessary adjustments and ensure that your miter saw is correctly set for accurate angle cuts throughout your project.
Mitigating Common Issues And Errors
Learn how to effectively use a miter saw to cut angles without common issues and errors. Discover expert tips and techniques for accurate and precise angle cuts in this informative guide.
Addressing Common Issues With Miter Saw Angles:
Using a miter saw to cut angles is a skill that takes practice and patience. However, even experienced users can sometimes run into common issues and errors that can affect the accuracy of their cuts. Here, we will address some of these issues and provide practical solutions to help you mitigate them:
- Misaligned saw blade: If your miter saw blade is not aligned correctly, it can lead to inaccurate cuts. To fix this, start by checking the blade’s alignment using a reliable angle gauge. If it’s misaligned, refer to your saw’s manual for instructions on how to adjust it.
- Inconsistent bevel angles: When cutting bevel angles, it’s crucial to ensure consistency. Inconsistent bevel angles can result in joints that don’t fit properly. To avoid this, use a digital angle finder to measure the bevel angle accurately before making any cuts. Adjust the bevel scale on your miter saw accordingly if needed.
- Uneven cut length: Sometimes, you may notice that one side of your angled cuts is longer than the other, leading to uneven joints. This issue can be caused by not properly aligning the workpiece or pushing it against the miter saw fence unevenly. Take extra care while positioning your workpiece and ensure it is firmly pressed against the fence throughout the cut to achieve even lengths.
Troubleshooting Inaccurate Cuts:
Getting precise cuts is crucial for the success of your woodworking projects. If you find that your miter saw is consistently producing inaccurate cuts, here are a few troubleshooting tips to help you:
- Blade selection: Start by ensuring that you are using the right type of blade for the material you are cutting. Different blades are designed to cut specific materials effectively, so using the correct one can greatly improve accuracy.
- Blade sharpness: A dull blade can cause tear-out and imprecise cuts. Regularly check the sharpness of your miter saw blade and replace it if necessary. A sharp blade will provide cleaner and more accurate cuts.
- Secure workpiece: Make sure your workpiece is securely clamped or held in place before making any cuts. If the workpiece moves or shifts during the cut, it can affect the accuracy of your angles. Consider using clamps or fixtures to hold the workpiece firmly in place.
Fixing Misalignment Problems:
Even with proper setup, misalignment issues can occur with miter saw angles. Here are some steps you can take to fix misalignment problems:
- Check the miter gauge and bevel scales: If you suspect your miter gauge or bevel scales are not accurate, it’s essential to calibrate them. Refer to your miter saw’s manual for instructions on adjusting and recalibrating these components.
- Aligning the cutting line: Always align the cutting line with the appropriate marking on your saw’s fence. This will help you ensure that the angle is set correctly and improve the accuracy of your cuts.
- Test cuts: Before making precise cuts on your actual workpiece, do a few test cuts on scrap material. This will allow you to fine-tune your angle settings and make any necessary adjustments without wasting valuable materials.
By following these troubleshooting tips and taking the time to address common issues, you can enhance the accuracy of your miter saw angle cuts, resulting in more precise and professional-looking woodworking projects.
Enhancing Accuracy With Accessories
Achieve precise angles with your miter saw by using the right accessories. Enhance accuracy and make clean cuts effortlessly for your woodworking projects.
To make precise and accurate cuts with a miter saw, there are various accessories available that can greatly enhance the overall performance. These accessories not only improve accuracy but also provide additional safety measures. In this section, we will explore some of the essential accessories that can take your woodworking skills to the next level.
Using Laser Guides For Improved Accuracy
- Laser guides: Laser guides are an incredible tool to achieve perfect cuts. They project a laser beam onto the material, showing the exact path the blade will follow. This helps you line up your cut with precision and avoid any errors. Laser guides are especially useful when cutting angles, as they eliminate any guesswork and ensure absolute accuracy.
- Adjustable laser guides: If you frequently work with various angles, an adjustable laser guide can come in handy. These guides allow you to control the laser positioning, making it adaptable to different cutting degrees. With an adjustable laser guide, you can easily set up and cut intricate angles flawlessly.
- Dual laser guides: For those seeking the utmost accuracy, dual laser guides are a game-changer. These advanced accessories project two lasers on either side of the blade, allowing you to see the exact width of the cut. Dual laser guides are particularly useful when working with wider materials, as they help you align the blade precisely.
Enhancing Precision With Miter Sleds And Fences
- Miter sleds: Miter sleds are essential accessories that offer exceptional accuracy when cutting angles. These devices provide a stable and secure platform for your workpiece, ensuring perfect alignment and preventing any movement during the cut. Miter sleds are particularly useful for cutting long or heavy materials, as they offer enhanced safety and stability.
- Miter fences: A miter fence is another valuable accessory that helps improve precision and repeatability. These fences act as guides, ensuring consistent and accurate cuts by aligning the workpiece at the desired angle. By using a miter fence, you can achieve straight and clean cuts every time, saving you precious time and reducing the risk of errors.
- Clamping systems: When working with delicate or small pieces of wood, using a clamping system alongside your miter saw can significantly enhance accuracy. These systems secure the workpiece firmly in place, preventing any movement during the cutting process. By eliminating unwanted shifting, clamping systems ensure precise and repeatable cuts.
By utilizing these accessories, you can maximize the accuracy and precision of your miter saw cuts. Laser guides provide clear and visible cutting paths, while miter sleds, fences, and clamping systems offer stability and consistency. Incorporating these accessories into your workflow will not only enhance your woodworking skills but also ensure professional-grade results in every project.

Cleaning And Lubricating
Learn how to effectively clean and lubricate your miter saw to improve its performance and enhance the accuracy of angle cuts. Follow these simple steps to maintain your saw for long-lasting use and precision cutting.
Importance Of Regular Cleaning And Lubrication
Regular cleaning and lubrication of your miter saw is essential for its optimal performance and longevity. Neglecting this important maintenance task can lead to decreased cutting accuracy, reduced blade lifespan, and even potential safety hazards. By keeping your miter saw clean and properly lubricated, you can ensure smooth and precise angle cuts for any woodworking project.
Recommended Cleaning Techniques
To maintain your miter saw’s cleanliness, follow these recommended techniques:
- Start by unplugging the miter saw to eliminate any risk of accidental activation.
- Use a soft brush or compressed air to remove dust, wood shavings, and debris from the blade guard, blade housing, and surrounding areas.
- A damp cloth can be used to wipe down the saw’s surface, ensuring that no residue is left behind.
- Pay special attention to the miter saw’s throat plate and fence, as these areas often accumulate debris that can affect the accuracy of your cuts.
- For stubborn residue, a mild detergent can be used to clean the surfaces, followed by a thorough rinse and drying.
Remember to always refer to the manufacturer’s instructions for specific cleaning recommendations tailored to your miter saw model.
Lubrication Points And Proper Lubricants
Proper lubrication ensures smooth motion and reduces friction in critical parts of your miter saw. Here are some key lubrication points and the proper lubricants to use:
- Blade pivot point: Apply a few drops of a high-quality lubricant, such as lithium grease or machine oil, to the blade pivot point. This lubrication will allow the blade to swing freely, providing accurate angled cuts.
- Miter gauge: Regularly lubricate the miter gauge’s pivot point and slide surfaces with a silicone-based lubricant. This will ensure smooth and precise movement as you adjust the angle for your cuts.
- Sliding rails: Lubricate the sliding rails with a specialized sliding compound or a silicone-based lubricant. This will reduce friction and enable effortless sliding of the saw head during operation.
- Fence rails: Apply a thin coat of lubricant to the fence rails to promote smooth operation and prevent any sticking or binding.
Remember to wipe away any excess lubricant after application to prevent accumulation of dust and debris.
By following the recommended cleaning techniques and ensuring proper lubrication of your miter saw’s essential parts, you can enhance its performance, accuracy, and overall lifespan. Regular maintenance is key to maximizing the efficiency and safety of your woodworking projects.
Blade Alignment And Replacement
Learn how to properly align and replace the blade on your miter saw to ensure precise and accurate cuts, especially when working with angles. Avoid common mistakes and follow these steps for optimal blade performance.
Checking Blade Alignment For Accurate Cuts:
- Examine the blade alignment to ensure precise and accurate cuts.
- Start by unplugging the miter saw and inspecting the blade’s position relative to the miter gauge slots.
- Look for any inconsistencies or misalignments that could affect your cuts.
- Check if the blade is seated properly and aligned parallel to the miter gauge slots.
- Verify that the teeth of the blade are perpendicular to the saw’s base.
Adjusting Blade Alignment If Necessary:
- If you notice any misalignment, you can make adjustments to improve accuracy.
- Refer to your miter saw’s manual for specific instructions on adjusting the blade alignment.
- Usually, you will need to loosen the screws on the saw’s motor housing that hold the blade assembly in place.
- Gently nudge the blade into the desired alignment, ensuring it remains parallel to the miter gauge slots.
- Tighten the screws back to secure the blade assembly in the adjusted position.
- Conduct a final inspection to ensure the blade alignment is correct before using the miter saw.
Replacing The Miter Saw Blade:
- Regular blade replacement is vital to maintain optimal cutting performance.
- Start by unplugging the miter saw and retracting the blade guard.
- Locate the arbor bolt at the center of the blade and use a wrench to loosen it.
- Carefully remove the old blade from the arbor, ensuring not to touch the sharp teeth.
- Clean the arbor, removing any debris or buildup that may hinder the installation of the new blade.
- Place the new blade onto the arbor, aligning the mounting hole with the arbor bolt.
- Tighten the arbor bolt securely using a wrench, making certain the new blade is firmly in place.
- Double-check that the blade is properly aligned and the blade guard is functioning correctly.
By following these steps, you can ensure accurate blade alignment and smoothly replace the miter saw blade. Always prioritize safety precautions and refer to your miter saw’s manual for model-specific instructions. Happy cutting!
Storage And Safety
Looking to cut angles with a miter saw? Learn how to use this versatile tool while ensuring storage and safety. Follow these guidelines to get precise and accurate angle cuts for your projects.
Proper Storage To Prevent Damage
- Store your miter saw in a clean and dry location to avoid exposure to moisture and debris.
- Keep the saw in a cabinet or on a shelf to protect it from accidental damage.
- Use a blade guard or cover to prevent the blade from getting damaged or causing injuries.
- Securely fasten the power cord to prevent it from getting tangled or damaged.
- Store the miter saw in a position that keeps it stable and prevents it from tipping over.
Safety Precautions For Miter Saw Usage
- Wear appropriate personal protective equipment (PPE) such as safety glasses, ear protection, and a dust mask.
- Ensure that the miter saw is positioned on a stable surface before use.
- Measure and mark your material accurately to ensure precise cuts and prevent any accidents.
- Keep your hands away from the blade and use clamps or other tools to secure the material in place.
- Hold the material firmly and avoid reaching over the blade while it is in motion.
Maintenance Schedule And Checklist
- Regularly clean the miter saw to remove dust, debris, and any other build-up that can affect its performance.
- Check the blade for any signs of damage, such as chips or dullness, and replace it if necessary.
- Inspect the power cord for any fraying or exposed wires, and repair or replace it as needed.
- Lubricate the moving parts of the saw, such as the pivot points and the slide mechanism, to ensure smooth operation.
- Test the safety features of the miter saw, such as the blade guard and the emergency stop button, to make sure they are functioning properly.
Remember, proper storage, safety precautions, and regular maintenance are crucial for using a miter saw safely and efficiently. By following these guidelines, you can protect your saw from damage, avoid accidents, and prolong its lifespan. Stay safe and enjoy making accurate angled cuts with your miter saw!
Frequently Asked Questions For How To Use A Miter Saw To Cut Angles
How Do You Cut An Angle On A Miter Saw?
To cut an angle on a miter saw, follow these steps:
1. Set the miter saw to the desired angle.
2. Secure the material to be cut firmly against the back fence of the miter saw.
3. Align the marked cutting line with the saw blade.
4. Start the saw and carefully lower the blade onto the material to make the cut.
Can A Mitre Saw Cut Any Angle?
Yes, a mitre saw can cut any angle. It is versatile and can be adjusted to cut various angles.
How Do You Cut A 45 Degree Angle Trim?
To cut a 45-degree angle trim, follow these steps:
1. Measure and mark the desired angle on the trim.
2. Set your miter saw to a 45-degree angle.
3. Place the trim against the fence of the miter saw.
4. Align the marked line with the saw blade and cut the trim.
5. Double-check the angle and trim for accuracy before installing.
How Do You Measure And Cut Angles For Trim?
To measure and cut angles for trim:
1. Use a protractor or an angle finder tool.
2. Measure the angle of the corner where the trim will be installed.
3. Transfer the angle measurement to the trim using a bevel or miter gauge.
4. Cut the trim at the marked angle using a miter saw or a coping saw, ensuring a precise fit.
Conclusion
Mastering the use of a miter saw for cutting angles can greatly enhance your woodworking projects. With practice, patience, and precision, you can achieve precise and accurate cuts that fit seamlessly together. Remember to carefully measure and mark your workpiece, ensuring that you set the correct angle on your miter saw.
Allow the saw to do the work for you by gently guiding the blade through the material. Regular maintenance and blade changes are crucial for optimal performance. Whether you’re a professional carpenter or a DIY enthusiast, a miter saw is an essential tool to have in your workshop.
By following the steps outlined in this guide and incorporating safety measures, you’ll be mastering the art of cutting angles in no time. So go ahead and confidently tackle those tricky angled cuts and watch your woodworking skills soar.