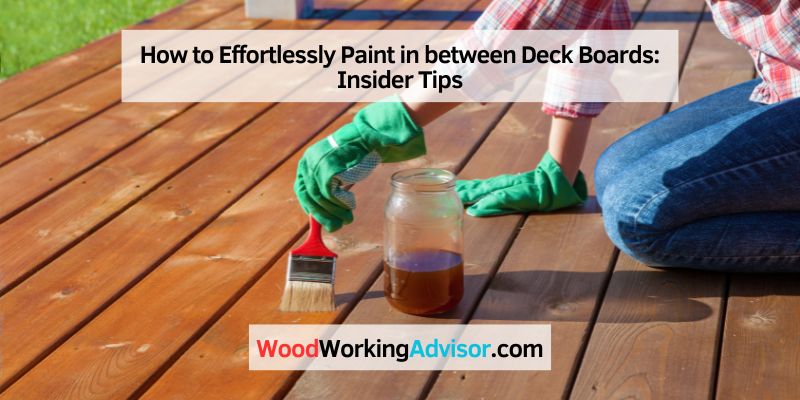
How to Paint in Between Deck Boards Without a Mess
To paint in between deck boards, follow these steps: Clean the surface thoroughly, use a narrow brush to apply paint in the gaps, and wipe off any excess. Now, let’s dive into a detailed introduction about painting in between deck boards.
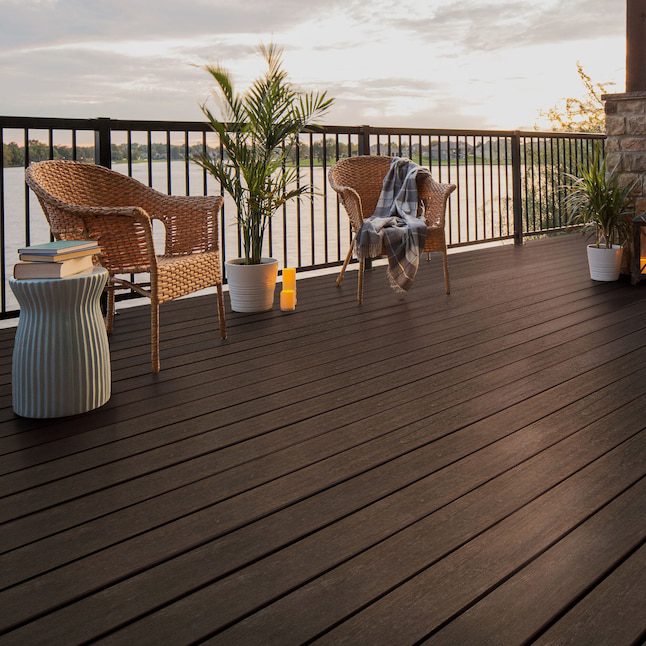
The deck is an essential part of your outdoor space, providing a comfortable area to relax and enjoy the fresh air. However, over time, the paint on your deck can start to fade or peel, leaving the wood vulnerable to the elements.
To maintain the beauty and longevity of your deck, it’s important to repaint it periodically. While painting the top surface is relatively straightforward, the real challenge lies in painting in between the deck boards. In this guide, we will walk you through the step-by-step process of painting in between deck boards, ensuring that your deck stays protected and looks its best.
Choosing The Right Tools
To paint in between deck boards, it’s crucial to select the right tools. A small, angled paintbrush can help to get into the tight spaces, while a paint pad or roller can cover larger areas quickly and evenly. Additionally, a good quality exterior paint will ensure a long-lasting finish.
Selecting The Best Paintbrush
Choosing the right paintbrush is crucial to achieving a smooth and even finish between deck boards. The quality and type of brush you use can make a significant difference in the final outcome of your project. Here are a few tips to keep in mind while selecting the best paintbrush for this task:
- Opt for a brush with synthetic bristles, preferably nylon or polyester, as they are more durable and handle outdoor conditions better than natural bristle brushes.
- Consider the size of the brush head. A brush that is too wide may not fit easily between narrow deck boards, while one that is too small could slow down your progress. Aim for a brush size that allows you to paint efficiently and effectively.
- Look for a brush with a comfortable handle grip. This will prevent hand fatigue during extended painting sessions and provide better control over your strokes.
- Choose a brush with a tapered or angled tip. This shape allows for better access between deck boards and helps you reach tight corners and edges with ease.
Picking The Right Applicator
In addition to a paintbrush, using the right applicator can simplify and enhance your deck board painting process. Different tools serve different purposes, so it’s crucial to select the right one that suits your needs. Here are a few options to consider:
- Roller: A roller is an excellent choice for larger deck surfaces. It provides quick and efficient coverage while minimizing the need for multiple strokes. However, using a roller may not be suitable for reaching between narrow deck boards.
- Sponge Brush: A sponge brush is a versatile tool that can work well for getting paint into tight spaces. Its flat, sponge-like head absorbs paint easily and allows for precise application between the deck boards. Sponge brushes are also budget-friendly and easy to clean.
- Pad Applicator: If you prefer a tool that combines the benefits of a brush and a roller, a pad applicator may be the perfect choice. Its flat, rectangular shape with a handle is designed to cover large areas quickly while still providing access to narrow gaps between deck boards.
Preparation Is Key
When it comes to painting in between deck boards, preparation is essential for achieving a clean and professional-looking finish. Taking the time to properly prepare your deck before painting will not only ensure better adhesion of the paint but also extend the longevity of your deck’s appearance. In this article, we will discuss the crucial steps involved in preparing your deck for painting, including cleaning the deck thoroughly and using tape for clean lines.
Cleaning The Deck Thoroughly
Before you start painting, it is crucial to clean the deck thoroughly. Cleaning removes dirt, algae, mildew, and any loose paint chips, ensuring a smooth surface for the paint to adhere to. Here’s how you can clean your deck:
- Clear the deck of any objects, including furniture, planters, or debris.
- Sweep the deck to remove loose dirt and leaves.
- Use a deck cleaner or mild detergent mixed with water to scrub off stubborn dirt and stains. Ensure you follow the manufacturer’s instructions for the cleaner.
- Rinse the deck thoroughly with a garden hose or pressure washer to remove all traces of cleaner and dirt.
- Allow the deck to dry completely before proceeding to the next step.
Using Tape For Clean Lines
Once your deck is clean and dry, it’s time to tape off the areas where you want to avoid painting, such as between the deck boards. Using tape not only provides clean lines but also prevents paint from seeping into unwanted areas. Follow these steps for tape application:
- Carefully place painter’s tape along the edges of the deck boards, ensuring the tape adheres firmly without any gaps.
- Press down firmly on the tape to ensure a tight seal, preventing paint bleeding.
- For added protection, you can also use a putty knife or a thin object to press the tape firmly into the gaps between the boards.
- Double-check that the tape is securely in place before starting to paint.
By following these simple steps of cleaning the deck thoroughly and using tape to create clean lines, you will be well on your way to achieving a professional-looking finish when painting in between deck boards. Remember, preparation is key to a successful painting project!
Techniques For Painting
Painting in between deck boards can be a challenging task, but with the right techniques, you can achieve a professional-looking finish. Below are some effective methods for painting in between deck boards:
Utilizing A Flexi-edge Tool
When painting in tight spaces between deck boards, a flexi-edge tool can be a game-changer. This handy tool features a flexible pad or brush that can reach between the boards, ensuring even coverage without the need for excessive bending or stretching.
Mastering The ‘Cutting In’ Method
The ‘cutting in’ method involves using a paintbrush to carefully outline the edges before filling in the larger areas. This technique allows for precision painting in between the deck boards, ensuring that no spots are missed and the paint reaches all the way to the edges.
Choosing The Perfect Paint
When it comes to painting the spaces in between deck boards, selecting the right paint is essential. Not only does it provide visual appeal, but it also protects the wood from the elements, preventing rot and decay. In this section, we will explore how to choose the perfect paint for your deck, considering the type of paint and the color and finish options available.
Selecting The Best Deck Paint Type
When selecting the type of paint for your deck, it’s important to choose one that is specifically designed for outdoor use. Here are a few options to consider:
- Acrylic Paint: Acrylic paint offers excellent durability and a quick-drying formula, making it a popular choice for decks. It provides good adhesion to the wood surface and is resistant to fading and cracking.
- Oil-based Paint: Oil-based paint is known for its exceptional waterproofing properties, making it ideal for decks exposed to heavy rainfall. It penetrates deep into the wood, providing long-lasting protection.
- Water-based Stain: If you prefer a more natural look, water-based stains are a great option. They enhance the natural beauty of the wood while still providing a protective barrier.
Considering Color And Finish
When it comes to color and finish options, deck paints offer a wide range of choices to suit your personal taste and the overall aesthetic of your outdoor space. Here are a few factors to consider:
- Color Selection: Choose a color that complements the existing color scheme of your home and blends well with the surroundings. Earth tones, such as browns and grays, are popular choices for deck paints as they create a harmonious outdoor environment.
- Finish Type: The finish of the paint determines how it will appear on your deck. Some common options include:
| Finish Type | Description |
|---|---|
| Gloss | Gives a shiny, reflective appearance; easy to clean but may show imperfections |
| Semi-Gloss | Offers some shine for a polished look; less reflective than gloss |
| Satin | Provides a soft, subtle sheen; great for hiding imperfections |
| Matte | Gives a flat, non-reflective finish; ideal for a more natural look |
Consider the level of sheen and the maintenance requirements when choosing the finish type for your deck paint.
Maintenance And Aftercare
Painting in between deck boards is an essential part of maintenance and aftercare. It helps protect the wood from moisture and prolongs the life of your deck. Follow these simple steps to ensure a smooth and even finish for a beautifully maintained deck.
Once you have successfully painted in between the deck boards, it’s important to establish a solid maintenance and aftercare routine to ensure the longevity of your fresh paint job. Routine deck inspections and proper care are crucial to preserving the beauty and protection provided by the paint. In this section, we will discuss two important aspects: routine deck inspections and caring for your painted deck.
Routine Deck Inspections
Regular deck inspections are vital to identify any issues early on and address them promptly. By incorporating this simple practice, you can prevent small problems from snowballing into costly repairs. Here are some key points to consider during your routine deck inspections:
- Check for signs of wear: Inspect the entire deck, paying special attention to high-traffic areas and vulnerable spots, such as stairs, railings, and areas close to the ground. Look for any signs of peeling, cracking, or chipping in the paint.
- Address water damage: Examine the deck for water damage, as it can weaken the wood and compromise the paint’s integrity. Pay attention to areas where water tends to accumulate, such as near downspouts or underpotted plants.
- Inspect for pests: Keep an eye out for any signs of pest infestation, such as termites or carpenter ants. These critters can cause structural damage to your deck, affecting the painted surface as well.
- Look for loose or damaged boards: Check for loose or damaged boards and make necessary repairs. Secure loose boards and replace damaged ones to maintain the structural stability of your deck.
Remember, early detection and preventative measures can save you time, money, and a headache down the road.
Caring For Your Painted Deck
Proper care is crucial to ensure the longevity and vibrancy of your painted deck. By following these aftercare tips, you can keep your deck looking fresh and well-maintained for years to come:
- Clean regularly: Regularly cleaning your deck will help remove dirt, debris, and potential mold or mildew that can degrade the paint. Sweep away debris and use a deck cleaner suitable for your painted surface.
- Avoid harsh chemicals: When cleaning your deck, avoid using harsh chemicals that can damage the paint. Opt for gentle cleaners and follow the manufacturer’s instructions to maintain the paint’s integrity.
- Protect against direct sunlight: Over time, prolonged exposure to direct sunlight can cause the paint to fade. Consider applying a clear sealant or UV protectant to shield your deck and the painted surface from harmful UV rays.
- Address stains promptly: If you notice any stains on your painted deck, address them promptly. Use a mild cleaner suitable for your painted surface and gently scrub the affected area to prevent the stain from setting in.
By incorporating routine deck inspections and proper aftercare, you can extend the life of your painted deck and enjoy its beauty for years to come. Remember, a well-maintained deck is not only visually appealing but also contributes to the overall safety and value of your home.
Frequently Asked Questions Of How To Paint In Between Deck Boards
How Do You Get In Between Boards When Staining A Deck?
To get in between boards when staining a deck, use a brush with bristles that can reach into the gaps. Apply the stain in a back-and-forth motion to ensure even coverage. Take your time and be careful not to spill or splash on the surrounding areas.
What Tool Is Used To Stain Between Deck Boards?
A stain pad or brush is used to stain between deck boards for a clean and even application. Staining between deck boards helps protect and enhance the appearance of the deck. Regular maintenance is important to prolong the life of the deck and keep it looking great.
What Is The Best Brush For Staining Between Deck Boards?
A narrow bristle brush is the best choice for staining between deck boards. Its fine bristles allow for precision and reach into tight spaces easily. Make sure to select a high-quality brush for even application and professional results.
How Do You Scrape Paint Between Deck Boards?
To scrape paint between deck boards, use a scraper or putty knife to carefully remove the paint. Start at one end and work your way across the boards, taking care not to damage the wood.
Conclusion
Learning how to paint in between deck boards can make a significant difference in the appearance and longevity of your deck. With the right tools and techniques, you can achieve a professional finish that enhances the beauty of your outdoor space.
By following the tips outlined in this blog post, you’ll be able to tackle this project with confidence and achieve impressive results.