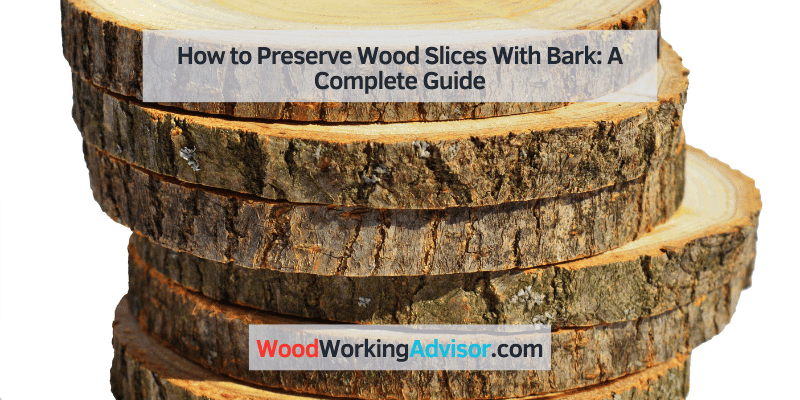
How to Preserve Wood Slices With Bark (Without the Bark Falling Off)
Wood slices with bark stay intact only if you stabilize the bark with a green-wood soak like Pentacryl before any topcoat goes on — skip that step and the bark shrinks faster than the wood underneath it and cracks loose within a year. This guide covers stabilizing the bark, treating for pests first, and choosing the right finish for wood slices, rounds, and cookies with the bark left on. If your slice does not have bark to worry about, see our general guide to preserving wood slices for crafts.
This post contains affiliate links. As an Amazon Associate, Woodworking Advisor earns from qualifying purchases at no extra cost to you.
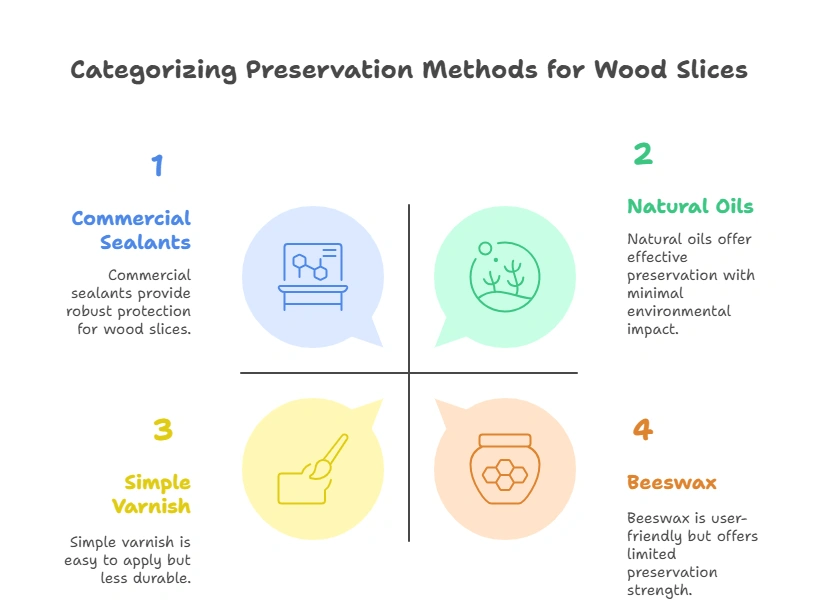
Stabilize the Bark Before You Preserve Wood Slices
Best Bark-Stabilizer Pick
Pentacryl Green Wood Stabilizer, 32oz
Ready-to-use soak or brush-on stabilizer for freshly cut, green wood slices — around $34.95 for the 32oz size.
- Best for: green, freshly cut slices and cookies you plan to finish with bark on
- Why we picked it: the manufacturer’s own 6-year test showed intact bark on treated wood vs. cracked bark on untreated wood
- Main drawback: won’t re-bond bark that has already fully separated — that needs glue, not stabilizer
Compare more bark-preservation options
 Option 1 Pentacryl 1 Gallon
|
 Option 2 Starbond Thin CA Glue, 2oz
|
 Option 3 TotalBoat Table Top Epoxy, 1 Gallon
|
As an Amazon Associate we earn from qualifying purchases.
Bark falls off wood slices because it dries and shrinks at a different rate than the wood underneath it, not because the finish itself failed. Stabilize the bark before any topcoat goes on, or the finish will just seal in a problem that is already happening underneath it.
- Cut during the dormant season: Wood harvested in late fall or winter, when sap flow has stopped, holds its bark far better than spring-cut wood.
- Soak green wood in Pentacryl: This ready-to-use green-wood stabilizer slows and evens out moisture loss so the wood and bark shrink together instead of separating.
- Run thin CA glue or diluted PVA into loose seams: For a slice that’s already dry and the bark is lifting at the edges, thin cyanoacrylate (CA) glue or PVA glue thinned with water wicks into the gap and re-bonds it.
📊 A maple slab treated with Pentacryl before drying kept its bark fully intact after 6 years, while an untreated cottonwood cookie cracked and pulled away from its bark the same winter it was cut. — Source: Preservation Solutions, 2022
Below are the products that cover both ends of this: a stabilizer for a slice that’s still green, and a fast-drying adhesive for bark that’s already started to lift.
Treat for Pests Before You Seal the Bark
Bark-on slices can carry bark beetle larvae or other wood-boring insects, and sealing over an active infestation just traps them inside the finished piece. Check for small round exit holes or fine sawdust-like frass under the bark before you finish anything.
- Borax wash: Wipe the wood down with a mild solution of about 1/4 cup laundry borax per gallon of warm water, let it soak in, and air-dry fully before finishing.
- Freezing: Small slices can go in a chest freezer for at least a week to kill larvae and eggs.
- Plastic-sheet solarizing: For larger slices, sealing the piece under clear plastic in full sun for a few months excludes new beetles and cooks out existing ones.
According to the UC Statewide IPM Program, bark beetles are attracted to stressed, drought-weakened, or recently cut wood — which is exactly the condition most wood slices are in when you cut or buy them. If the bark is too pest-damaged to save, it may be simpler to remove the bark from the wood entirely rather than finish over it.
6 Steps to Preserve Wood Slices With Bark
Once the bark is stabilized and pest-checked, the actual finishing follows the same basic process every time. Here’s the step-by-step method, covered in more depth — including drying time and moisture targets — in our general guide to preserving wood slices.
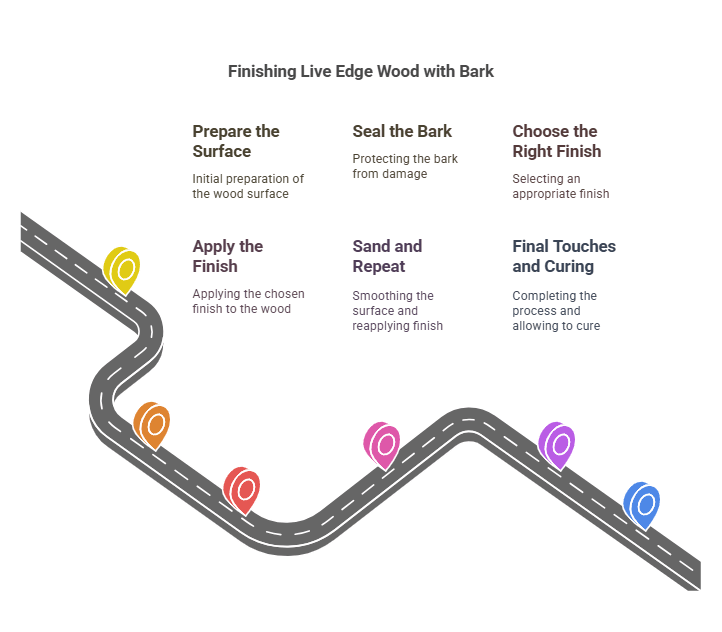
Step 1: Prepare the surface
Start by inspecting the wood slice and bark for any loose or damaged areas. Use a stiff brush to remove any dirt, dust, or debris from the surface. If necessary, lightly sand the wood to create a smooth and even surface.
Step 2: Seal the bark
Apply a clear wood sealer, diluted PVA, or thin CA glue to the bark using a small brush, covering the entire bark surface and any exposed edges. This is the step most guides skip — sealing the bark itself, not just the wood, is what keeps it attached long-term. Allow it to dry completely per the product’s instructions.
Step 3: Choose the right finish
Consider the desired look and level of protection when choosing a finish for a wood slice with bark. Epoxy, polyurethane, lacquer, and oil finishes all work — see the comparison table below for which one to pick based on your bark’s condition.
Step 4: Apply the finish
Using a clean brush or cloth, apply a thin, even layer of the chosen finish to the wood surface, avoiding excessive buildup or drips. Work with the grain of the wood to ensure an even application. Pay special attention to the outer edge and bark, ensuring they receive adequate coverage. Allow the first coat to dry completely.
Step 5: Sand and repeat
Once the first coat is dry, lightly sand the wood surface using fine-grit sandpaper. Remove any dust particles with a tack cloth before applying additional coats. Repeat until you reach the desired sheen and protection.
Step 6: Final touches and curing
After applying the final coat, inspect for uneven areas, touch up if needed, and let the finish cure completely per the manufacturer’s instructions. Curing typically takes a few days to a couple of weeks depending on the finish.
Polyurethane vs Epoxy for Bark Edges: Which Should You Use?
Epoxy and polyurethane solve different problems at the bark edge. Epoxy bonds and locks down bark that’s loose or cracked because it soaks into the gap and hardens rigid; polyurethane sits on top as a flexible film and won’t glue anything down.
| Finish | Bark Bonding | Best For |
|---|---|---|
| Epoxy resin | Soaks into gaps, hardens rigid | Cracked or separating bark, coasters, tabletop pours |
| Oil-based polyurethane | Surface film only, no bonding | Solid, fully intact bark |
| Thinned CA glue (spot fix) | Fast-drying, hardens instantly | Small loose spots before a full topcoat |
“Cutting during the dormant winter period means no more sugar is coursing through the sap edge, so the bark stays more firmly attached to the wood.”
Caring for Preserved Wood Slices With Bark
Caring for wood slices with bark is essential to ensure their longevity and preserve their natural beauty. Here are some maintenance tips to keep in mind:
- Regular cleaning: Use a soft, lint-free cloth or a brush to gently remove dirt or particles. Avoid harsh chemicals or abrasive cleaners that could damage the bark or the finish.
- Avoid excessive moisture: Keep the wood away from direct contact with water, and wipe up spills immediately. Use coasters or placemats to protect the surface.
- Minimize exposure to sunlight: Prolonged sunlight causes fading and discoloration. Position the piece away from direct sun or rotate it periodically.
- Control temperature and humidity: Maintain a consistent indoor environment and keep moisture levels within a suitable range.
- Avoid sharp objects and impacts: Bark is fragile — use protective pads or mats under heavy objects to prevent scratches or indentations.
- Reapply finish periodically: Inspect the surface and reapply a fresh coat as the existing finish wears.
- Get professional restoration if needed: If bark becomes loose or damaged, a skilled furniture restorer can assess and repair the piece.
FAQs
What do you put on wood slices to preserve them?
Stabilize green wood with a soak-in sealer like Pentacryl before it dries, and cut the tree during its dormant winter period when sap flow has stopped — both slow the uneven shrinkage that pulls bark loose. For a slice that’s already dry and cracking, thin CA glue worked into the bark seam re-bonds loose sections, then a clear epoxy or polyurethane topcoat seals and protects the finished piece.
How do you dry wood and keep the bark on?
Dry it slowly. Green wood should air-dry roughly one year per inch of thickness before finishing, though a Pentacryl-type stabilizer speeds this by controlling moisture loss evenly across the wood and bark. Drying too fast — near a heater, in direct sun, or in a hot car — shrinks the wood faster than the bark and pulls the two apart.
Should you treat wood slices for bugs before sealing?
Yes. Bark-on slices can carry bark beetle larvae, and sealing over an active infestation traps them inside. Wipe the wood down with a mild borax solution (about 1/4 cup per gallon of warm water) and let it air-dry, or freeze small pieces, before you apply any finish.
Is epoxy or polyurethane better for bark edges?
Epoxy is the better pick for fragile or already-separating bark because it soaks into gaps and hardens rigid, locking the bark down. Polyurethane is faster to apply and easier to touch up later, but it won’t glue down bark that’s already lifting.
How do you seal natural wood slices with bark on?
Clean and lightly sand the surface, seal the bark itself with a thin coat of clear sealer, diluted PVA, or thin CA glue, then apply your chosen topcoat (epoxy, polyurethane, lacquer, or oil) in thin, even coats — working with the grain and paying extra attention to the bark seam. Sand lightly between coats and let the final coat cure fully per the manufacturer’s instructions.
Conclusion
Preserving wood slices with bark comes down to sequence: stabilize the bark first, check for pests, then pick epoxy or polyurethane based on how loose the bark already is. Skip the stabilizing step and no topcoat will keep the bark from separating from the wood as it finishes drying.
Whether it’s a coaster, a centerpiece, or an outdoor display piece, getting the bark prep right up front is what makes the finished slice last for years instead of shedding bark within a season.
Sponsored / affiliate links. As an Amazon Associate I earn from qualifying purchases. I may earn additional commission from eligible campaigns.