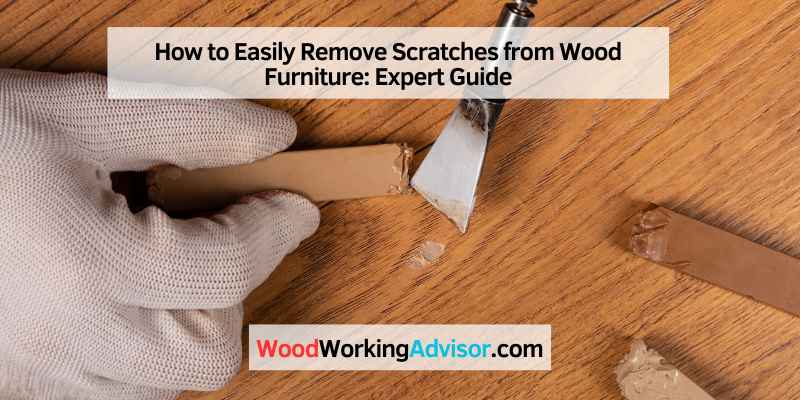
How to Remove Scratches from Wood Furniture (Deep & Minor Fix Guide)
Remove minor scratches from wood furniture by rubbing with a 1:1 mixture of cooking oil and white vinegar — but deep scratches that cut through the finish layer require wood filler, color-matched stain, and light sanding to blend. Using the wrong method on the wrong scratch type makes the repair visible permanently. This guide covers how to identify scratch depth, the best DIY and product-based fixes for each type, and how to match stain when refinishing.
For more, see our complete wood care & protection guide.
Quick Answer
For minor scratches: rub with a 1:1 mix of cooking oil and white vinegar, or buff with a walnut. For deep scratches: fill with wood filler or a wax repair stick, sand flush when dry, then apply a color-matched stain. Always work in the direction of the wood grain and test any product on a hidden area first.
Understanding Scratches On Wood Furniture
Not all wood furniture scratches are the same — and the repair method that works perfectly on one type will make another type worse. The first step is identifying scratch depth before touching the wood with any product.
Different Types of Scratches
There are three scratch types that require different approaches:
- Surface scratches (finish only): These scratch the clear coat or finish layer but do not reach the wood fibers beneath. They appear as dull lines when light hits at an angle. Oil-based methods work best here.
- Light wood scratches: These penetrate the finish and lightly abrade the wood surface but do not remove significant material. A wax repair stick or furniture marker handles these well.
- Deep scratches and gouges: These remove wood material and often show raw, lighter-colored wood at the base of the scratch. These require wood filler or wood putty, sanding, and stain-matching to repair properly.
Causes of Scratches
Common causes include: dragging objects across the surface without felt pads, pet claws, keys or jewelry dropped on the surface, children’s toys, and improper cleaning with abrasive cloths. Heat marks from hot cups and dishes look similar to surface scratches but require a different repair process — treating them like scratches will not help.

Essential Tools And Materials
Gather these materials before starting any repair. Having the wrong grit sandpaper or missing the stain matching step are the two most common causes of visible repairs.
Sanding Tools
Use the correct sandpaper grit for the job: 120–150 grit for initial sanding of deep scratches, 220 grit for final smoothing before finishing, and 0000-grade steel wool for buffing wax repairs to a seamless blend. Always sand in the direction of the wood grain — never across it. A sanding block (or a small block of wood wrapped in sandpaper) keeps pressure even and prevents finger-shaped depressions.
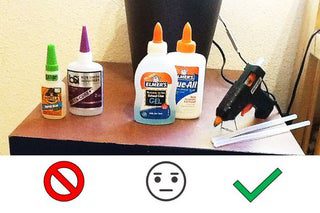
Wood Filler
Choose a wood filler that is stainable if you plan to apply stain after repair. Most latex wood fillers are stainable; most solvent-based fillers are not. Color-matched wax repair sticks (also called Fil-Stik or wax crayon repair sticks) are a faster option for scratches that do not require full sanding — press the wax into the scratch, scrape flush with a plastic razor blade, then buff with 0000 steel wool.
Stain And Sealant
Color matching is the hardest part of deep scratch repair. Bring a photo of the furniture to the paint or hardware store, or test several stain samples on the underside of the furniture before committing to a color. Howard Restore-A-Finish (available in multiple wood tones including Walnut, Cherry, and Oak) is a popular blending product that masks surface damage and dull finishes without stripping or refinishing. After staining, seal with the same type of finish that was originally on the furniture (oil, wax, polyurethane, or lacquer).
Preparing The Wood Surface
Cleaning The Furniture
Clean the scratched area before any repair. Dirt, grease, or wax buildup will prevent fillers and stains from adhering correctly. Use a damp cloth with a drop of dish soap, wipe the area clean, then let it dry completely — at least 30 minutes. For furniture with an existing wax polish, clean with mineral spirits to remove the wax layer before applying any filler or touch-up product.
Removing Old Finishes
For deep scratch repairs that require blending new stain into the old finish, lightly scuff the entire panel (not just the scratch) with 220-grit sandpaper or 0000 steel wool. This removes the sheen from the surrounding area so that the new finish blends in rather than creating a bright patch. Always test your stain color on the underside or a hidden area before applying near the visible scratch.
Repairing Minor Scratches
Minor scratches that only affect the finish layer are the easiest to fix and rarely require any sanding or products from a hardware store.
Sanding The Affected Area
For light scratches, use 220-grit sandpaper only — and sand only in the grain direction. The goal is to blend the scratch into the surrounding finish, not to remove wood material. After sanding, wipe away all dust, then apply a furniture oil or polish to restore the sheen. If the scratch is truly surface-only (in the clear coat only), try the oil-and-vinegar method first before reaching for sandpaper.
Applying The Wood Filler
For scratches that have removed some wood material, apply a small amount of color-matched wood filler with a putty knife. Press it firmly into the scratch and slightly overfill (filler shrinks as it dries). Let dry fully according to the product directions — usually 2–4 hours for latex filler. Once dry, sand flush with 220-grit sandpaper, wipe clean, and apply matching stain if needed.
Fixing Deep Scratches
Deep scratches that expose raw wood require a multi-step repair: fill, sand, stain, and seal. Skipping any step creates a visible patch that stands out from the surrounding finish.
- Clean the area: Remove all dust, wax, and grease from the scratch and surrounding surface.
- Fill the scratch: Use stainable wood filler for large gouges, or a wax repair stick for narrower deep scratches. Overfill slightly — fillers shrink when dry.
- Let dry completely: Wait the full recommended dry time before sanding. Sanding too early creates drag marks.
- Sand flush: Sand with 150 grit first if significantly overfilled, then finish with 220 grit. Always sand in the grain direction.
- Apply color-matched stain: Test on a hidden area first. Apply with a small brush or cotton swab. Wipe off excess after 1–2 minutes. Let dry completely.
- Seal: Apply one coat of the original finish type (polyurethane, oil, wax, or lacquer) over the repaired area and blend out to the edges of the panel.
Repairing With Wood Putty
Wood putty (petroleum-based) is best for repairs on finished furniture where no further finishing will be applied — it does not accept stain. Apply it directly to the scratch, shape it flush with a plastic razor, and buff with 0000 steel wool once set. It is softer and more flexible than wood filler, making it ideal for furniture that experiences slight wood movement.
Matching The Stain
Stain matching is the most difficult part of deep scratch repair on stained furniture. The best approach: bring a furniture drawer or door panel to the paint store for side-by-side comparison, or test Minwax stain samples (available in small trial sizes) on the furniture’s underside. Apply stain in thin coats — it is easier to add more than to remove excess. Feather the stain outward from the repair so there is no hard edge.

Best Products for Wood Scratch Repair
For scratches that need a quicker fix or where DIY oil-and-vinegar methods are insufficient, these are the most widely used products:
★ Best Pick — Touch-Up Markers
Minwax Blend-Fil Pencil (Wood Scratch Repair)
Wax-based repair pencil in multiple wood tones. Fills light-to-medium scratches quickly with no drying time required. Press into the scratch, wipe off excess, done.
Check price on Amazon →As an Amazon Associate we earn from qualifying purchases.
★ Best for Deep Scratches
Howard Restore-A-Finish (Wood Finish Restorer)
Penetrating finish restorer that blends surface scratches and dull areas into the surrounding finish. Available in 9 wood tones. No stripping or sanding required for surface-level repairs.
Check price on Amazon →As an Amazon Associate we earn from qualifying purchases.
Frequently Asked Questions
Does vinegar remove scratches from wood furniture?
Yes — a 1:1 mixture of white vinegar and cooking oil removes minor surface scratches from wood furniture. Dip a soft cloth in the mixture, rub it gently along the grain of the scratch, let it sit for 1–2 minutes, then wipe away excess. The oil conditions the wood fibers while the vinegar lightly cleans the finish, and together they help surface scratches appear less visible. This method works only on shallow, finish-level scratches — not on deep gouges that have removed wood material.
How do you get deep scratches out of wood furniture?
To remove deep scratches from wood furniture: clean the area, fill with stainable wood filler or a wax repair stick, let dry fully, sand flush with 220-grit sandpaper in the grain direction, apply a color-matched stain, then seal with the original finish type. For very deep gouges, use two-part wood filler for a harder, more durable repair. The key to an invisible repair is stain matching — always test the stain color on a hidden area before applying it to the scratch.
Can you use toothpaste to remove scratches from wood?
White toothpaste (not gel) can reduce the visibility of very light surface scratches on wood furniture. The mild abrasive in toothpaste polishes the finish surface gently. Apply a small amount with a soft cloth, rub in the grain direction, then wipe clean. It is best for very fine scratches in clear finish coats. Toothpaste will not remove deep scratches or color the wood — and should never be used on raw or waxed wood surfaces.
What household items remove scratches from wood furniture?
Effective household items for removing minor wood furniture scratches include: walnut (rub the nut meat directly over the scratch — the natural oils fill and darken the mark), cooking oil + white vinegar (1:1 mixture, rub with grain), white toothpaste (mild abrasive for surface polishing), shoe polish in a matching color (fills and masks the mark), and crayon wax in a matching wood tone (melt slightly and press into deeper scratches). None of these methods work on deep gouges that expose raw wood.
How do you prevent scratches on wood furniture?
Prevent scratches on wood furniture by: placing felt pads under all objects that sit on the surface, using coasters under drinks, avoiding dragging items across the surface, keeping pet nails trimmed, using placemats and tablecloths on dining furniture, and applying a fresh coat of furniture wax or oil annually to maintain the protective finish layer. A well-maintained finish coat absorbs minor contact rather than letting it reach the wood beneath.
Conclusion
Most wood furniture scratches are fixable at home with the right method for the scratch depth. Use oil-and-vinegar or a walnut for surface marks, a wax repair stick for light-to-medium scratches, and stainable wood filler plus stain matching for deep gouges. The most important rule: always work in the grain direction and test any product on a hidden area first. For severe damage across a large surface area, professional refinishing will give a better result than spot repairs.