How To Repair Splintered Wood Deck: Easy Steps for Restoring Your Outdoor Space
To repair a splintered wood deck, first, remove any loose or damaged boards. Then, sand the splintered area smooth, apply a wood filler, and sand again before staining or painting the deck.
A splintered wood deck can be both an eyesore and a safety hazard. Over time, exposure to the elements can cause wood to warp, crack, and splinter. If left untreated, these splintered areas can lead to painful injuries and further damage to the deck.
However, repairing a splintered wood deck is relatively easy and can be done with a few steps. We will guide you through the process of repairing a splintered wood deck to restore its appearance and ensure its durability for years to come.
Identifying Splintered Wood
If your wood deck has splintered, it is important to identify the areas that need repair. Look for sharp edges, raised fibers, or loose pieces of wood. Once you have identified the splintered areas, you can then proceed with the necessary repair steps to restore the deck’s appearance and safety.
If you have a wood deck, splintering is something you need to address sooner rather than later. Splintered wood not only looks unsightly but can also be a safety hazard if left untreated. In this section, we’ll go over how to identify splintered wood on your deck, so you can take the necessary steps to repair it.
Inspecting Your Deck
To begin the process of identifying splintered wood, take a thorough look at your deck. Take note of any areas where the wood appears to be damaged or worn down. Look out for raised edges, rough patches, or visible cracks. These signs often indicate splintering.
Determining Severity Of Splintering
Once you have identified potential splintered areas, you need to determine the severity of the splintering. Light splintering may only have a few raised edges or small cracks. Moderate splintering may involve larger cracks or chunks of wood starting to break off. Severe splintering will have significant chunks of wood missing and may even pose a danger to those walking on the deck.
When determining the severity, keep in mind that the longer you delay treating splintered wood, the worse it is likely to get. It’s crucial to address the issue as soon as possible, even if the splintering seems minor initially. This proactive approach will save you time, effort, and potentially costly repairs down the line.
Inspecting and determining the severity of splintering on your deck is an important first step in the repair process. Once you have a clear understanding of the condition of your deck, you can move forward with the necessary repairs to restore its beauty and ensure its safety.
Preparing Your Deck For Repair
Before diving into the process of repairing a splintered wood deck, it is essential to prepare the deck for the repair. Proper preparation ensures that the repair work is effective and long-lasting. Here are a few steps you should follow to prepare your deck:
Clearing The Deck
Start by clearing your deck of any furniture, plants, or other decorative items. A clutter-free deck will provide you with ample space to work and prevent anything from getting in your way during the repair process. Additionally, be sure to sweep away any dirt, leaves, or debris on the deck surface. This will give you a clean and clear surface to work on.
Removing Loose Splinters
Next, you’ll want to remove any loose or protruding splinters on your deck. Splinters can be hazardous and cause further damage if left unattended. To remove loose splinters, wear protective gloves and use a putty knife to gently scrape away the splinters. Take care not to damage the surrounding wood, as you want to preserve as much of the existing deck as possible.
If you have larger areas of splintered wood, you may need to use a chisel or pry bar to carefully lift and remove the damaged portions. Be cautious when using these tools to avoid any injury.
After removing the loose splinters, you can sand the surface of the deck to smooth out any rough spots. A coarse-grit sandpaper can be used initially, followed by a finer-grit sandpaper for a smoother finish. Sanding the deck will help create an even surface for the subsequent repair work and ensure a seamless final result.
Remember: When repairing a splintered wood deck, always prioritize safety. Wear protective gear such as safety goggles, gloves, and a dust mask to protect yourself from potential hazards. Take your time in preparing your deck for repair to ensure a successful outcome.
Repairing Splintered Wood
Repairing splintered wood on a deck is essential for maintaining its integrity. With the right tools and techniques, you can easily fix these unsightly and hazardous splinters, ensuring a safe and picturesque outdoor space.
If your wood deck has become splintered over time, don’t worry. With a few simple steps, you can repair the damage and bring your deck back to its former glory. In this section, we will guide you through the process of repairing splintered wood on your deck. From sanding the deck to filling cracks and holes, and finally applying wood stain or sealer, we’ve got you covered.
Sanding The Deck
Sanding the deck is an essential first step in repairing splintered wood. Before you start sanding, make sure to clear the deck of any furniture or decorations.
– Use a power sander or sandpaper to smooth out the rough areas on the deck surface.
– Start with a coarse grit sandpaper and then gradually move to a finer grit for a smoother finish.
– Make sure to sand in the direction of the wood grain to avoid any further damage.
– Pay extra attention to the splintered areas, sanding them down until they are smooth to the touch.
– Once you’re done sanding, use a broom or a leaf blower to remove any dust or debris from the deck.
Filling Cracks And Holes
After sanding the deck, it’s time to fill in any cracks and holes to ensure a seamless surface.
– Start by cleaning out the cracks and holes using a brush or a vacuum to remove any loose debris.
– Next, choose a wood filler that matches the color of your deck.
– Apply the wood filler using a putty knife, making sure to press it firmly into the cracks and holes.
– Smooth out the surface of the filler with the putty knife, removing any excess.
– Allow the filler to dry completely according to the manufacturer’s instructions.
– Once dry, use sandpaper to lightly sand the filled areas, blending them with the rest of the deck.
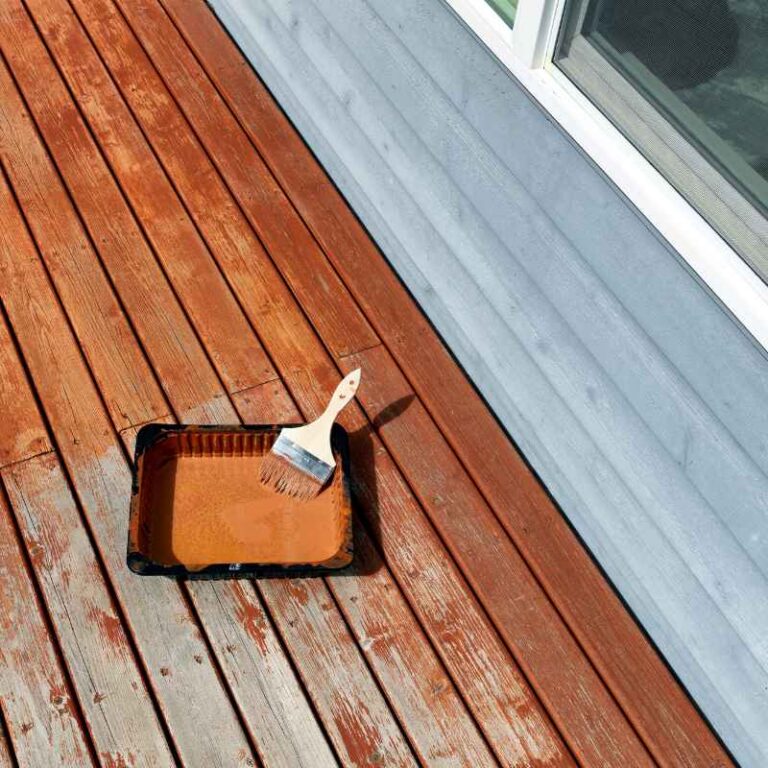
Applying Wood Stain Or Sealer
After repairing the splintered wood and filling any cracks or holes, it’s time to protect your deck by applying a wood stain or sealer.
– Start by choosing a stain or sealer that is suitable for outdoor use and compatible with your deck wood type.
– Before applying the stain or sealer, make sure the deck surface is clean and dry.
– Use a brush, roller, or sprayer to evenly apply the stain or sealer, following the manufacturer’s instructions.
– Make sure to cover all exposed surfaces, including the sides of the deck boards.
– Allow the stain or sealer to dry completely before using the deck.
By following these steps to repair splintered wood on your deck, you can restore its beauty and ensure its longevity. Remember to regularly inspect and maintain your deck to prevent future damage. So roll up your sleeves and give your deck the care it deserves!
Protecting And Maintaining Your Deck
our deck is a valuable outdoor space that deserves proper protection and regular maintenance to ensure its longevity and beauty. By incorporating simple cleaning techniques and applying protective coatings, you can keep your deck looking its best for years to come.
Regular Cleaning And Maintenance
Maintaining a clean deck is essential to prevent splintering and other damage. Regularly sweeping away debris, such as leaves and dirt, helps to prevent them from accumulating and causing moisture to build up, which can lead to wood deterioration.
Occasionally, giving your deck a thorough cleaning is necessary to remove dirt, stains, and mildew that may have developed over time. Use a deck cleaner specifically designed for your deck material, following the manufacturer’s instructions.
Remember to pay special attention to areas prone to moisture, such as around planters and water features. Regularly inspect your deck for any signs of wear, rot, or loose boards. Promptly address any issues to prevent further damage.
Applying Protective Coating
Protective coatings are an effective way to shield your deck from the elements, reducing the risk of splintering and extending its lifespan. Before applying any coating, ensure your deck is clean and dry.
Select a high-quality deck sealant or stain that is compatible with your deck’s material. This will not only enhance the natural beauty of the wood but also provide an additional layer of protection against UV rays, moisture, and mold.
Using a brush or roller, apply the coating in even strokes, following the grain of the wood. Be sure to cover all surfaces, including the underside of the deck and any steps. Allow the coating to dry thoroughly before moving furniture back onto the deck.
Regularly inspect the coating’s condition and reapply as necessary, typically every two to three years, or as recommended by the manufacturer. This will ensure that your deck remains protected and maintains its appearance over time.
Conclusion
To conclude, repairing splintered wood decks can be a simple task with the right tools and knowledge. By following the steps outlined in this blog post, you can restore your deck’s beauty and functionality. Remember to inspect your deck regularly and address any maintenance issues promptly to prevent further damage.
With proper care, your wood deck will provide a welcoming outdoor space for years to come.