How to Rip Boards With a Circular Saw: Master the Art with These Expert Tips
To rip boards with a circular saw, you need to align the saw blade with the cut line and carefully guide the saw along the board, using a straightedge as a guide. Ripping boards with a circular saw can be a straightforward and efficient way to create clean, straight cuts in lumber.
Whether you’re tackling a DIY project or working on a professional woodworking job, understanding how to rip boards with a circular saw is a valuable skill. By following a few simple steps and using the right techniques, you can achieve accurate and precise cuts every time.
We will discuss the proper setup, technique, and safety precautions for ripping boards with a circular saw. These guidelines will help you master this skill and complete your projects with ease. So, let’s get started and learn how to rip boards with a circular saw effectively.
Choosing The Right Blade
Ripping boards with a circular saw requires the right blade for the job. Choosing the right blade is crucial in ensuring a smooth and efficient cutting process. Let’s dive into understanding the different types of circular saw blades and how to select the appropriate blade for ripping boards.
Understanding The Different Types Of Circular Saw Blades
Before selecting a circular saw blade for ripping boards, it’s essential to understand the different types available. Circular saw blades come in various materials, teeth configurations, and sizes, each designed for specific cutting tasks.
- Carbide-tipped blades: Known for their durability and ability to cut through tough materials like hardwood.
- High-speed steel blades: Suitable for cutting non-ferrous metals and other softer materials.
- Diamond-tipped blades: Ideal for cutting through concrete, tiles, and other masonry materials.
Selecting The Appropriate Blade For Ripping Boards
When ripping boards with a circular saw, it’s crucial to choose a blade specifically designed for this task. For optimal results, select a blade with fewer teeth, typically a 24-tooth blade. This configuration allows for faster and more aggressive cutting through the wood fibers, resulting in cleaner and smoother rip cuts. Additionally, the blade should have anti-kickback features, ensuring safety during the cutting process.
Setting Up The Circular Saw
Learn how to properly set up and use a circular saw for ripping boards. This step-by-step guide will help you make precise cuts with ease.
Preparing The Saw For Ripping Boards
Before you start ripping boards with a circular saw, it’s important to properly prepare the saw for the task at hand. Taking the time to set up your circular saw correctly will help ensure accurate and clean cuts. Here’s what you need to do:
- Ensure the saw is unplugged or the battery is disconnected if you’re using a cordless saw.
- Place the saw on a flat and stable surface, such as a workbench or sawhorse.
- Inspect the saw blade to make sure it’s in good condition, without any dull or missing teeth.
- Securely tighten the blade onto the saw’s arbor, following the manufacturer’s instructions.
- Check the blade guard and make sure it moves freely and springs back into place.
- Attach a rip fence to the saw’s base, if available and desired. A rip fence helps guide the saw along the board’s edge, ensuring a straight cut.
Adjusting The Depth And Cutting Angle
Once you’ve prepared the circular saw, it’s time to adjust the depth and cutting angle to match the specifications of the board you’re ripping. Here’s how to do it:
- Refer to the board’s thickness and adjust the blade depth accordingly. Loosen the depth adjustment lever or knob, position the blade at the desired depth, and then tighten the lever or knob to secure it in place.
- For a standard 90-degree rip cut, make sure the saw’s cutting angle is set to zero degrees. However, if you want to make bevel or angled cuts, adjust the cutting angle accordingly using the bevel adjustment controls.
- Double-check the depth and cutting angle settings to ensure they are accurate before proceeding with ripping the boards.
With your circular saw properly set up and adjusted, you’re now ready to start ripping boards with confidence. Remember to prioritize safety throughout the process and always follow the manufacturer’s instructions and guidelines.
Measuring And Marking The Boards
When it comes to ripping boards with a circular saw, precision is key. And to achieve that precision, you need to start by measuring and marking the boards accurately. In this section, we will discuss the importance of taking accurate measurements and how to mark the boards for cutting.
Taking Accurate Measurements
Before you start ripping any boards, it’s crucial to take precise measurements to ensure a clean cut. Here are a few steps to guide you:
- Start by measuring the length of the board:
- Place the board on a flat surface and align it properly.
- Use a tape measure to measure the exact length of the board.
- Write down the measurement in both inches and centimeters for easy reference.
- Measure and mark the desired width:
- Decide on the width you want the board to be after the cut.
- Using a straightedge or a combination square, draw a line across the width of the board at the desired measurement.
- Make sure the line is straight and perpendicular to the length of the board.
By taking accurate measurements, you’ll have a clear reference point for your cuts, ensuring precise and uniform results.
Marking The Boards For Cutting
Once you have measured the boards accurately, it’s time to mark them for cutting. Here’s how you can do it:
- Using a pencil or a marker, draw a cut line on the board:
- Place the straightedge or combination square along the previously measured width line.
- Hold it firmly in place to ensure a straight line.
- Carefully run the pencil or marker along the edge of the straightedge to mark the cut line.
- Indicate the waste side of the board:
- Draw an arrow or an “X” on the side of the cut line that will be discarded as waste.
- This step will help you avoid confusion during the cutting process, especially if you have multiple lines marked on the board.
By marking the boards for cutting, you’ll have a clear visual guide to follow during the ripping process, minimizing errors and ensuring accurate cuts.
Ensuring Safety
Ripping boards with a circular saw is a practical skill for any DIY enthusiast or professional woodworker. However, safety should always be the top priority when using power tools. Here are some key measures to ensure safety during the board ripping process.
Using Safety Equipment
Before starting any work with a circular saw, ensure that you are properly equipped with the necessary safety gear. This must include:
- Protective goggles to safeguard your eyes from wood chips and dust
- Hearing protection to minimize the noise generated by the saw
- A dust mask to prevent inhalation of sawdust
- Gloves to provide a better grip and protect your hands
Securing The Boards Properly
Properly securing the boards being ripped is essential for safe and accurate cutting. Utilize sturdy sawhorses or a workbench to support the boards during cutting. Additionally, consider using clamps to secure the board to the sawhorse or workbench, preventing any movement during the cutting process. Double-check that the boards are firmly in place before activating the saw.
Executing The Rip Cut
Learn how to execute a precise rip cut using a circular saw, an essential skill for any DIY enthusiast or professional carpenter. This guide will walk you through the important steps involved in ripping boards with a circular saw, from positioning the saw and board to making steady and controlled cuts.
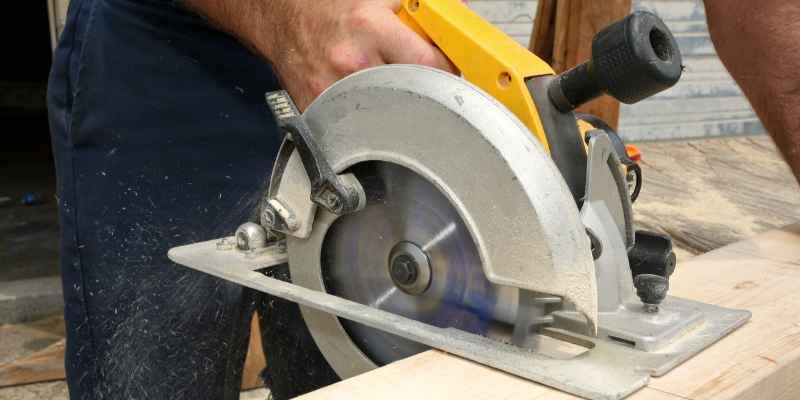
Positioning The Saw And Board
Proper positioning of the saw and board is crucial to ensure accurate and safe rip cuts. Follow these steps:
- Mark the cut: Measure and mark the desired width of the board on both ends, using a pencil or a straight edge. Double-check your measurements to avoid mistakes.
- Secure the board: Place the board on a stable work surface, such as a sawhorse or workbench. Ensure it is level and firmly secured to prevent any accidental movement during the cut.
- Adjust the saw’s cutting depth: Set the cutting depth of the circular saw slightly deeper than the thickness of the board. This allows the saw to move smoothly through the material without causing any binding.
- Position the saw: Align the circular saw blade with the marked cut line. Make sure the blade is parallel to the board’s edge for a straight cut.
- Secure the saw: Firmly grip the saw’s handle with one hand, while using the other hand to stabilize the front of the saw base. This provides stability and control during the cut.
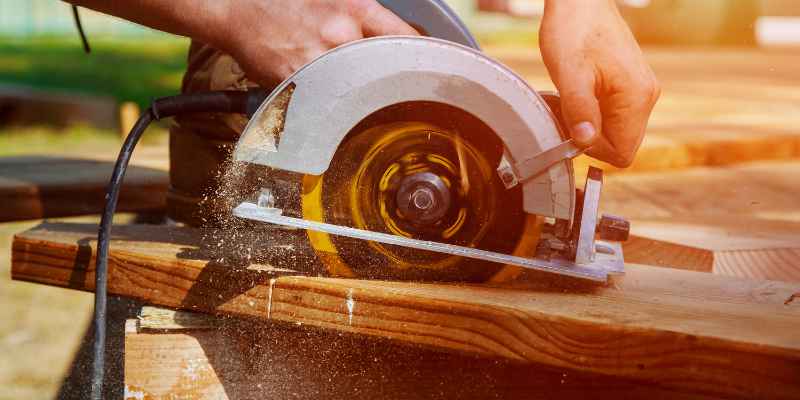
Making Steady And Controlled Cuts
Once you have positioned the saw and board correctly, it’s time to make the rip cut. Follow these steps to ensure steady and controlled cuts:
- Start the saw: Switch on the circular saw and allow the blade to reach its full speed before making contact with the board.
- Begin the cut: Position the blade on the waste side of the board and slowly lower it into the material, keeping the saw’s baseplate flat and steady on the surface.
- Maintain a steady pace: Keep a consistent forward pace as you guide the saw along the marked cut line, applying gentle pressure on the front of the saw base to prevent it from wandering.
- Follow the cut line: Focus on following the marked cut line precisely, keeping the blade aligned with it. Avoid deviating from the line to maintain a straight cut.
- Complete the cut: Once you reach the end of the board, slowly retract the saw from the material while it’s still running. Allow the blade to come to a complete stop before setting the saw aside.
By following these steps, you will be able to execute accurate and controlled rip cuts with a circular saw like a pro. Remember to prioritize safety throughout the process by wearing appropriate protective gear and maintaining a safe working environment.
Conclusion
Ripping boards with a circular saw requires precision and safety measures. Understanding the techniques and practicing proper usage of the tool is essential. Following the tips and recommendations in this guide will help you achieve clean and accurate cuts for your woodworking projects.
Now, you can confidently take on board ripping tasks with your circular saw.