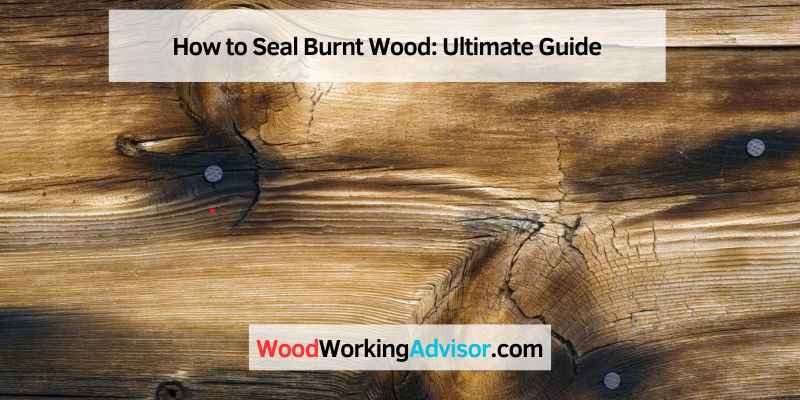
How to Seal Burnt Wood After Torching or Charring
To seal burnt wood, it is advisable to use a finishing oil or sealant such as polyurethane, Danish oil, or paste wax. These sealants provide protection against the elements and help prevent cracks, peels, and chipping.
Applying a liberal amount of the chosen sealant and allowing it to soak in and dry will ensure proper sealing of the burnt wood. It is important to follow the instructions provided on the product for best results.
Understanding Shou Sugi Ban Technique
To seal burnt wood using the Shou Sugi Ban technique, apply finishing oils like Hemp Oil for protection. Use Pure Tung Oil or Outdoor Defense Oil generously, letting it soak in to prevent cracks and peeling from weather exposure. This process enhances the wood’s resilience and durability.
History Of Shou Sugi Ban
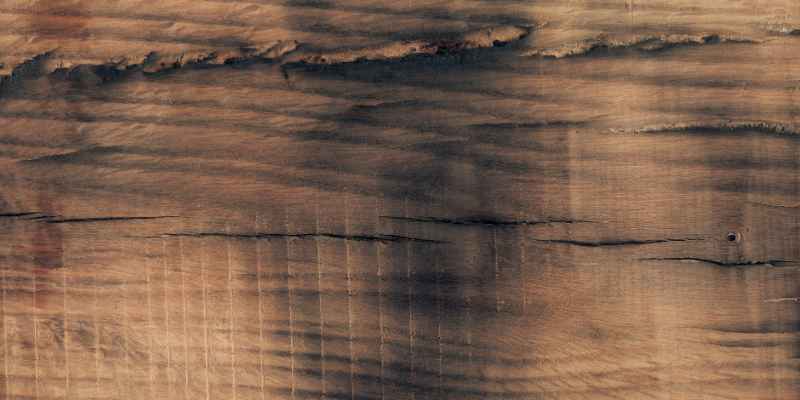
Shou Sugi Ban, also known as Yakisugi, is an ancient Japanese wood-burning technique that has been used for centuries. It originated in the 18th century as a way to preserve and protect wooden structures from the harsh elements of nature. This traditional method involves charring the surface of the wood to create a carbonized layer that acts as a natural barrier against fire, rot, insects, and weathering.
Principles Of Shou Sugi Ban
The principles of Shou Sugi Ban involve a careful balance of heat, flame, and time. The wood is evenly charred with a propane torch or open flame, and then brushed or scraped to remove the loose soot and charcoal. This process not only enhances the wood’s natural beauty, but also increases its durability and longevity.
To achieve the desired effect, it is important to follow these principles:
- Controlled Heat: The wood should be exposed to controlled heat to prevent excessive charring. This ensures that the texture and grain of the wood are preserved while still achieving the desired charred effect.
- Flame Treatment: The wood is then exposed to an open flame, such as a propane torch, to further char the surface. This flame treatment helps to create a unique, rustic appearance.
- Scraping or Brushing: After the charring process, the wood is carefully scraped or brushed to remove any loose soot and charcoal. This step helps to create a smooth and even surface.
- Sealing: Once the wood has been charred and cleaned, it is important to seal it to protect it from moisture, UV rays, and other environmental factors. Sealing also helps to enhance the beauty of the charred surface.
By understanding the history and principles of Shou Sugi Ban, you can create stunning burnt wood finishes that are not only visually striking, but also highly durable. Whether you are working on a DIY project or a professional wood-burning endeavor, this technique provides a unique and beautiful way to seal burnt wood and preserve its natural beauty for years to come.
Preparing Burnt Wood For Sealing
Surface Cleaning
Before sealing burnt wood, it’s essential to thoroughly clean the surface to remove any dirt, dust, or debris. Use a soft brush or cloth to gently scrub the wood and ensure it is free from any contaminants that could affect the sealing process.
Smoothing The Burnt Surface
To achieve a smooth finish on burnt wood, sanding the surface is crucial. Use fine-grit sandpaper to gently smooth out any roughness or uneven areas caused by the burning process. This step is essential for creating a level surface that will enhance the final sealant application.
Sealing Techniques For Burnt Wood
Boldly apply Danish Oil onto the burnt wood surface using a clean cloth or brush.
Coat the burnt wood with Polyurethane Sealant ensuring even coverage for optimal protection.
Apply a layer of Paste Wax to the burnt wood for a smooth finish and added durability.
Sealing burnt wood is crucial to enhance its longevity and protect it from weathering effects. Using the right sealing techniques can effectively preserve the charred surface while providing a beautiful finish.
Applying Danish Oil, using Polyurethane Sealant, and incorporating Paste Wax are effective methods to seal burnt wood, each offering unique benefits.
DIY Sealing Methods & Tips
When it comes to sealing burnt wood, there are several DIY methods and tips that can help preserve and protect the wood for years to come. These methods range from using natural oils to following best practices for sealing. In this section, we will explore three popular DIY sealing methods: applying linseed oil, using mineral oil for preservation, and best practices for sealing.
Applying Linseed Oil
Linseed oil is a popular choice for sealing burnt wood due to its natural properties and ease of application. Here’s a step-by-step guide on how to apply linseed oil:
- Clean the burnt wood surface using a soft cloth to remove any dirt or debris.
- Apply linseed oil to a clean cloth or brush and evenly distribute it on the wood surface.
- Allow the linseed oil to penetrate the wood for about 15-20 minutes.
- After the soaking period, wipe off any excess linseed oil using a clean cloth.
- Repeat the process if necessary, depending on the desired level of protection.
Linseed oil not only seals the burnt wood but also enhances its natural beauty by bringing out the richness of the grain patterns. This oil-based sealer also provides protection against moisture and UV damage, ensuring the wood stays in top condition.
Mineral Oil For Preservation
If you’re looking for a more affordable and readily available option, mineral oil can be an excellent choice for preserving burnt wood. Here’s how to use mineral oil as a sealer:
- Start by cleaning the burnt wood surface with a soft cloth to remove any loose particles.
- Apply a generous amount of mineral oil to the wood surface, ensuring even coverage.
- Allow the oil to penetrate the wood for at least 30 minutes.
- Wipe off any excess oil using a clean cloth.
- Depending on the level of protection desired, repeat the process and apply multiple coats of mineral oil.
Mineral oil acts as a barrier, preventing moisture from penetrating the wood and causing further damage. It helps to keep the burnt wood hydrated, preventing cracks and splitting.
Best Practices For Sealing
Aside from the specific sealing methods mentioned above, there are some best practices you should follow to ensure effective and long-lasting results when sealing burnt wood:
- Always start with clean and dry burnt wood.
- Avoid sealing the wood when the humidity levels are high, as it may affect the absorption of the sealer.
- Apply the sealer in thin coats, allowing each coat to dry completely before applying the next.
- Use a clean cloth or brush for application to avoid any contaminants that may interfere with the sealing process.
- Consider wearing gloves to protect your hands from any chemicals present in the sealing products.
- Follow the manufacturer’s instructions for the specific sealing product you choose.
By following these best practices, you can ensure that the burnt wood is effectively sealed and protected, prolonging its lifespan and maintaining its appearance.
Now that you are familiar with the DIY sealing methods and tips for burnt wood, you can confidently seal your burnt wood projects and enjoy their beauty for years to come.
Preservation & Maintenance
Burnt wood often requires special care and maintenance to ensure its longevity and appeal. Proper preservation and ongoing maintenance are crucial for maintaining the quality of the wood and extending its lifespan. In this section, we will discuss how to store and care for sealed burnt wood effectively.
Storing Sealed Burnt Wood
When storing sealed burnt wood, it is essential to keep it in a dry and well-ventilated area to prevent moisture buildup. Store the wood in a cool, shaded place away from direct sunlight to avoid potential discoloration.
Ongoing Care And Maintenance
Regular care and maintenance are necessary to uphold the appearance and durability of sealed burnt wood. Here are some tips for ongoing care and maintenance:
- Regularly clean the sealed burnt wood with a soft, dry cloth to remove dust and debris.
- Periodically inspect the wood for any signs of wear, such as cracks or peeling, and address them promptly.
- Apply a fresh coat of sealer as needed to maintain the protective layer and prevent moisture penetration.
Proper storage and ongoing care play a vital role in preserving the beauty and integrity of sealed burnt wood, ensuring that it remains a stunning and enduring addition to your space.
Common Questions About Sealing Burnt Wood
Choosing The Right Sealant
When it comes to selecting the right sealant for burnt wood, it’s crucial to choose one that is specifically designed for exterior wood surfaces. Look for sealants that offer UV protection, water resistance, and durability to ensure the longevity of the burnt wood.
Ensuring Longevity Of The Seal
To guarantee the longevity of the seal on burnt wood, it is essential to apply multiple coats of the chosen sealant. Ensure that each coat is allowed to dry completely before applying the next one. Regular maintenance, such as cleaning and resealing when necessary, is also vital to maximize the lifespan of the seal.
Sustainability And Environmental Considerations
When considering sustainability and environmental impact, opt for sealants that are eco-friendly and low in volatile organic compounds (VOCs). Look for products that are biodegradable and derived from natural ingredients to minimize the environmental footprint of the sealing process.
Frequently Asked Questions On How To Seal Burnt Wood
Do You Seal Wood After You Burn It?
It is recommended to seal wood after burning it. Sealing adds an extra layer of protection against the elements and helps prevent cracks, peeling, and chipping. You can use finishing oils such as Hemp Oil, Pure Tung Oil, or Outdoor Defense Oil to seal charred wood.
Polyurethane, Danish oil, and paste wax are also effective sealants for wood burning projects.
What Do You Put On Burnt Wood To Seal It?
To seal burnt wood, you can use finishing oils like Hemp Oil, Pure Tung Oil, or Outdoor Defense Oil. These oils provide protection and enhance the wood’s natural grain. Polyurethane, Danish oil, and paste wax are also effective sealants for preserving burnt wood projects.
What Is The Best Sealant For Wood Burning?
The best sealant for wood burning is polyurethane, Danish oil, or paste wax. These sealers provide a durable finish and enhance the natural grain of the wood. It’s essential to follow the directions on the product’s packaging for optimal results.
Applying a sealer helps protect the wood from environmental damage.
How Do You Finish Burnt Wood?
To finish burnt wood, apply finishing oils like Hemp Oil or Pure Tung Oil for protection. Sealing prevents cracks and peeling.
Conclusion
Sealing burnt wood is essential for protecting it from the elements and preventing further damage. Whether you’ve used the shou sugi ban technique or have burned wood for a DIY project, applying a wood sealer will provide an extra layer of defense against cracks, peels, and chipping.
There are various sealants available, including polyurethane, Danish oil, and paste wax, all of which give a durable finish and enhance the natural grain of the wood. So, don’t forget to seal your burnt wood for long-lasting beauty and durability.