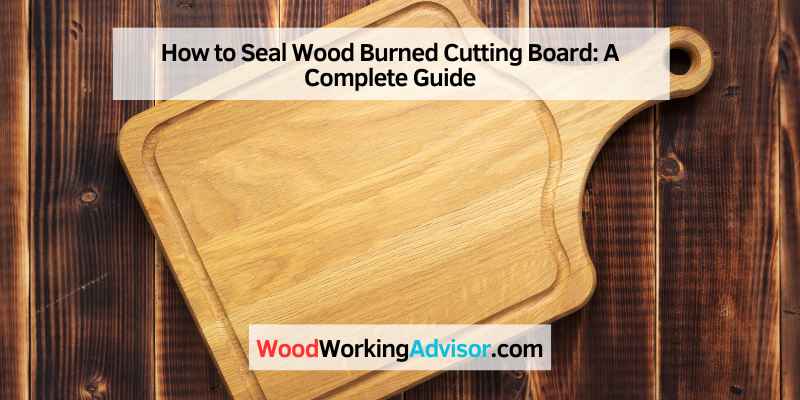
How to Seal a Wood-Burned Cutting Board
To seal a wood burned cutting board, start with an oil to penetrate and protect the wood, and then add a water-resistant coating for added protection. This will prevent cracking and preserve the board’s longevity.
A wood burned cutting board is a beautiful and functional addition to any kitchen. However, if left untreated, it can become susceptible to damage and wear and tear. That’s why sealing the board is crucial for preserving its longevity and beauty.
We’ll explore some effective ways of sealing a wood burned cutting board that will help protect it from damage and keep it looking great for years to come. From oils to water-resistant coatings, we’ll cover everything you need to know to ensure your cutting board stays in top condition.
Different Ways To Seal A Wood Burned Cutting Board
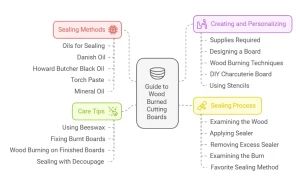
To protect and preserve a wood burned cutting board, there are various sealing methods available such as Danish oil, mineral oil, polyurethane, and paste wax. Applying oil to penetrate the wood and prevent cracking followed by adding a water-resistant coating to the outside can help keep the cutting board in good condition even after repeated use.
After creating a beautiful wood burned design on your cutting board, it’s essential to protect the wood surface to ensure the design lasts longer. Sealing the cutting board will help prevent the wood from drying out, cracking, and absorbing moisture, which can lead to bacterial growth. There are different ways to seal a wood burned cutting board, including using oils, torch paste, or mineral oil.
Oils that are Good for Sealing Cutting Boards
There are different types of oils suitable for sealing cutting boards, such as walnut, mineral, and coconut oils. Walnut oil is a great option for sealing cutting boards, as it can enhance the natural wood grain and provide protection. Mineral oil is also a popular choice, as it’s odorless, tasteless, and FDA-approved for use on food surfaces. However, coconut oil should be avoided, as it can go rancid quickly and leave a sticky residue on the board.
Pros and Cons of Danish Oil
Danish oil is a blend of varnish, oil, and mineral spirits that can provide protection and enhance the wood’s natural beauty. It can also create a water-resistant layer on your cutting board. However, it’s essential to note that Danish oil can darken the wood and require multiple applications to achieve the desired level of protection.
Howard Butcher Black Oil and Conditioner
Howard Butcher Block Oil and Conditioner is a popular option for sealing cutting boards due to its ability to penetrate deep into the wood and provide long-lasting protection. It’s made with food-grade mineral oil and natural waxes, making it safe for use on cutting boards. Moreover, it’s easy to apply and works great for restoring old and worn cutting boards.
Applying Torch Paste
Applying torch paste to a wood burned cutting board is another way to seal the surface and protect it from damage. Torch paste is made by mixing beeswax and mineral oil to create a water-resistant coating that can penetrate the wood. Applying it with a paper towel or brush is an easy and effective way to seal your cutting board.
Applying Mineral Oil
Applying mineral oil to a wood burned cutting board is an easy and inexpensive way to provide protection and enhance the natural wood beauty. It’s odorless, tasteless, and can penetrate the wood to provide long-lasting protection. Moreover, applying mineral oil is a simple process that involves wiping the board with a cloth soaked in oil and allowing it to absorb for a few hours.
In conclusion, sealing your wood burned cutting board is crucial to ensure it remains in excellent condition for years to come. Whether you prefer oils, torch paste, or mineral oil, any of these methods will seal and protect your cutting board from damage and bacterial growth. Make sure to avoid using coconut oil and let the chosen sealant absorb completely before using your cutting board again.
Creating And Personalizing A Wood Burned Cutting Board
Learn how to properly seal a wood burned cutting board to protect it from long-term use and prevent cracking. Start with an oil that penetrates the wood, then add a water-resistant coating to the outside for added protection. Avoid certain oils that can go rancid and use food-safe cutting board finish to rub the board.
A wood burned cutting board is an excellent way to personalize your kitchen and to make cooking and entertaining more enjoyable. This piece of art is both practical as well as visually appealing. By using stencils, you can create intricate designs, and by wood burning, you can create an even more personalized look. In this article, we will go over the supplies required, designing a cutting board, wood burning on a cutting board, making a DIY charcuterie board, and using stencils to personalize a cutting board.
Supplies Required
To create a personalized cutting board, you’ll need a few supplies, including a wooden cutting board, sandpaper (220 and 400 grit), a ruler, a pencil, a wood burning tool, and a sealer. The wooden cutting board should be made from a hardwood, such as maple or cherry, since these types of wood are durable enough to withstand the rigors of daily use. The sandpaper is used to smooth any rough edges or surfaces on the board, while the ruler and the pencil are necessary to mark out your design. The woodburning tool is used to make the design, and finally, the sealer is used to protect your design from water damage.
Designing a Cutting Board
When designing a cutting board, the sky’s the limit – you can choose any design or pattern you like. You can opt for something simple, like your initials, or you can go for something more intricate, like a floral design. The most important thing is to ensure that the design you choose is one that you’re happy with – after all, you’ll be looking at it every time you use the board! Use a ruler and pencil to create an outline of your design and then color it in with the pencil to get a feel for the final product.
Wood Burning on a Cutting Board
Once you have your design drawn onto your cutting board, it’s time to start wood burning. Begin by heating up your wood burning tool, ensuring that you’re using the correct tip for your design. Then, carefully trace over your pencil design with the wood burning tool, applying even pressure to create a consistent look.
You may find that there are some areas that are harder to reach with your tool; in this case, you can apply a bit of pressure with the point of a knife to create an indentation that will be easier to reach with your woodburning tool. Once you have completed your design, you can use sandpaper again to smooth any rough spots that might have been left over from wood burning.
DIY Charcuterie Board
One of the most popular types of cutting boards is the charcuterie board. Charcuterie boards are perfect for entertaining, as they allow you to display an assortment of cheeses, meats, and fruits for your guests. To create a DIY charcuterie board, start with a large piece of hardwood, such as maple or walnut, and then sand it down until it’s smooth. You can then use a woodburning tool to create a unique design on the board. After your design has been created, finish the board by using a sealer to protect the wood and maintain the board’s longevity.
Using Stencils to Personalize a Cutting Board
If you’re looking to create a personalized cutting board but are new to wood burning, using stencils can be a great option. Stencils allow you to create intricate designs and patterns without having to worry about your hand shaking. You can purchase stencils from your local art supply store or create your own by printing an image onto cardstock and then cutting it out with scissors. Once you have your stencil, simply hold it down onto the cutting board and trace over it with your wood burning tool. This can be especially useful if you’re creating a design with lettering or more intricate patterns.
In conclusion, creating and personalizing a wood-burned cutting board can be an entertaining and unique way to express your creativity in the kitchen. By following the steps outlined above, you can have a beautiful and functional cutting board. Remember to choose a hardwood board, mark out your design using pencil, carefully trace over it with a wood burning tool, and finish it off by using a sealer. With your new cutting board in hand, you’ll be ready to embrace your inner chef and cook up a storm!
How To Seal A Wood Burned Cutting Board
To seal a wood burned cutting board, start with applying an oil, such as Danish oil, to the wood to protect it from long term use and to prevent cracking. Then, add a water-resistant coating to the outside to keep the water out.
Finish by rubbing the wood with a food-safe cutting board finish to complete the process.
Wood burned cutting boards are not just useful in the kitchen, but they can also make for stunning works of art. However, to preserve the wood for long-lasting use, it is important to seal it properly. In this guide, we will take you through the steps to sealing your wood burned cutting board, including how to examine the wood, apply sealer, remove excess sealer, and examining the burn. We will also discuss some popular methods of sealing and what to avoid.
Examining the Wood
Before sealing your wood burned cutting board, it is essential to examine the wood to ensure it is ready for the next step. Check if there are any cracks or scratches on the surface, and sand them down with fine grit sandpaper. Wipe the board clean with a damp cloth and let it dry completely before moving onto the next step.
Applying Sealer
Once the board is clean and dry, it’s time to apply the sealer. There are several types of sealer you can use, including polyurethane, Danish oil, and paste wax. You can also use a combination of sealer to get optimal results. Apply a thin layer of sealer with a brush and spread it evenly over the surface of the board. Let it dry completely before moving on to the next step.
Removing Excess Sealer
After the sealer has dried, check the board for any excess sealer. You can remove it by lightly sanding the surface with fine-grit sandpaper. Be sure to remove all the sanding dust and wipe the board clean again with a damp cloth. This will prepare the board for the next step.
Examining the Burn
Now that the board is properly sealed, take some time to examine the burn. Check if there are any areas you missed or want to touch up. You can do this by lightly sanding the surface with fine-grit sandpaper and properly wiping the board clean. Then use a wood burning tool to make any touch-ups or corrections you might need.
Favorite Mode of Sealing
When it comes to sealing a wood burned cutting board, there are different methods you can use, and everyone has their preference. Some popular modes of sealing include applying a thin layer of mineral oil and letting it soak into the wood overnight or using a mixture of beeswax and mineral oil. However, it is essential to avoid using oils that can go rancid, like coconut oil, as they can ruin the board.
In conclusion, sealing your wood burned cutting board is a crucial step in preserving the wood for long-lasting use. Follow the steps outlined above, and you will have a beautiful and functional cutting board that will stand the test of time.
Tips For Caring For A Wood Burned Cutting Board
To seal a wood burned cutting board, start with an oil to penetrate the wood and protect it from long-term use, preventing cracking. Then, add a water-resistant coating to the outside to keep the water out. Remember to use food-safe cutting board finish and avoid oils that can go rancid.
When it comes to wood burned cutting boards, proper care and maintenance are essential in order to prolong their longevity. Here are some tips for caring for a wood burned cutting board:
Using Beeswax to Seal Chopping Boards
Beeswax is a natural substance that can be used to seal chopping boards, giving them a protective layer against moisture, bacteria, and other harmful elements. To use beeswax, start by melting it in a double boiler or microwave, then apply it to the cutting board with a clean cloth. Allow the wax to dry for a few minutes, then buff the surface with a clean cloth to remove any excess wax.
Fixing Burnt Cutting Boards
If you’ve accidentally burned your cutting board while wood burning, don’t despair. There are several ways to fix it, depending on the severity of the burn. For minor burns, you can sand the surface of the cutting board to remove the burn marks. For more severe burns, you may need to use wood filler or replace the affected area of the cutting board.
Wood Burning on Finished Cutting Boards
If you plan to wood burn on a finished cutting board, it’s important to choose the right type of finish. Oil-based finishes, such as mineral oil or walnut oil, are ideal for wood burning projects since they won’t interfere with the burning process. Avoid water-based finishes, as they can cause the wood to swell and warp.
How to Seal and Finish Cutting Boards with Decoupage
Decoupage is a decorative technique that involves applying printed or decorative paper cutouts to a surface and sealing them with varnish. To use decoupage on a cutting board, start by sanding and cleaning the surface of the board. Apply a layer of decoupage glue to the surface, then apply your chosen paper cutouts. Once the glue has dried, apply several layers of varnish to seal the surface of the cutting board. This will protect it from moisture and scratches.
In conclusion, caring for a wood burned cutting board is important to prolong its life. Using beeswax to seal the surface, fixing burnt areas, choosing the right finish, and using decoupage to add style while sealing the surface are all effective tips to keep your cutting board in top shape for years to come.
Frequently Asked Questions For How To Seal Wood Burned Cutting Board
What Do You Use To Seal A Cutting Board After Wood Burning?
When sealing wood-burning projects, start with an oil to penetrate the wood and prevent cracking. Then add a water-resistant coating. Any finishing oil, such as Danish oil or tung oil, can work as a sealer. Polyurethane and paste wax are also good options.
Avoid using oils that can go rancid, like coconut oil.
Do You Seal Wood After Wood Burning?
Yes, when sealing woodburning projects for the kitchen, it’s recommended to start with an oil first, then add a water-resistant coating to the outside to protect it from long term use and prevent cracking. Finishes such as polyurethane, Danish oil, and paste wax can also be used as excellent sealers for wood or gourd projects.
What Do You Use To Seal Burnt Wood?
To seal burnt wood, start with an oil to penetrate and protect the wood, then add a water-resistant coating to the outside. You can use finishing oils, such as Hemp Oil, Pure Tung Oil or Outdoor Defense Oil. Avoid oils that can go rancid or acrylic sealers.
Applying a food-safe finish, such as beeswax and orange oil, is also recommended for wood burned cutting boards.
What Is The Best Sealer For Wood Burning?
Polyurethane, Danish oil, and paste wax are recommended sealers for wood burning projects. For kitchen items, start with oil to penetrate the wood and add a water-resistant coating outside to protect it from long-term use. Mineral oil is also essential to be applied on the board.
Conclusion
Sealing your wood burned cutting board is vital to its longevity and durability. It protects the board from moisture, bacteria, and other harmful elements that can cause it to wear down quickly. There are many options for sealing your cutting board, from danish oil and polyurethane to mineral oil and beeswax.
Whichever option you choose, remember to apply it evenly and allow it to dry properly before using your cutting board. A properly sealed cutting board is not only functional but also a beautiful addition to any kitchen. So, take care of your wood burned cutting board and enjoy cooking with it for years to come.